• Skip to primary navigation
  • Skip to main content
  • Skip to primary sidebar
  • Home
  • Reviews
    • Book Index
    • Fiction
    • Non-Fiction
    • Top Ten Tuesdays
The Hungry Bookworm

The Hungry Bookworm

reading + eating

  • Recipes
    • Drinks
    • Snacks, Sides & Apps
    • Main Dishes
    • Desserts
    • 5 Ingredients or Less
  • About
    • Meet Megan
    • How I Rate
    • Review Policy
    • Contact

dessert

The Word Exchange + Mini Pineapple Upside-Down Cakes

November 29, 2017 by Megan 1 Comment

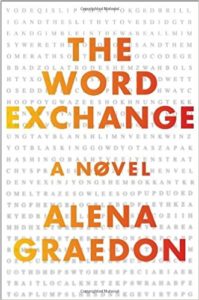
For those of you who read my recent Top Ten Tuesday, where I covered books I’m thankful for, you’ll recognize today’s title. Alena Graedon’s debut novel is a dystopia called The Word Exchange. It had been on my TBR list for a little while now, but I forget how it got there. I remember adding it to the consideration set for our office’s Diversity Book Club when we were selecting from various dystopias one month. It didn’t win then, and honestly, it may have taken me a lot longer to get to it if not for my good friend Deanna suggesting it for our most recent book club meeting (outside of work).

Though I ended up loving The Word Exchange, it wasn’t an instant hit for me. I struggled a bit through the first couple of chapters; I even warned our book club to get started sooner rather than later and break out the dictionary. The language was complicated (purposefully, I found out later) and those chapters were dense. But, after about 50 pages or so, I began getting into the story and was suddenly hooked.

Graedon describes a near-future where the death of print has happened and handheld devices are taking over society. Furthermore, people begin to rely on something called The Word Exchange, where people makeup definitions and words in a sort of online marketplace. Anana works with her father at the North American Dictionary of the English Language, and when he goes missing, she finds herself in a world where language is quickly losing meaning. She enlists her bookish coworker Bart in the search for her father and answers - trying to avoid contracting the rapidly spreading “word flu” all the while.

The combination of the importance of language and our reliance on technology was done quite skillfully, in a way that still haunts me whenever the novel comes to mind. I’ve tried to be more conscious of my use of technology - particularly my cell phone and social media - since finishing this book. Not that any of it is bad in and of itself, just that it’s important to me to not become dependent on these, particularly as a way of passing time. As I learned over the recent Thanksgiving Readathon, putting down my phone gives me a lot more time to focus on something more worthwhile - like spending time with family or reading.

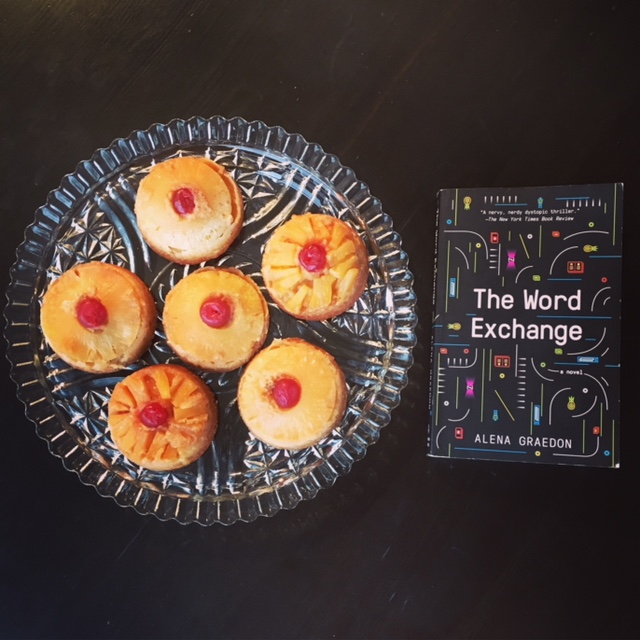
Anana’s father’s favorite fruit is a pineapple, and if you’re wondering why I know that, it’s actually a bit of thing throughout the book. Anana’s name, in fact, means pineapple when an s is added to the end. I knew almost immediately they would be a huge part of what I made to go along with the book. If I’m remembering correctly, pineapple upside-down cake was his favorite dessert. I decided to make it in mini form, thinking that would be easier. (In the end, I don’t think that’s the case.)

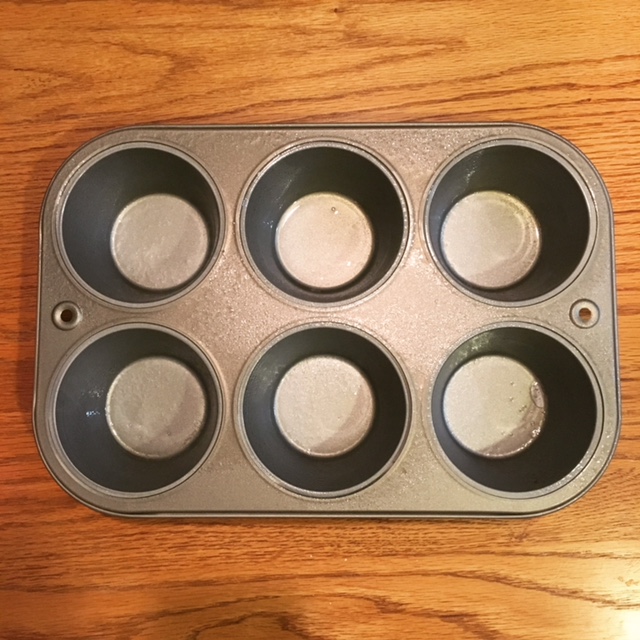
It was really important to me to find a recipe that used the rings rather than the chunks, and so after a bit of research, I found this one from Baker by Nature. I started the whole process by ordering some jumbo muffin tins from Amazon - the jumbo ones are required so that the pineapple rings can fit in the bottom.

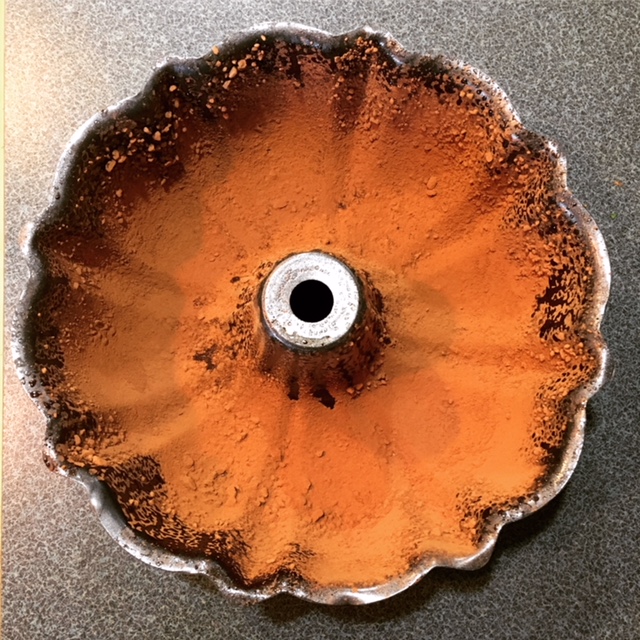
They arrived in time for me to make the mini cakes for our book club meeting, so I got to work the night before. I preheated the oven and greased the jumbo tins.

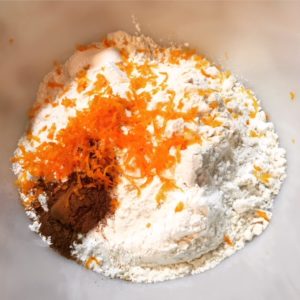
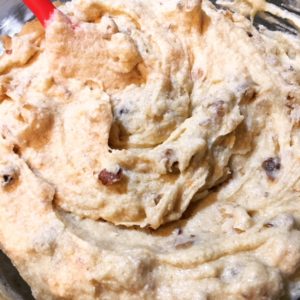
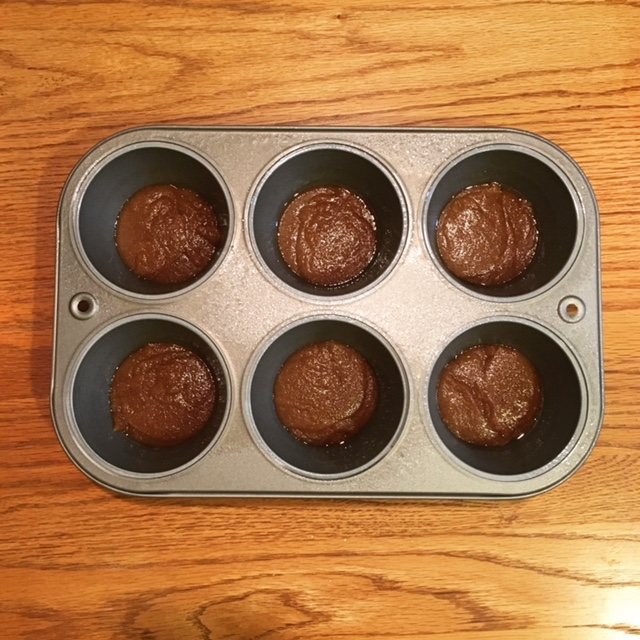
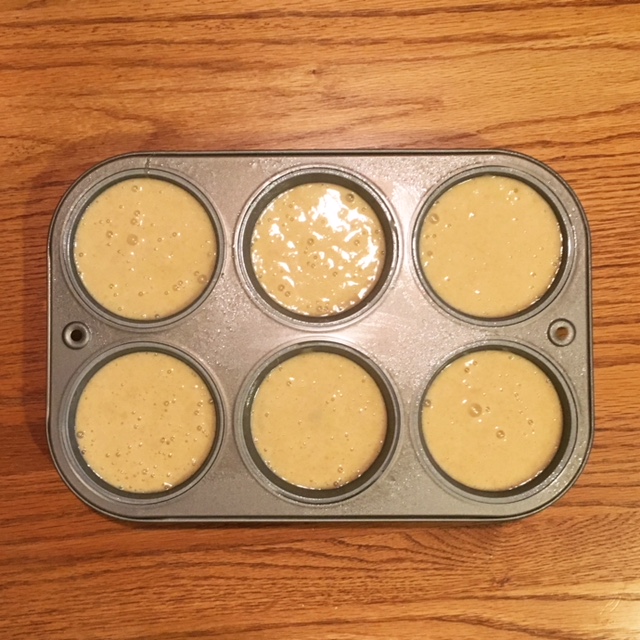
Then I mixed together the cake batter. I combined the eggs with the sugars and rum, beating until smooth. To that I added the pineapple juice, just stirring it in. Separately, I sifted together the dry ingredients, and then added them into the wet ingredients, whisking until just combined.

In a small saucepan, I made the topping for the cakes. I melted butter and then added brown sugar, rum and salt, stirring while it cooked.

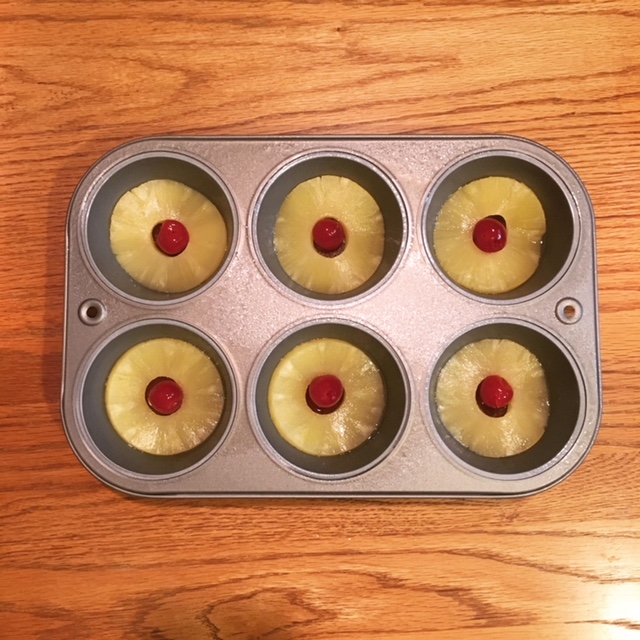
I added the topping to the bottom of the jumbo tins (because they’ll be flipped upside-down later!) to start.

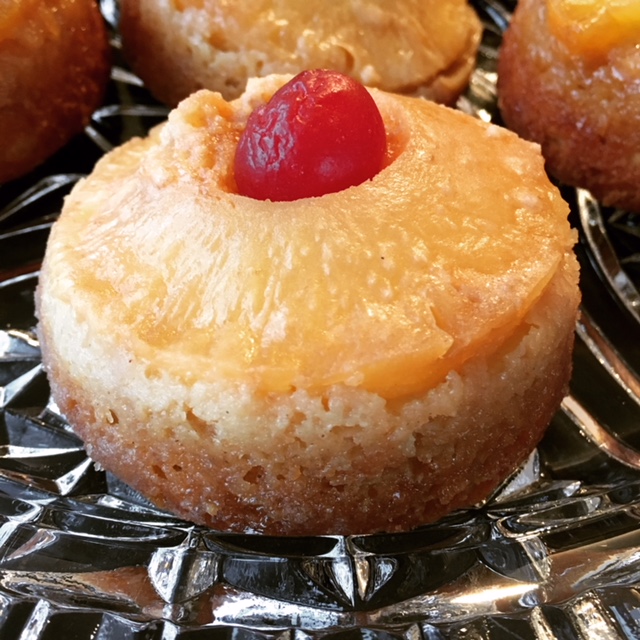
Then, I added in the pineapple rings on top of that, with a maraschino cherry in the middle of each.

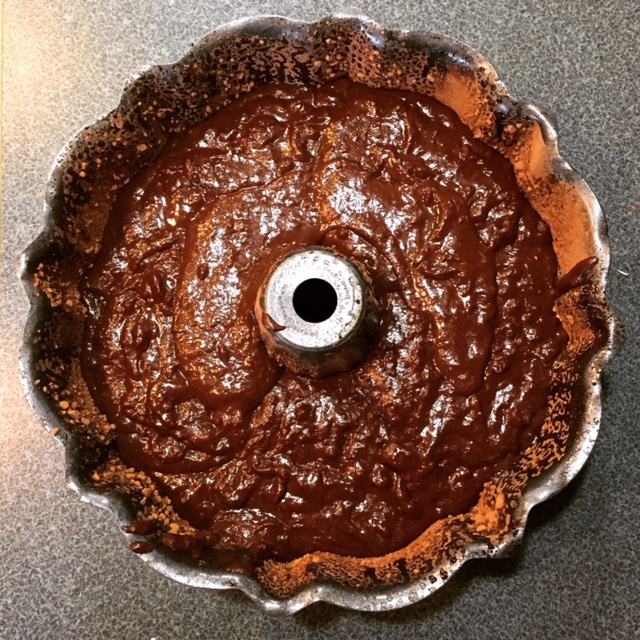
Finally, I added the cake batter, filling them roughly ¾ of the way full.

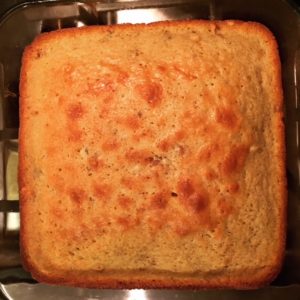
I baked the cakes for about 20 minutes and then pulled them out of the oven to cool.

They cooled in the pan for 5 minutes before it was time to turn them out to cool on a rack. I want to caution you to be very careful when flipping your pans. If you have two tins of 6 cakes each, please do them individually and not at the same time - even if you think you can manage it. The topping is VERY hot and still ooey gooey, which I can tell you from personal experience makes a huge mess if something goes awry and it happens to get all over the kitchen.

It is important to place the cooling rack within a baking pan with a lip. Place that upside down on top of the muffin tin and then quickly and carefully flip that over so that the pan and cooling rack are on the bottom. Repeat with the other rack/pan/muffin tin.

I hadn’t had pineapple upside-down cake before, and I was pleasantly surprised at how much I liked it. Anana’s dad was onto something!

Mini Pineapple Upside-Down Cakes

  • Servings: 12
  • Time: 30 minutes
  • Print

Ingredients

  • 4 large eggs, at room temperature
  • 1¼ cups granulated sugar
  • ¼ cup dark brown sugar, packed
  • ½ cup pineapple juice
  • 2 teaspoons rum (or pure vanilla extract)
  • 1½ cups all purpose flour
  • 2¼ teaspoons baking powder
  • ½ teaspoon cinnamon
  • ¼ teaspoon salt
  • 2 tablespoons cornstarch
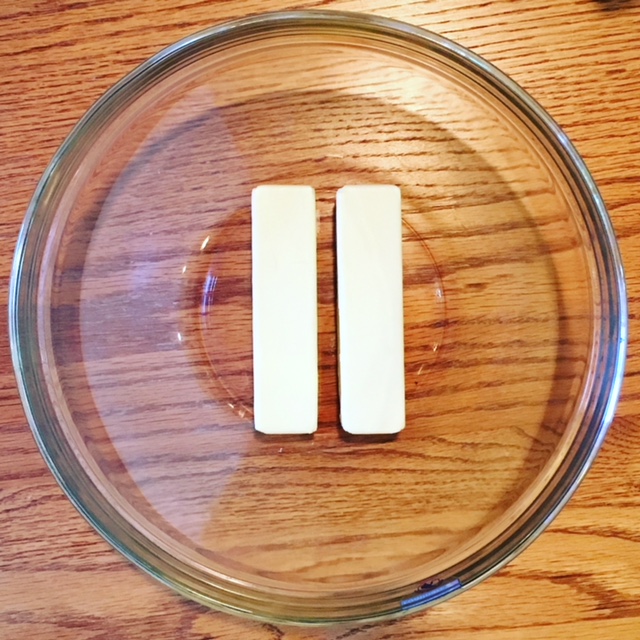
  • 6 tablespoons unsalted butter
  • 1½ cups dark brown sugar (packed)
  • 1 teaspoon rum (or vanilla extract)
  • ⅛ teaspoon salt
  • 12 pineapple rings
  • 12 maraschino cherries

Directions

  1. Preheat oven to 350 degrees (F). Generously spray a 12-mold jumbo muffin tin with non-stick cooking spray; set aside.
  2. Crack the eggs into a large mixing bowl; whisk smooth. Add in the granulated sugar, brown sugar, and rum (or vanilla), and beat smooth. Stir in pineapple juice and set aside.
  3. In a separate bowl, sift together the flour, baking powder, cinnamon, salt, and cornstarch. Gradually add the dry ingredients into the wet ingredients and whisk until just combined. Be sure not to over mix here! Set mixture aside while you make the topping.
  4. For the topping: In a small sauce pan, melt the butter over medium heat. Add in the brown sugar, rum, and salt, and cook for 1 minute, whisking constantly. Remove from heat.
  5. Spoon 2 tablespoons of the topping mixture into the bottom of each muffin tin; place a pineapple ring on top, then place a cherry in the middle of each pineapple ring. Divide the cake batter evenly among the prepared tins, fill each muffin tin 3/4 of the way full.
  6. Bake for 20-22 minutes, or until the tops are puffed and golden brown, and a toothpick inserted in the center of the cake comes out clean.
  7. Remove from the oven and cool in pan for 5 minutes. Gently run a knife around the edge of each cake to help loosen any stuck bits, then gently place a wire cooling rack on top and quickly flip over. You will want to place the cooling rack on a large sheet pan before doing this, to help make it less messy. Serve cakes warm or at room temperature.

From: Baker by Nature

Recipe Notes: Rum may be substituted with pure vanilla extract. Cakes are best eaten the day they are made, but may be stored in the fridge, in an airtight container, or on a plate covered tightly with plastic wrap, for up to 3 days.


Filed Under: book review, recipe Tagged With: baking, dessert, dystopia, fiction, fruit

The Red Tent + Honeyed Cake

November 18, 2017 by Megan 2 Comments

Anita Diamant’s The Red Tent has been on my radar since I read The Boston Girl earlier this year. Several people recommended it to me, so I bought it at my library’s used book sale in the spring. I finally got around to reading it, and though I was expecting a bit of a grueling read - it’s set in biblical times - I was pleasantly surprised.

In this piece of historical fiction, Diamant explores the life of Dinah, who is briefly mentioned in the Bible as the only daughter of Jacob (father of a dozen sons). The Red Tent starts with the story of Dinah’s mothers, the four wives of Jacob - Leah, Rachel, Zilpah, and Bilhah - and continues into her life as she grows up and leaves the land of her father.

For the most part, the lives of women are glossed over in the Bible, and this novel takes an interesting look at what life might’ve been like for a woman of that time. It gives several strong female characters a voice when the book in which Dinah first appears did not and thoughtfully portrays the unique relationships that women have with one another. It also offers a different, and dare-I-say feminist, perspective on a Christian narrative in which things may not have been exactly as depicted.

In Jacob’s camp - which is how I thought of it, as it was rambling and full of tents and animals - the family usually ate quite well. In an interview Diamant said, “There’s a lot of food in The Red Tent...To not write about food...is to not talk about women’s experience.” They depend on the land for food, and the selection seemed quite abundant. There is mention of olives, lamb, figs, pomegranates, barley, mint, and of course, honeyed cake.

Honeyed cake, in fact, was mentioned a few times, and though it was given little description, I was intrigued. I wanted to make it try it myself. After a Google search, I finally settled on a recipe from Genius Kitchen for a recipe that seemingly dripped with honey. (And drip with honey, it did!)

To start, I combined the dry ingredients - flour, baking powder, salt, cinnamon and some orange zest. The orange zest smelled absolutely amazing while I prepared the rest of the ingredients.

In a different bowl, I creamed the butter with the sugar and then added in the four eggs, one at a time. To these ingredients, I added the dry mix, mixing just until incorporated. Then, I added the chopped walnuts.

I poured the batter into a prepared square pan and set it to bake for 40 minutes in a 350-degree oven.

Meanwhile, I began making the honey sauce. This recipe uses quite a bit of honey, which can be expensive, but otherwise the ingredients are pretty run-of-the-mill baking ingredients. Still, we used almost half of this little honey bear.

In a saucepan, I combined 1 cup of honey, 1 cup of white sugar and ¾ cup of water. I let it simmer for about 5 minutes before adding the lemon juice and bringing it to a boil. Please use a medium-sized saucepan. When it gets boiling, it can boil over easily and quickly - it’s not as easy to tame as boiling water. And it’s possible you’ll get a sticky mess all over your stove, like I happened to do. Anyway, once it was finished cooking for 2 minutes, I removed it from the heat, where it say until the cake was ready.

After the cake finished baking, I removed it from the oven and allowed it to cool for 15 minutes.

I then cut it into triangles. The original recipe recommends diamonds, but I’ll admit I wasn’t sure how to accomplish that. I’m not sure shape matters that much, though the more cuts, the more honey will soak through the cake. Regardless, after cutting the cake, I covered it with honey sauce. I used about a third at a time and did my best to allow it to soak in before covering it with the next third. (This requires some patience.)

I found the cake to taste a bit like Fruit Loops (probably from the orange zest). Overall, it was quite good but very sticky.

Greek Honey Cake

  • Servings: 12
  • Time: 55 minutes
  • Print

Ingredients

  • 1 cup all-purpose flour
  • 1½ teaspoons baking powder
  • ¼ teaspoon salt
  • ½ teaspoon ground cinnamon
  • 1 teaspoon orange zest
  • ¾ cup butter
  • ¾ cup white sugar
  • 3 eggs
  • ¼ cup milk
  • 1 cup chopped walnuts
  • 1 cup white sugar
  • 1 cup honey
  • ¾ cup water
  • 1 teaspoon lemon juice

Directions

  1. Preheat oven to 350 degrees F. Grease and flour a 9 inch square pan. Combine the flour, baking powder, salt, cinnamon and orange rind. Set aside.
  2. In a large bowl, cream together the butter and 3/4 cup sugar until light and fluffy. Beat in the eggs one at a time. Beat in the flour mixture alternately with the milk, mixing just until incorporated. Stir in the walnuts.
  3. Pour batter into prepared pan. Bake in the preheated oven for 40 minutes, or until a toothpick inserted into the center of the cake comes out clean. Allow to cool for 15 minutes, then cut into diamond shapes. Pour honey syrup over the cake.
  4. For the Honey Syrup: In a saucepan, combine honey, 1 cup sugar and water. Bring to a simmer and cook 5 minutes. Stir in lemon juice, bring to a boil and cook for 2 minutes.

From: Genius Kitchen

This post contains affiliate links. Full disclosure here.

Filed Under: book review, recipe Tagged With: baking, dessert, feminism, fiction, historical fiction

The Rules of Magic + Tipsy Chocolate Cake

October 31, 2017 by Megan 18 Comments

Happy Halloween, readers! Before I kick off today’s typical post, I want to share a little story. A couple of months ago, I had an epiphany - I thought of the perfect Halloween costume, and almost immediately, I set about finding all of the necessary pieces. Normally, Halloween isn’t exactly my thing, but once I realized who I had to dress up as, that all changed. This year would be different. Readers, I decided to be Julia Child and my excitement could not be contained. I was lucky enough to find the perfect top, skirt and heels secondhand (thank you, thredUP!) as well as a wonderful replica of her L'Ecole des Trois Gourmandes badge from Etsy. Armed with her cookbook and some cooking utensils, all I needed to complete the look was a curly-haired wig and an apron. Here’s what I came up with - what do you think?

Now, onto the usual post, which I'm also excited to share with you. As you may recall, I recently picked up Alice Hoffman’s Practical Magic in anticipation of its prequel The Rules of Magic, which came out earlier this month - just in time for Halloween reading! For fans of Practical Magic, Hoffman’s latest novel follows the lives of the beloved aunts you well-remember, Frances and Jet, as well as their brother Vincent as they negotiate being teenagers.

Thankfully, The Rules of Magic was exactly as good as I had hoped it would be. If I’m being honest, I liked it better than Practical Magic (the book), which I read and reviewed here just a few weeks ago. I loved finding out more about Sally and Gillian’s aunts, who make a big impression even though they only appear briefly in the movie. Growing up in New York City during the sixties, the sisters wrestle with the normal struggles of being teenagers alongside the unique consequences of the Owens family curse.

Though not a traditional pageturner, Hoffman’s writing and magical storytelling made this a really quick, enjoyable read. Previously, the story of the Owens family revolved around women - often sisters, so I was surprised to learn about Vincent. I have to say I loved the addition of an Owens brother; his story was unexpectedly beautiful.

As with Sally and Gillian’s story, Franny and Jet’s includes a beloved aunt as well. In the summer of Franny’s seventeenth year, family tradition takes all three siblings to the Massachusetts home of their Aunt Isabelle, where they eat cake for breakfast and stay up as late as they like. It is also there that they learn how to unlock their powers and about their family’s past. Isabelle’s tipsy chocolate cake, which she bakes with copious amounts of rum, makes an impression as well - for the sisters continue to make it even when they move back home to New York City. (Sometimes leaving out the rum, when children are invited.)

I found a recipe from The Crumby Kitchen for a chocolate bundt cake filled with rum, both baked in and covered in a rum-soaked glaze. It looked easy enough, and most of all, it sounded delicious. To start, I sprayed my bundt pan with cooking spray and dusted it with cocoa powder.

Then, I preheated my oven to 325 degrees F and combined the dry ingredients in a bowl - sifted flour, baking soda, baking powder and salt. In a large saucepan over medium heat, I mixed the butter, buttermilk, hot chocolate, rum, cocoa powder, and cinnamon, nutmeg and ground cloves. I stirred it together, and once the butter melted, I whisked in the brown and granulated sugars until they dissolved. I removed the pan from the heat and allowed it to cool for at least 5 minutes before transferring the mixture to a large bowl.

In a small bowl, I whisked together the eggs and vanilla. I added it to the cooled chocolate rum mixture in the larger bowl, stirring until combined. I added the dry ingredients to the large bowl of wet ingredients and stirred it until it was just combined. The batter was slightly lumpy as described. I poured it into the bundt pan.

The cake baked for about an hour. (Check after 50 minutes.) I let it cool while I started to make the glaze, for at least 20 minutes.

In a small saucepan, I dissolved brown sugar into heavy cream over medium-low heat before adding the rum. I let it come up to a simmer until the liquid reduced and the glaze thickened. The last step in the glaze was to add two tablespoons of butter, stirring until it melted.

Using a skewer, I poked a bunch of holes into the bottom and spooned the glaze over the cake. I let it sit for about 10 minutes so it would soak in, and I repeated this process twice more.

Finally, once the cake was cooled, I turned it out onto a plate. I covered the top of the bundt cake with the rest of the glaze.

Even Julia Child got in on the action - I brought it to work so the whole office could enjoy the tipsy chocolate cake for our Halloween festivities. Both the cake and the costume were a hit.

I hope you all have a safe and happy Halloween!

Print Recipe

Tipsy Chocolate Cake

Prep Time30 mins
Cook Time1 hr
Cooling Time30 mins
Total Time1 hr 30 mins
Course: Dessert

Ingredients

For the Cake:

  • 3 cups all-purpose flour sifted
  • 1 teaspoon baking powder
  • 1 teaspoon baking soda
  • ½ teaspoon salt
  • 3 sticks unsalted butter
  • 1½ cups buttermilk
  • 1 cup hot chocolate
  • ½ cup dark rum
  • 1½ cups plus 3 Tablespoons cocoa powder divided
  • 1 teaspoon cinnamon
  • ½ teaspoon nutmeg
  • ¼ teaspoon ground cloves
  • 1¾ cups brown sugar
  • ½ cup granulated sugar
  • 3 eggs room temperature
  • 2 teaspoons vanilla extract

For the Rum Glaze:

  • ½ cup brown sugar
  • ½ cup heavy cream
  • ½ cup rum
  • 2 Tablespoons butter

Special Tools:

  • 15- cup Bundt Pan

Instructions

To make the cake:

  • Preheat oven to 325 degrees F. Spray a 15-cup bundt pan with baking spray, then dust with 3 Tablespoons cocoa powder; set aside.
  • Whisk flour, baking soda, baking powder and salt together in a medium bowl; set aside.
  • In a large saucepan set over medium heat, combine butter, buttermilk, hot chocolate, rum, cocoa powder, and spices. Heat until butter melts and all ingredients come together, then whisk in sugars, stirring until dissolved. Cool mixture for 5 minutes, then transfer to a large mixing bowl.
  • In a small bowl, whisk together eggs and vanilla extract, and add to cooled chocolate rum mixture, stirring until combined.
  • Add flour mixture and stir until just combined - batter will be rather thin but slightly lumpy/bubbly.
  • Pour batter into prepared bundt pan. Bake for 50-60 minutes, or until a skewer inserted to the bottom comes out clean. Remove from oven and allow to cool for 20-30 minutes while you prepare the glaze.

To make the glaze:

  • In a small saucepan, dissolve brown sugar into cream over medium-low heat. When combined, add rum and set heat to low. Allow to simmer until liquid is reduced and thickens. Add butter and stir to melt, then remove from heat.
  • Using a skewer, poke multiple holes across the bottom of the cake. Spoon or brush buttered rum glaze on the cake, and allow to soak 5-10 minutes, then repeat with more glaze two more times. Let cake soak & cool 20-30 minutes.
  • When cake is cooled, turn it out onto a cake plate. Brush top and sides of cake with remaining glaze, making multiple passes over it until it's all used up.
  • Top with whipped cream or ice cream if desired before serving. Enjoy!

Notes

Adapted from: The Crumby Kitchen

_______________

This post contains affiliate links. This does not increase the price you pay, but I may receive a small commission for any products you choose to buy. Purchases made through affiliate links help to cover my blogging costs. Thank you for helping to support The Hungry Bookworm! Full disclosure here.

Filed Under: book review, recipe Tagged With: alcohol, baking, dessert, fiction

Kitchens of the Great Midwest + Peanut Butter Bars

October 21, 2017 by Megan 2 Comments

Based on the title alone, Kitchens of the Great Midwest seemed like a book I, lover of food, resident of the Midwest, would thoroughly enjoy. The Goodreads description also seemed promising: “When Lars Thorvald's wife, Cynthia, falls in love with wine--and a dashing sommelier--he's left to raise their baby, Eva, on his own. He's determined to pass on his love of food to his daughter--starting with puréed pork shoulder. As Eva grows, she finds her solace and salvation in the flavors of her native Minnesota...Each chapter in J. Ryan Stradal's startlingly original debut tells the story of a single dish and character, at once capturing the zeitgeist of the Midwest, the rise of foodie culture, and delving into the ways food creates community and a sense of identity. By turns quirky, hilarious, and vividly sensory, Kitchens of the Great Midwest is an unexpected mother-daughter story about the bittersweet nature of life--its missed opportunities and its joyful surprises.” I tracked it down, dug right in and...

If you don’t already know where I’m going with this, I’m sorry to say, I didn’t thoroughly enjoy it, or really like it all. I think it’s one thing if a story doesn’t live up to the hype - in this case, I’d heard good things and it had almost a 4.0 on Goodreads - but it’s another thing entirely if the blurb is completely mismatched with the story that’s actually told.

Spoiler Alert! (Click for more.)
Each chapter did delve into the story of a single dish and character, as promised, but unfortunately, the way it was done felt very disjointed. Eva, as much as I wanted to like her, was hard to rally behind. Her success felt inauthentic, and her presence as she flitted in and out of chapters felt forced. I also found myself wishing for more recipes, or perhaps, recipes that were a bit more central to the story.

In the end, one of the chapters I enjoyed the most was the one featuring Pat Prager, a very Midwestern mom who enjoys cooking for a crowd and does so from the heart. I also thought this chapter provided a stark contrast between the world Eva now cooked in and the world of everyday Midwestern food. In Kitchens, Pat is locally famous for her wonderful, award-winning peanut butter bars that sounded amazing even on the page. I knew I had to make them too.

Though they were very central to the story, no recipe was included, so I found a 5-ingredient recipe from Chef Savvy that was no fuss and no bake - perfect for the warm weather we’re somehow still having in October. True to Pat’s tendencies, I also made them for a crowd; I brought them to work for a coworkers birthday. (And, yes, they were a hit!)

I started by melting the 2 sticks of butter the recipe requires in a large bowl.

While that melted in the microwave, I got some aggression out by crumbling up 2 cups worth of graham crackers (this was about 12 crackers, or half a box). You can do this however you prefer - a food processor will provide the most consistently-sized and likely finest chunks - but I opted to toss them in a plastic Ziploc bag and crush them with my hands. (You could also use a rolling pin.) My chunks weren’t consistent, but I liked the way it added texture to the finished product.

To the same bowl where I’d melted the butter, I added the crushed graham crackers, a cup of peanut butter and 1½ cups of powdered sugar.

I combined them all well with a large spatula and spread the mixture into my prepared 9x13 pin. Then, in a smaller bowl, I added the other half cup of peanut butter and 1½ cups of semi-sweet chocolate chips. These too went in the microwave to melt.

Once the chocolate was melted and combined with the peanut butter, I poured that mixture over the peanut butter mixture already spread in the pan. I smoothed it with a spatula and set it in the fridge to set.

After a few hours, I took the peanut butter bars out of the fridge to taste-test before bringing them to work the next day. (You can’t bring a birthday dessert to work without first knowing that it’s worth bringing.) This was a bit hard to slice right out of the fridge - you’ll want to use a sharp knife, and make sure you have a good grip on the pan.

As I said before, these were an absolute hit at work, and luckily they were easy enough that I could bring them again! Keep this recipe in your back pocket - it’s great for family get-togethers, potlucks or book clubs.

Peanut Butter Chocolate Bars

  • Servings: 12-18
  • Time: 20 minutes
  • Print

Ingredients

  • 2 sticks butter (1 cup), melted
  • 1½ cups powdered sugar
  • 1 cup creamy peanut butter
  • 2 cups graham crackers, crushed
  • ½ cup creamy peanut butter
  • 1½ cups semi-sweet chocolate chips

Directions

  1. Spray a 9 x 13 pan with cooking spray. Set aside.
  2. Add butter, powdered sugar, 1 cup of peanut butter and crushed graham crackers in a large bowl. Mix to combine and layer into the prepared pan.
  3. Put the ½ cup of peanut butter and chocolate chips into a small bowl. Microwave in 15 second intervals until fully melted, stirring to combine as you go.
  4. Pour the chocolate peanut butter mixture on top of the layer in the pan and smooth with a rubber spatula.
  5. Place in the refrigerator to firm up for an hour.
  6. When ready to serve, cut into squares and enjoy!

From: Chef Savvy

Filed Under: book review, recipe Tagged With: dessert, fiction, five ingredients or less

Practical Magic + Apple Tart with Black Pepper

October 14, 2017 by Megan 5 Comments

Maybe I watched Practical Magic a little on the young side (it came out when I was 12), but ever since then I’ve loved it. Even though it’s not exactly a traditional Halloween movie, I make it a point to watch every fall season. Next week, in fact, I have a movie date with Deanna to watch it together because she’s never seen it and she needs to. This post isn’t about the movie, though, it’s about the book, which I didn’t even realize was a thing until I heard about the prequel The Rules of Magic coming out a couple of months ago.

Excited about the prequel, I hunted down Alice Hoffman’s book Practical Magic, sure I would love it as much as I did the movie. I definitely enjoyed it, but it’s different than I was expecting. The movie’s plot is so ingrained in me at this point, that it didn’t occur to me that the book wouldn’t follow it as well. Obviously, movies change book plots all the time, often to the disappointment of the reader - it’s just that usually I don’t watch the movie (over and over and over) before reading the book. So I was a bit blind-sided, and the irony is not lost on me.  

All that being said, the book is worth picking up. (This NPR review of the prequel describes the differences in Practical Magic book vs. movie wonderfully, the journalist in a similar situation to me.) Hoffman’s writing style is lovely. She crafts a beautiful story of sisterhood and magic that’s perfect for cozy fall reading. I haven’t read anything else she’s written, but I’m looking forward to trying some of her other novels - I’ve heard good things. And, of course, I'm still excited to read The Rules of Magic too. 

Have any of you read or seen Practical Magic? I’d be interested to hear from those of you who read the book before the movie which you prefer. Any other Hoffman novels you’d recommend?  

At one point in the novel, one of the sisters, Sally, makes an apple tart with her secret ingredient, black pepper. And though it’s midsummer in the story, this recipe seemed perfect to make at this time of year. Local apple orchards are bursting at the seams, and I was itching to make an apple dessert anyway. Black pepper as an addition intrigued me. I found a recipe online that included it in an apple galette and used it as a basis for my own version, mostly so I would be able to better estimate how much black pepper to include.

To keep it simple, I used store bought pie crust. Feel free to make your own, if you’re so inclined. First, I prepped my apples, which Scott and I had picked up at a local cider mill the weekend before. I used Gala because I like those and we had also bought them for snacking, but any baking apple would work just as well.

I don’t have an apple peeler contraption and my vegetable peeler wasn’t getting the job done, so I opted to make my tart a bit more “rustic” and left the apples unpeeled. I sliced them pretty thinly and tossed them with lemon juice, some sugar and a bit of freshly ground black pepper (more on the coarse side).

I laid the pie crust on a parchment lined baking sheet, piled the apples on the middle of it, and folded the crust over around the edges. To help it become a more rich golden brown, I brushed the crust with an egg wash before baking.

I covered the tart loosely with a tented piece of aluminum foil and put the tart in a 375-degree oven to bake for about an hour. I set my timer for 45 minutes and checked it every 20 minutes or so. Once it seemed close to being done, I removed the foil and allowed it to bake for another 10 or 15 minutes without, so the crust would get some good color.

It smelled amazing, but I patiently allowed it to cool completely before serving. I cut into 6 slices (though it could certainly be cut into smaller or larger pieces, depending on the size of your family/party). We enjoyed it without any additions, but it would absolutely be delicious with a scoop of vanilla or cinnamon ice cream while it’s still a bit warm from the oven.

What’s your favorite apple recipe in the fall?

Apple Tart with Black Pepper

  • Servings: 6
  • Time: 1½ hours
  • Print

Ingredients

  • 1 pie crust (use your own recipe, or use refrigerated store bought)
  • 3 - 4 medium apples, cored and sliced (¼” - ½” thick)
  • 2 TBS granulated sugar
  • ½ tsp freshly ground black pepper
  • 1 TBS lemon juice
  • 1 egg, mixed with a little bit of water

Directions

  1. Preheat the oven to 375 degrees F.
  2. Prepare the apples and toss them with the sugar, black pepper, and lemon juice.
  3. Place dough on parchment paper or a silicone mat on a baking sheet. Arrange the apples in the center of the dough, leaving about an inch border. Fold the extra dough over the sides of the tart.
  4. Brush the crust lightly with an egg wash.
  5. Cover the tart loosely with aluminum foil and bake for about 45 minutes to an hour. After when there are about 15 minutes left (apples should be soft, dough should be mostly cooked), remove the foil to allow the dough to become golden.
  6. Let cool completely before serving. Best served at room temperature. Enjoy!

Adapted from: Earth Powered Family

Notes: It’s not much more work to make 2 tarts at a time, especially if you’re using store bought crust. Plan to use 6 medium apples and double the sugar, pepper and lemon juice. Divide apples evenly between both crusts. Baking time shouldn’t change.

You can peel your apples if desired, but with thin slices, it doesn’t affect the texture much to leave them on. Plus, it makes it much quicker!


This post contains affiliate links. Full disclosure here.

Filed Under: book review, recipe Tagged With: 5 ingredients or less, baking, contemporary, dessert, easy prep, fiction, fruit

The Heart's Invisible Furies + Custard Slice

October 5, 2017 by Megan 4 Comments

Generally, I do enjoy most of what I read. Sometimes I don’t, but luckily, sometimes the opposite is true and I love a book so much that I can’t shut up about it. John Boyne’s The Heart’s Invisible Furies is one such book. Readers, my second 5-star book of the year is here, and I couldn’t be more excited to share it with you!

I first heard about this book on my new favorite podcast, All the Books. (Thank you, Liberty Hardy! You’re always full of excellent recommendations.) So, when I saw it in my August BOTM selections, I knew I had to select it. When it showed up in the mail, I was surprised at its heft - it’s nearly 600 pages - and set it aside for nearly enough, thinking I didn’t have time to get into a difficult, long book. I waited a couple of weeks, but when I finally picked it up, I was captivated in just the first few pages and by the end of the first chapter, I was hooked.

The novel follows Cyril Avery beginning when he is still an unborn child in his mother’s womb in a small town in 1940s Ireland. When she is cast out by a cruel priest, she finds herself in Dublin, where she must make it on her own. Her circumstances almost require her to put Cyril up for adoption, and he is taken by a hunchbacked Redemptionist nun to the home of Maude and Charles Avery, an eccentric couple who aren’t exactly cut out for parenthood. From there, Cyril’s life takes both heartwarming and heart-wrenching turns, bringing us to modern day Ireland in truly spectacular and unforgettable fashion.

This book may be 592 pages, but I couldn’t put it down. I finished it in a weekend and have been talking about it ever since. Furies is filled with complex and varied characters, all memorable in their own way. As entertaining as this novel was - it absolutely had it’s laugh out loud moments - I should probably mention that, like my last 5-star favorite, it tackles some sensitive topics and was hard to read in parts. But to me, that is the beauty of Boyne’s novel; he expertly captured all the nuances of humanity, from the mundanely everyday to unexpected tragedy in a captivating way.

Finding a recipe to pair with such a sweeping saga wasn’t as hard as I expected it to be. Several key scenes throughout take place in a parliamentary tea shop where “cream slice” seems to be a popular menu item. After doing some research, I found it’s also known as custard slice. I was able to find a recipe from RTE, or the Raidió Teilifís Éireann in Ireland, which is a real television station where Cyril finds himself working at one point in the novel.

The recipe has quite a lot of steps, but the ingredients list is small and it’s not really that complicated, so don’t let the long recipe below fool you. It’s totally doable.

To start, I set out my frozen puff pastry sheets to thaw while I made my pastry cream. I poured the milk into a saucepan, added a vanilla pod split down the middle and let it come to a boil. In the meantime, I combined the sugar, egg yolks and cornstarch with a mixer, beating for a few minutes until it became pale and light.

Once the milk began boiling, I removed it from the heat and slowly added it to the egg mixture, whisking all the while. I added it back to the saucepan, bringing it up to a slow boil over low heat, stirring continuously. After several minutes, it thickened, so I removed it from the heat and added it to a wide bowl to cool more quickly. I covered it with cling wrap and placed it in the fridge.  

Once the puff pastry dough was thawed (able to be unfolded), I used a sharp knife to cut it down to an 8x8 square. (I don’t think this is entirely necessary, if you have a 9x9 pan, which I found I did after the fact. I’ve explained further in the recipe notes below.) Then, on two parchment-lined baking sheets, I baked them for about 10 minutes each, until they were lightly golden.

After they cooled, I placed one pastry in the bottom of my pan, which was lined with foil. Per the directions, I made sure to leave extra foil hanging out of the pan so the completed custard slice could be removed more easily later; this is definitely a big help. Then, I smoothed the cooled pastry cream over the bottom layer of puff pastry and placed the prettier looking pastry sheet on top. The assembled dessert went back into the fridge to set while I made the topping.

I combined powdered sugar with a small amount of cold water to create a drizzle-able icing. I also melted some dark chocolate (you could also use milk chocolate if you prefer) in a small bowl in the microwave, until it was thin enough to drizzle with a spoon.

First, I drizzled the icing diagonally across the top of the pastry. Then, turning the pastry 90 degrees, I drizzled the melted chocolate to create a criss-cross pattern with the icing.

I covered the completed custard slice and put it back in the fridge to set until we were ready to give it a try. Later that evening, I cut it into 8 rectangular slices and served as our dessert. We found it to be sort of messy to eat, and I would recommend using a fork and a knife, but it certainly was tasty. If you decide to give it a go, I hope you enjoy!

Have you read John Boyne’s novel yet? What did you think?

Vanilla Custard Slice

  • Servings: 8
  • Time: 45 minutes
  • Print

Ingredients

  • 2 sheets frozen puff pastry
  • 13 fl oz whole milk
  • 1 vanilla pod, split down the middle or 1 tsp vanilla extract
  • 6 Tablespoons (3 ounces) granulated sugar
  • 3 egg yolks
  • 3 Tablespoons cornstarch
  • pinch of salt
  • 2 Tablespoons, or 1 ounce, or unsalted butter, cut into small cubes
  • ¼ cup powdered sugar
  • ¼ cup melting chocolate or chocolate chips

Directions

  1. Make the crème pâtissière to begin: Pour the milk into a saucepan and add the split vanilla pod, if using. (If using the vanilla extract, add it in with the butter at the end.) Bring the milk mixture to the boil, then remove from the heat.
  2. Whisk the sugar, egg yolks and cornstarch together in a large bowl for about 2–3 minutes using a hand-held electric mixer until pale and light.
  3. Pour the hot milk onto the egg mixture, whisking continuously, and then return the mixture to the saucepan. Cook the mixture over a low heat, stirring continuously, until the mixture becomes thick. It should just come to a boil. If it boils unevenly or too quickly, it may become lumpy, in which case use a whisk to mix until smooth again.
  4. Remove the custard from the heat and pour into a bowl (push the mixture through a sieve if there are any lumps). Add the pinch of salt and the butter (and vanilla extract if using) and stir until melted and thoroughly combined.
  5. Leave to cool, cover with cling wrap and chill before using.
  6. Preheat the oven to 425 degrees F. Line two baking trays with parchment paper.
  7. If using frozen puff pastry sheets, these should already be approximately 9x9. If you have a 9x9 pan available, you can use as-is. If you only have (or prefer to use) an 8x8 pan, cut the puff pastry sheets so they will fit the smaller pan. Cut approximately 1 inch off two of the sides, forming an 8x8 square.
  8. Place each pastry sheet onto the lined baking trays, prick each piece a few times with a fork and chill for 10-15 minutes. Then, bake the pastry sheets for 10-15 minutes or until golden brown and crisp. Set aside to cool.
  9. While the pastry bakes, line your baking pan with foil, allowing plenty of extra foil at the sides to allow you to lift out the assembled slices. If you don't have a square tin, it's not the end of the world, just use the foil to make a base and sides.
  10. Place one pastry sheet in the bottom of the lined tin (reserve the prettiest piece for the top). Spread the crème pâtissière evenly onto the pastry in the baking tray before placing the other piece of pastry on top. Refrigerate while making the icing.
  11. For the icing, sift the icing sugar into a bowl. Stir in 3-4 teaspoons cold water – just enough to give you a thick, drizzling consistency – and set aside.
  12. Place the chocolate in a bowl sitting over a saucepan with a few centimetres of water. Bring the water up to the boil, then take off the heat and allow the chocolate to melt slowly. (Another option would be to heat in the microwave at defrost or 30% power in 30 minute increments, stirring until it becomes melted enough to drizzle. If using melting chocolate, follow directions on the bag.)
  13. Take the custard slice from the fridge to decorate. First, using a spoon, drizzle the icing diagonally across the pastry. Turn the pan 90-degrees and, using a different spoon, drizzle the chocolate across the pastry forming lines that criss-cross the icing lines. Repeat with icing and chocolate as desired/until you run out.
  14. Place the slice back into the fridge to set. Later, cut the finished custard slice into 8 pieces. Using the foil, carefully lift the portioned vanilla slices out of the tray and serve.

Adapted from: Rachel Allen, via RTE

Notes: This recipe was adapted for the US from a recipe created in Ireland. Measurements were converted when necessary to accommodate American cooks.


This post contains affiliate links. Full disclosure here.

Filed Under: book review, recipe Tagged With: baking, book of the month, contemporary, dessert, drama, historical fiction, tough topics

  • « Go to Previous Page
  • Go to page 1
  • Interim pages omitted …
  • Go to page 9
  • Go to page 10
  • Go to page 11
  • Go to page 12
  • Go to page 13
  • Go to page 14
  • Go to Next Page »

Primary Sidebar

About

The Hungry Bookworm brings together literature and food. Megan has an insatiable appetite for both.

As C.S. Lewis said, “Eating and reading are two pleasures that combine admirably.” Enjoy!

  • Bloglovin
  • Facebook
  • Instagram
  • Pinterest

Subscribe

Don't miss out on bookish content, exclusive giveaways, and of course, book club-friendly recipes. Get notified of new posts via email.

Join 2879 subscribers.

Search for Ingredients, Recipes, or Books

Recent Posts

  • Subscriber Box Review: Literati Book Club - Roxane Gay's Audacious Book Club
  • Arsenic and Adobo + Ensaymada
  • Review of The Kindred Spirits Supper Club
  • Kids Edition: Sometimes I Like to Curl Up in a Ball + "Dirt" Pudding Cups
  • The Midnight Library + Broccoli and Ricotta Toast

Goodreads

Tags

5 ingredients or less appetizer baking book club book list book of the month books about food bread breakfast brunch chicken contemporary cookies cultural dessert dinner dinner party dystopia easy prep favorites fiction fruit historical fiction holiday ice cream linkup lunch meat memoir mini review nonfiction pasta quick read reading challenge science fiction seafood show us your books side dish snack soup TBR list thriller top ten tuesday vegetarian veggies

Archives

Other Great Book Blogs

Literary Quicksand
Never Enough Novels
Death by Tsundoku
Professional Reader 25 Book Reviews
Privacy & Cookies: This site uses cookies. By continuing to use this website, you agree to their use.
To find out more, including how to control cookies, see here: Cookie Policy

Footer Widget Header

Megan’s Instagram

Copyright © 2023 · Hungry Bookworm