• Skip to primary navigation
  • Skip to main content
  • Skip to primary sidebar
  • Home
  • Reviews
    • Book Index
    • Fiction
    • Non-Fiction
    • Top Ten Tuesdays
The Hungry Bookworm

The Hungry Bookworm

reading + eating

  • Recipes
    • Drinks
    • Snacks, Sides & Apps
    • Main Dishes
    • Desserts
    • 5 Ingredients or Less
  • About
    • Meet Megan
    • How I Rate
    • Review Policy
    • Contact

baking

American Gods + Beef Pasties

May 4, 2017 by Megan 4 Comments

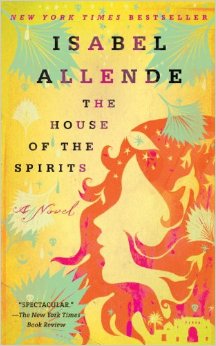
I read American Gods hoping to create some personal excitement for the new series on Starz (which premiered on April 30), but I finished it feeling less than enthused. I’ve had a bit of a mixed reaction to Neil Gaiman - ultimately thinking that my first selection The Ocean at the End of the Lane was just okay, but enjoying both Coraline and Neverwhere.

American-Gods-Cover-05292015.jpg

Gaiman’s novel is interesting enough at the outset. It follows Shadow as he is released from prison after serving three years. On his way home, he meets a mysterious man called Wednesday, an old god, actually. Wednesday enlists Shadow to help him recruit other old gods, traveling back and forth across the United States attempting to convince them to join the fight against the new gods.

Shadow’s story, when we were following it, kept my attention. It was the detours Gaiman took at the end of each chapter that I found distracting, as the story peeked in at the goings-on of various other gods we usually hadn’t met yet (and sometimes never saw again). The plot took a lot of twists and turns, and had I been fully invested, I would’ve been at the edge of my seat so I can see why people really enjoy it.

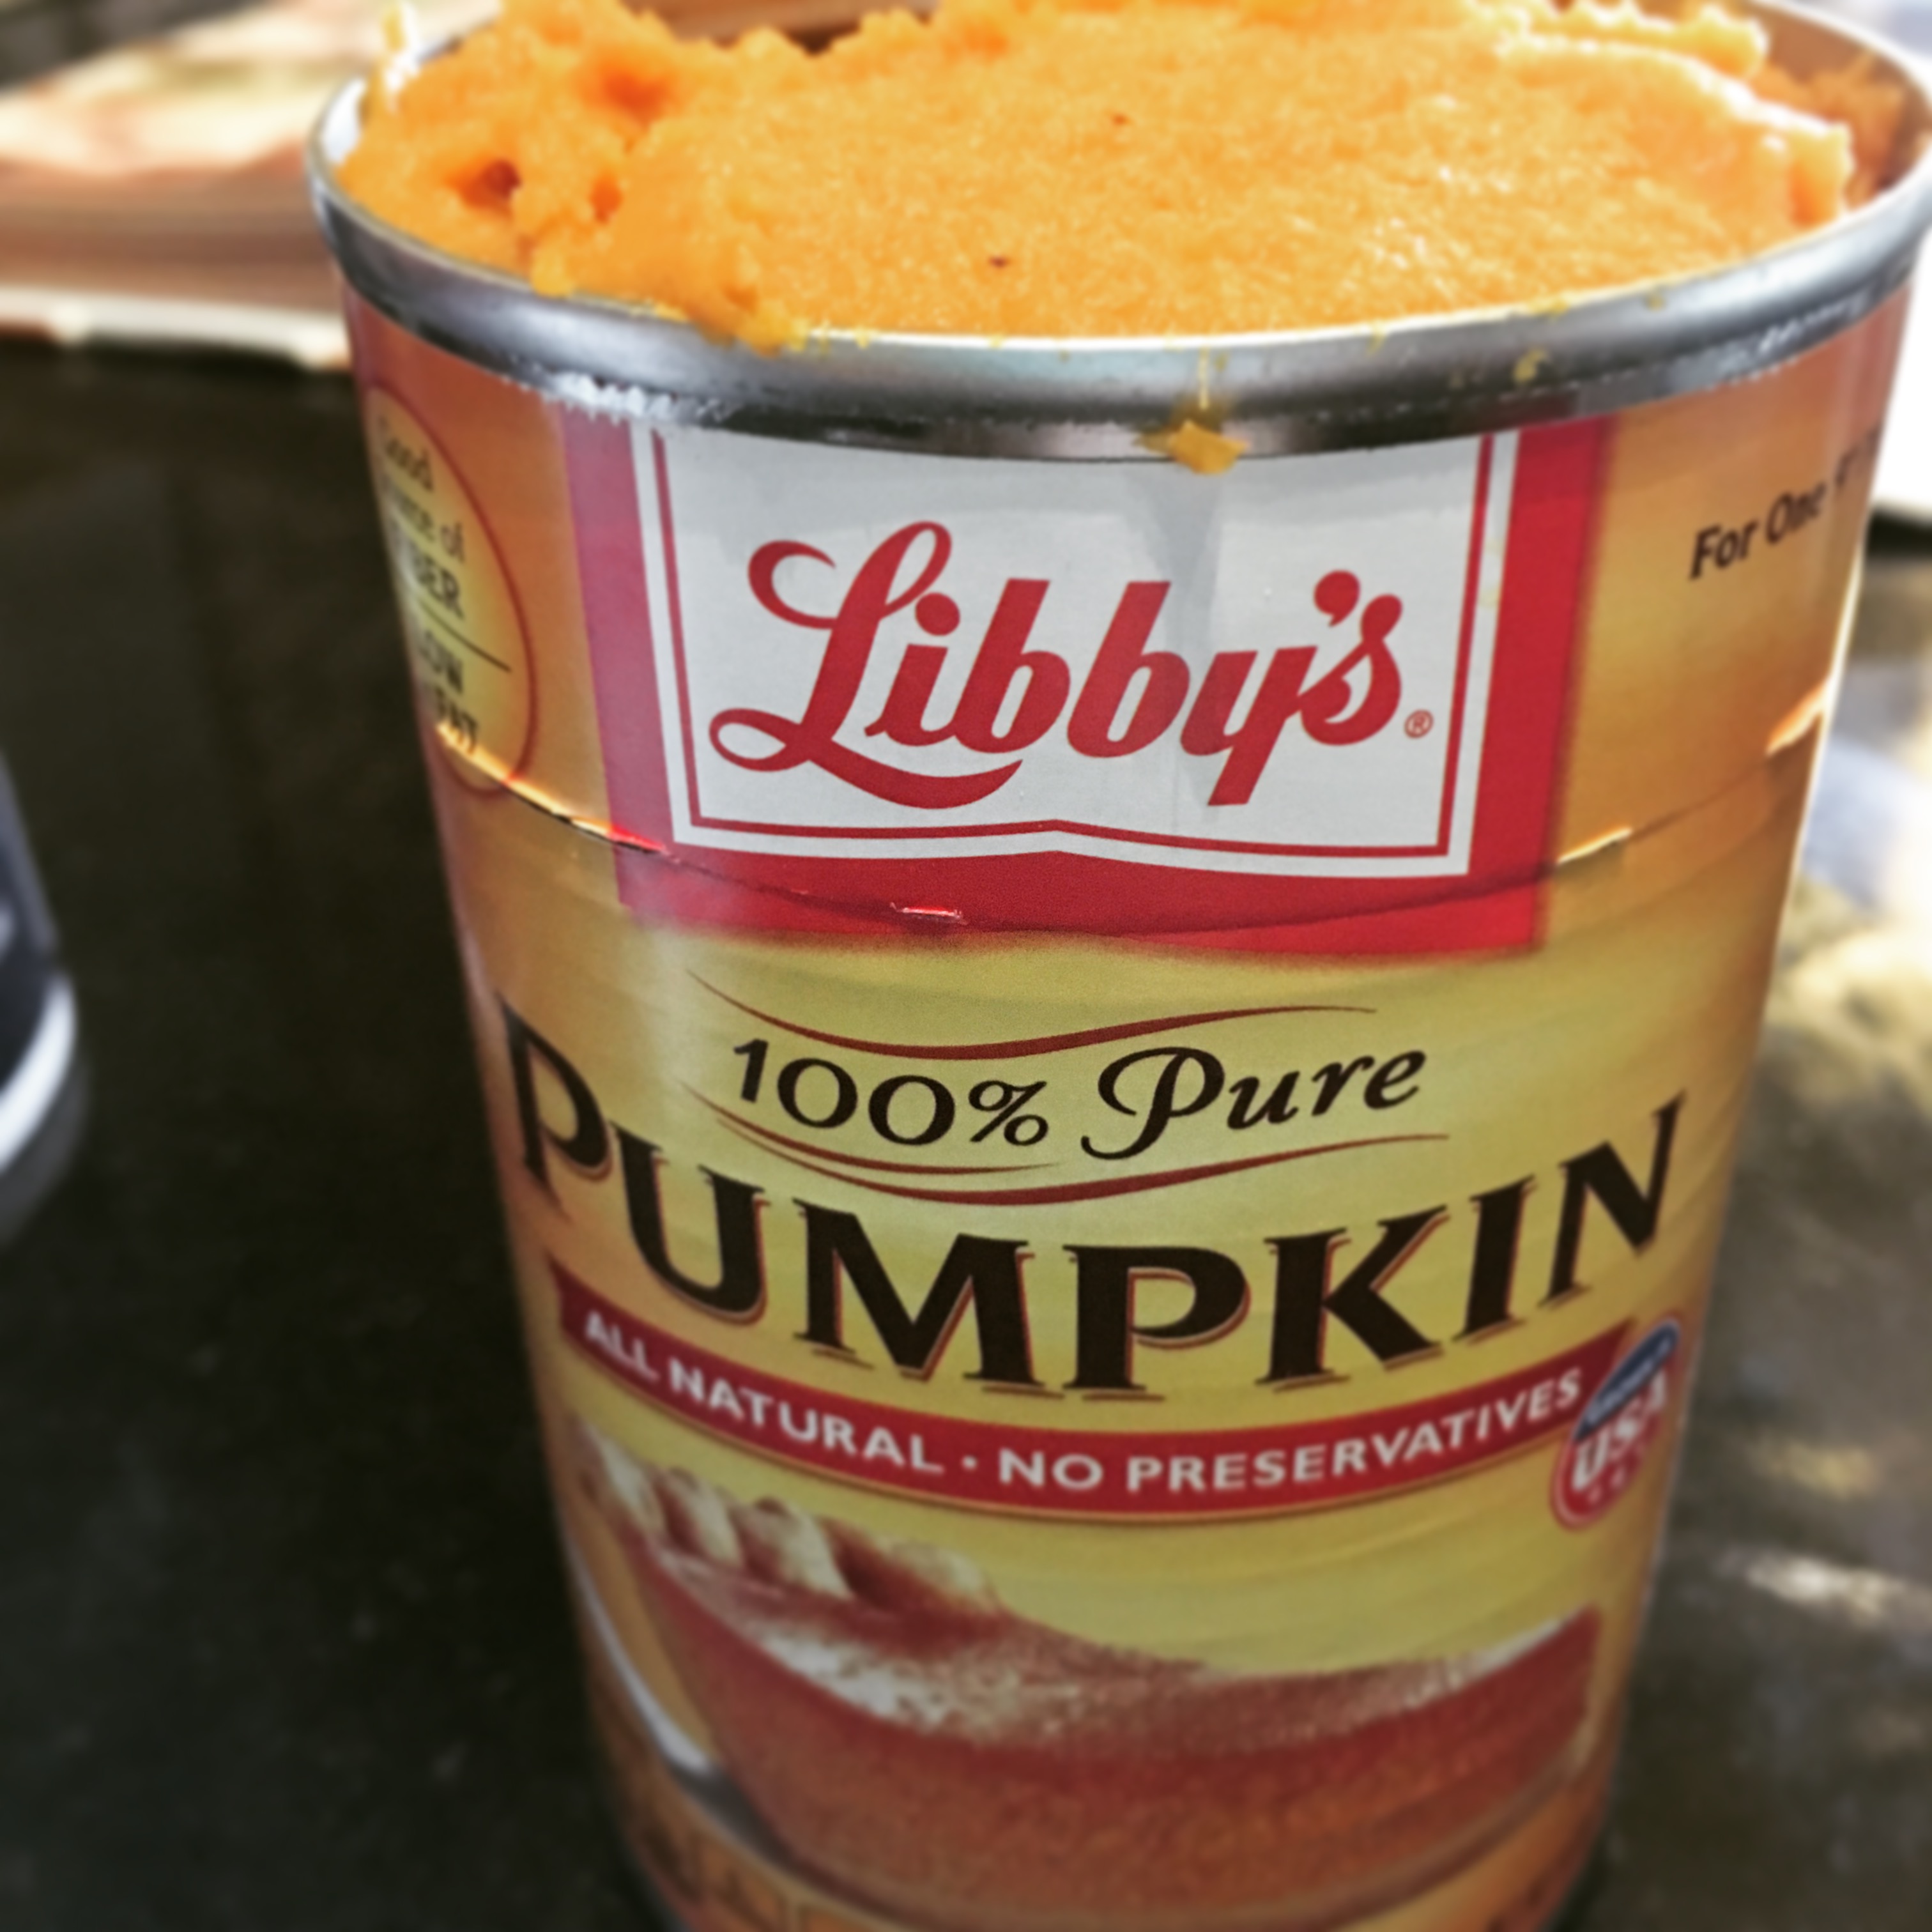
When he wasn’t with Wednesday, Shadow took refuge in a small town called Lakeside, Wisconsin. It was there that I found my recipe for American Gods - Mabel’s famous pasties. Pasties are baked pastries filled with meat and vegetables, said to have originated in Cornwall, England. They are also quite popular in the Upper Peninsula of Michigan, and while I have had them in England, I’ve never had them close to home - until now.

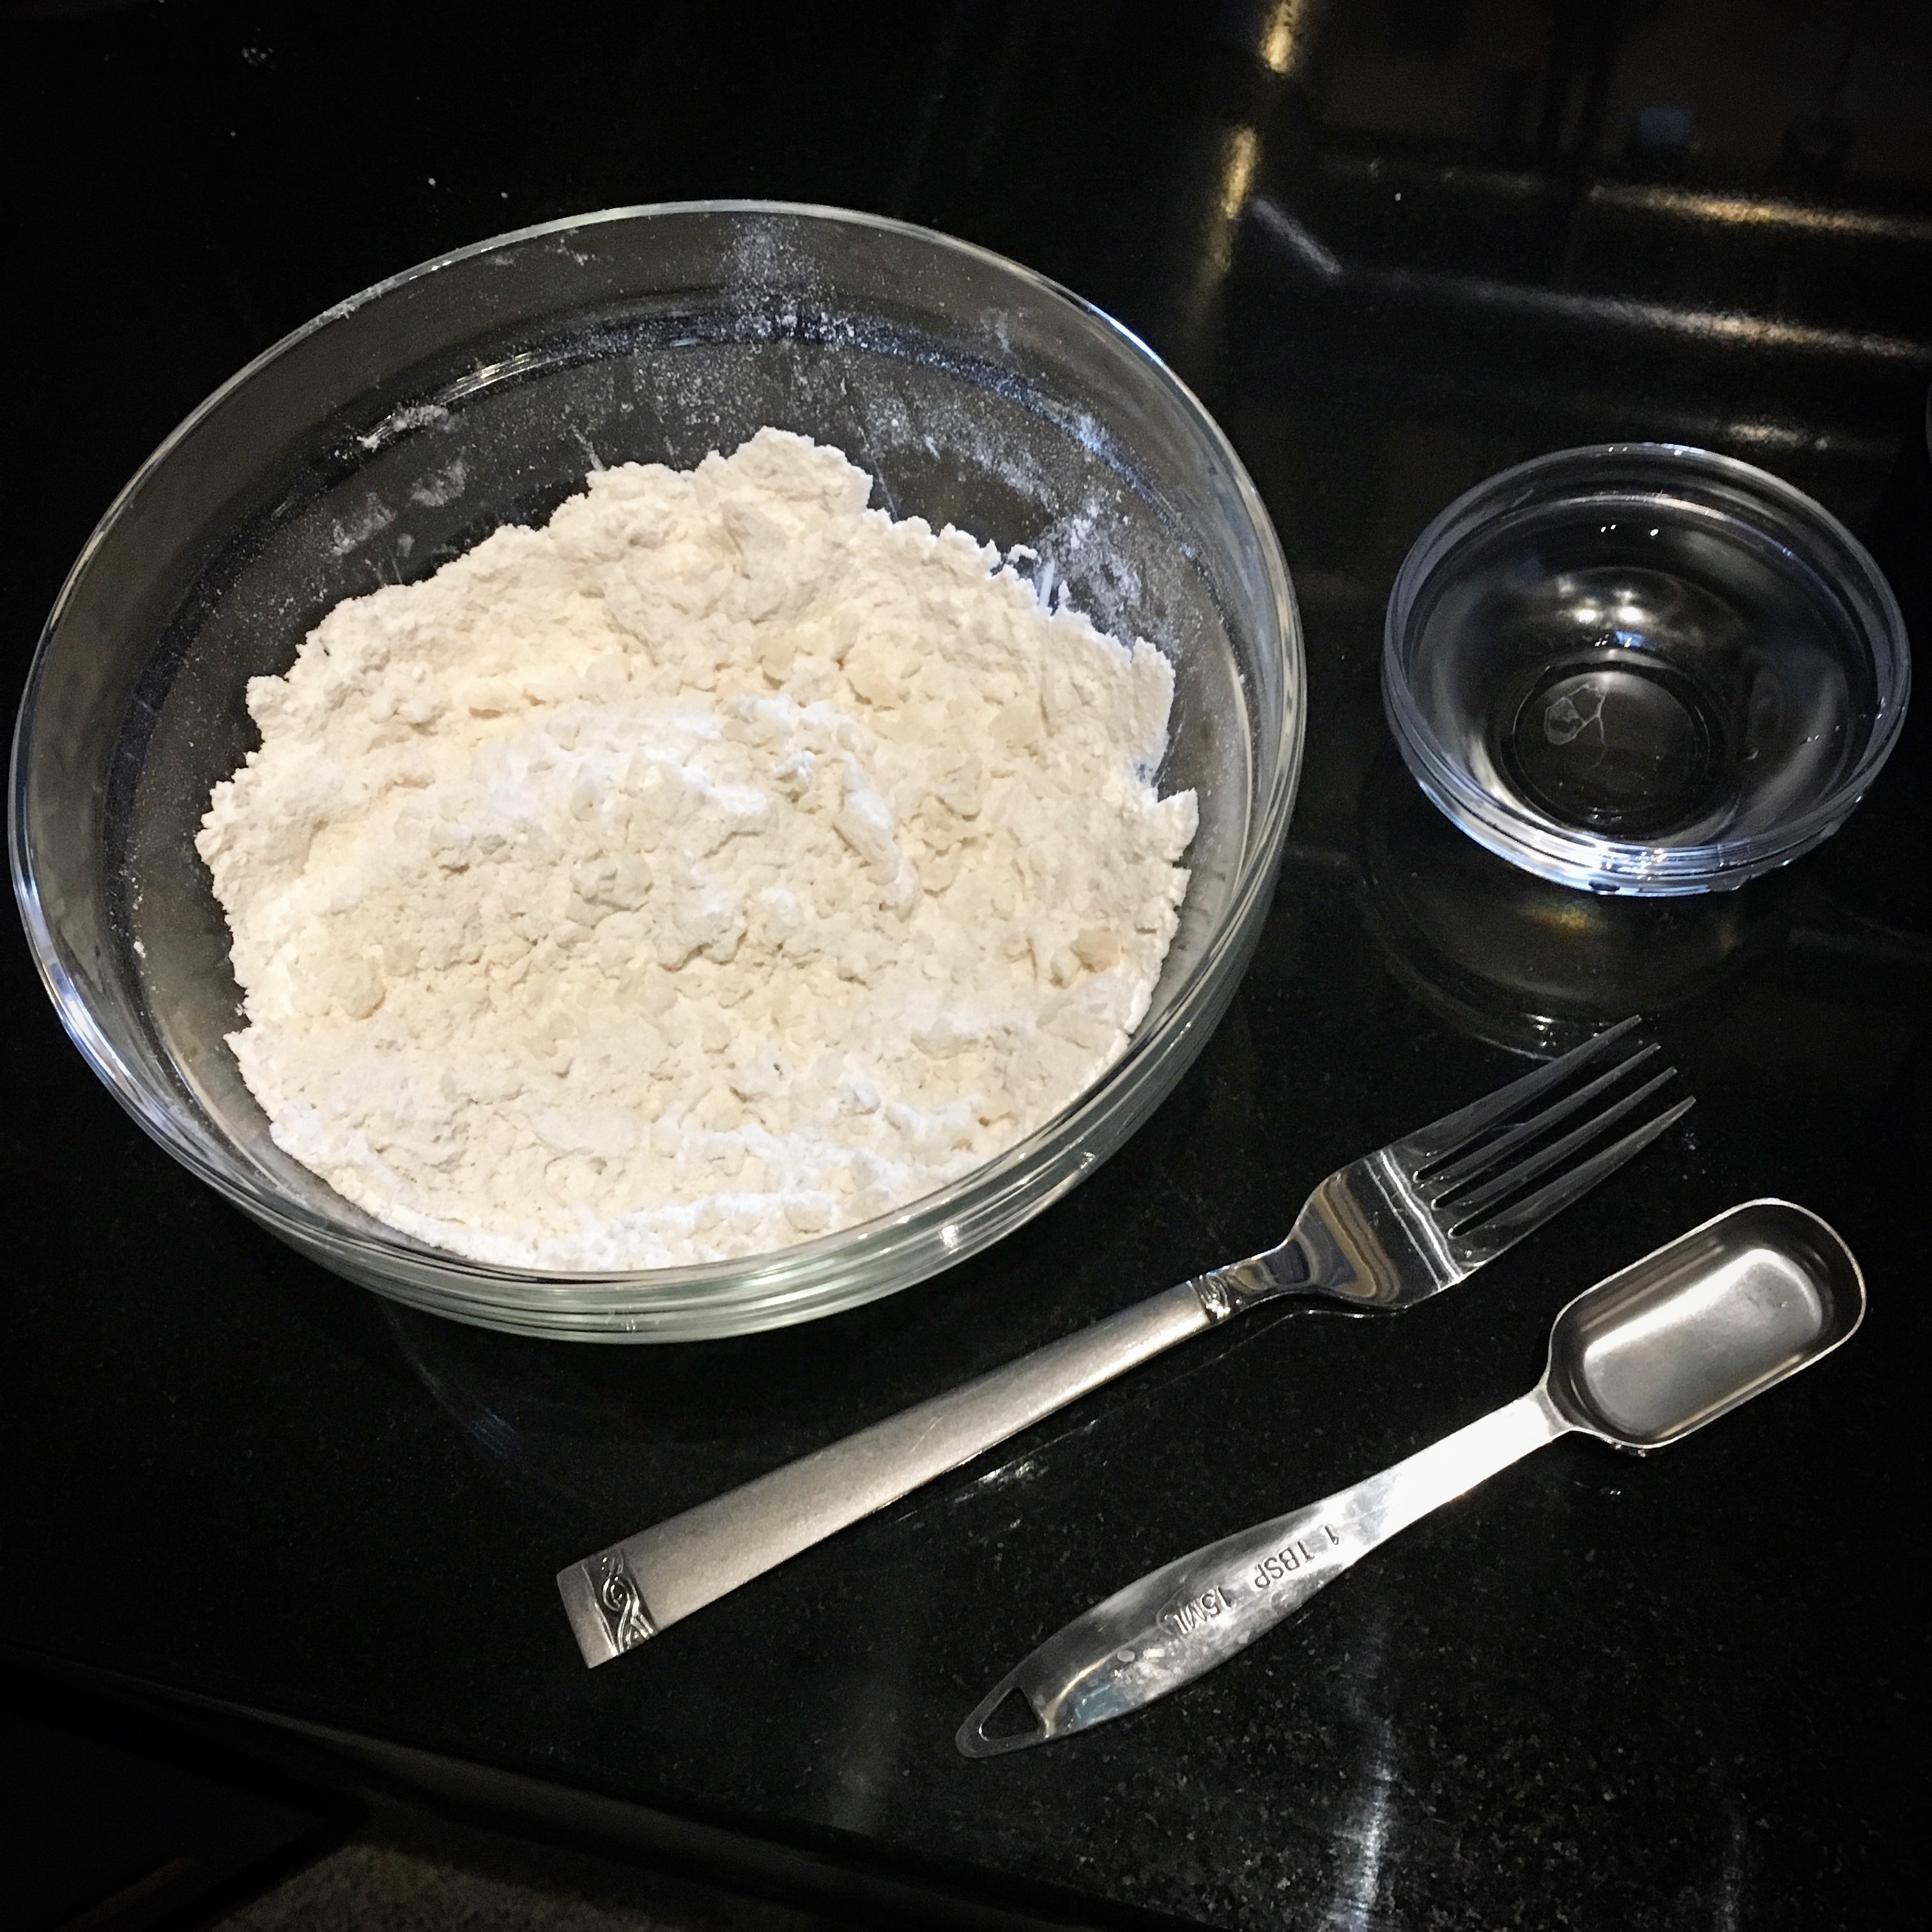
Scott’s mom had actually made them before and shared her recipe with me. (Thank you!) I made my own dough, which she said would be easy with a food processor - and it was.

My food processor didn’t seem to be able to handle such a large amount of ingredients, however, so I ended up splitting the dough into two batches. I also needed slightly more liquid to get it to come together, so use your best judgment, but make sure not to overdo the liquid because you don’t want the dough to become sticky.  

I formed the dough into two smaller disks and stored them in the refrigerator in plastic wrap to chill. I allowed mine to chill overnight but a couple of hours should be sufficient.

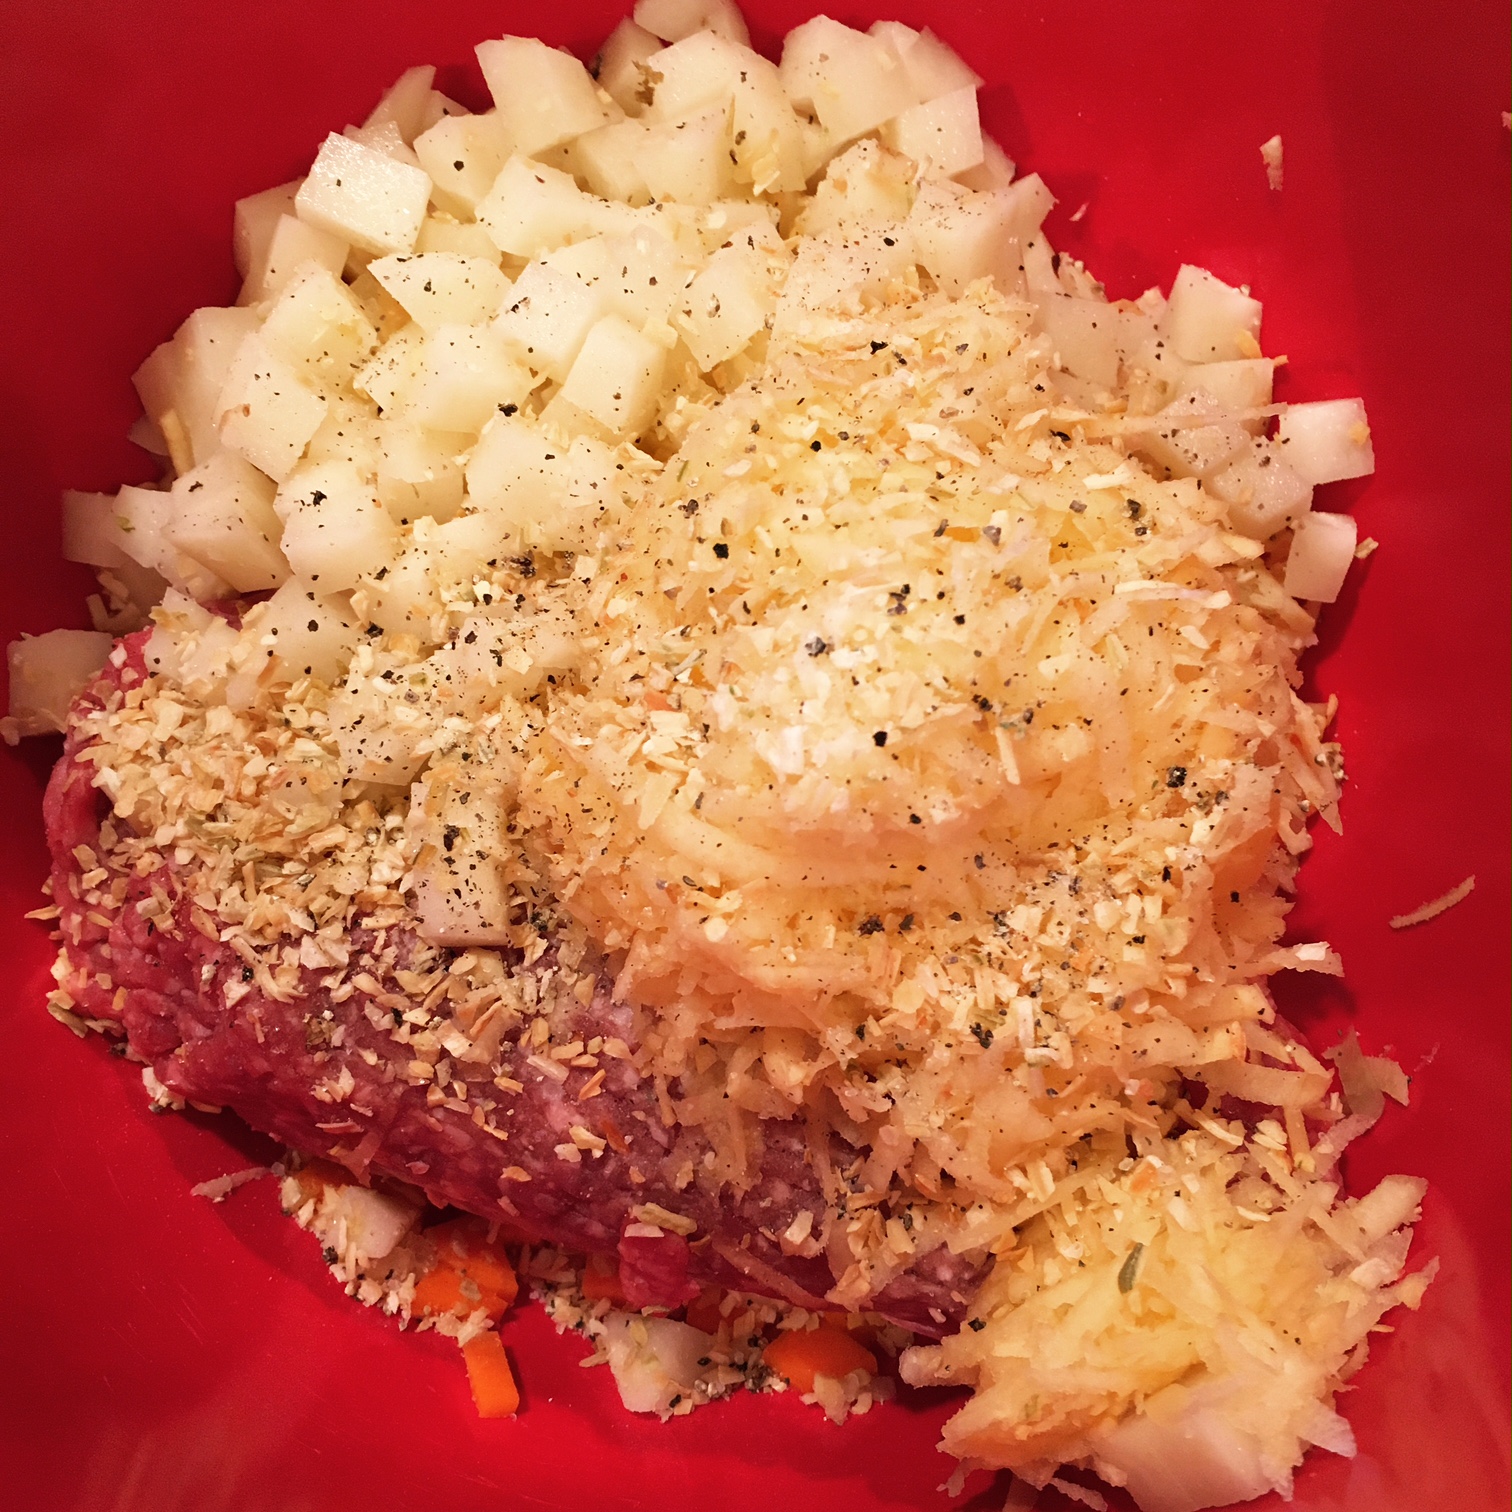
While the dough chilled (or in my case, before I took it out to roll it), I prepared the vegetables for the filling. First, I diced the carrots, doing my best to keep them relatively small so they would soften well while baking.

Having never even eaten rutabaga (to my knowledge), I certainly had never made it, so I was a little unsure how to tackle it at first. Ultimately, I just hacked off a chunk of it, peeled off the skin and then cut the piece into smaller pieces that would fit in my food processor spout. I used my grating attachment to grate it quickly.

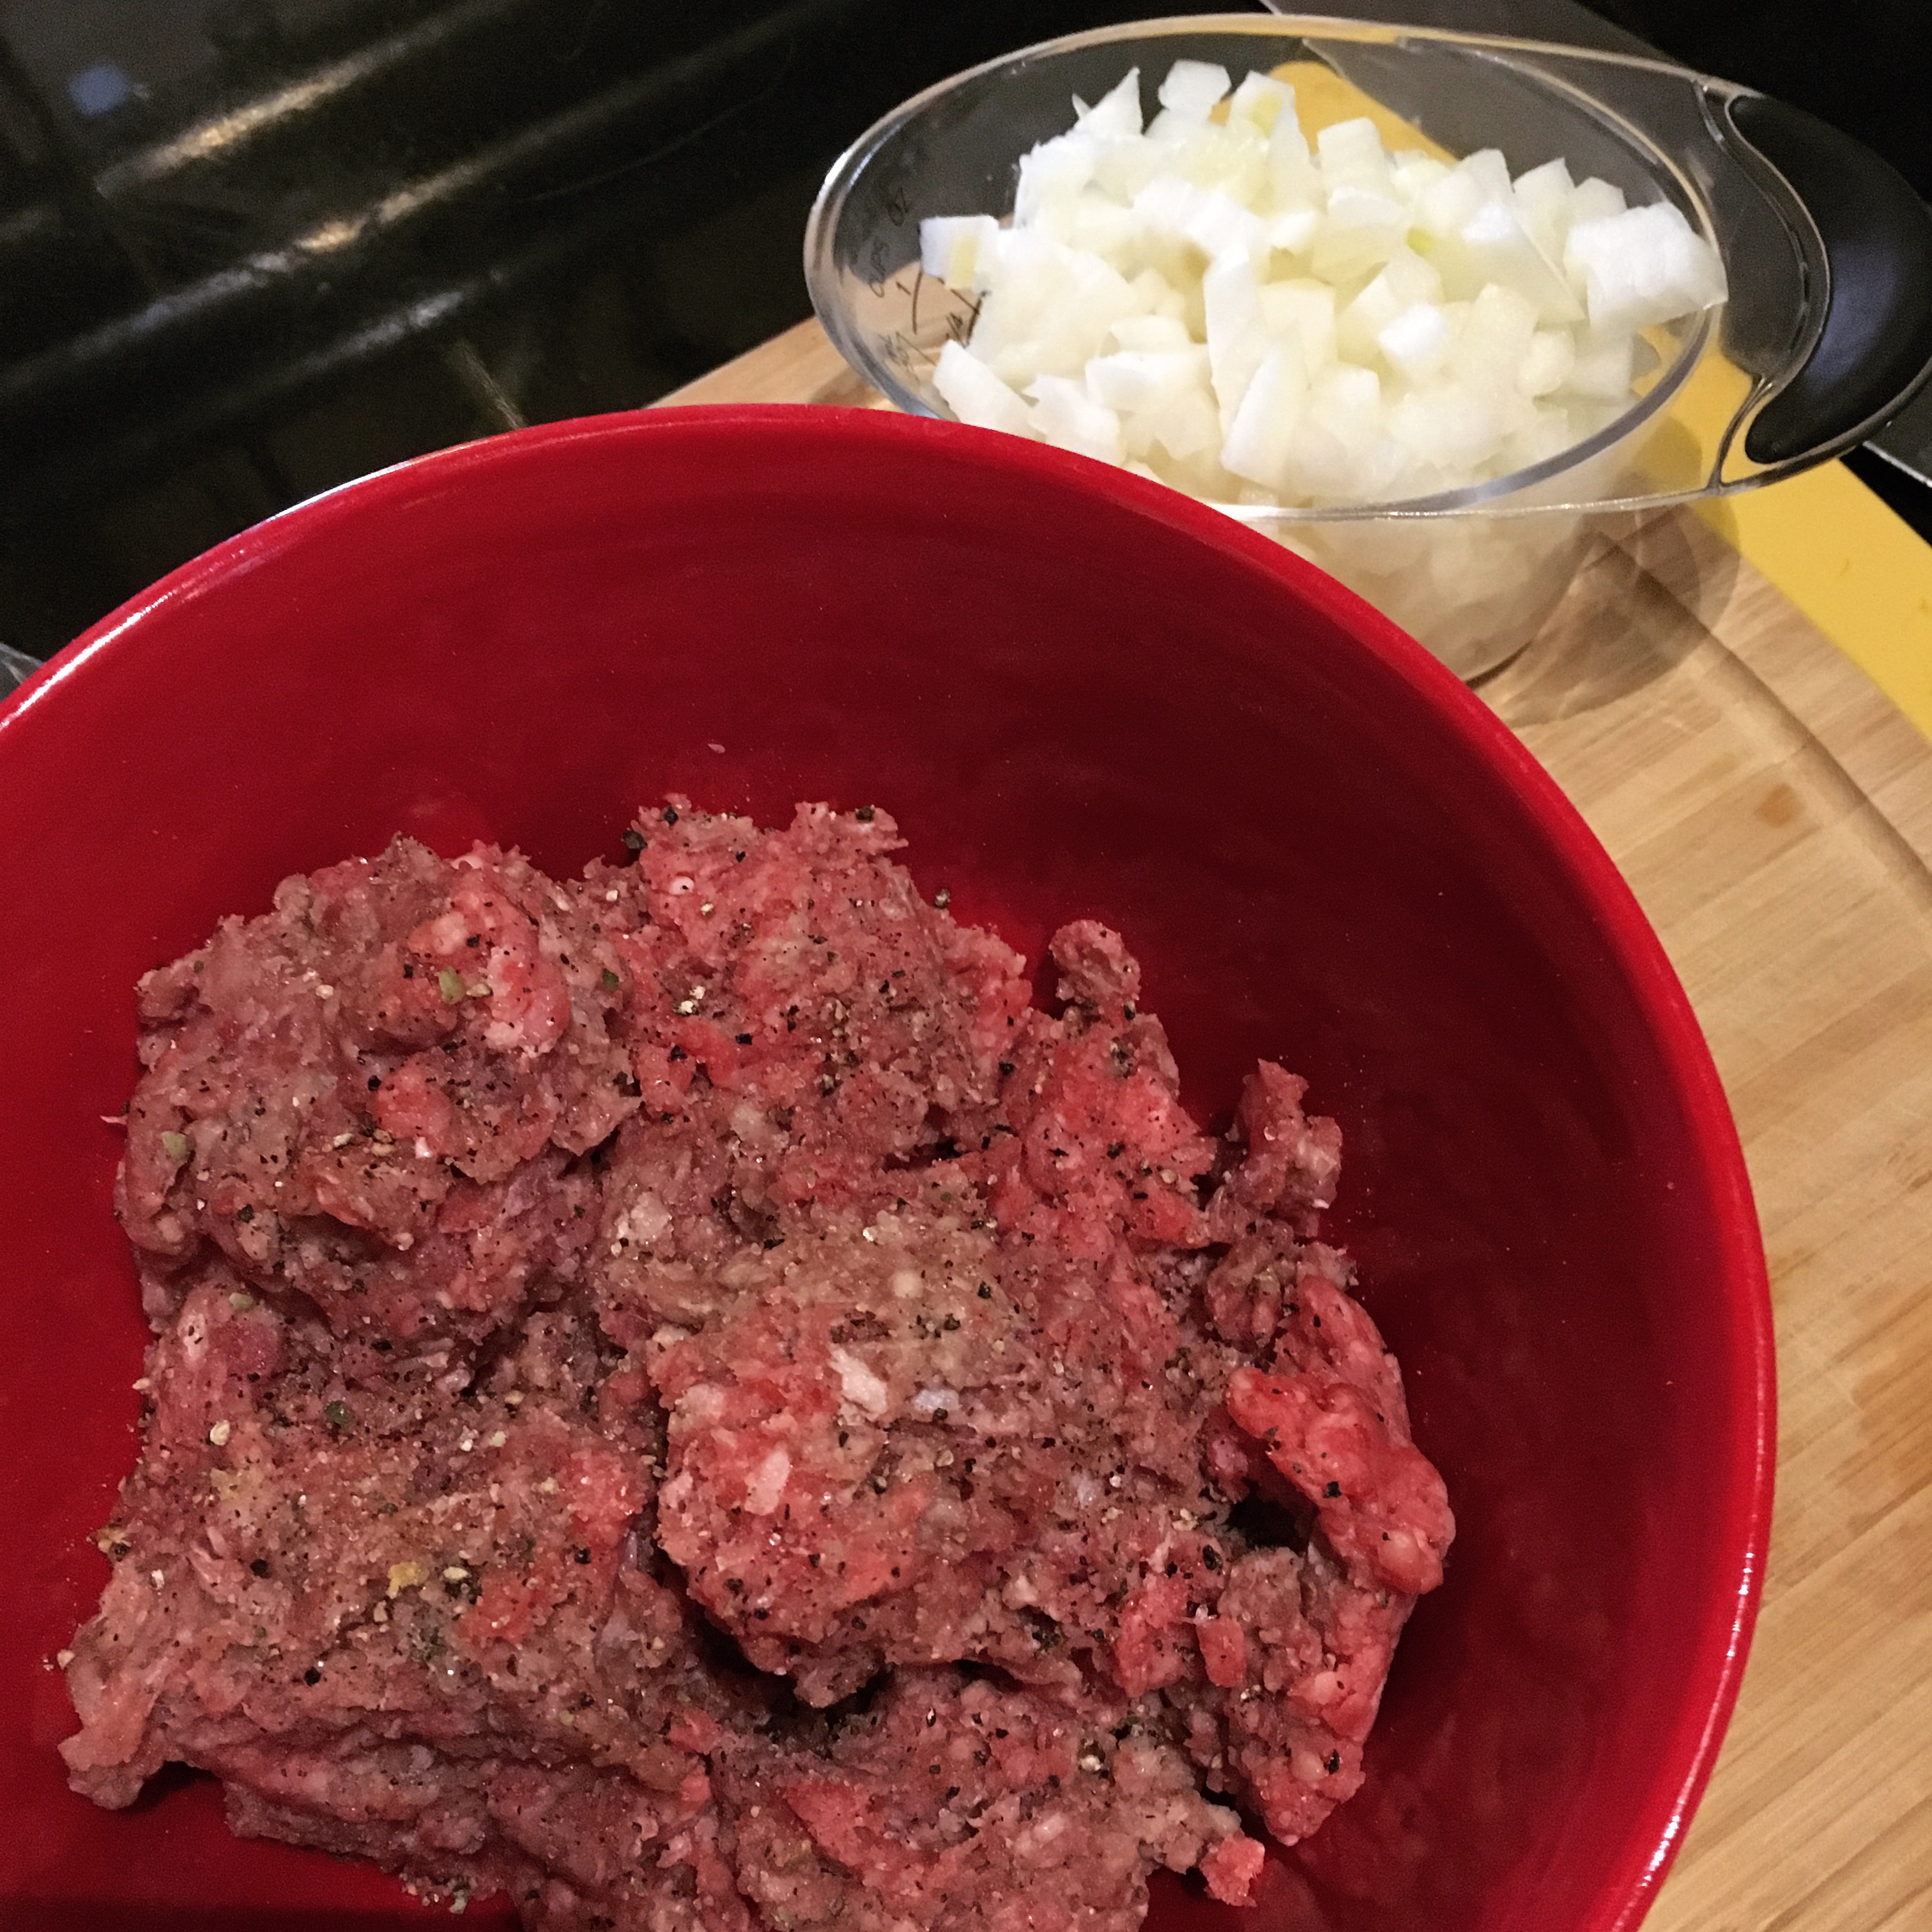
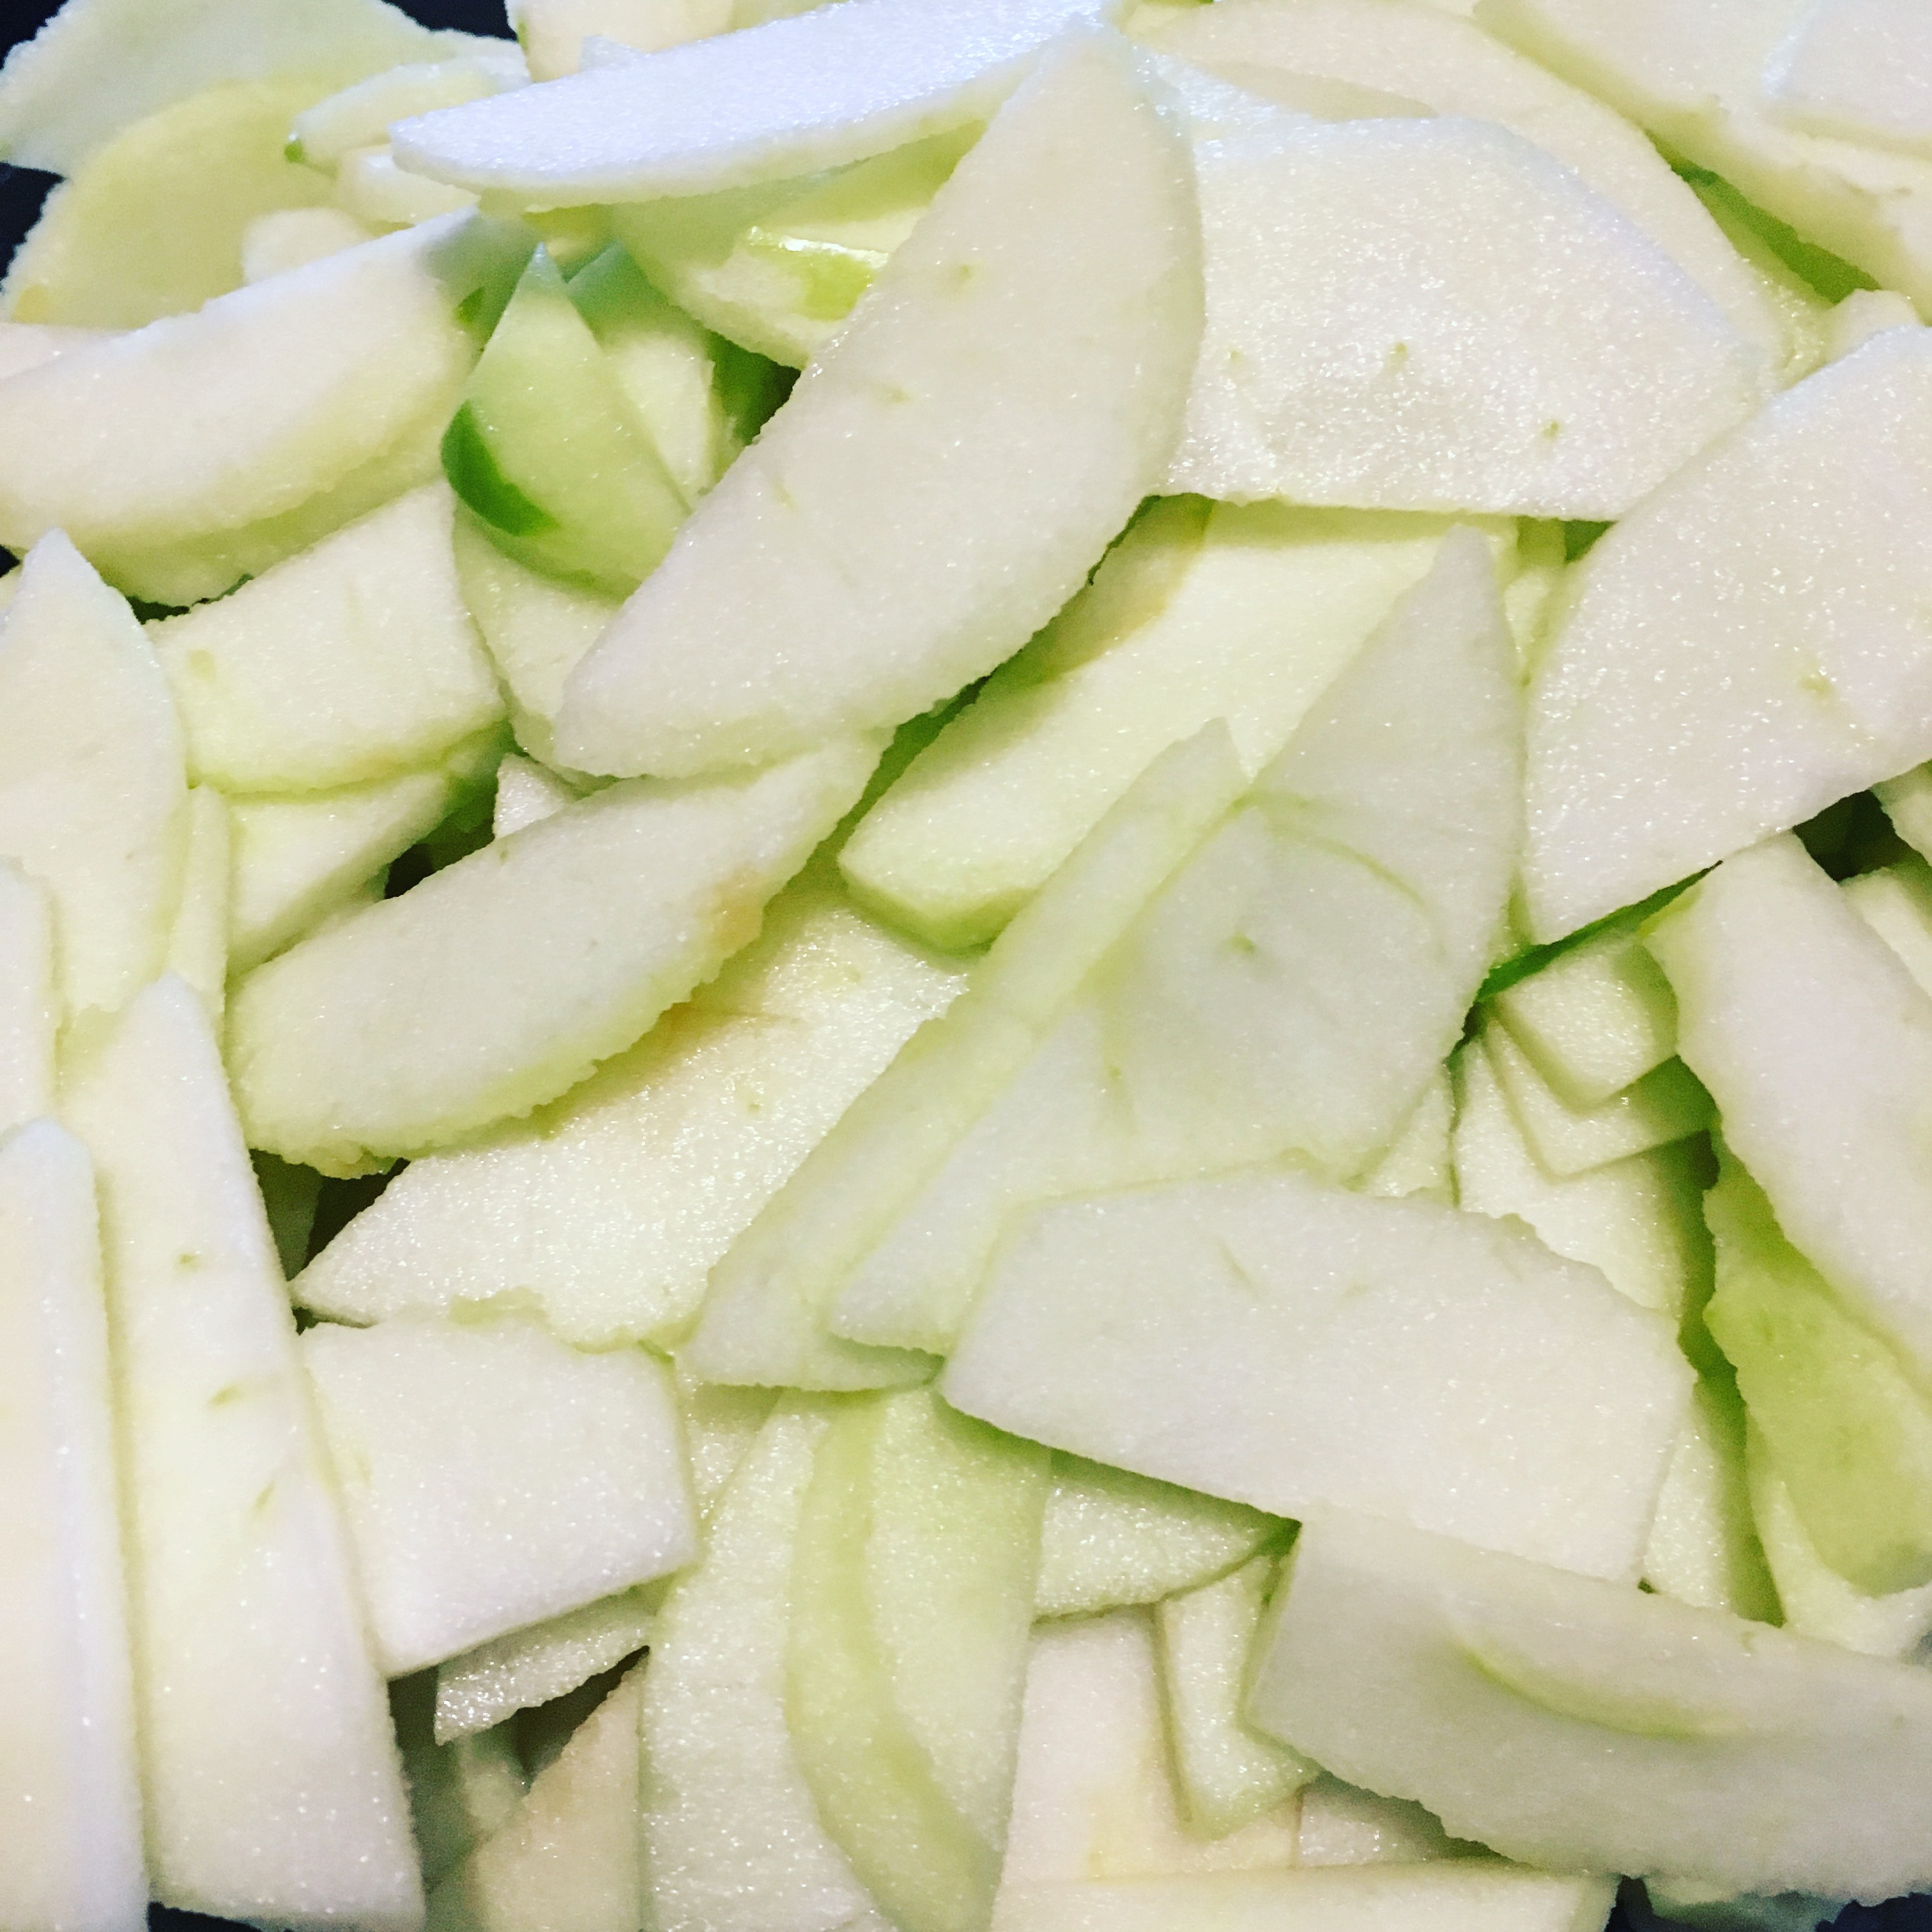
Then, I peeled and diced my potatoes, trying to keep their size in line with the size of my carrots. About 2 medium potatoes yielded the 1½ cups I needed. After so much prepped I decided to just use minced dried onion out of my cupboard. Fresh onion might impart a bit more moisture into the meat, but it turned out well with the dried version, so use whatever works best for you.

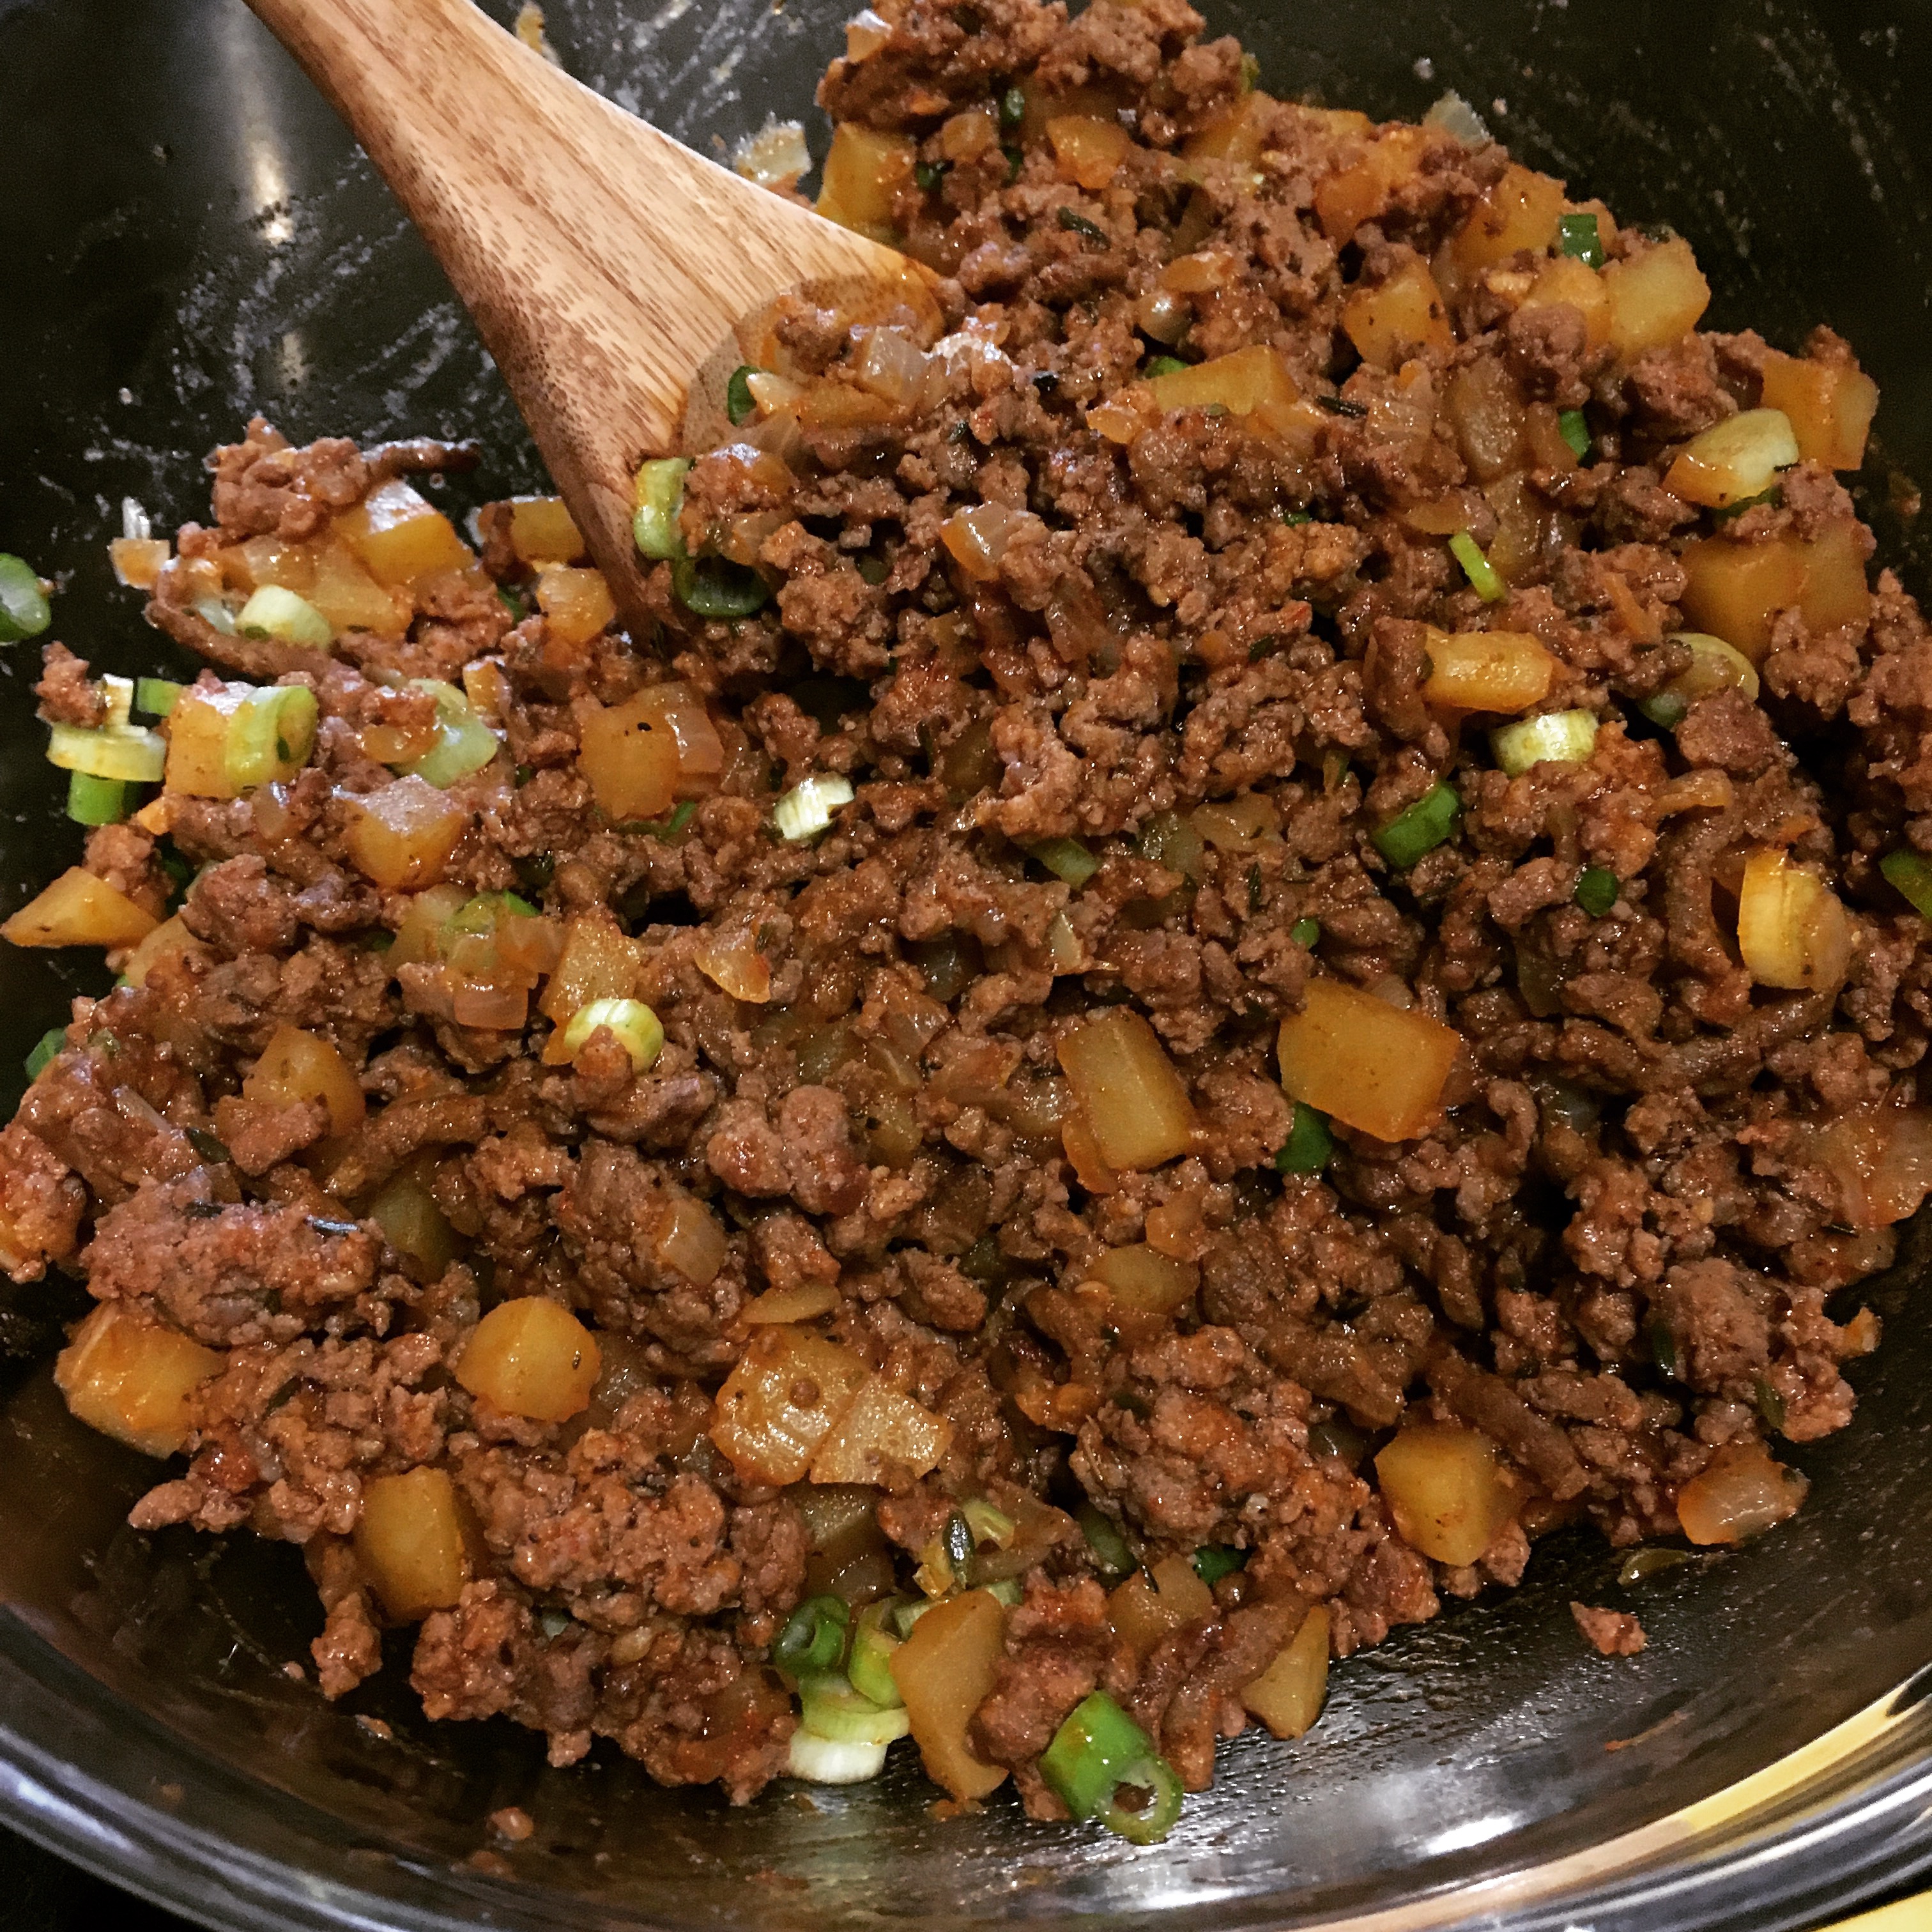
I combined all of my filling ingredients - about a pound of ground beef, the carrots, potatoes, rutabaga and minced onion. I also added salt and some freshly ground black pepper. Lastly, I melted the butter and poured that over the filling, making sure to mix it in well.

IMG_2869

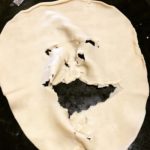
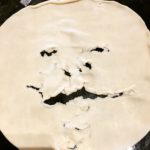
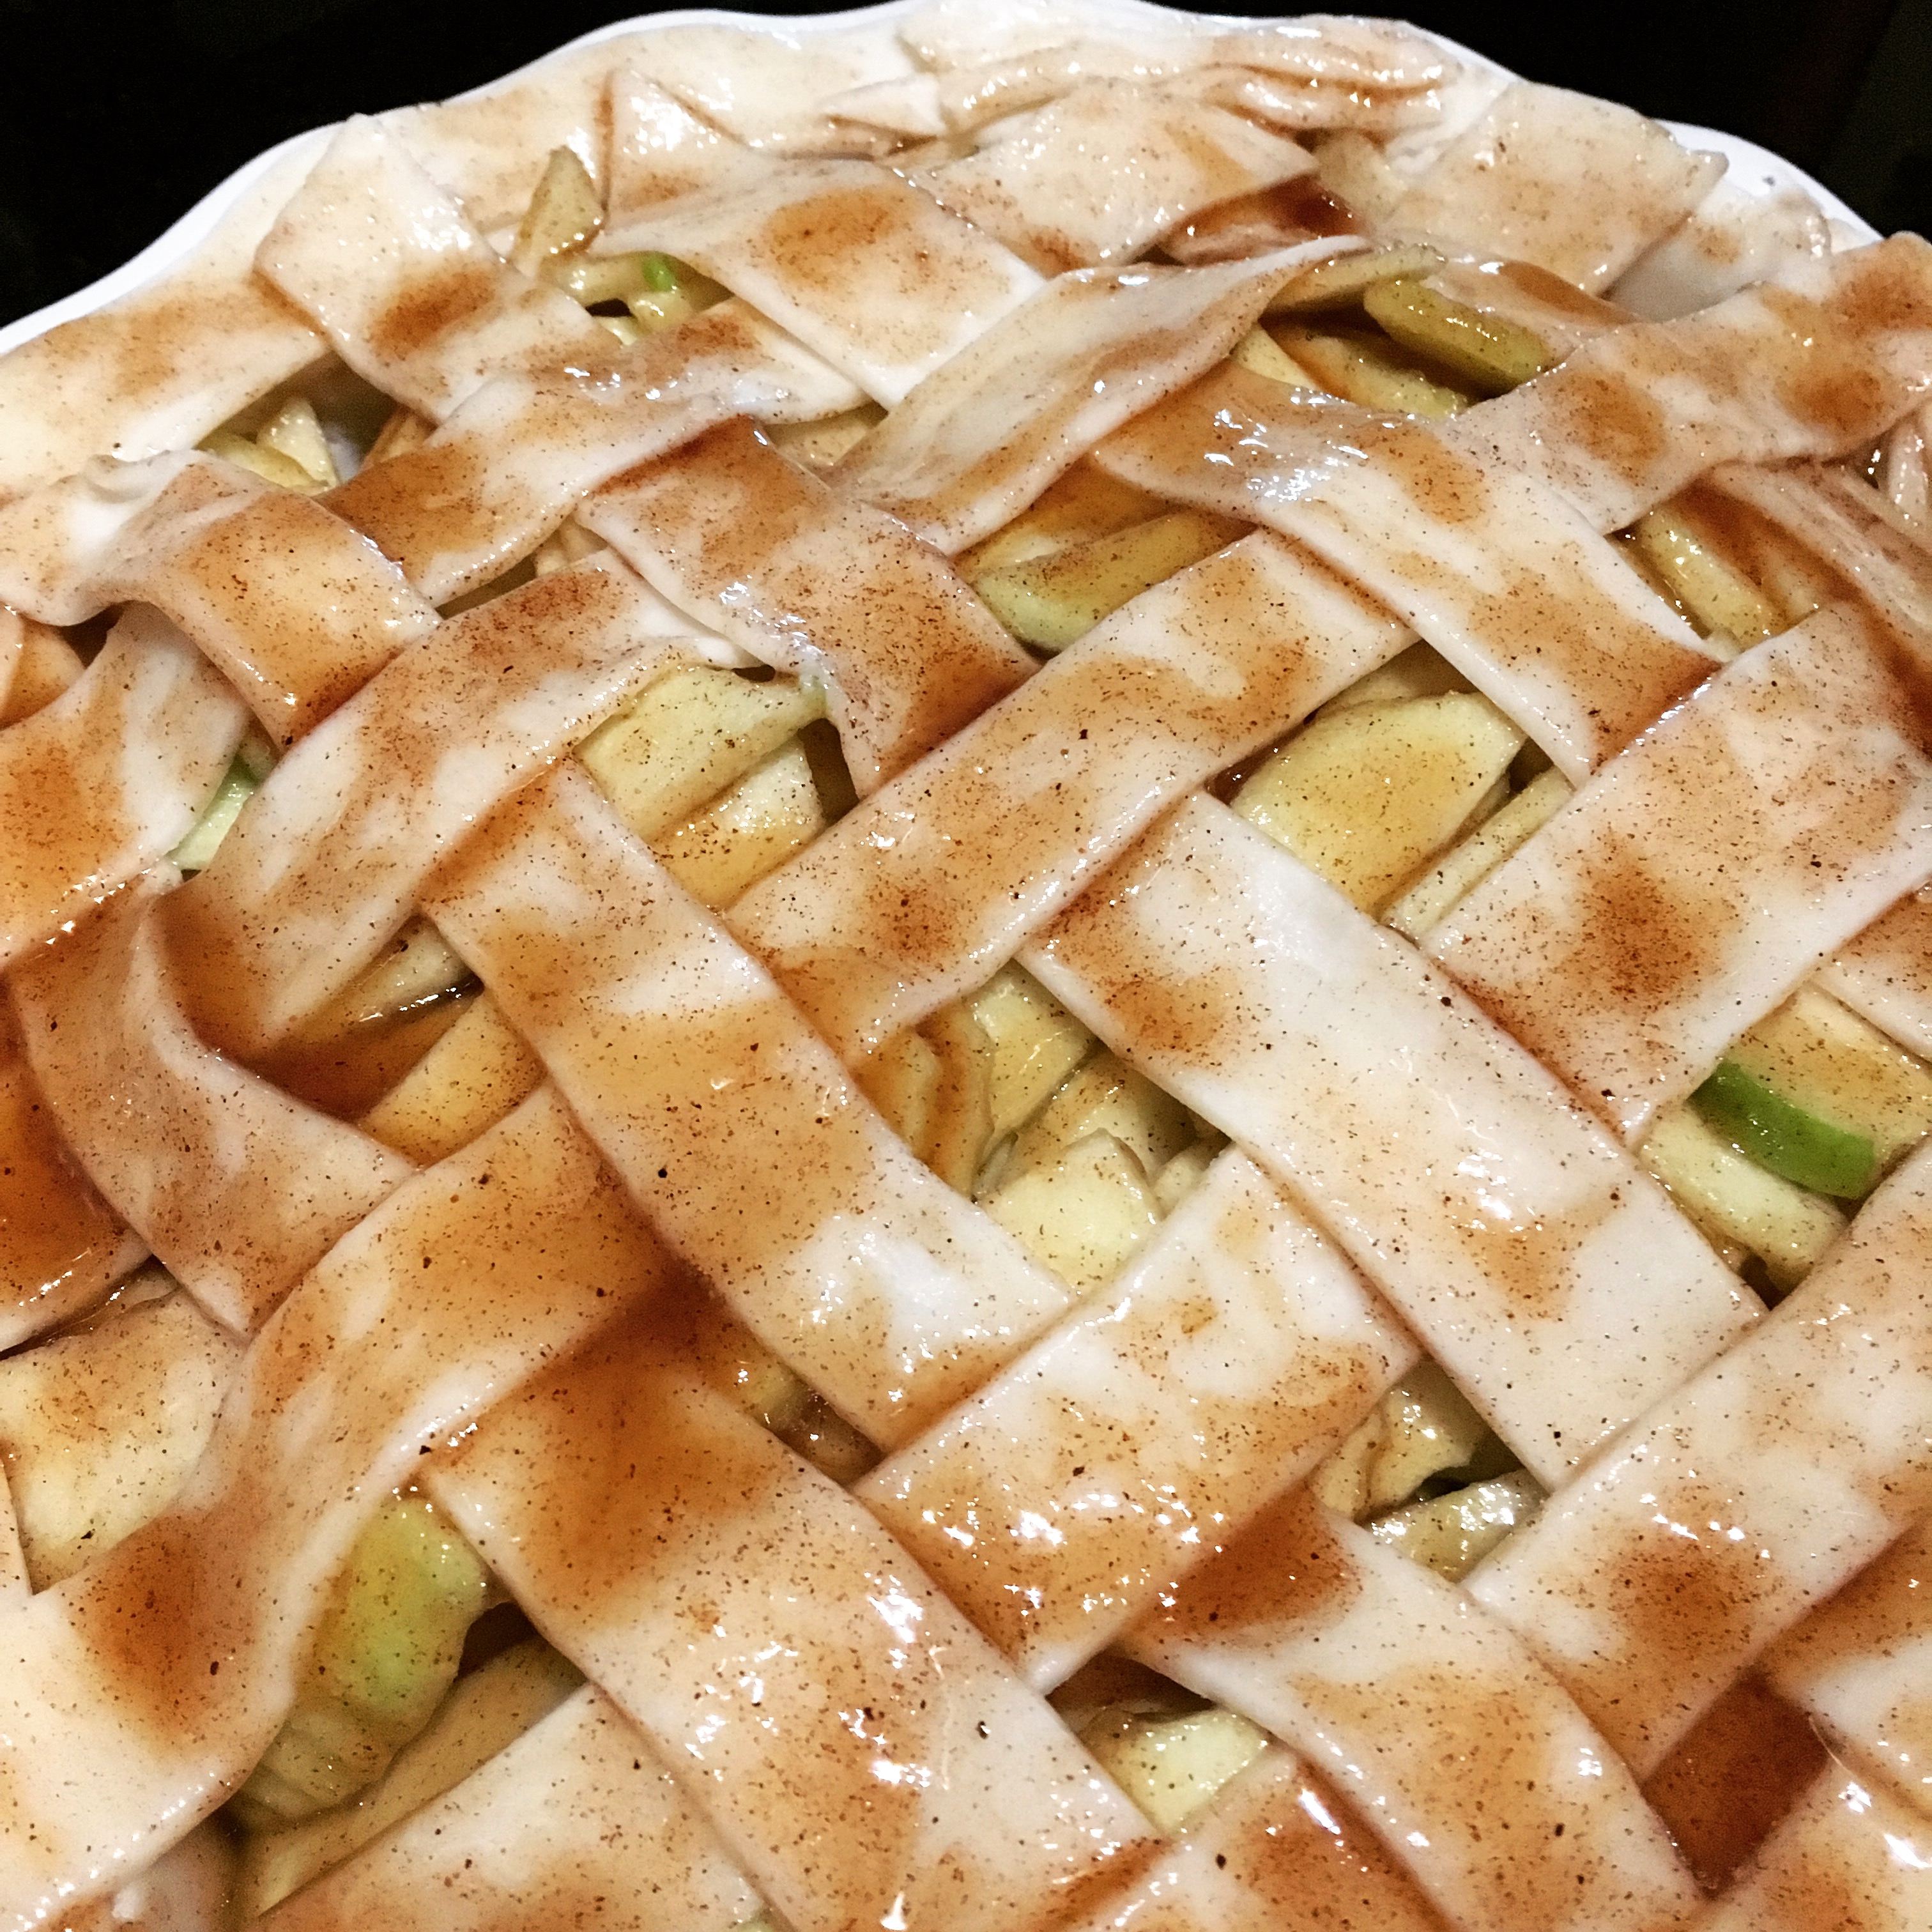
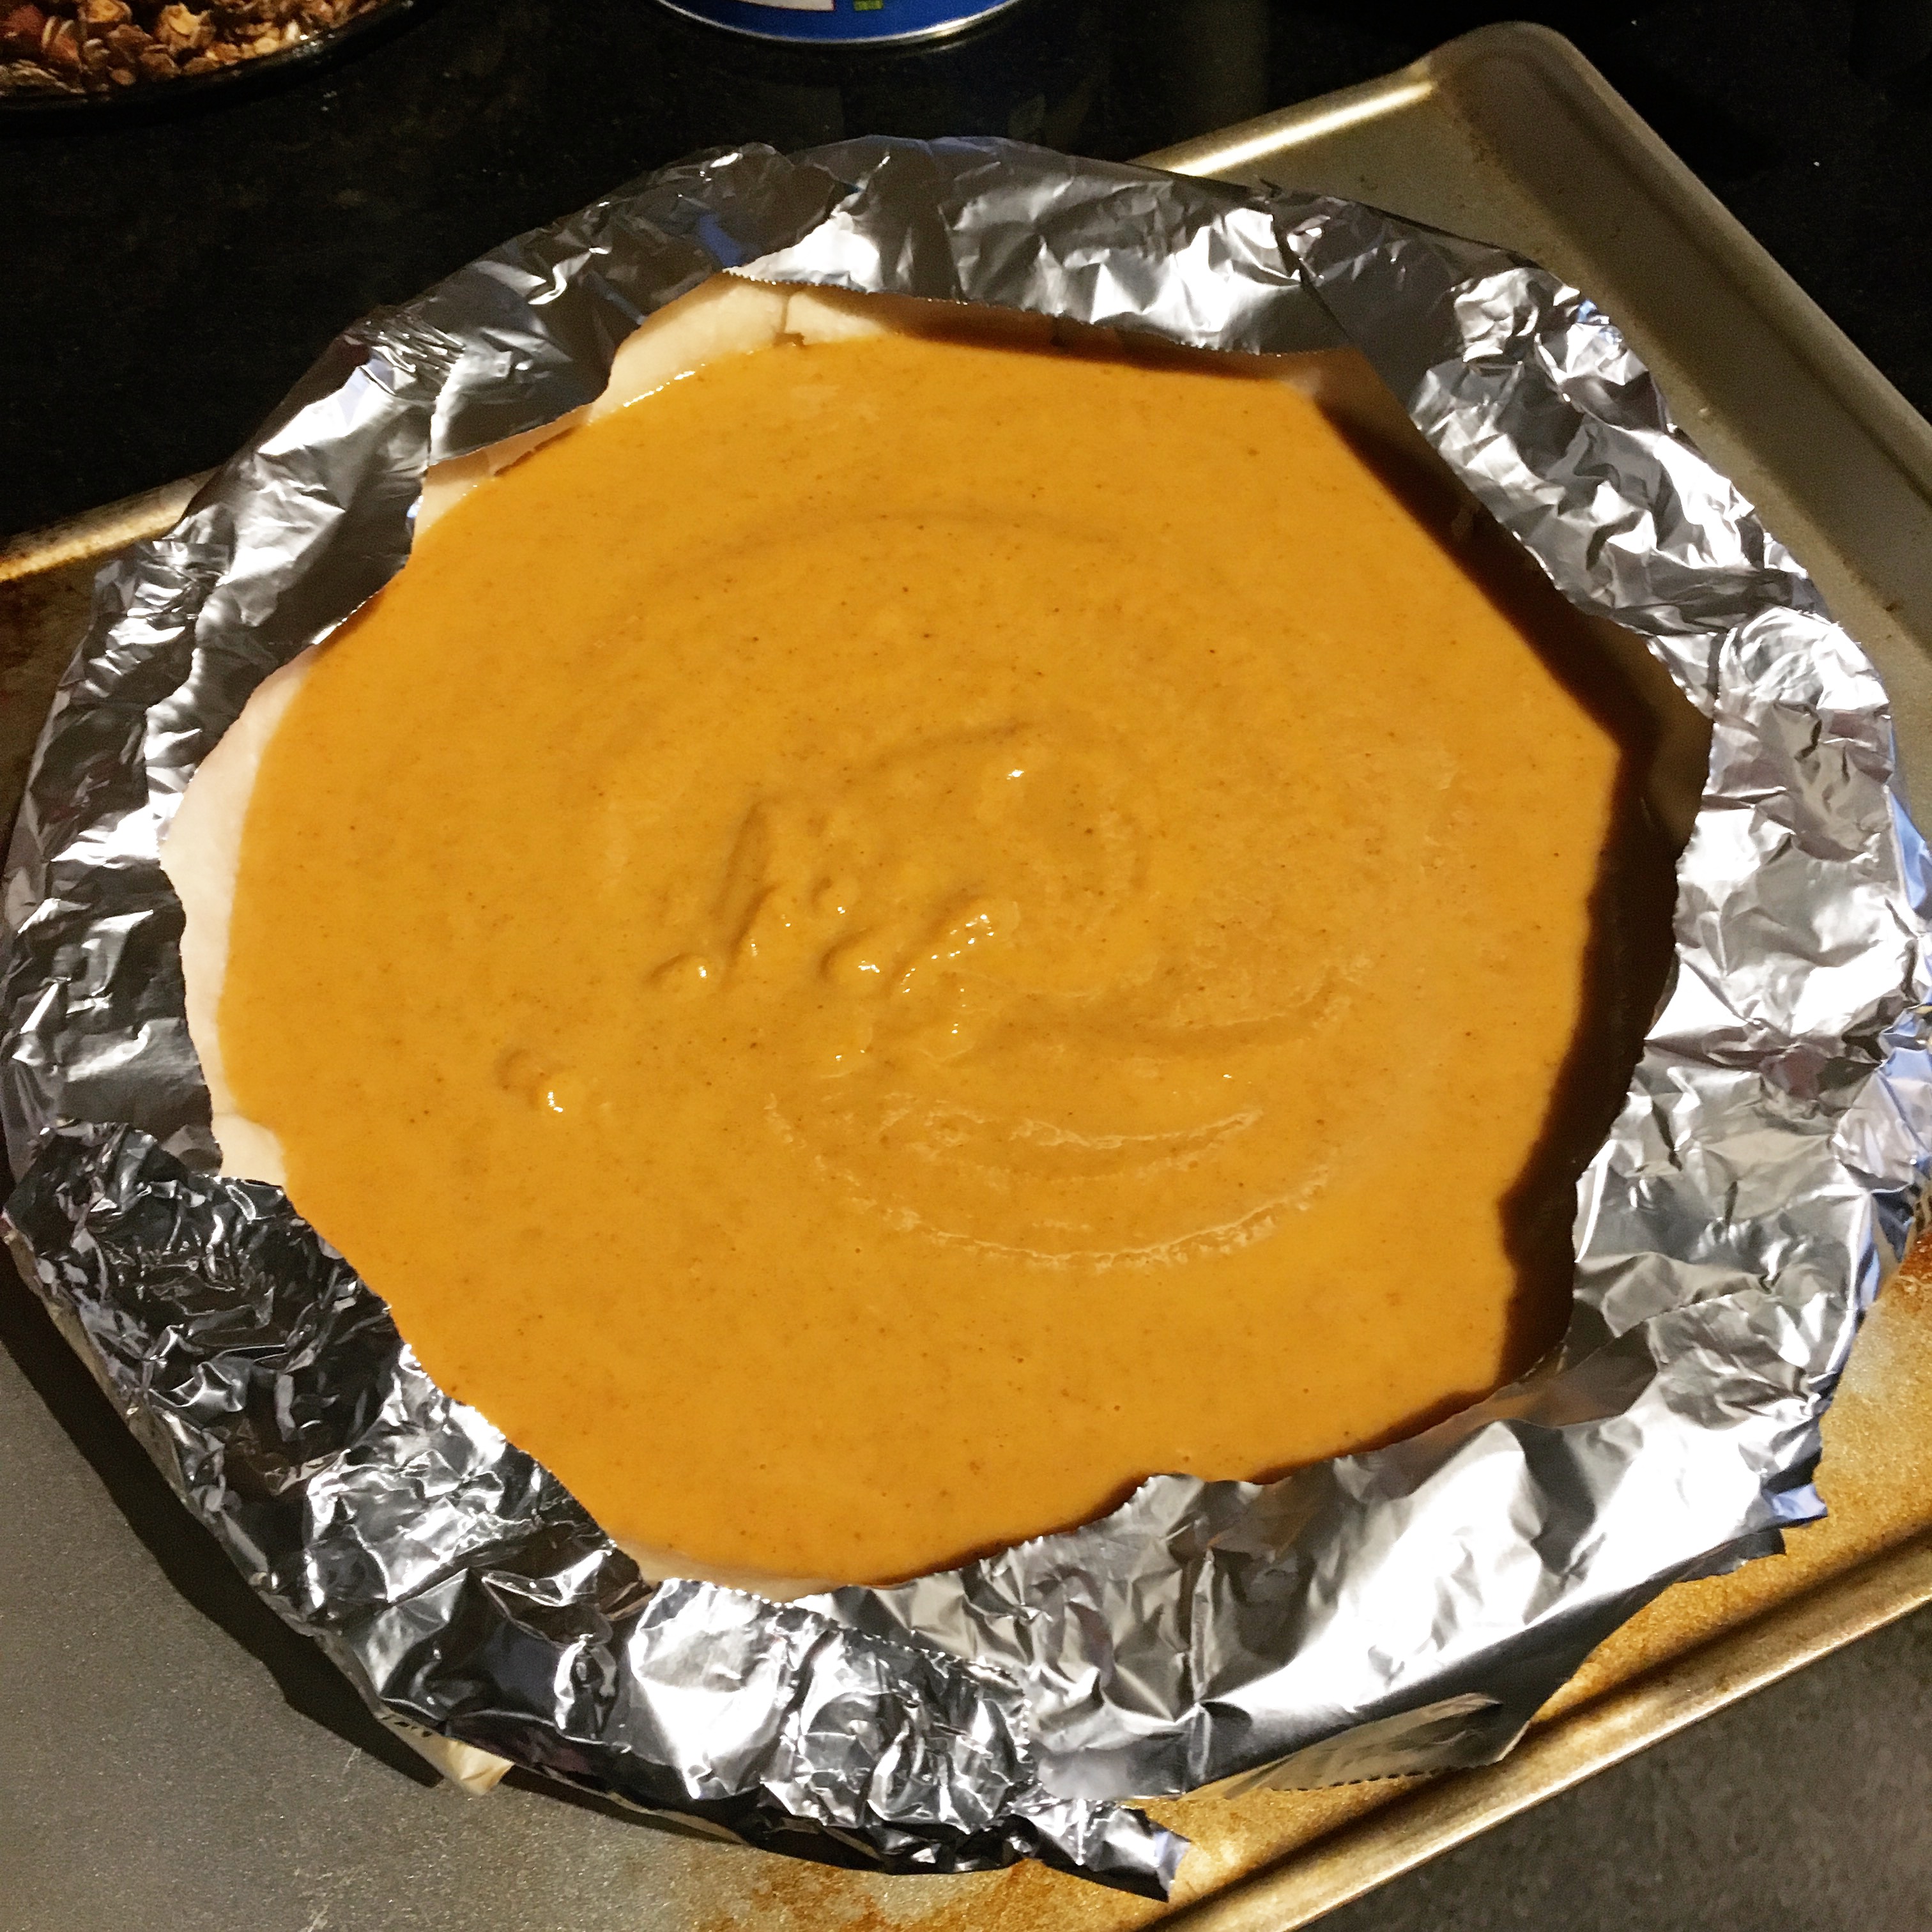
As I took my dough out to roll and shape, I turned on my oven to 350 degrees F to preheat. I rolled out the dough and used 8” saucers as a guide for my circles, yielding 4 large pastry circles. I filled half of each circle with as much filling as I could, making sure it could still be closed and sealed.  

IMG_2870

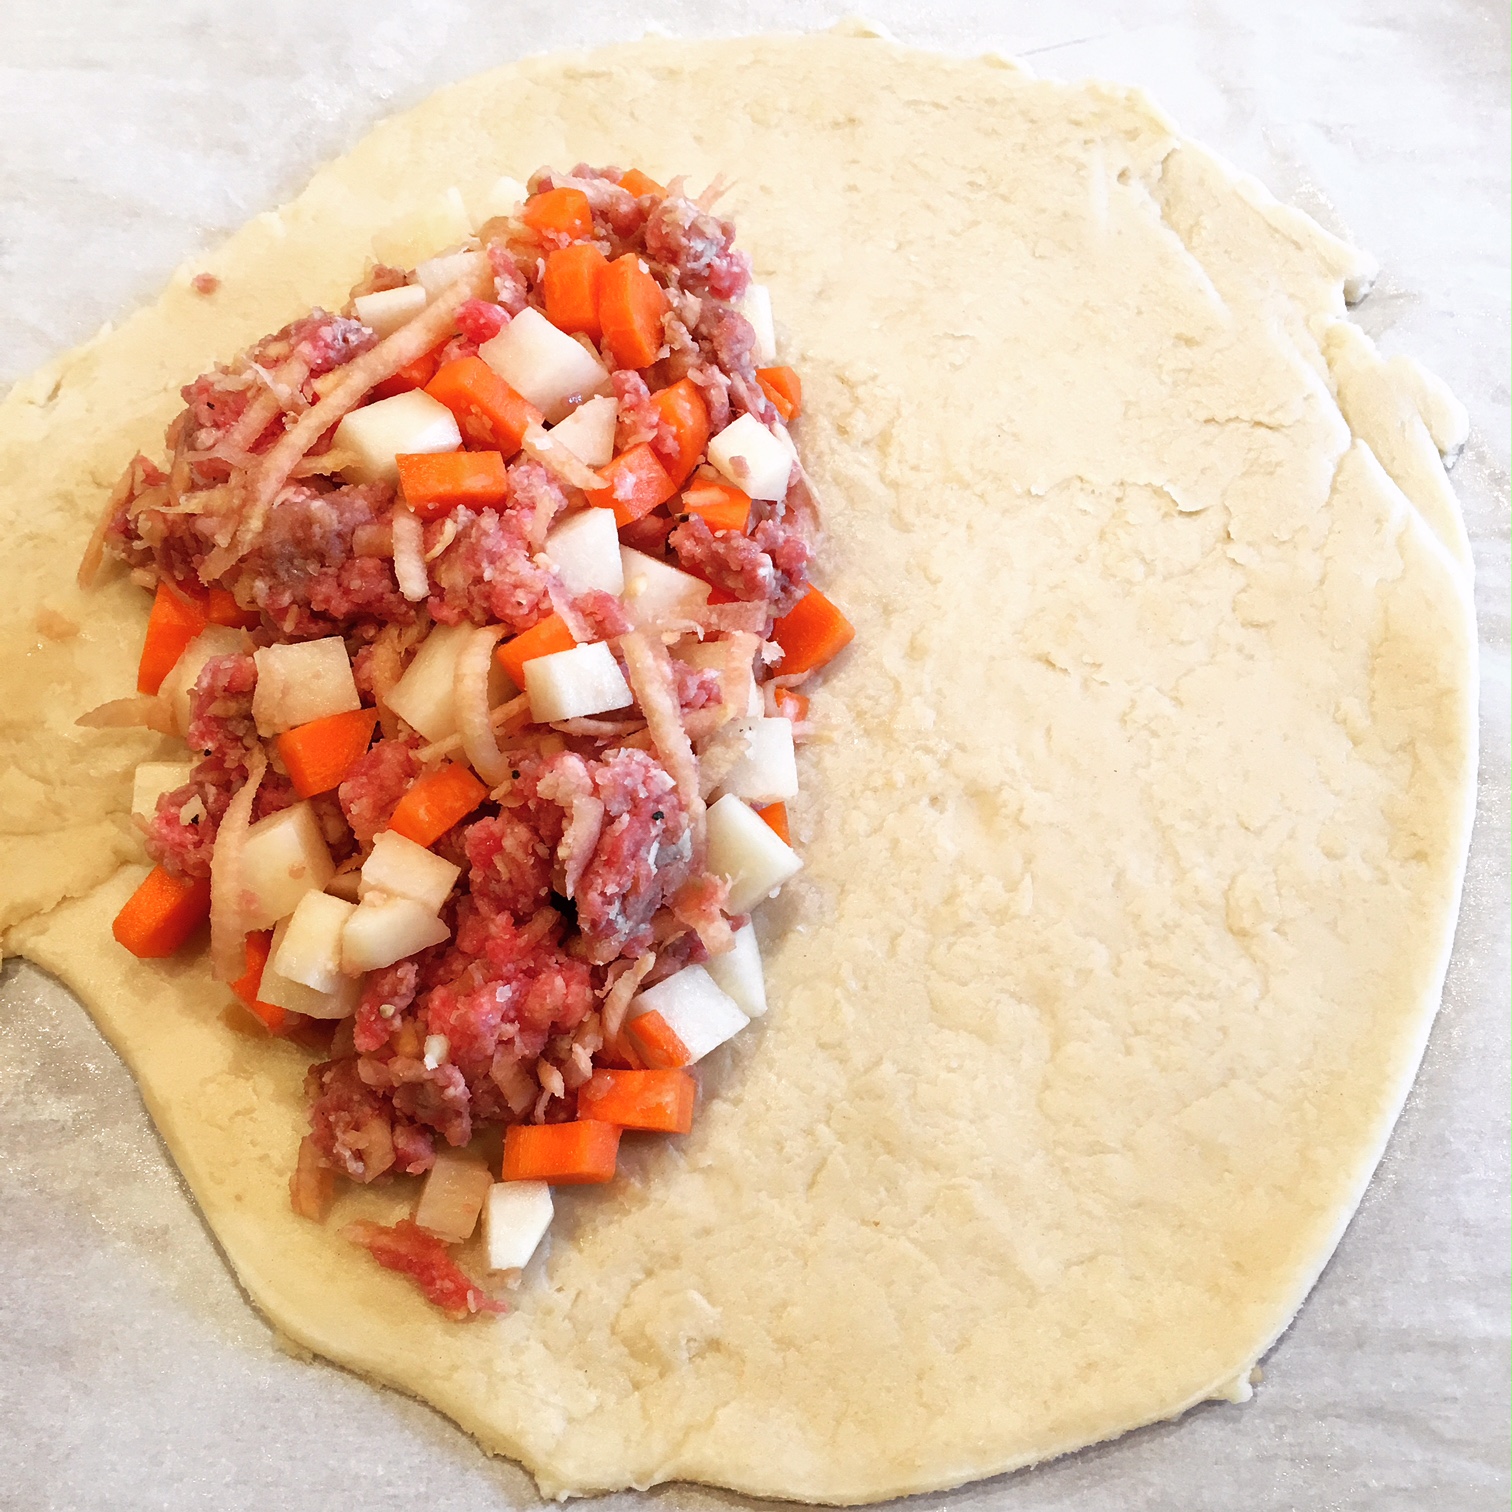
Note: I had a bit of filling leftover as well as a bit of pastry, so I probably could’ve made each one a bit bigger.

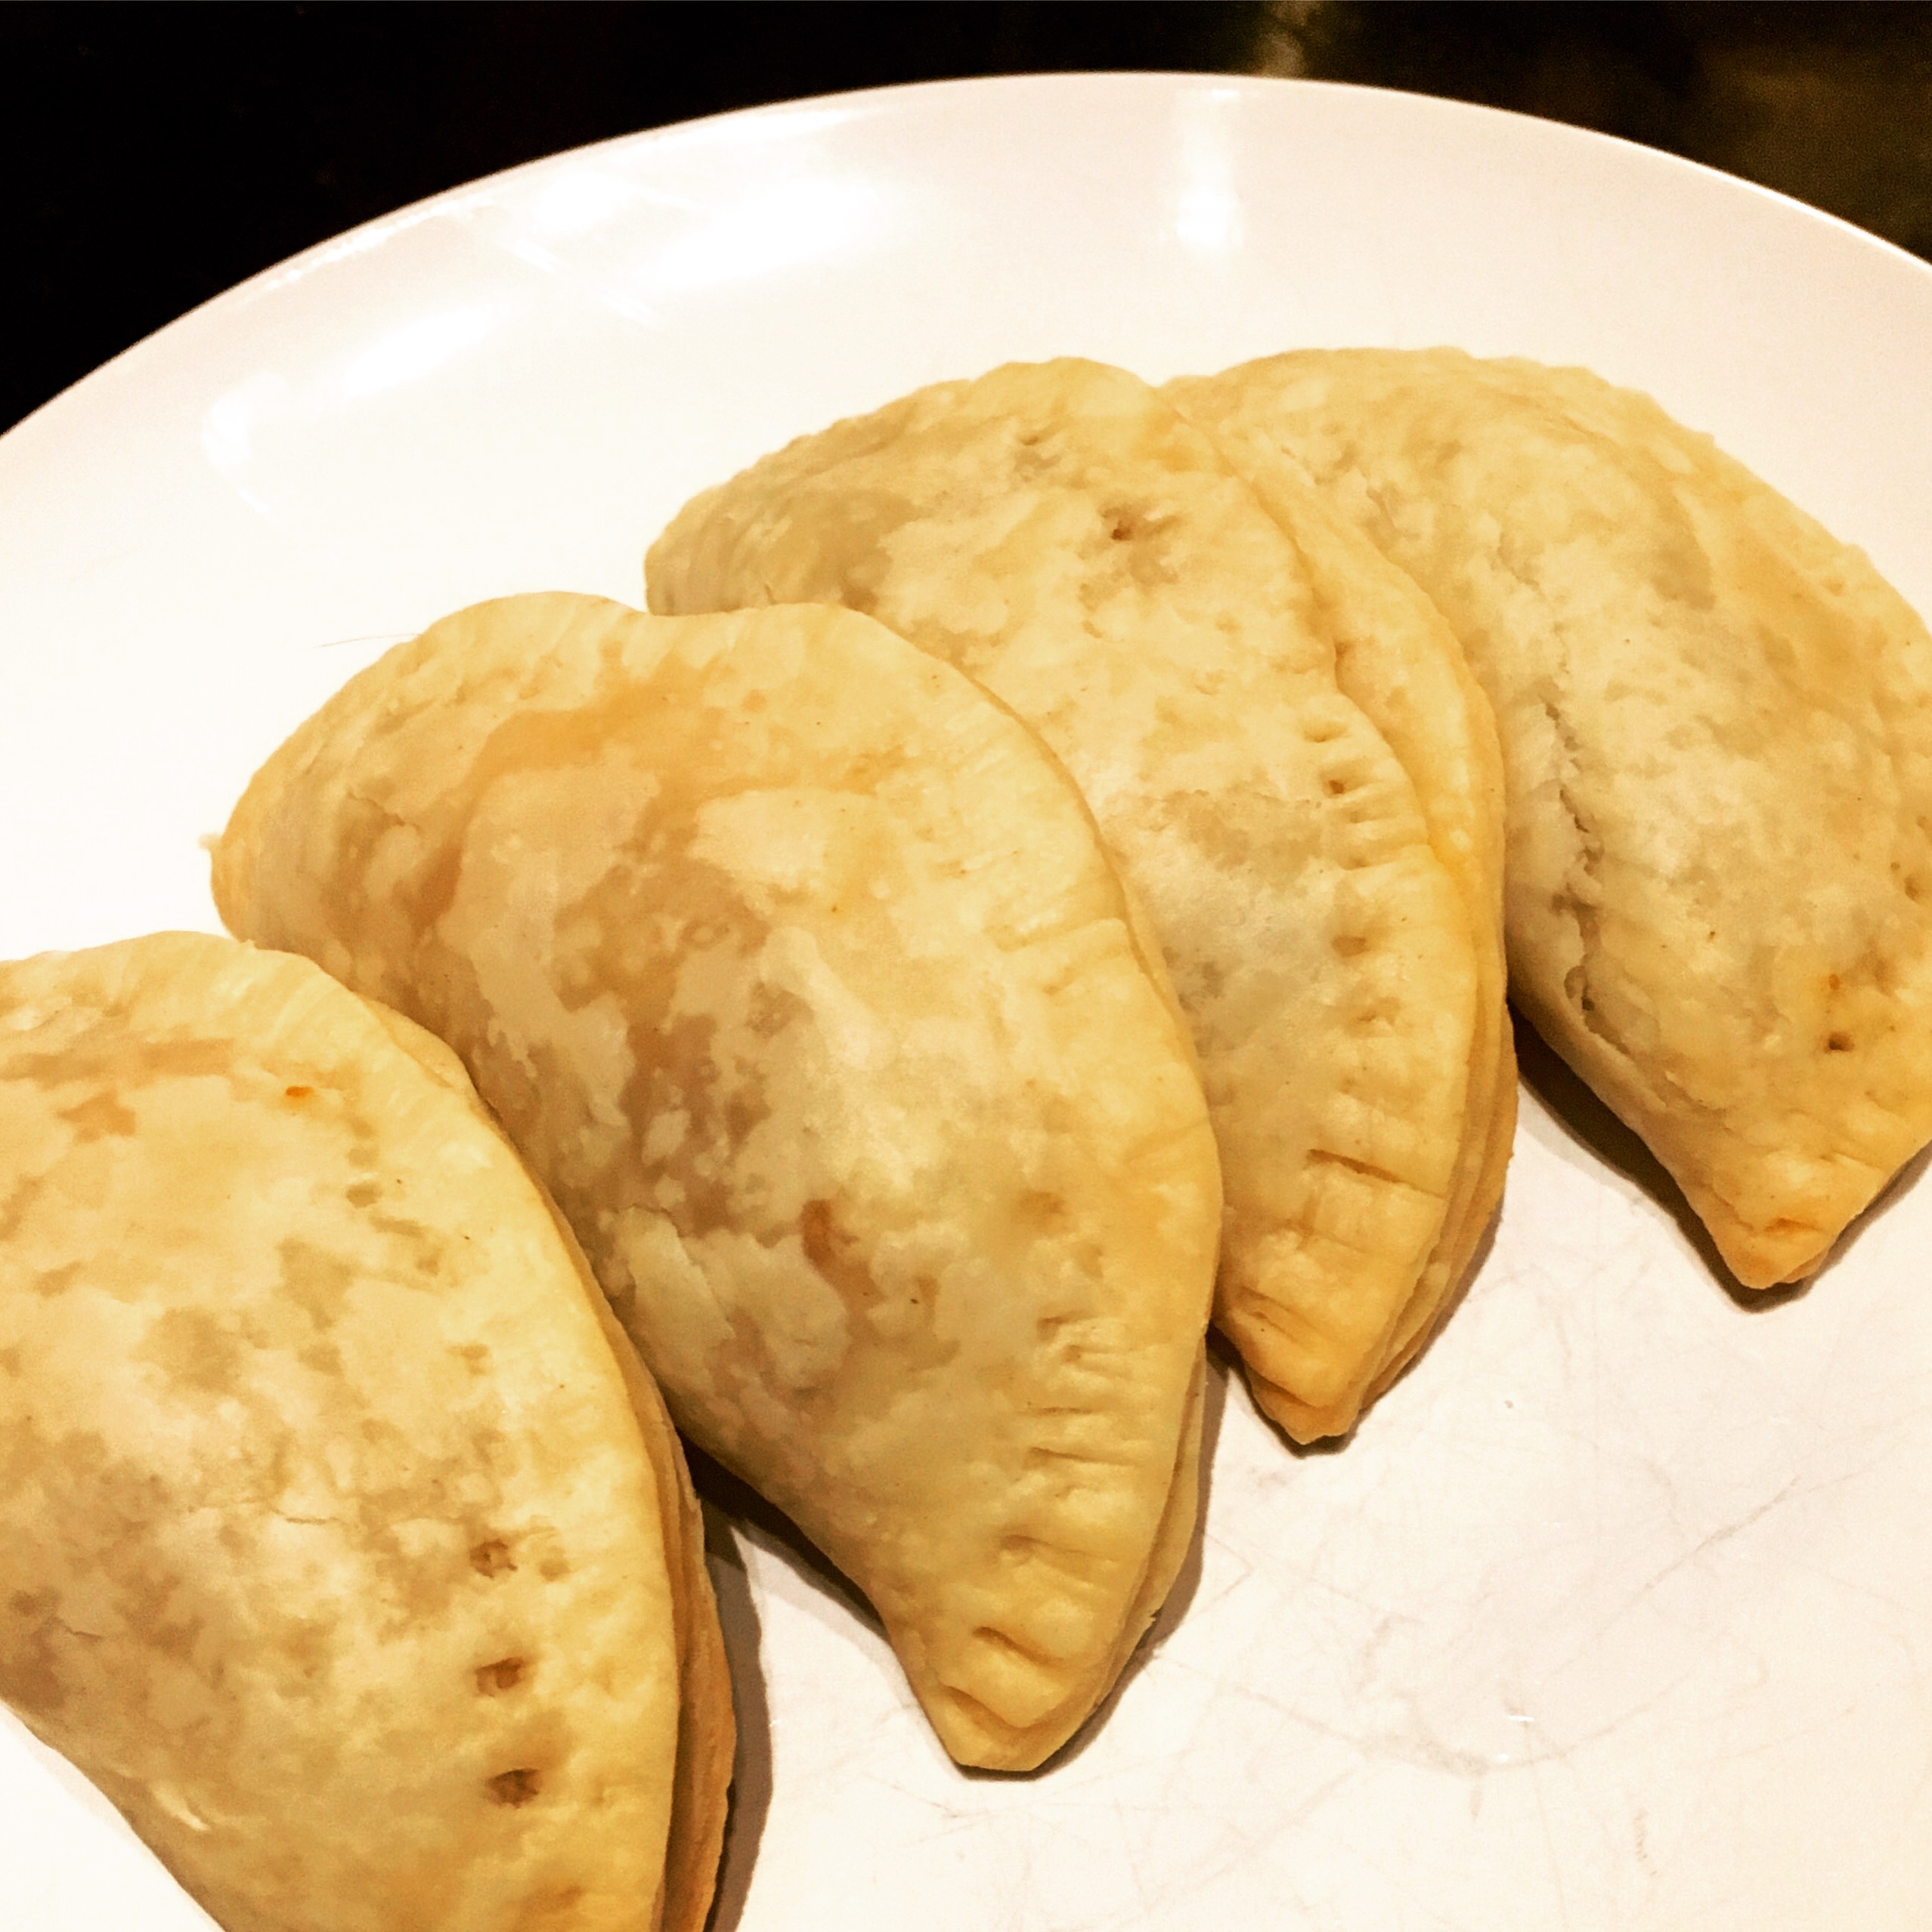
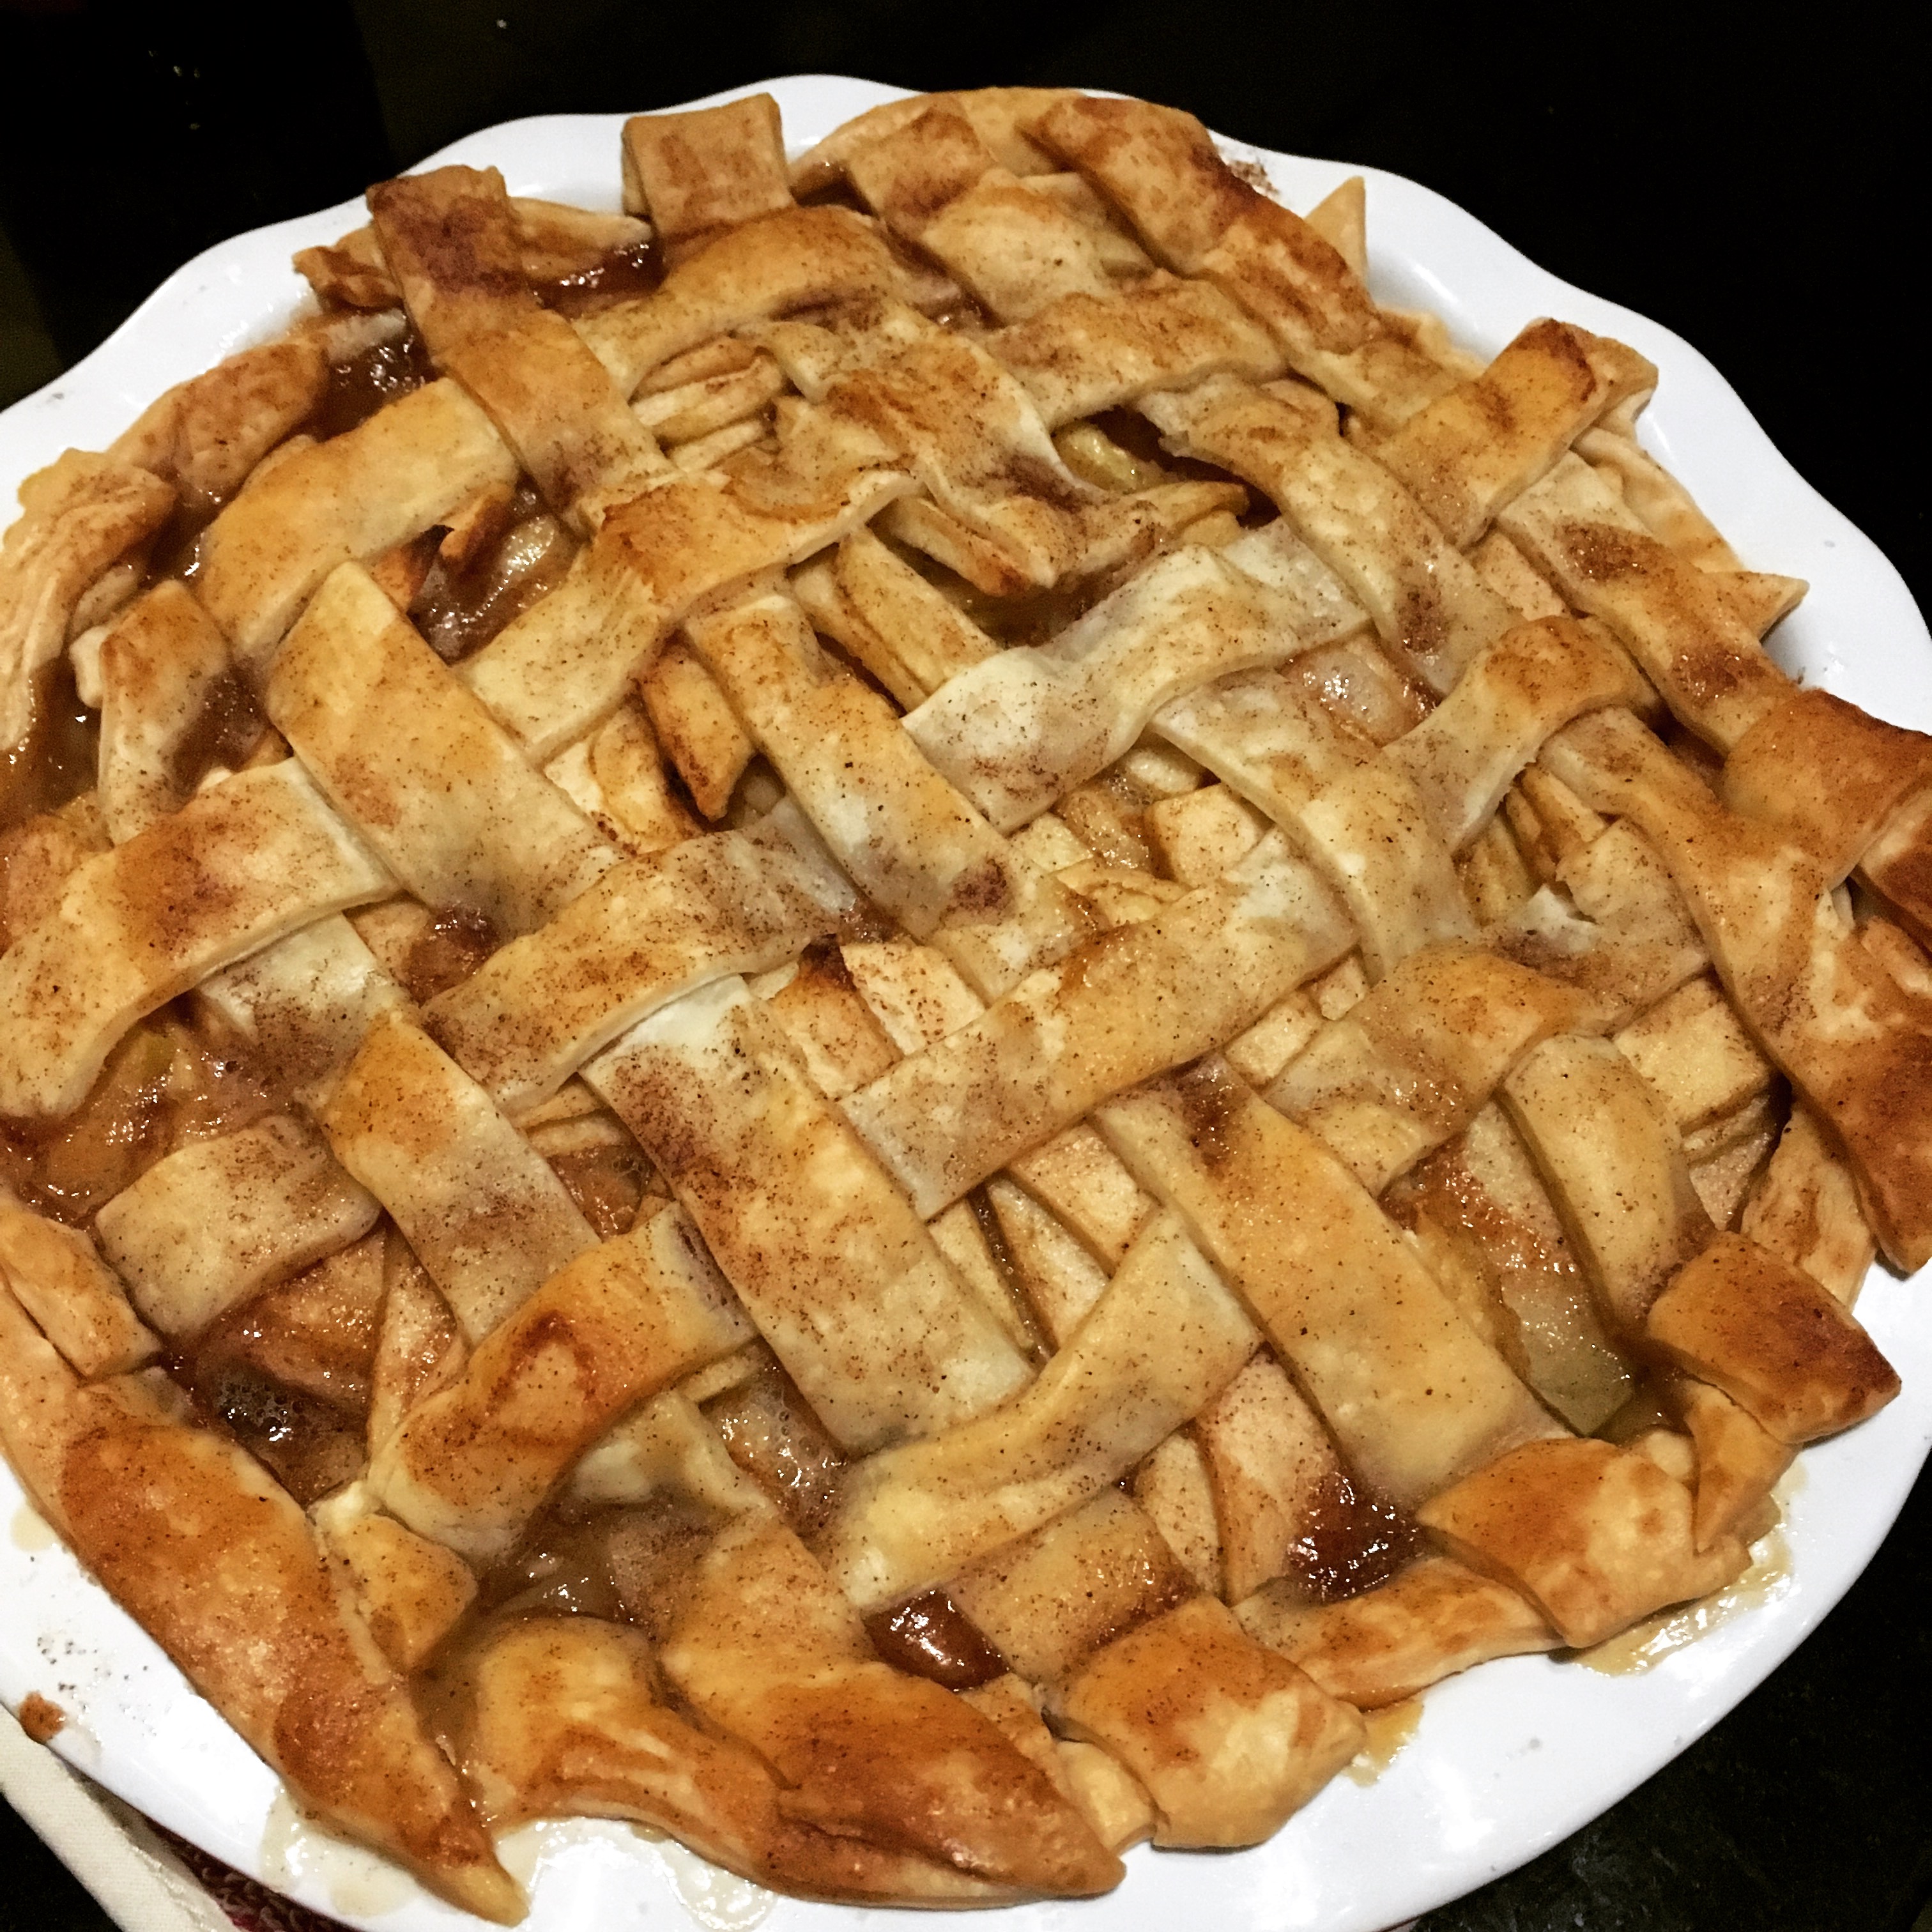
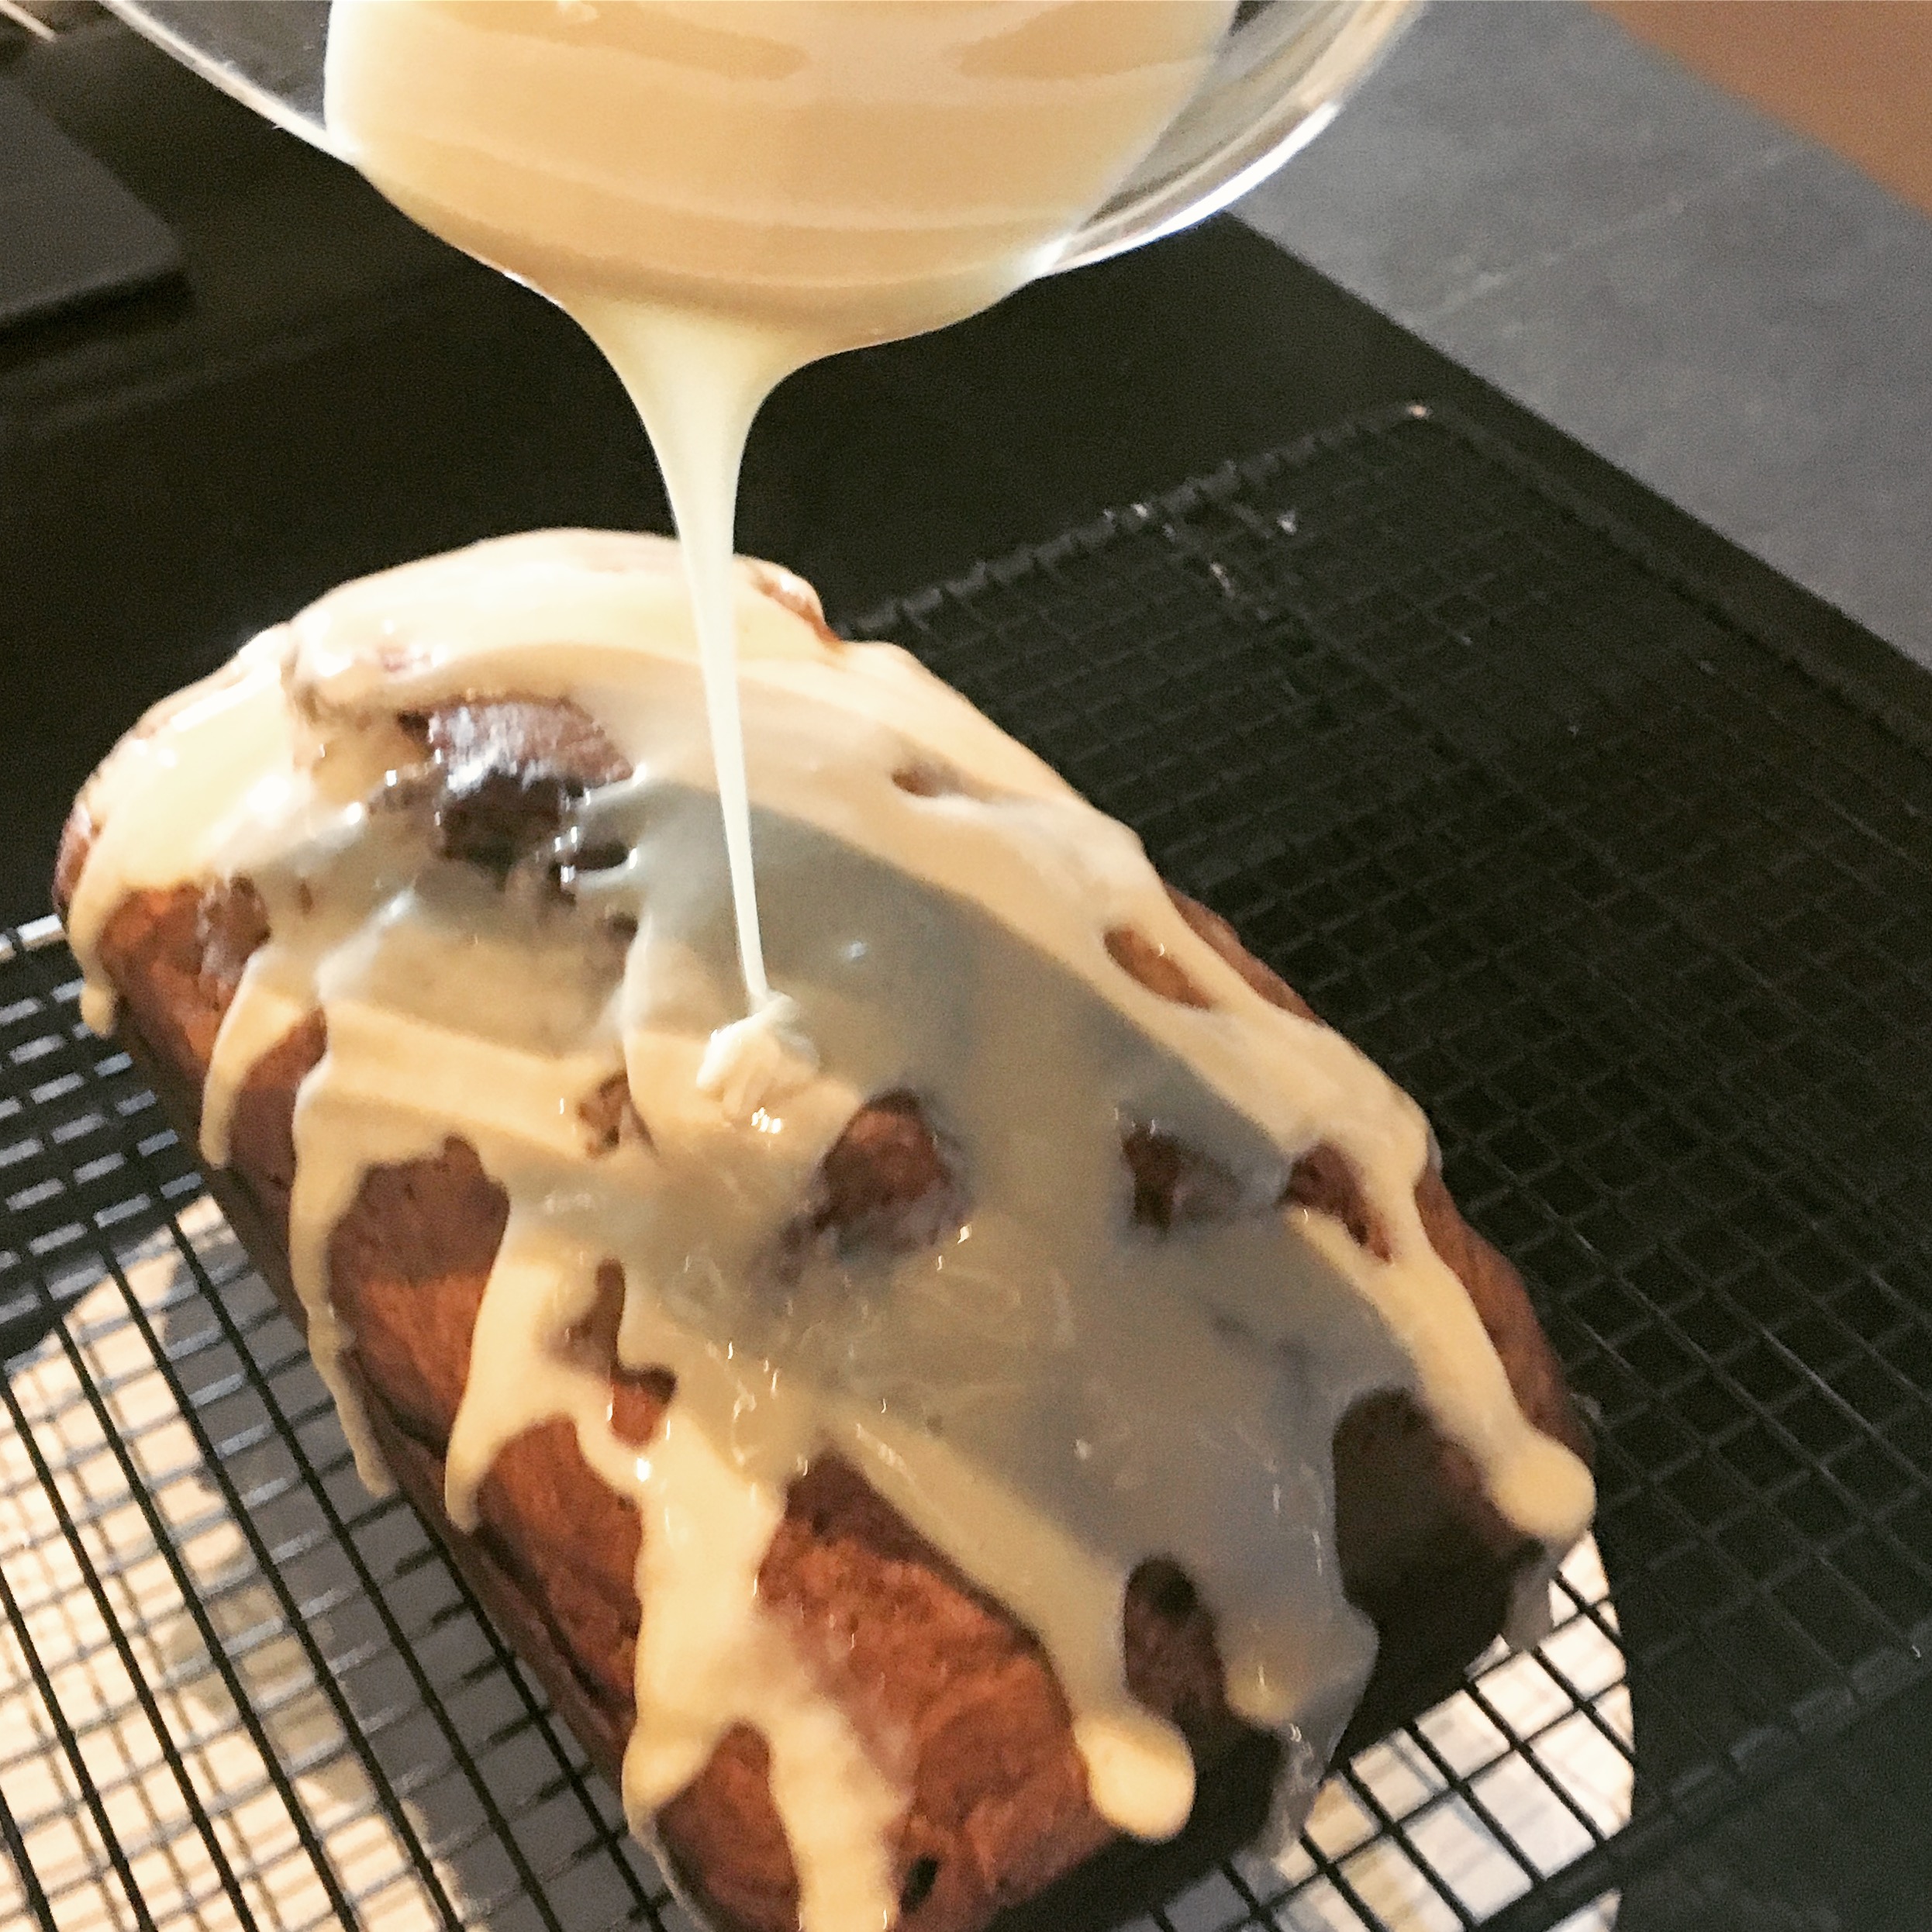
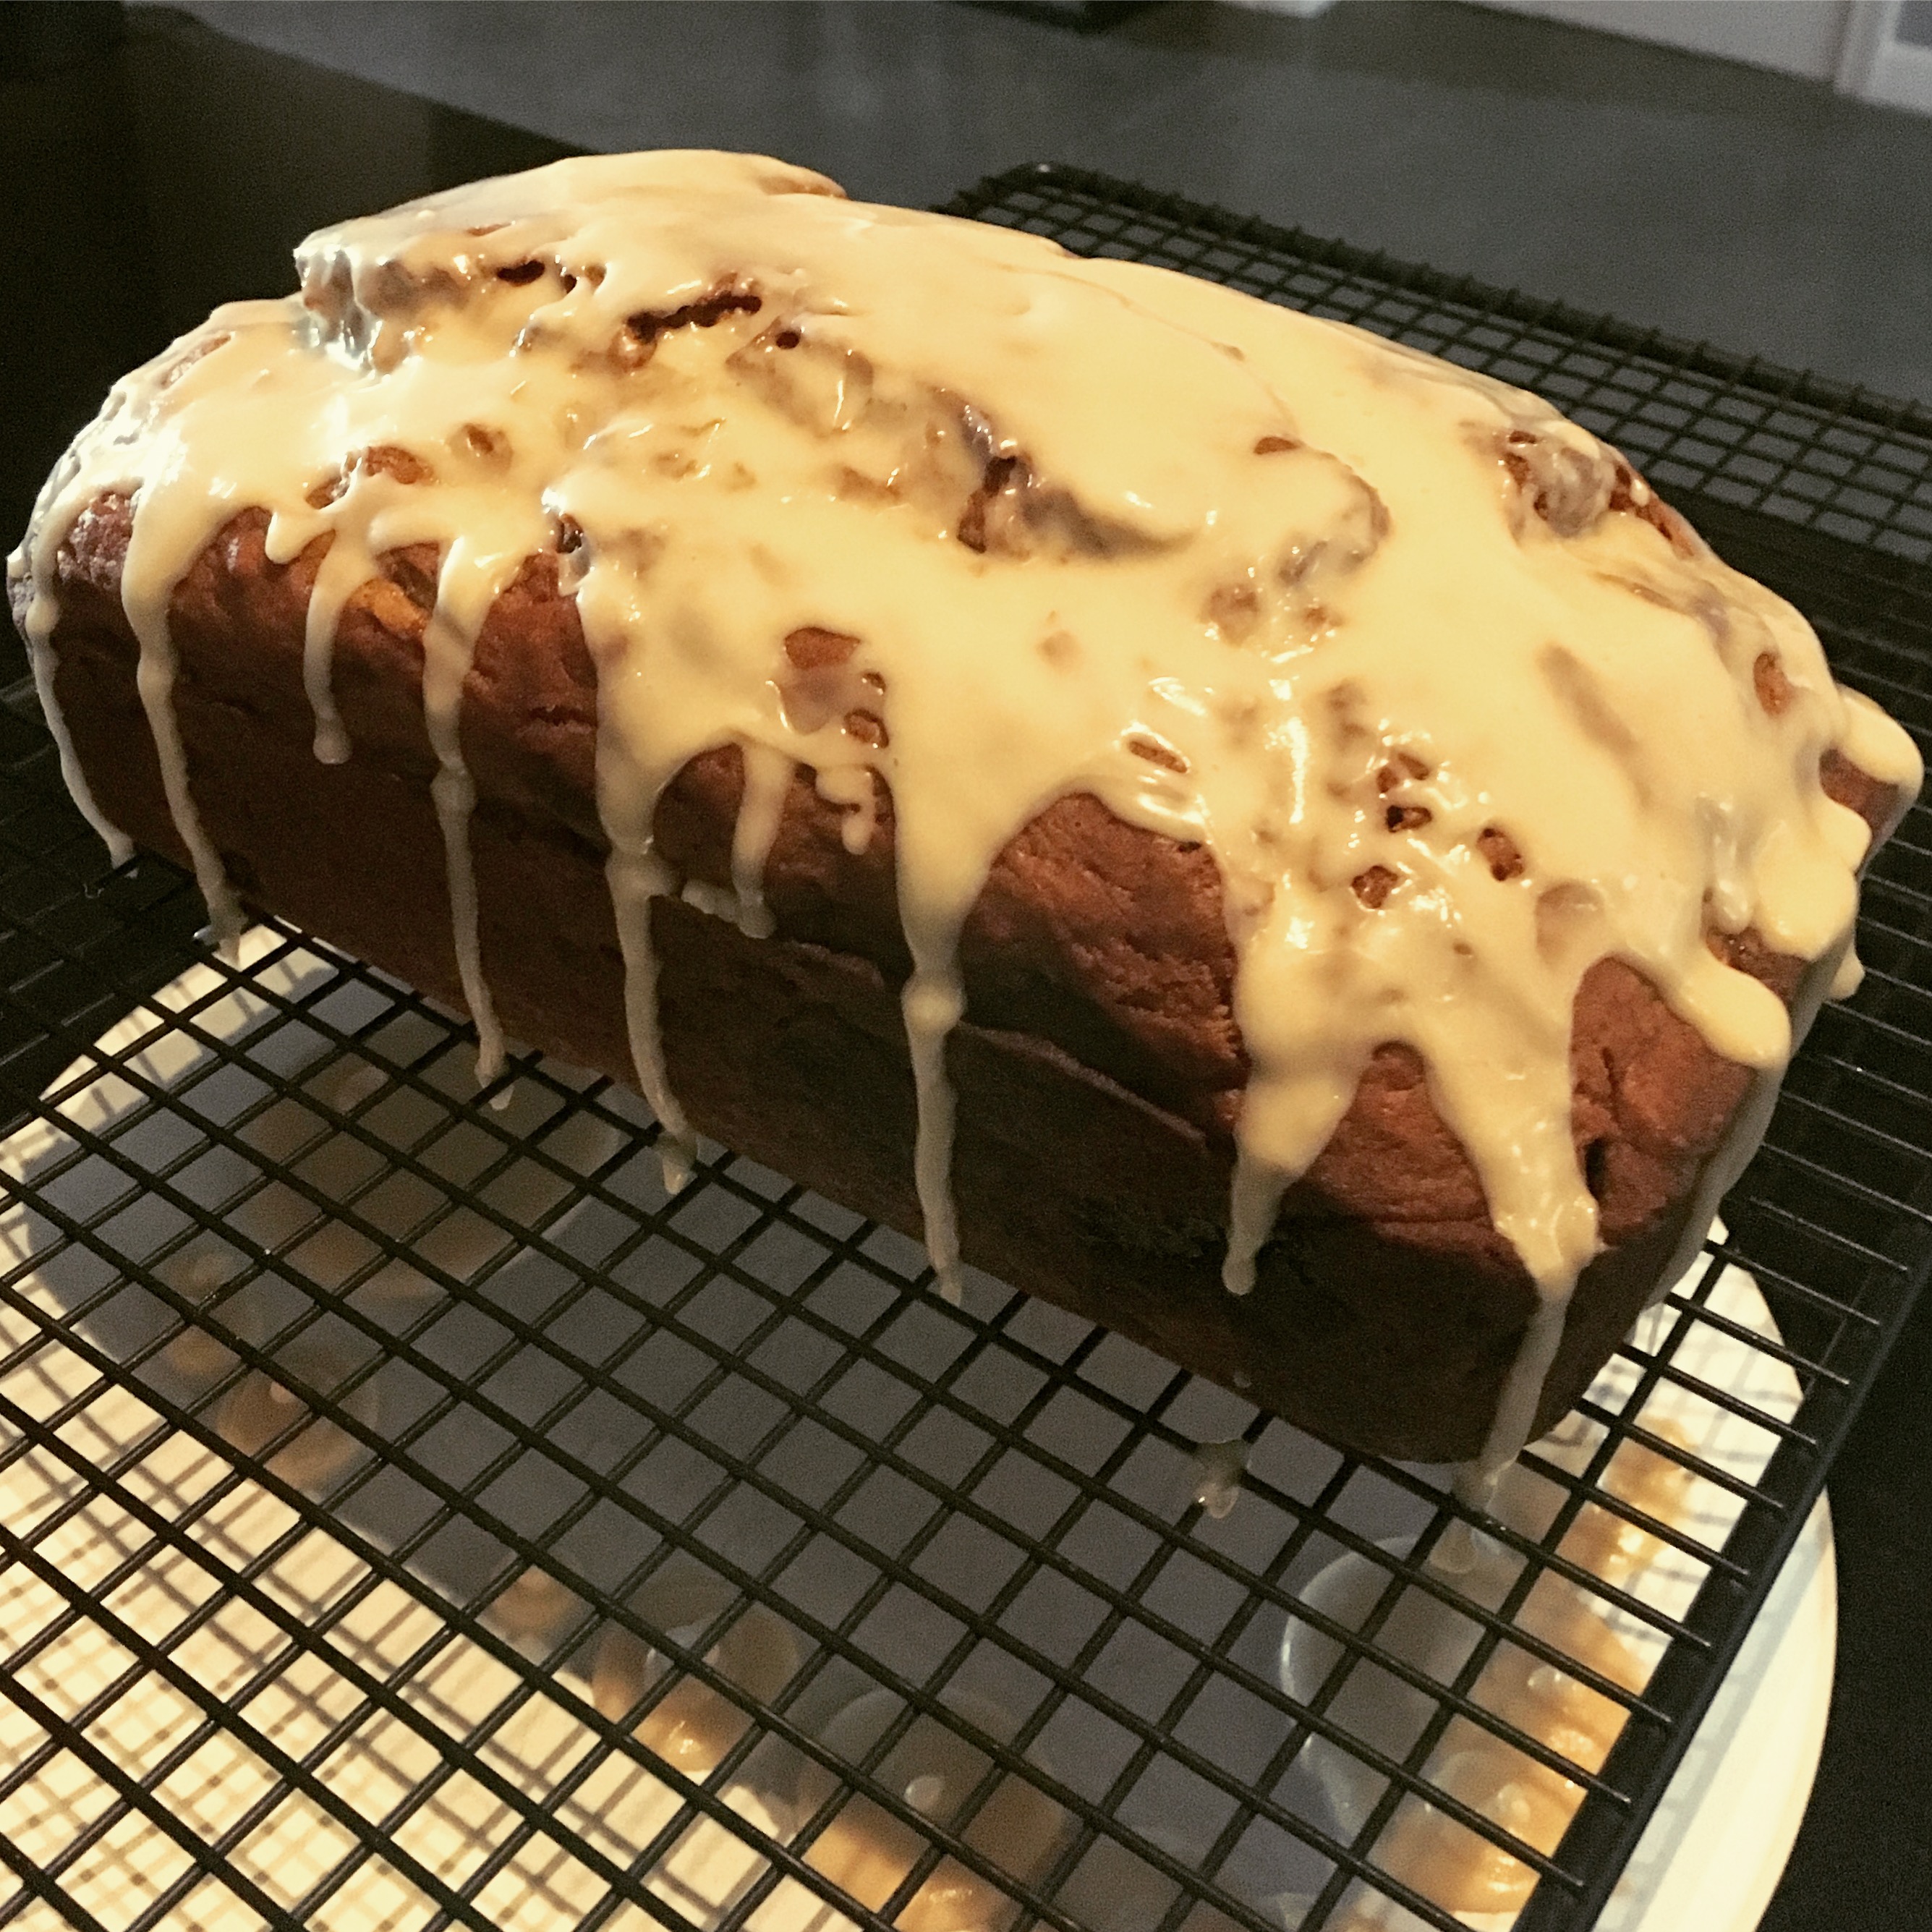
Finally, I cut 3 slits into each pasty and brushed them with an egg wash before putting them in the oven on baking sheets lined with parchment paper. After about an hour, they came out a lovely golden brown.

IMG_2868

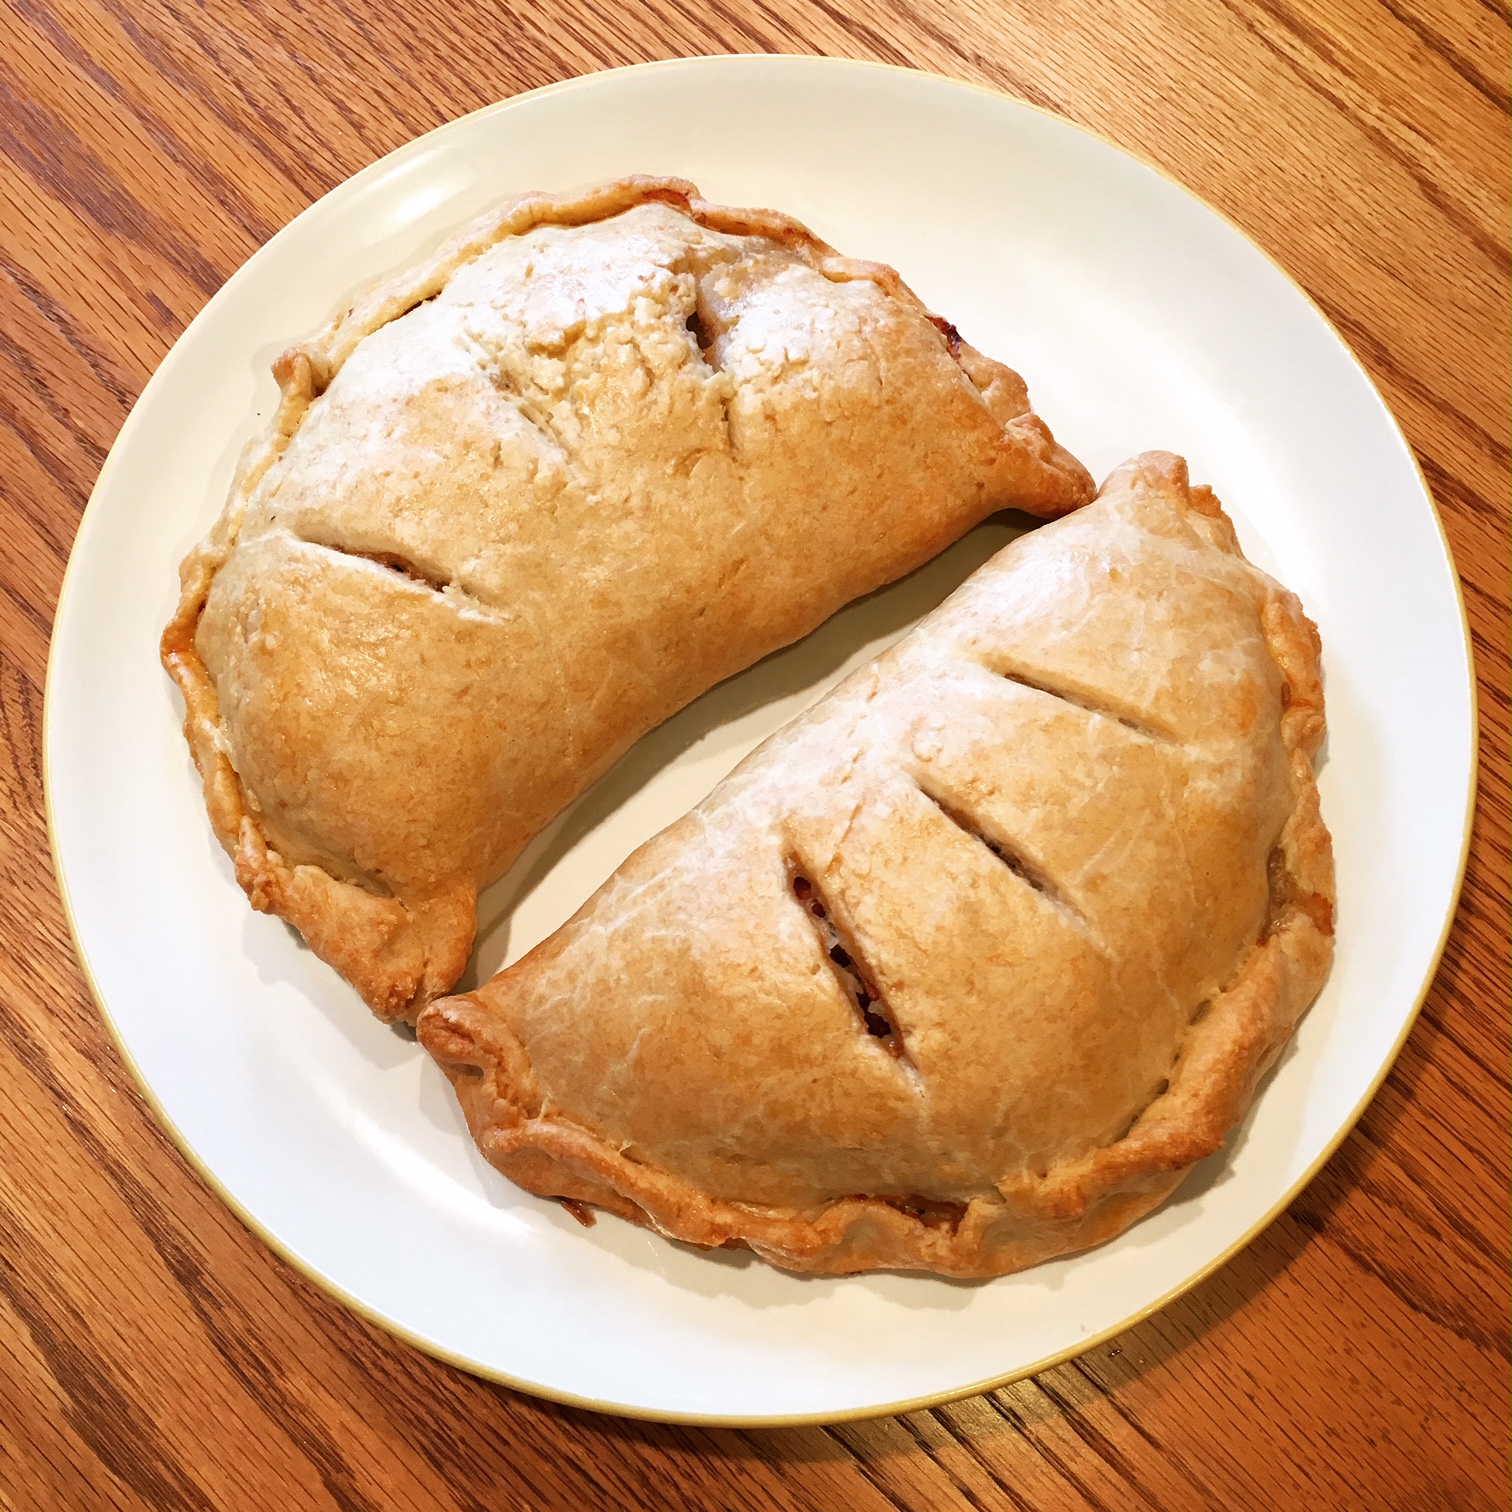
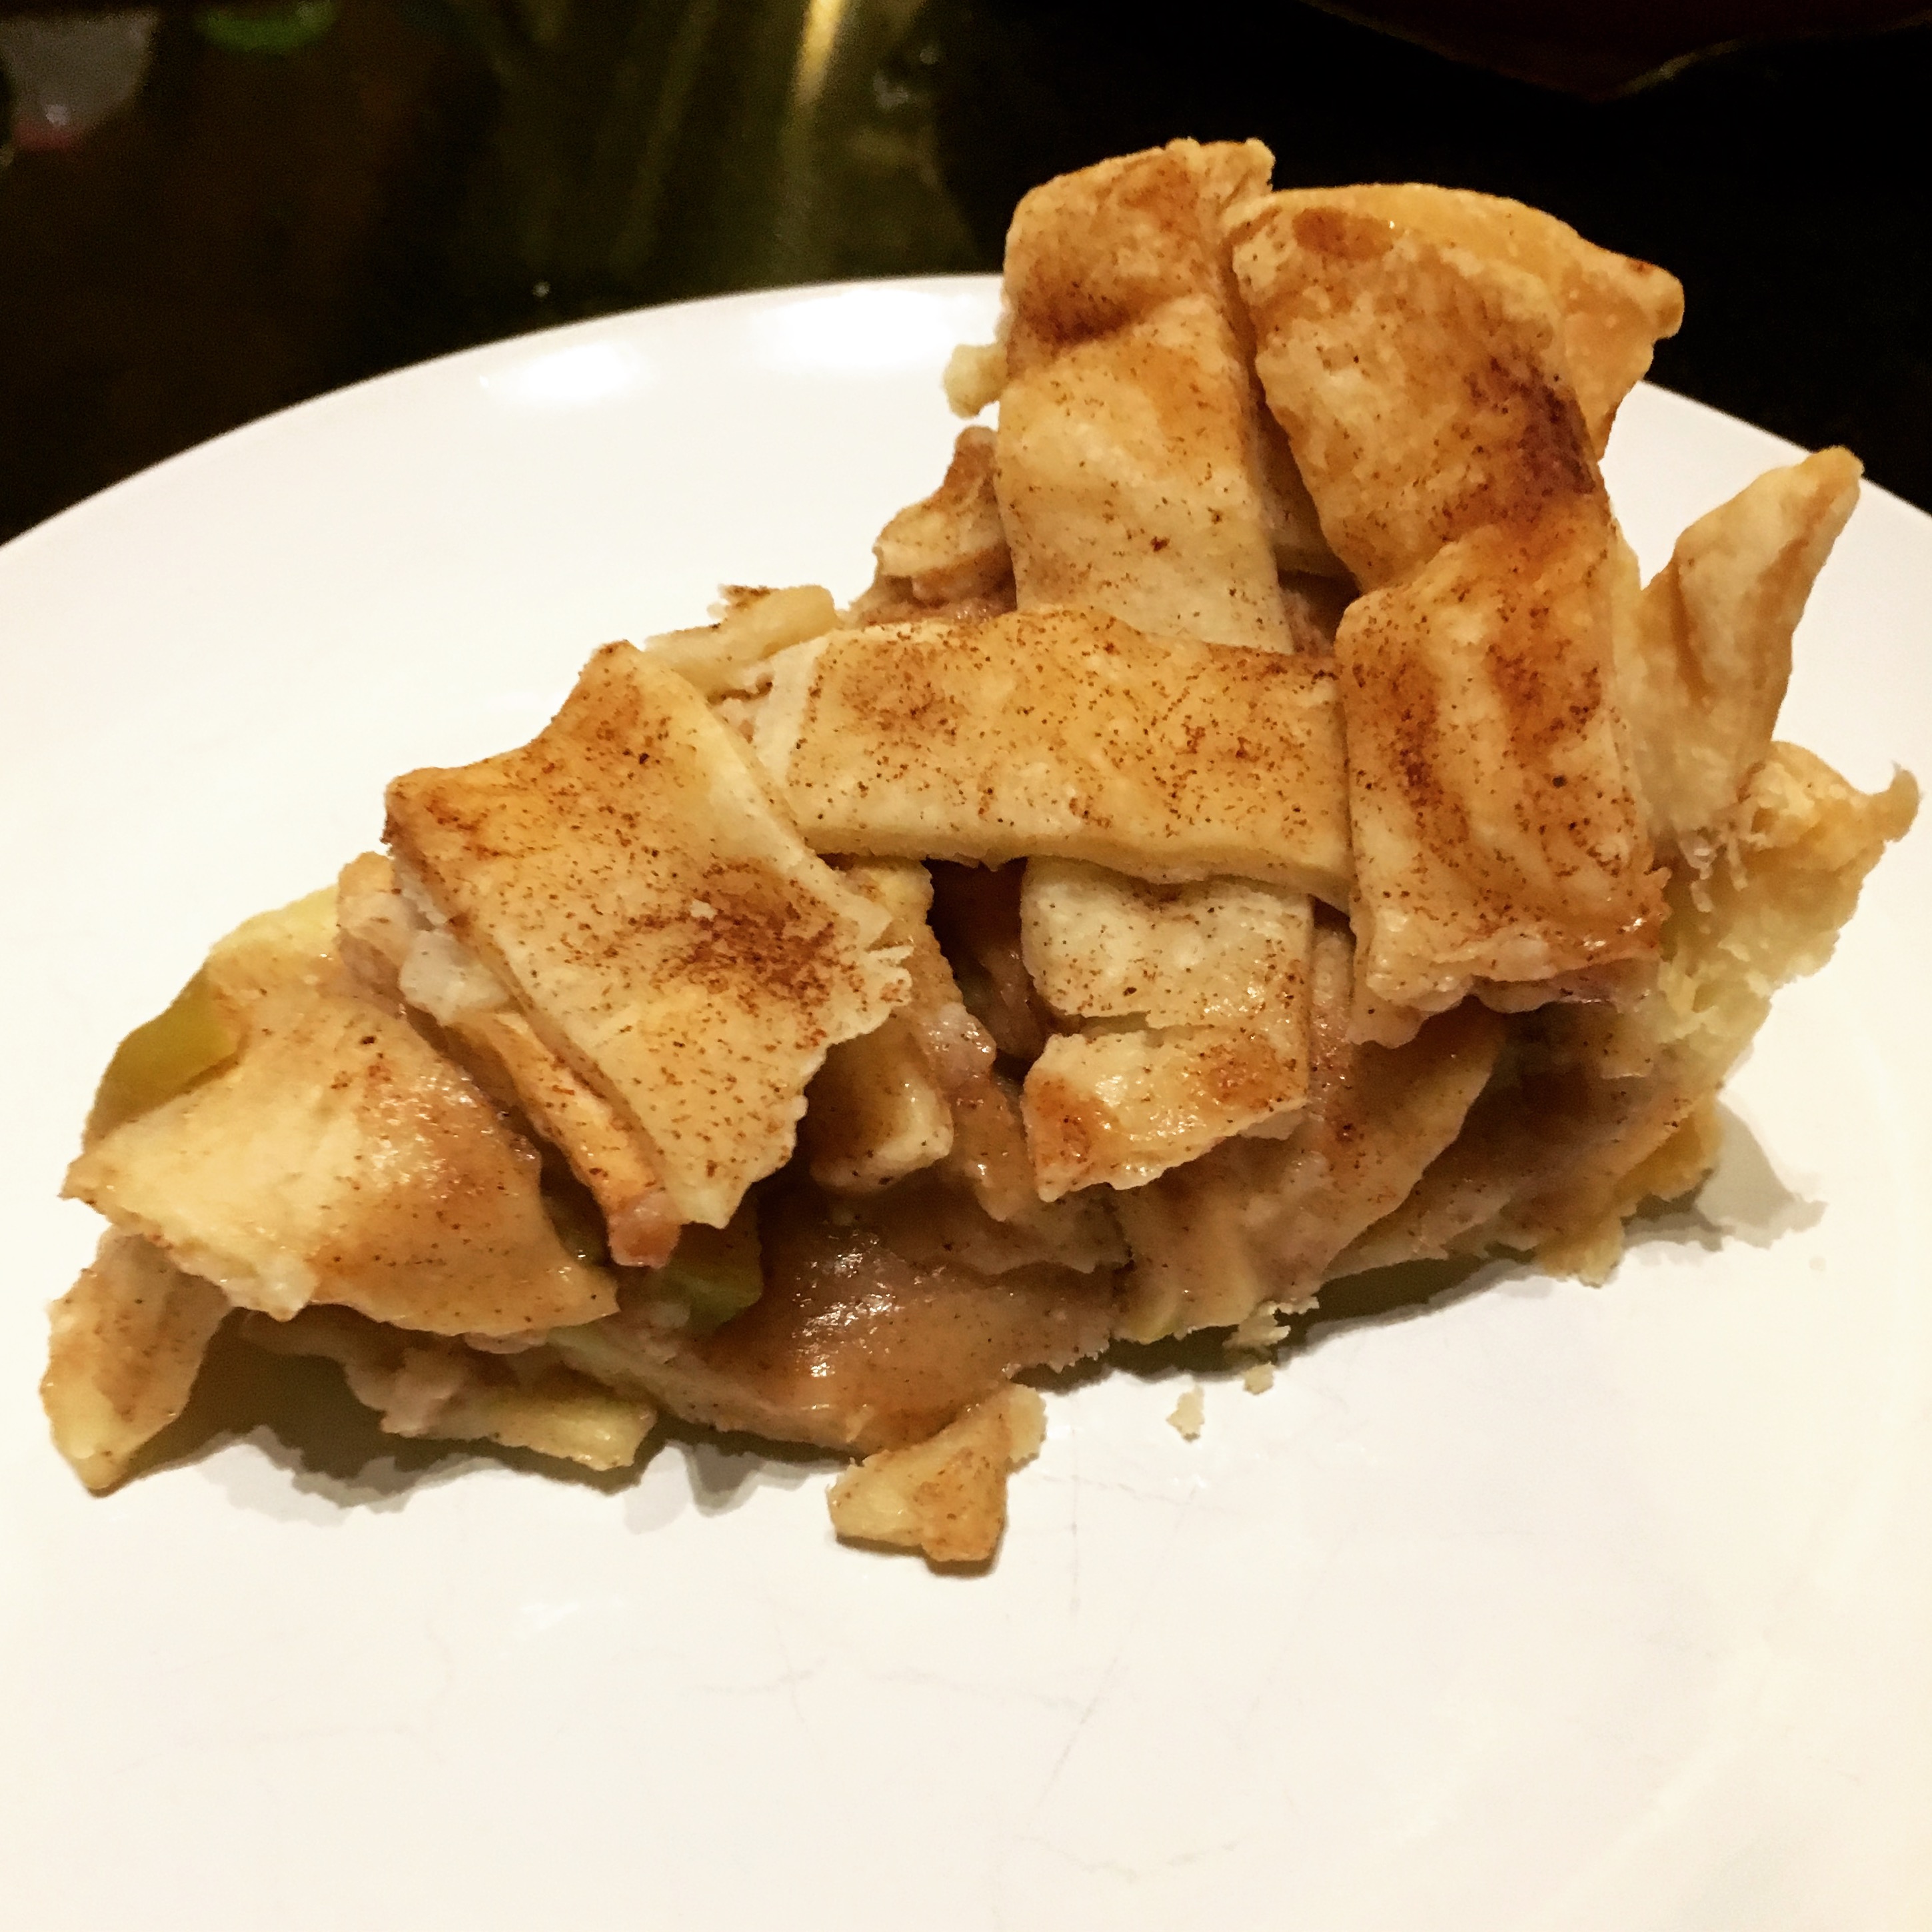
Thinking it seemed similar to meatloaf (and after some online research), I decided to eat mine with some ketchup - which seems to be a popular choice - as well as a little spicy brown mustard. Scott enjoyed his with sour cream (another online hit). Serve with whatever condiments you enjoy, but make sure you allow them to cool before digging in! 

Beef Pasties

  • Servings: 4
  • Time: 1 hour, 20 minutes (not including inactive time for the dough to chill)
  • Print

Ingredients

    For the Dough:
  • 1 cup Crisco or lard
  • 3½ cups flour
  • ½ tsp baking powder
  • ½ tsp salt
  • 1 egg (beaten)
  • ½ TBS vinegar
  • ½ cup ice water
  • For the Filling:

  • 1 pound ground beef
  • 1 cup grated (or finely diced) rutabaga
  • 1 ½ cup diced potatoes
  • 1 or 2 carrots, diced
  • 1 small onion, diced or 1 TBS dried minced onion
  • salt and pepper
  • 1/4 stick butter or margarine, melted
  • egg wash: 1 egg and 1 TBS water

Directions

  1. To make the dough, put the dry ingredients - shortening/lard, flour, salt and baking powder - into the food processor. With it on low, drizzle in the liquid ingredients - 1 beaten egg, 1 tablespoon of white vinegar and ½ cup of ice water.
  2. Once dough is well combined, form into a disk (or two smaller disks) in plastic wrap and allow to chill for a few hours, or overnight. When ready to create the pasties, roll out the dough and cut into circles with a small saucer (8” or 10” diameter).
  3. Combine the filling ingredients, adding the melted butter last.
  4. Add filling to one half of each pastry circle. Fold over and crimp the edges.
  5. Brush with an egg wash and make 2-3 slits or use a fork on the top to allow the steam escape while baking.
  6. Bake on parchment paper-lined baking sheets at 375 degrees F for 15 minutes before turning down to 325 degrees F for 45 minutes, OR just bake for 1 hour at 350 degrees F.


From: The Kitchen of Scott’s Mom, Karen

You could also make more smaller pasties, by cutting smaller circles of dough and using less filling. This may affect baking time. Mine were quite giant, but worked well as a main course (or full meal)!


Filed Under: book review, of interest, recipe Tagged With: baking, fantasy, fiction, meat, television series

Making Arrangements + Caramel Cake

December 29, 2016 by Megan 3 Comments

Expecting to die from cancer, Lang does her best to make sure her husband survives without her. She leaves notes for important moments and even prepares dessert for his next birthday. When he unexpectedly dies before she does, her life is turned upside down. In Ferris Robinson’s novel Making Arrangements, Lang has to learn how to cope when life doesn’t go exactly as she planned.

IMG_2392.JPG

While the story itself is an important reminder to expect the unexpected, I found most of the characters to be quite unlikeable. Even Lang herself was weak and self-defeating for most of the novel, probably due to her son Teddy’s and late husband’s attempts to keep her in the dark and stifle any ounce of gumption she may have once had. It was refreshing when she gave in to her impulses, finally forging new relationships and learning to be self-sufficient.

Baking comes effortlessly to Lang. Skilled at making cakes, it’s important to her to provide her husband with a birthday cake even after she’s gone. She lovingly makes and then freezes his favorite, a caramel cake, so it will be waiting for him.

The theme of this book makes it an appropriate read for the end of the year; likewise, this caramel cake seemed to be a perfect treat to bring along to a holiday party or New Year’s celebration. Ferris Robinson provided me with a copy of her recipe for Decadent Deep South Caramel Cake (along with a copy of the book), so I set to work making what I hoped would turn out to be a decent imitation of Lang’s own masterpiece.

I preheated the oven first, greased and floured the cake pans, and assembled all of my cake ingredients. (I also got out the 2 sticks of butter for the icing so that it would be easier to use when I was ready later.) In a large bowl, I combined the plain white cake mix, whole milk, 3 eggs, vanilla extract and another stick of butter, melted. Once blended, I used an electric mixer on medium for 2 minutes.

I split the cake batter evenly between my two cake pans and set them in the 350-degree oven for 27 minutes.

img_2389

After they were finished, I put them on a cooling rack in the pans for 10 minutes and then inverted onto the racks so that they could continue to cool.

While they fully cooled, I worked on the caramel icing. In a non-stick saucepan, I melted 2 sticks of butter and stirred in 1 pound of brown sugar and ¼ teaspoon of salt, until the sugar dissolved. I added in the evaporated milk and stirred until it was fully incorporated. This mixture came up to a boil and I left it boil softly for about 4 minutes. (At one point, my boil got a little out of control, but I just turned down the heat and kept stirring until it became a little less vigorous. Just go with it - caramel can sometimes be a little intimidating but it doesn’t have to be difficult.)

I took the saucepan with the caramel mixture off the heat to allow it to cool. I used this time to sift my powdered sugar and even out the tops of the cooled cakes. I also began boiling some water in a smaller saucepan to use for my double-boiler. After cooling for about 7 minutes, I added the caramel mixture to my bowl of powdered sugar and vanilla, using the electric mixer to thoroughly combine the icing.

My bottom layer of cake on a plate, I spread a thick layer of caramel icing along the top. Once it was well-coated, I placed the second cake on top of it and poured the icing on it, allowing it to spill off the edges and coat the sides. I’m not great at cake-decorating or evenly icing cakes, so given the consistency of the frosting I thought this would be the best way. If you use this method, be careful that the icing doesn’t spill over the sides of the plate (or that you have something in place to catch the overflow). It did provide even coverage, but it made a bit of a mess. Sadly, my presentation wasn’t as great as it could’ve been, but I was hoping the taste would make up for it.

img_2390

The good news is, it absolutely did. The cake was delicious, very moist and airy. The caramel icing had great flavor and once set, it provided a nice thick and slightly hard coating on the cake. A decadent cake for sure, one that is worth making for any special occasion.

img_2391

Decadent Deep South Caramel Cake

  • Servings: 8-12
  • Time: about 1 hour
  • Print

Provided directly by Ferris Robinson. The recipe and an excerpt of the novel are also available in the free e-cookbook KP Authors Cook Their Books.

Ingredients

    Cake
  • 1 package (18.25 ounces) plain white cake mix [Note: A 16.25 ounce package was the largest I was able to find in the store; I used it and had no problems.]
  • 1 cup whole milk
  • 8 tablespoons butter, melted
  • 3 eggs
  • 2 teaspoons pure vanilla extract (not imitation)
  • Lang’s Famous Decadent Caramel Icing

  • 2 sticks butter
  • 1 (16 oz.) box of light brown sugar
  • ¼ teaspoon salt
  • ⅔ cup evaporated milk (canned)
  • 2 cups sifted confectioner’s sugar
  • 2 teaspoons pure vanilla extract

Directions

  1. Preheat the oven to 350 degrees F.
  2. Grease two 9-inch round cake pans, then dust with flour.
  3. Blend cake mix, milk, melted butter, eggs, and vanilla extract in a large mixing bowl with an electric mixer. When blended, beat on medium speed for about two minutes.
  4. Pour batter into greased cake pans and bake until they are golden brown and spring back when lightly to touch, about 27 to 29 minutes. Let cool 10 minutes before inverting onto plate. Make sure they are completely cool before icing.
  5. While the cakes cool, prepare the Decadent Caramel Icing. Heat butter, brown sugar and salt in a saucepan, stirring until the brown sugar dissolves. Add milk and stir until blended. Bring to slow boil for about four minutes, stirring constantly. Let hot mixture cool for several minutes.
  6. Add confectioner’s sugar and vanilla and mix with electric mixer until lighter in color and caramelized. Ice that cake! Work quickly, while the frosting is still warm because it will set up. If the frosting gets too hard to work with, place it over low heat for a minute, stirring constantly. [I mixed in the sugar and vanilla in a homemade double-boiler (glass bowl over gently boiling saucepan) and this helped to prevent it setting up.]

Cake can be stored covered in plastic wrap or aluminum foil at room temperature for up to 1 week, or it can be frozen, wrapped in saran and foil, for up to 6 months. Thaw the cake overnight before serving.

The icing recipe made significantly more icing than I needed. If you wanted to make an additional cake layer, so that it has 3 instead of 2, you would still likely have enough without altering the above icing recipe.

I hope everyone has a safe New Year's celebration! Looking forward to seeing you all again in 2017!

* This book was given to me by the author in exchange for an honest review.

Filed Under: book review, recipe Tagged With: baking, contemporary, dessert, fiction

The House of the Spirits + Beef Empanadas

December 17, 2016 by Megan 2 Comments

Almost all books can open your eyes to new experiences - whether it be new cultures, new points of view, or just something you didn’t know before. The same book can have different meaning from person to person, and it can have a different meaning from reading to reading. I don’t love everything I read, but I do appreciate the opportunity I have to come away with a new knowledge of the world, be it big or small.

The House of the Spirits, a selection for one of my book clubs, was one such book. By Isabel Allende, and originally written in Spanish, it is the story of strong Chilean women, spanning three generations. I don’t have a strong opinion about it either way, but in the end, I’m glad I read it.

51RR9yHMRCL._SY344_BO1,204,203,200_.jpg

It was not the easiest book for me to get into, and if I hadn’t been on vacation with a limited selection of reading material, I might have put it down and called it a day. As captivating as these three women were, the common thread throughout all of their narratives was Esteban, a really rather unlikeable character, who outlived all of them.

With elements of magical realism, like many Latin American stories, we follow Clara the Clairvoyant, her daughter Blanca and her granddaughter Alba as they live in Esteban’s orbit. For all of the beautiful writing and the expansive time covered, it feels as though the story slags on, with so little happening in any given chapter. Until the end, when Alba - the joy of Esteban’s life and who feels like the most important character - takes revolutionary steps that not only change her family forever but her country too.

It is in this part of the book, while stuck in the house during a curfew, that the maids decide to make empanadas as a way of entertaining themselves. I have always loved empanadas and thought making them on a very snowy day in Detroit would be a great way to entertain myself too!

I found a recipe from The New York Times for beef empanadas and went to work. In an attempt to save time, I used refrigerated dough, as suggested by a different recipe. Looking back, I wish I’d made the dough included in the original recipe (I’ll include it below). If you do decide to use refrigerated dough, you will probably need 2 packages, or 4 total pie crusts.

Since my dough was already made, I started with the filling. I used ground beef and ground chorizo, because I already had them on hand - I think they work just as well. I chopped the onion and set the beef to cooking on the stovetop.

img_2340

While the beef browned, I peeled and diced my potatoes. Once the beef was nearly cooked through, I added the onion and the chorizo to the pan, allowing them to cook for about 10 minutes. Then I added the potatoes, garlic and spices, seasoning with salt and pepper.

img_2341

After a few more minutes, I added the tomato paste, paprika, cayenne pepper (about an ⅛ teaspoon) and a cup of water. It began simmering and I let it all cook together for another 10 minutes.

While that cooked, I also chopped my scallions and made two hard-boiled eggs. Once the filling was finished, I put it in a bowl to cool and added the sliced scallions.

img_2342

I preheated the oven to 375 degrees and started making the dough rounds. Unrolling the dough was surprisingly difficult, but it did add this bright spot to my cooking.

I got about 15 total rounds out of my two sheets of dough, only enough to use half the filling. (The rest of the meat and potato mixture made a great addition to breakfast burritos as well as a quick dinner of tacos.) On each round, I added about 1 tablespoon of the meat filling, a sprinkle of chopped hard-boiled eggs, and a sprinkle of finely chopped green olives. Using more filling made them difficult to close.

img_2345img_2346

I brushed them with some melted butter and put them in the oven on a parchment lined baking sheet for 15 minutes. They didn’t come out quite as golden as they might have if I’d made my own dough, but they still tasted delicious.

img_2347

Beef Empanadas

  • Servings: makes 30-36
  • Time: 1½ hours
  • Print


From: The New York Times Cooking Section

Ingredients

    Dough Ingredients

  • 4 oz lard or butter, plus more for brushing tops
  • 1½ teaspoons fine sea salt
  • 750 grams all-purpose flour, about 6 cups, more as needed
  • Filling Ingredients

  • 1 pound beef chuck, in 1/8-inch dice (or very coarsely ground)
  • Salt and pepper
  • Lard or olive oil, or a combination, for sautéing
  • 1 cup diced onion
  • 2 ounces diced chorizo (or ground)
  • ½ pound potatoes, peeled and diced
  • 4 garlic cloves, mashed to a paste
  • 2 teaspoons chopped thyme
  • 2 teaspoons chopped marjoram or 1 teaspoon oregano
  • 1 tablespoon tomato paste
  • 1 tablespoon pimentón dulce or paprika
  • Large pinch cayenne
  • Beef or chicken broth, as necessary, or use water
  • ½ cup chopped scallions, white and green parts
  • ¼ cup chopped pitted green olives
  • 2 hard-cooked eggs, sliced

Directions

  1. Make the dough: Put 2 cups boiling water, 4 ounces lard and 1 1/2 teaspoons salt in large mixing bowl. Stir to melt lard and dissolve salt. Cool to room temperature.
  2. Gradually stir in flour with a wooden spoon until dough comes together. Knead for a minute or two on a floured board, until firm and smooth. Add more flour if sticky. Wrap and refrigerate for 1 hour.
  3. Make the filling: Season chopped beef generously with salt and pepper and set aside for 10 minutes. Melt 3 tablespoons lard in a wide heavy skillet over medium-high heat. Add beef and fry until nicely browned, stirring throughout to keep pieces separate, about 5 minutes.
  4. Turn heat down to medium and add onion and chorizo. Keep turning mixture with a spatula, as if cooking hash, until onion is softened and browned, about 10 minutes. Add potatoes, garlic, thyme and marjoram and stir well to incorporate. (Add a little more fat to pan if mixture seems dry.) Season again with salt and pepper and let mixture fry for 2 more minutes. Stir in tomato paste, pimentón and cayenne, then a cup of broth or water. Turn heat to simmer, stirring well to incorporate any caramelized bits.
  5. Cook for about 10 more minutes, until both meat and potatoes are tender and the sauce just coats them — juicy but not saucy is what you want. Taste and adjust seasoning for full flavor (intensity will diminish upon cooling). Stir in scallions and cool to room temperature, then cover and refrigerate until ready to use.
  6. Divide chilled dough into 1-ounce pieces and form into 2-inch diameter balls. Roll each piece into a 4 1/2-inch circle. Lay circles on a baking sheet lightly dusted with flour.
  7. Moisten outer edge of each round with water. Put about 2 tablespoons filling in the center of each round, adding a little chopped green olive and some hard-cooked egg to each. Wrap dough around filling to form empanada, pressing edges together. Fold edge back and finish by pinching little pleats or crimping with a fork.
  8. Heat oven to 375 degrees. Place empanadas on parchment-lined or oiled baking sheet, about 1 inch apart. Brush tops lightly with lard or butter and bake on top shelf of oven until golden, 10 to 15 minutes. Serve warm.

Filed Under: book review, recipe Tagged With: baking, book club, dinner, fiction, long read, lunch, magical realism, meat

The Hopefuls + All-American Apple Pie

November 10, 2016 by Megan Leave a Comment

Thankfully, election season is over. I think we can all agree it was a long one - no matter who you backed. The Hopefuls was another book I’ve had on hold for a while (it came out over the summer), and I finally got my turn with it. When I first saw the notification, a political book was the last thing I wanted to read, but somehow, the library knows exactly when to send me what I need.

9781101875612.jpg

Yes, most of the characters are politicians or work with/for them, and yes, it talks about the actual government (circa 2012), but The Hopefuls isn’t exactly a “political book.” At its heart, Jennifer Close’s novel is about relationships and learning to grow together. I actually found it to be a pleasant escape from the current state of politics.

Shortly after Obama’s re-election, Beth, an unemployed magazine writer, joins her husband Matt in Washington D.C., where he is taking on a new government role. At first, she struggles to adjust and hates everything about the capital city. However, when she and Matt become friends with a fellow White House staffer Jimmy and his wife, her whole outlook changes.

Beth becomes fast friends with Southern belle Ash, and the couples become nearly inseparable. As dynamic duo Matt and Jimmy take on new political opportunities, the four of them are led in directions none of them expected.

One of the more memorable scenes in the book takes place at a new cycling studio, the United States of Spinning. It is so decorated in stars and stripes and red, white and blue that Beth finds it dizzying. From the presidential portraits on the walls to the patriotic music selections, you cannot escape the fact that you are smack dab in the middle of the capital of the United States of America.

So, what recipe could possibly be more appropriate to represent The Hopefuls than an all-American apple pie? I’ll tell you what: The Best Apple Pie Ever.    

I didn’t end up making my own crust this time, but you can easily use the recipe from my pumpkin pie (double it to have enough for a lattice top) or take a shortcut and buy some refrigerated crust like I did.

Start with 8 small Granny Smith apples.

img_1747

I used a newly purchased (if slightly dysfunctional) apple peeler machine to peel all of them, and it worked mostly well. After they were peeled, I cored and sliced them. Do your best to get them about the same thickness, but I personally like a little variety in texture after they’re baked down.

img_1748

While the oven preheats to 425 degrees F, melt a stick of butter over medium heat in a medium saucepan. (It doesn’t specify, and I usually use unsalted butter for baking recipes, but I opted to use salted butter here since there was no additional salt in the recipe.) Add the flour to the melted butter and mix well. Mine didn’t form a “paste” but it got quite thick. Add all of the remaining ingredients and bring to a boil (for one minute) before reducing the heat and simmering for another minute.

It will form a delicious caramel-y syrup. Use about ¾ of this to coat the apples, by gently stirring/tossing them in their large bowl. (The original recipe recommends using ⅔ of the mixture, but I felt like I had a little too much when it came to the top.)

Pour the coated apples into the bottom pie crust, mounding it a little towards the center. Cover with your lattice top (or whichever top you prefer; I happen to prefer lattice, despite my inexperience). Brush the remainder of the caramel-y mixture over the top of the crust.

img_1749

Before it goes in the oven, lightly spray some aluminum foil with baking spray so it doesn’t stick to the pie. Place the pie dish on a cookie sheet and bake it for 10-12 minutes at 425 degrees F. Then, turn the oven down to 350 degrees and bake it for an additional 50 minutes, or until the crust is golden brown and the apples are soft. Mine baked longer, about 65 or 70 minutes, so that I could get the right color on the crust and the apples were baked through to my liking.

img_1750

Wait as long as you can for it to cool and then cut it up to share. 🙂 This pie would make an excellent addition to your Thanksgiving celebration, or whenever you have a hankering for some delicious apple pie.

img_1751

The Best Apple Pie Ever

  • Servings: 8-10
  • Time: roughly 2 hours, using pre-made crust
  • Print


From: Audrey’s Apron

Ingredients

  • 2 refrigerated pie crusts (1 package), or 2 batches of homemade crust
  • 7 to 8 small granny smith apples, peeled, sliced, and cored
  • 1 stick butter
  • 3 tbsp all-purpose flour
  • ¼ cup water
  • ½ cup white sugar
  • ½ cup brown sugar
  • 1 heaping tsp cinnamon
  • ¼ tsp nutmeg
  • 1 tsp vanilla

Directions

  1. Place the peeled, cored, and sliced apples in a large bowl. Set aside.
  2. Preheat oven to 425F.
  3. In a medium sauce pan, melt butter over medium heat. Add the 3 tbsp of flour and mix well, forming a paste. Add the water, sugars, cinnamon, nutmeg, and vanilla and mix well. Bring to a boil for 1 minute, then reduce heat to a simmer for an additional minute.
  4. Remove from heat and reserve about 1/3 cup of filling for pie crust. Add remaining filling to apples. Toss well.
  5. Pour apples into prepared pie crust, mounding slightly. Top with second pie crust (lattice design, etc). Brush the remaining 1/3 cup caramel filling over the crust.
  6. Cover the pie loosely with aluminum foil. I lightly spray the foil so it does not stick to the pie. Place the pie on top of a cookie sheet (to catch any drips) and bake at 425F for 10-12 minutes. Reduce the heat to 350F and bake for another 50 minutes (remove the foil the last 10 minutes to let the crust brown), or until done. The pie is done when the crust is golden-brown and the apples are soft when pierced with a fork.
  7. Allow the pie to cool before serving. Enjoy!

Filed Under: book review, recipe Tagged With: baking, dessert, fiction

Pumpkin: The Curious History of an American Icon + Pumpkin Pie

October 20, 2016 by Megan 2 Comments

Last fall, my cousin Nora and I campaigned hard for Pumpkin: The Curious History of an American Icon at our Good Reads & Good Eats book club - primarily so we could pair it with dinner at The Jolly Pumpkin. We were the only two who voted for it.

Still, the book stayed on my mind, and this fall, I decided to buy a used copy of it - primarily so I could make my very favorite dessert for the blog. Not that I didn’t want to learn the history and virtues of pumpkins; I just really wanted an excuse to make pumpkin pie.

411+6z2JfFL._SY344_BO1,204,203,200_.jpg

As the title promises, Pumpkin: The Curious History of an American Icon is chock-full of facts about pumpkins. In fact, as someone’s Grandma Jane wrote in the note that fell out when I opened my new-to-me copy of the book, it contains “absolutely more than you’ll ever remember about pumpkins!”

fullsizerender

Grandma Jane was right! There is way more information than I could ever remember, or that I ever needed to know. I’ll share a few:

In the very early days of farming, pumpkins and squash were basically interchangeable, in name as well as use. They were prized for their ability to grow abundantly in almost any condition and were often fed to livestock. Sweet pumpkin pie originated in the late eighteenth century and  was included in the first American cookbook by Amelia Simmons. By the time manufactured products became widespread, canned pumpkin made using fresh pumpkins in the kitchen seem like “an old-fashioned novelty.” And, even though canning made it possible to eat pumpkin year-round, Americans continued to prefer to eat it in the fall, particularly as part of the Thanksgiving meal.   

That’s probably why I was so looking forward to making pumpkin pie. The fall harvest has arrived - just look at all of the beautiful pumpkins and squash on display at Eastern Market this past Saturday!

I dug up my trusty pumpkin pie recipe, which I love because it’s well-seasoned. There’s nothing worse than a pumpkin pie that tastes like straight-out-of-the-can pumpkin. Though it’s called Scratch Pumpkin Pie, I’ve never actually made it from scratch because I’m way too impatient to spend 4 hours prepping and baking a pie before it’s ready to eat, and this time was no different.

For the crust, though, I shirked my usual go-to (the store bought frozen kind) and decided to go the homemade route. Despite my fear of additional prep time, the homemade crust really didn’t add more than 15 minutes or so. Plus, it tasted better. I used a recipe from one my very first cookbooks (courtesy of my mother, while I was in college), Anyone Can Cook.

I stirred the flour and salt together and then used my pastry blender to cut in the shortening. I filled a small prep bowl with cold water and grabbed a fork and tablespoon to begin moistening the dough.

img_1549

I probably ended up using closer to 6 or 7 tablespoons, but the recipe suggests 4-5 tablespoons. Use your best judgement - it shouldn’t be wet but should definitely be well-moistened.

I formed the dough into a ball and flattened that into a thick disk before rolling it out. As directed, I used the rolling pin to help lift the dough into the pie dish. I trimmed the edges where needed, folded any overhang underneath, and pressed the dough to fit the scalloped pattern of my dish.

When not using fresh pumpkin, the prep for the custard filling is easy. I use only 1 can of pumpkin puree (15 ounces), then add in the sugar, salt, spices and eggs. Once that’s combined, stir in the can of evaporated milk. I usually just use a wooden spoon, but you could use a whisk or hand-mixer if so desired.

img_1551

If you’re using store bought frozen pie crust, this makes too much filling. Fill the pie to almost the top of the crust; put any leftover filling in a small oven-safe bowl to bake separately in a water bath like a custard. (This is an excellent way to test your filling before you serve it, though I’ve never had any complaints with this recipe!) You’ll also need to watch the cook-time on the smaller portion, as it may not take as long as the whole pie.  

Because I used homemade crust in a larger pie dish (10-inch), this amount filled the pie up perfectly. I covered the edges in foil, so they didn’t brown too quickly and put it in the oven for about 80 minutes. (If using a smaller pie dish or a frozen crust, cook-time will be closer to the original recipe at an hour.)

img_1552

I did want some color on my crust, so I removed the foil with about 20 minutes left. You’ll know the pie is done when a knife or cake tester comes out clean. Allow it to cool, and enjoy!

img_1553

Pumpkin Pie

  • Servings: 6 to 8
  • Time: 1 hour, 10 minutes to 1½ hours
  • Print


Adapted from: Cheri B’s Scratch Pumpkin Pie, Food.com

Ingredients

  • 1 15-ounce can pumpkin puree
  • 1 12-ounce can evaporated milk
  • 3 eggs
  • ¾ cup sugar
  • ½ teaspoon salt
  • 1½ teaspoons ground cinnamon
  • 1 teaspoon ground ginger
  • ½ teaspoon nutmeg
  • ½ teaspoon ground cloves
  • 1 pie shell, 9-inch deep dish up to 10-inch (homemade or store bought)

Directions

  1. In medium bowl, add pumpkin puree, sugar, salt, spices, eggs. Mix until combined, then carefully add evaporated milk and stir.
  2. Pour into pie shell, foil edges, and place on foiled, cookie sheet and bake 350°F for 50-60 minutes. Give knife clean test. If not clean, bake longer. [Larger pie dishes will require longer baking times. My 10-inch pie baked for 80 minutes.]
  3. If using a smaller pie crust/dish, pour leftover pumpkin pie mix into a greased oven-safe dish (up to 1-quart) and bake in a water bath like custard. [This may take less time to bake than the pie.]

Pastry for Single-Crust Pie

  • Servings: 1 pie crust
  • Time: 10-15 minutes
  • Print

From Better Homes & Gardens Anyone Can Cook (Book 20, published in 2007), page 470

Ingredients

  • 1¼ cups all-purpose flour
  • ¼ teaspoon salt
  • ⅓ cup shortening
  • 4-5 tablespoons of cold water

Directions

  1. In a medium bowl, stir together all-purpose flour and salt. Using a pastry blender, cut in shortening until pieces are pea-sized.
  2. Sprinkle 1 tablespoon of cold water over part of the flour mixture, gently tossing with a fork. Push moistened dough to one side of the bowl. Repeat moistening flour mixture, using 1 tablespoon at a time, until all the flour mixture is moistened.
  3. Form pastry into a ball.
  4. On a lightly floured surface, roll dough into a circle about 12 inches in diameter. [Or larger, if needed to properly fill/cover your pie dish. Mine was closer to 15 inches.]
  5. Wrap pastry circle around the rolling pin to transfer it; unroll circle into a 9-inch pie plate. [Mine was a 10-inch dish.] Ease into pie plate without stretching it.
  6. Trim pastry ½ inch beyond edge of plate. Fold under extra pastry. Crimp edges as desired.

Filed Under: book review, recipe Tagged With: baking, dessert, nonfiction, seasonal

The Couple Next Door + Coffee-Glazed Banana Bread

October 15, 2016 by Megan Leave a Comment

From serious memoir to childhood favorite to suspenseful thriller - my last three books have been a little sporadic. The Couple Next Door is certainly more adult than The Secret Garden, but secrets still abound. After a shocking ending to a dinner party with (not surprisingly) the couple next door, Marco and Anne’s seemingly perfect life begins to unravel.

51qI2RzRlzL._SY344_BO1,204,203,200_.jpg

Shari Lapena’s The Couple Next Door was fast-paced, with new revelations at nearly every turn of the page. With a cast of characters that included an inappropriately flirtatious neighbor, a stay-at-home mom with a questionable past, and a power-hungry stepfather, no one’s motives were clear but everyone was suspect.

As the plot twisted here and turned there, food didn’t play much of a role. Despite starting with a dinner party, nothing much was mentioned aside from coffee. Uncertainty breeds sleeplessness, and the best cure for that is caffeine. In one instance, Lapena points out that the two main characters were “both living mostly on coffee and despair.”

In an effort to impart some comfort on a decidedly uncomforting storyline, I opted to make banana bread - with a coffee glaze. Comfort meets caffeine, thanks to this recipe from A Latte Food.

Like most quick breads, this one is pretty easy to get together. The really hard part is waiting for the baking (and cooling!) before you can finally eat it.

I had already-brewed coffee ready to go, but if you don’t, I suggest starting that process before you make the bread. I began by mashing up the bananas, which is always fun to do first thing in the morning. (Make sure your bananas are ripe. See them pre-mashed below; and mashed, with Beta looking on, wondering why she can’t have some of her favorite fruit too.)

I creamed the softened butter together with the sugars, adding the eggs and vanilla extract once the mixture was light and fluffy. To the wet ingredients, I slowly incorporated the flour, salt and baking soda. Once all was well-combined, I added the mashed bananas, stirring until just mixed.

Once in the prepared loaf pan, I let it bake in the oven for about an hour. With a few minutes to spare before the bread came out of the oven, I began the glaze so I could pour it over the loaf before it cooled completely. I whisked together the powdered sugar, brewed coffee and vanilla extract to form a light coffee-colored glaze.

I drizzled it over the still-cooling banana bread, with a plate underneath to catch any sugar-y drips.

img_1497img_1499

For those of you who don’t know me, I have a confession to make: I don’t like coffee. (Rory Gilmore would be horrified, I know.) I do, however, love banana bread. I thought the glaze tasted exactly like coffee, but Scott - who loves coffee - thought it tasted more like sugar. When I brought it to work, consensus all around was that it tasted good. If you actually like coffee, and prefer a more coffee-flavored glaze, I would suggest adding the espresso powder.

Or just enjoy it with a cup of coffee.

img_1498

Coffee-Glazed Banana Bread

  • Servings: 1 loaf
  • Time: 1 hour, 20 minutes
  • Print

Very slightly adapted from: A Latte Food

Ingredients

    Bread

  • ½ cup butter, softened
  • ½ cup sugar
  • ⅓ cup brown sugar
  • 2 eggs
  • 2 cups all-purpose flour
  • 1 tsp baking soda
  • ¼ tsp salt
  • 3 to 4 medium or large bananas
  • 1½ tsp vanilla extract
  • Coffee Glaze

  • 2 TBS strong coffee, brewed
  • 1 cup powdered sugar
  • ½ tsp vanilla extract
  • ¼ tsp espresso powder (optional)

Directions

    Bread

  1. Preheat the oven to 350. Grease a 9x5 loaf pan.
  2. In a small bowl, mash bananas. Set aside.
  3. In a large bowl, cream butter sugar, and brown sugar together until light and fluffy.
  4. Add in the eggs, one at a time, beating well after each addition. Add in vanilla extract, and mix.
  5. Sift together the flour, baking soda, and salt in a separate bowl. Slowly incorporate the dry ingredients into the wet ingredients, and stir until just combined.
  6. Add in mashed bananas, and mix until combined. Pour into prepared loaf pan.
  7. Bake for about 60 minutes, or until a cake tester comes out clean with just a few moist crumbs stuck to it.
  8. Allow to cool for 10 minutes. Move to a wire cooling rack.
  9. Glaze

  10. While bread is cooling, mix together powdered sugar, vanilla extract, espresso powder (if using), and 2 TBS brewed coffee. If the glaze is thicker than your desired preference, add in additional brewed coffee. [I used 2 TBS of coffee and no espresso powder and it was a perfect thickness; according to many, however, the flavor was not enough like coffee. Additional liquid may be required if adding the powder, but taste as you go to ensure a flavor you like.]
  11. Pour the glaze evenly over the loaf. Allow the glaze to harden completely before cutting into slices.

Filed Under: book review, recipe Tagged With: baking, breakfast, fiction, snack, suspense

  • « Go to Previous Page
  • Go to page 1
  • Interim pages omitted …
  • Go to page 11
  • Go to page 12
  • Go to page 13
  • Go to page 14
  • Go to Next Page »

Primary Sidebar

About

The Hungry Bookworm brings together literature and food. Megan has an insatiable appetite for both.

As C.S. Lewis said, “Eating and reading are two pleasures that combine admirably.” Enjoy!

  • Bloglovin
  • Facebook
  • Instagram
  • Pinterest

Subscribe

Don't miss out on bookish content, exclusive giveaways, and of course, book club-friendly recipes. Get notified of new posts via email.

Join 2879 subscribers.

Search for Ingredients, Recipes, or Books

Recent Posts

  • Subscriber Box Review: Literati Book Club - Roxane Gay's Audacious Book Club
  • Arsenic and Adobo + Ensaymada
  • Review of The Kindred Spirits Supper Club
  • Kids Edition: Sometimes I Like to Curl Up in a Ball + "Dirt" Pudding Cups
  • The Midnight Library + Broccoli and Ricotta Toast

Goodreads

Tags

5 ingredients or less appetizer baking book club book list book of the month books about food bread breakfast brunch chicken contemporary cookies cultural dessert dinner dinner party dystopia easy prep favorites fiction fruit historical fiction holiday ice cream linkup lunch meat memoir mini review nonfiction pasta quick read reading challenge science fiction seafood show us your books side dish snack soup TBR list thriller top ten tuesday vegetarian veggies

Archives

Other Great Book Blogs

Literary Quicksand
Never Enough Novels
Death by Tsundoku
Professional Reader 25 Book Reviews
Privacy & Cookies: This site uses cookies. By continuing to use this website, you agree to their use.
To find out more, including how to control cookies, see here: Cookie Policy

Footer Widget Header

Megan’s Instagram

Copyright © 2023 · Hungry Bookworm