• Skip to primary navigation
  • Skip to main content
  • Skip to primary sidebar
  • Home
  • Reviews
    • Book Index
    • Fiction
    • Non-Fiction
    • Top Ten Tuesdays
The Hungry Bookworm

The Hungry Bookworm

reading + eating

  • Recipes
    • Drinks
    • Snacks, Sides & Apps
    • Main Dishes
    • Desserts
    • 5 Ingredients or Less
  • About
    • Meet Megan
    • How I Rate
    • Review Policy
    • Contact

fiction

The Rules of Magic + Tipsy Chocolate Cake

October 31, 2017 by Megan 18 Comments

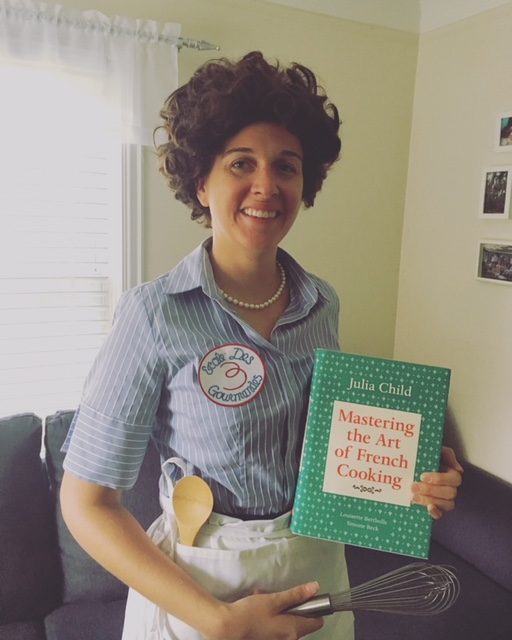
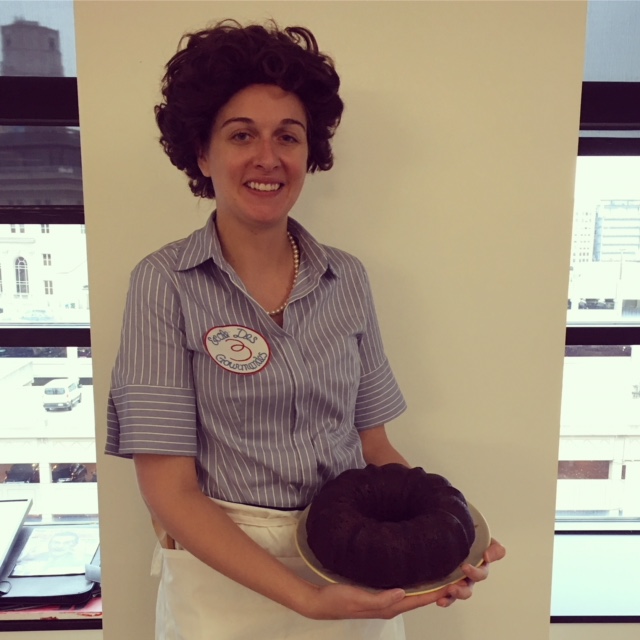
Happy Halloween, readers! Before I kick off today’s typical post, I want to share a little story. A couple of months ago, I had an epiphany - I thought of the perfect Halloween costume, and almost immediately, I set about finding all of the necessary pieces. Normally, Halloween isn’t exactly my thing, but once I realized who I had to dress up as, that all changed. This year would be different. Readers, I decided to be Julia Child and my excitement could not be contained. I was lucky enough to find the perfect top, skirt and heels secondhand (thank you, thredUP!) as well as a wonderful replica of her L'Ecole des Trois Gourmandes badge from Etsy. Armed with her cookbook and some cooking utensils, all I needed to complete the look was a curly-haired wig and an apron. Here’s what I came up with - what do you think?

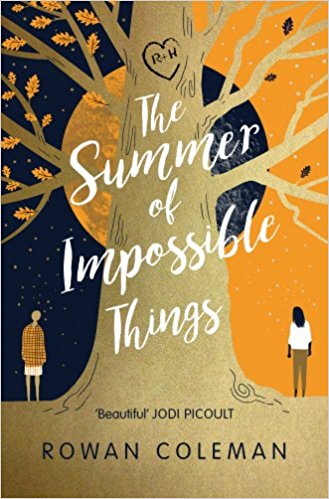
Now, onto the usual post, which I'm also excited to share with you. As you may recall, I recently picked up Alice Hoffman’s Practical Magic in anticipation of its prequel The Rules of Magic, which came out earlier this month - just in time for Halloween reading! For fans of Practical Magic, Hoffman’s latest novel follows the lives of the beloved aunts you well-remember, Frances and Jet, as well as their brother Vincent as they negotiate being teenagers.

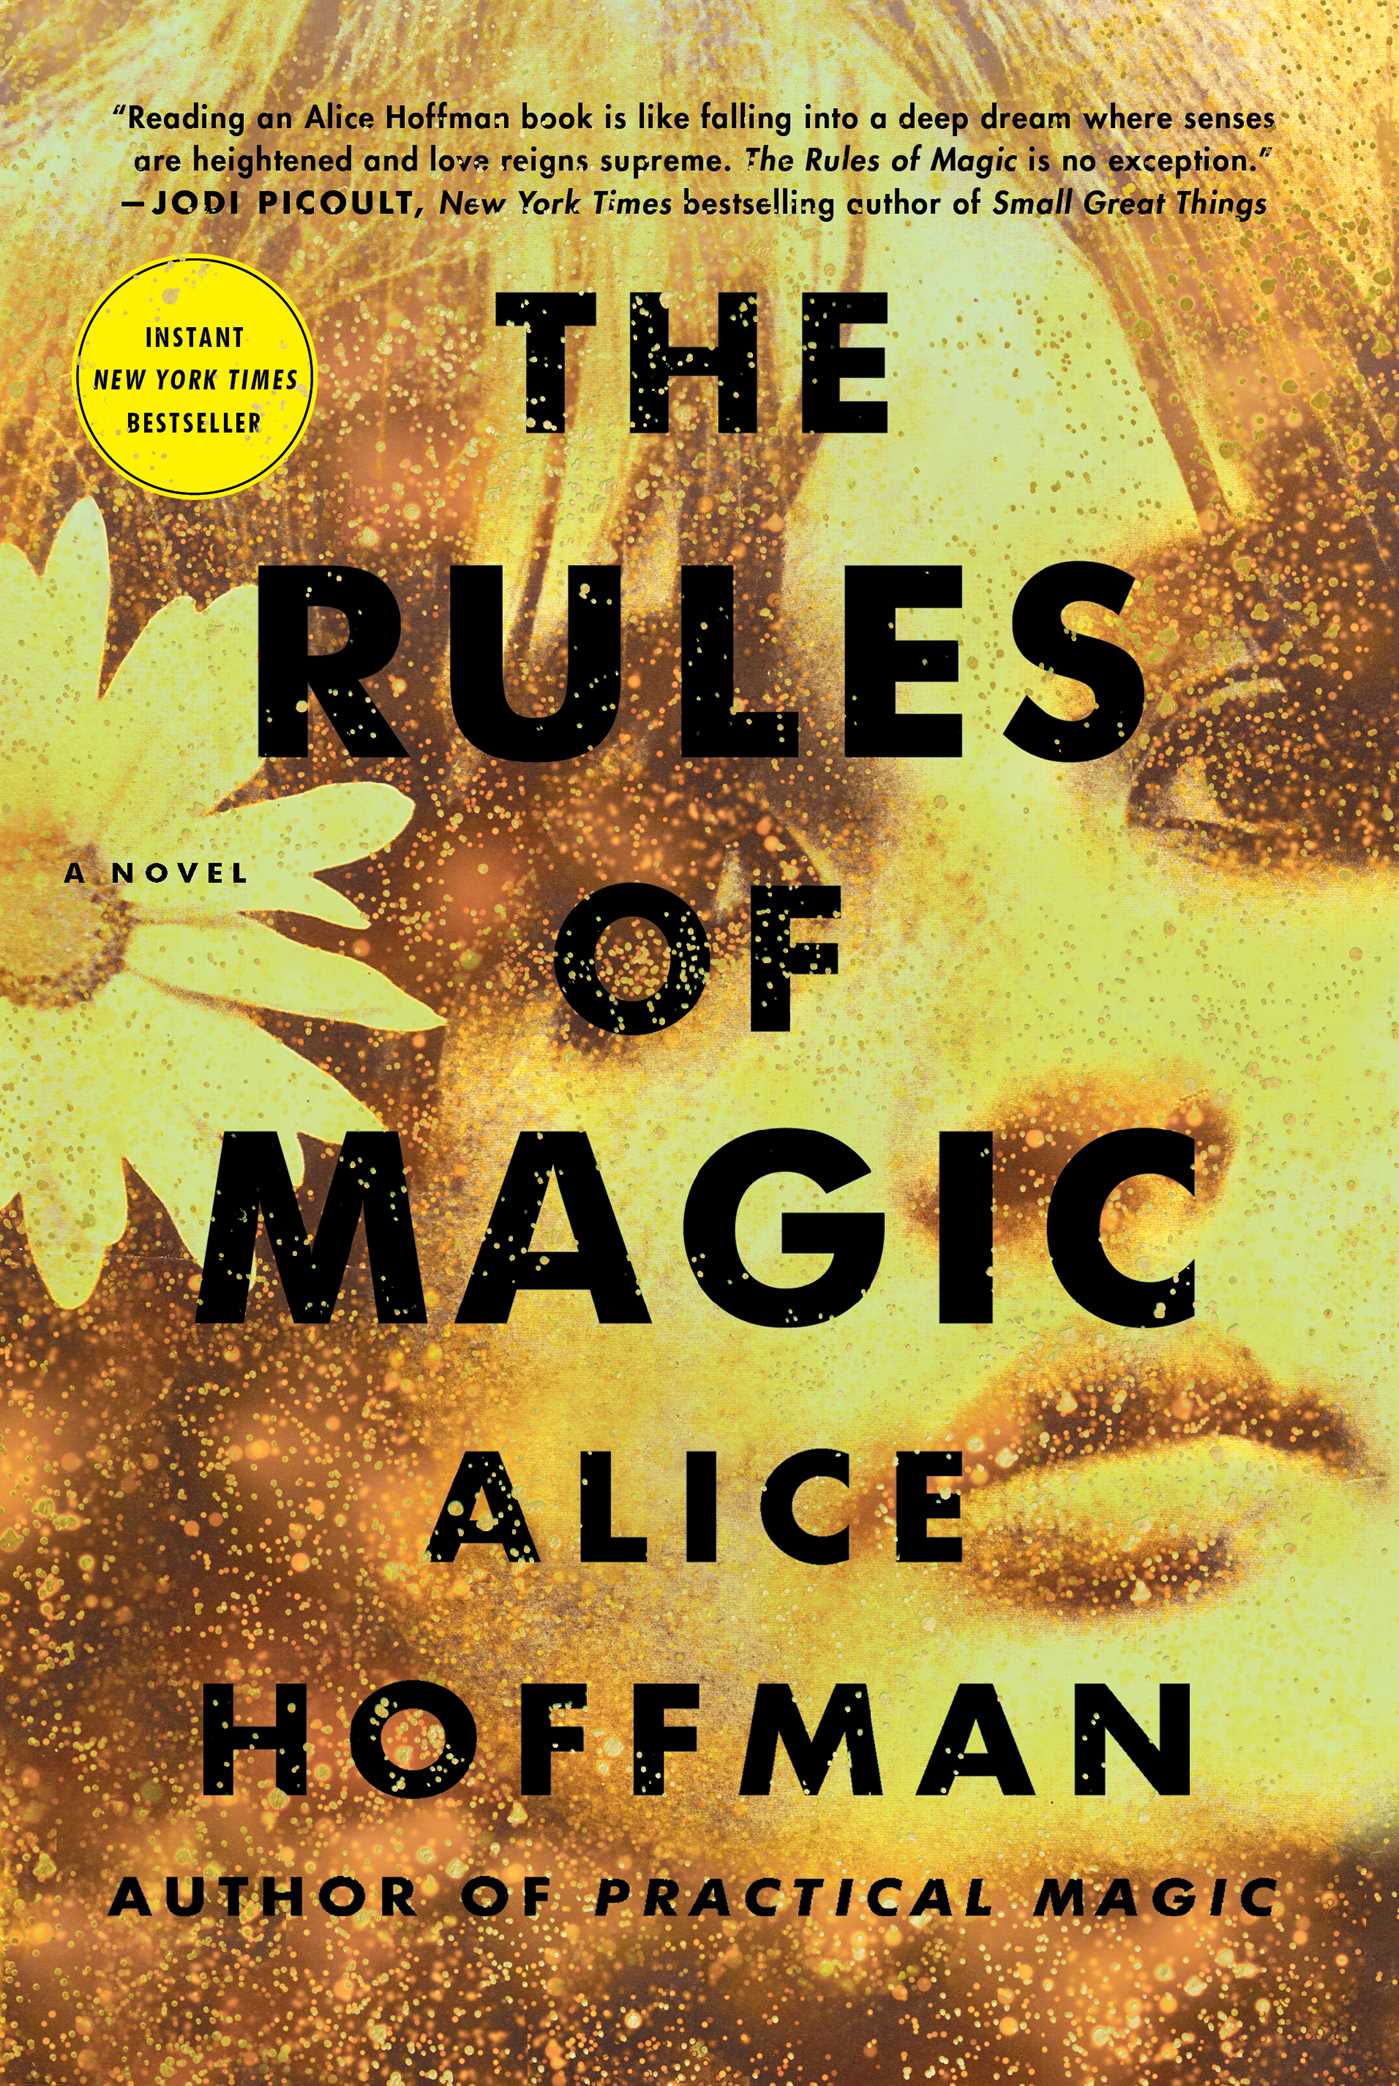
Thankfully, The Rules of Magic was exactly as good as I had hoped it would be. If I’m being honest, I liked it better than Practical Magic (the book), which I read and reviewed here just a few weeks ago. I loved finding out more about Sally and Gillian’s aunts, who make a big impression even though they only appear briefly in the movie. Growing up in New York City during the sixties, the sisters wrestle with the normal struggles of being teenagers alongside the unique consequences of the Owens family curse.

Though not a traditional pageturner, Hoffman’s writing and magical storytelling made this a really quick, enjoyable read. Previously, the story of the Owens family revolved around women - often sisters, so I was surprised to learn about Vincent. I have to say I loved the addition of an Owens brother; his story was unexpectedly beautiful.

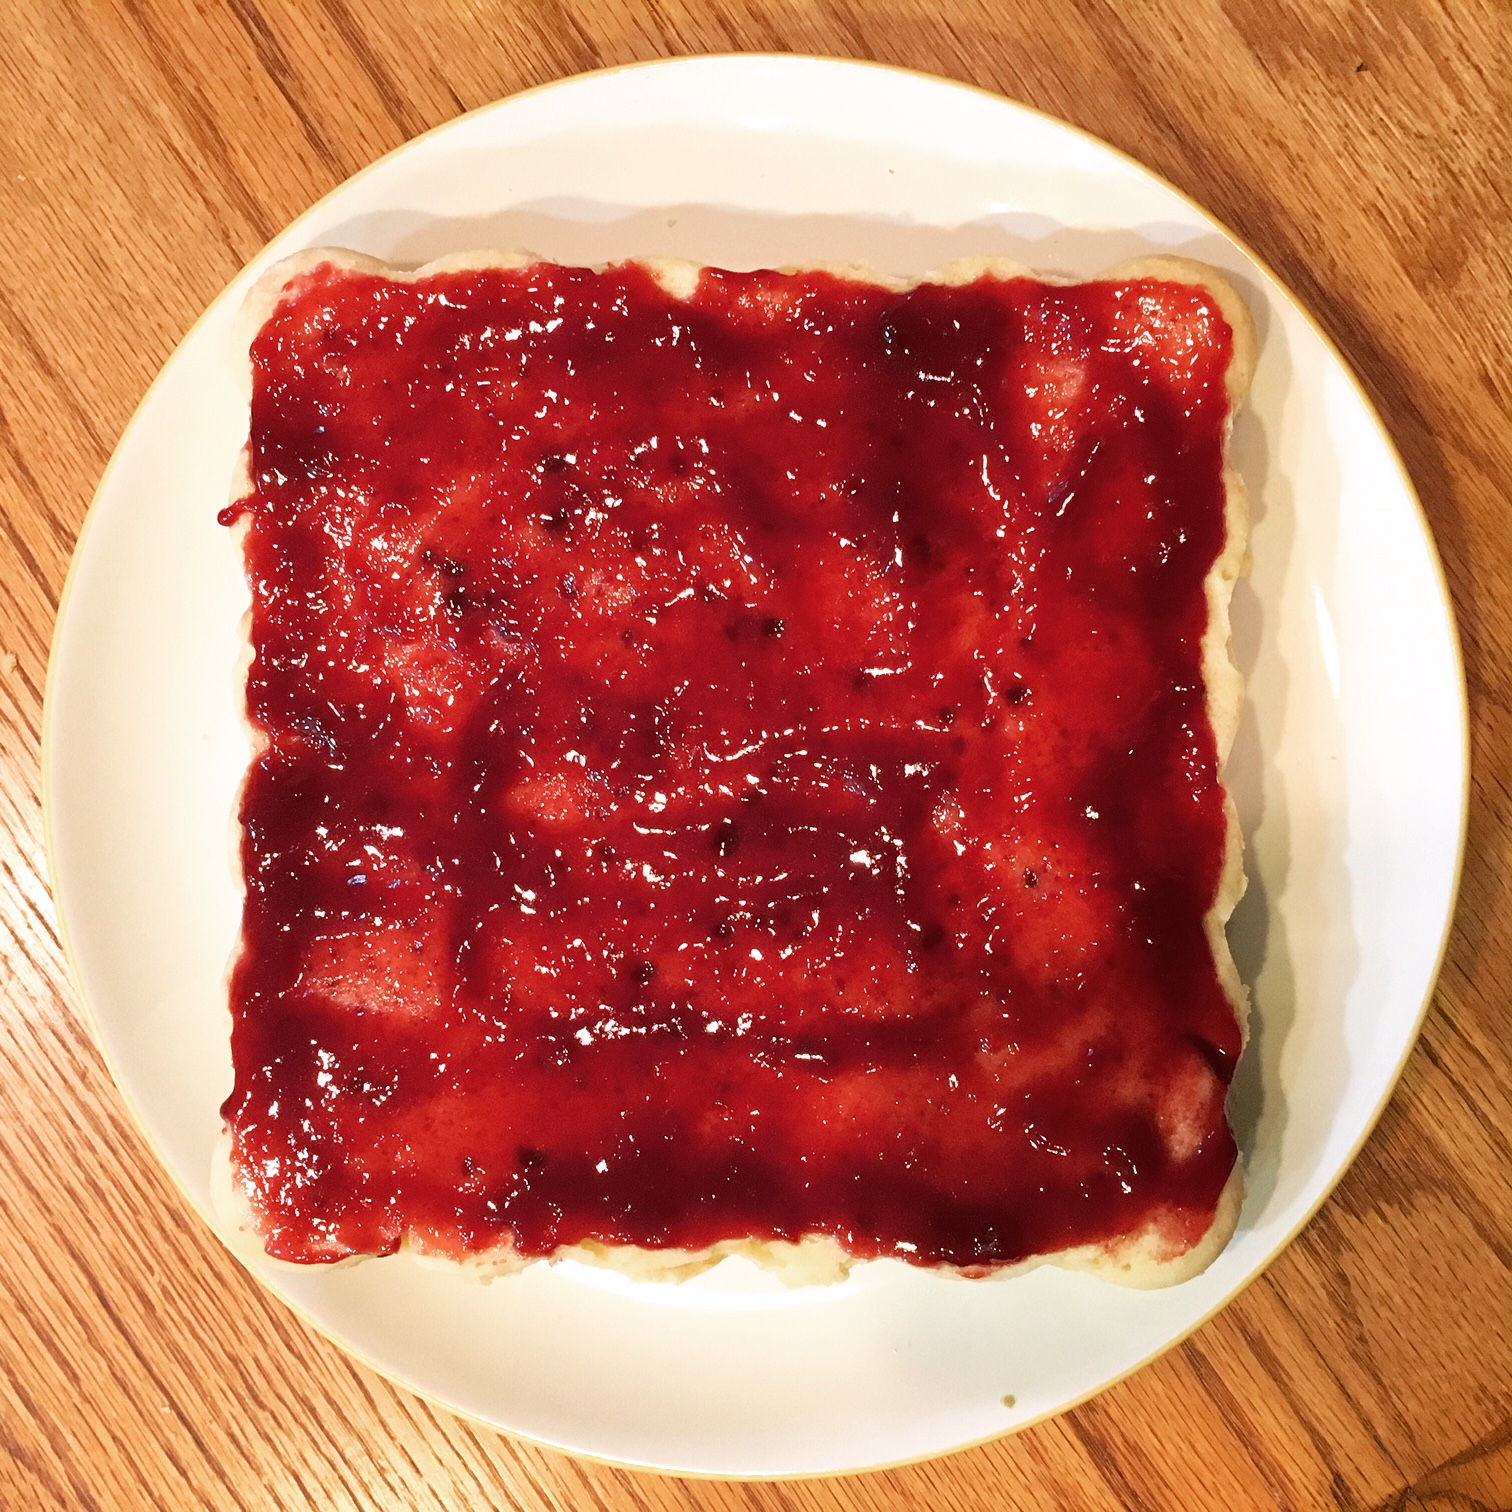
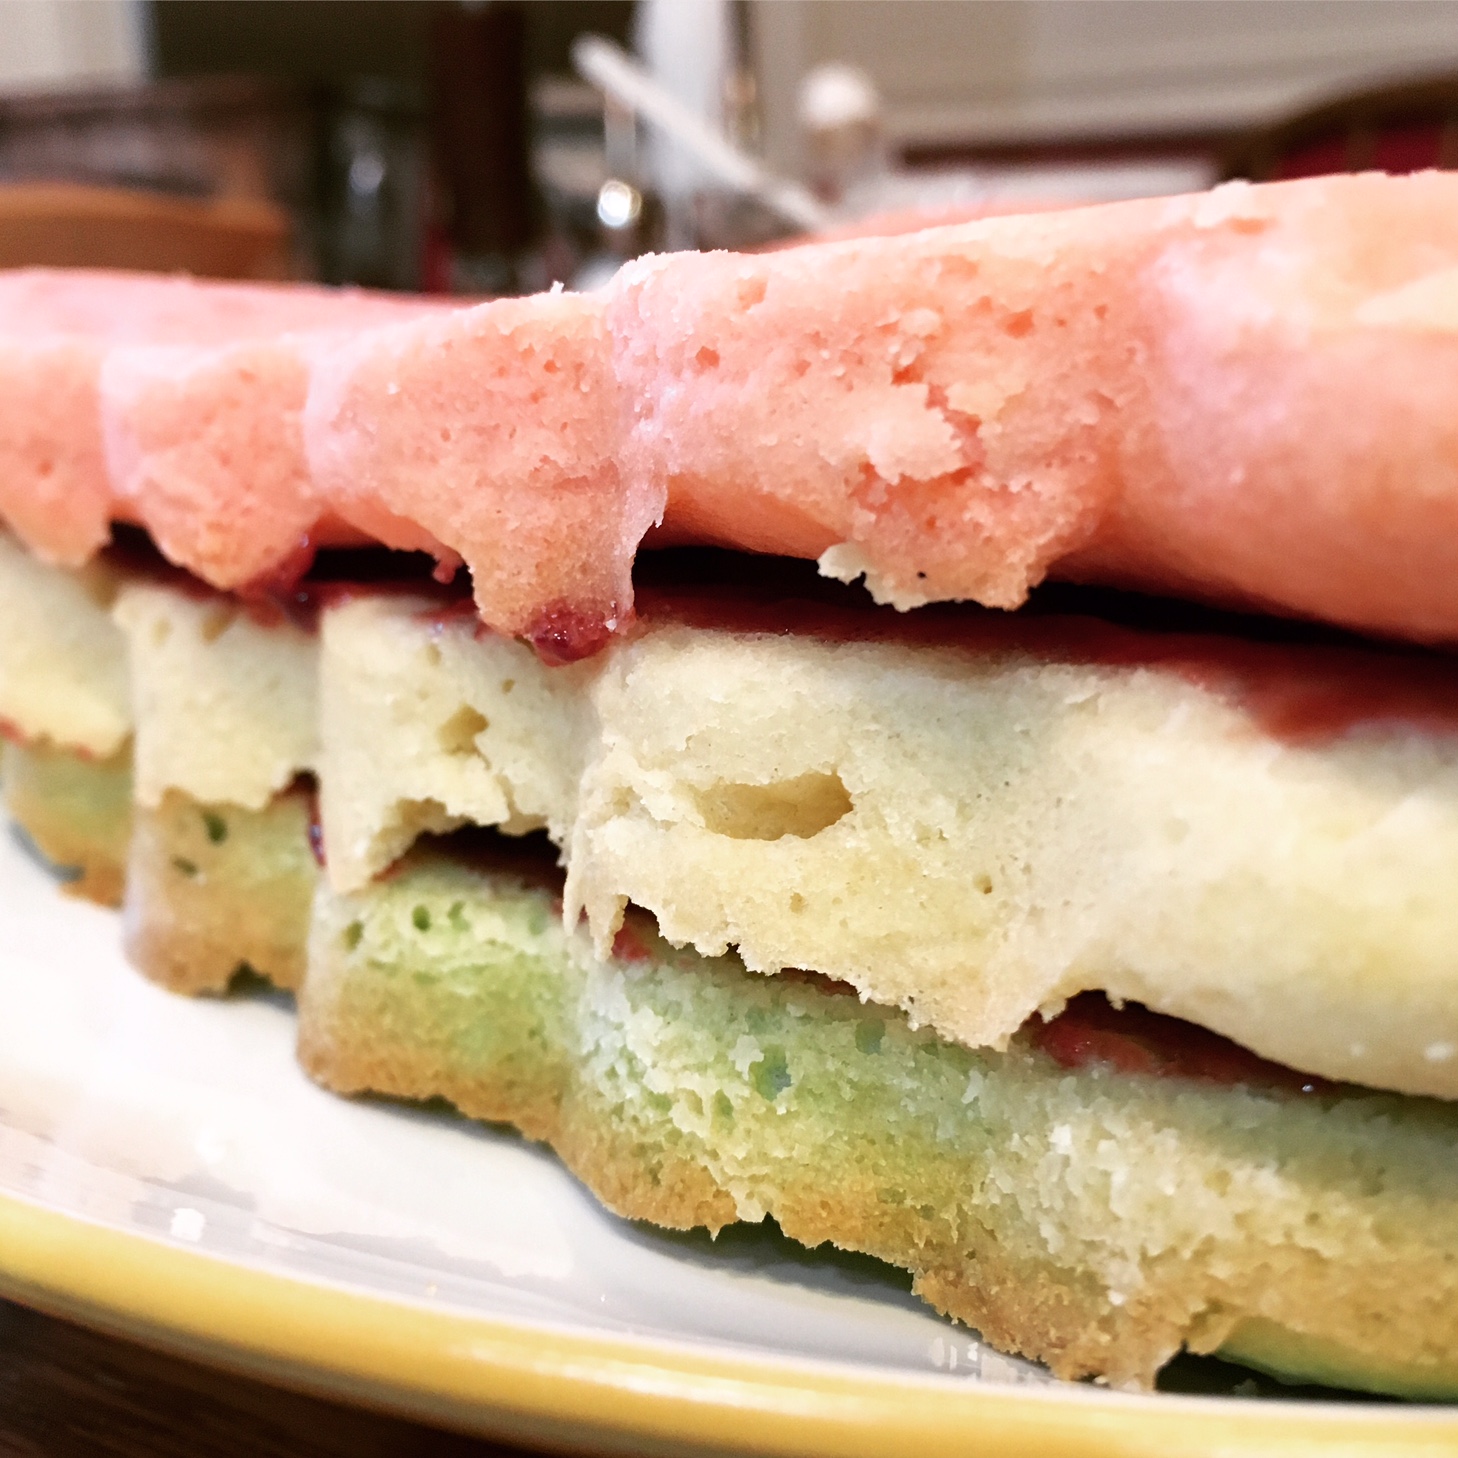
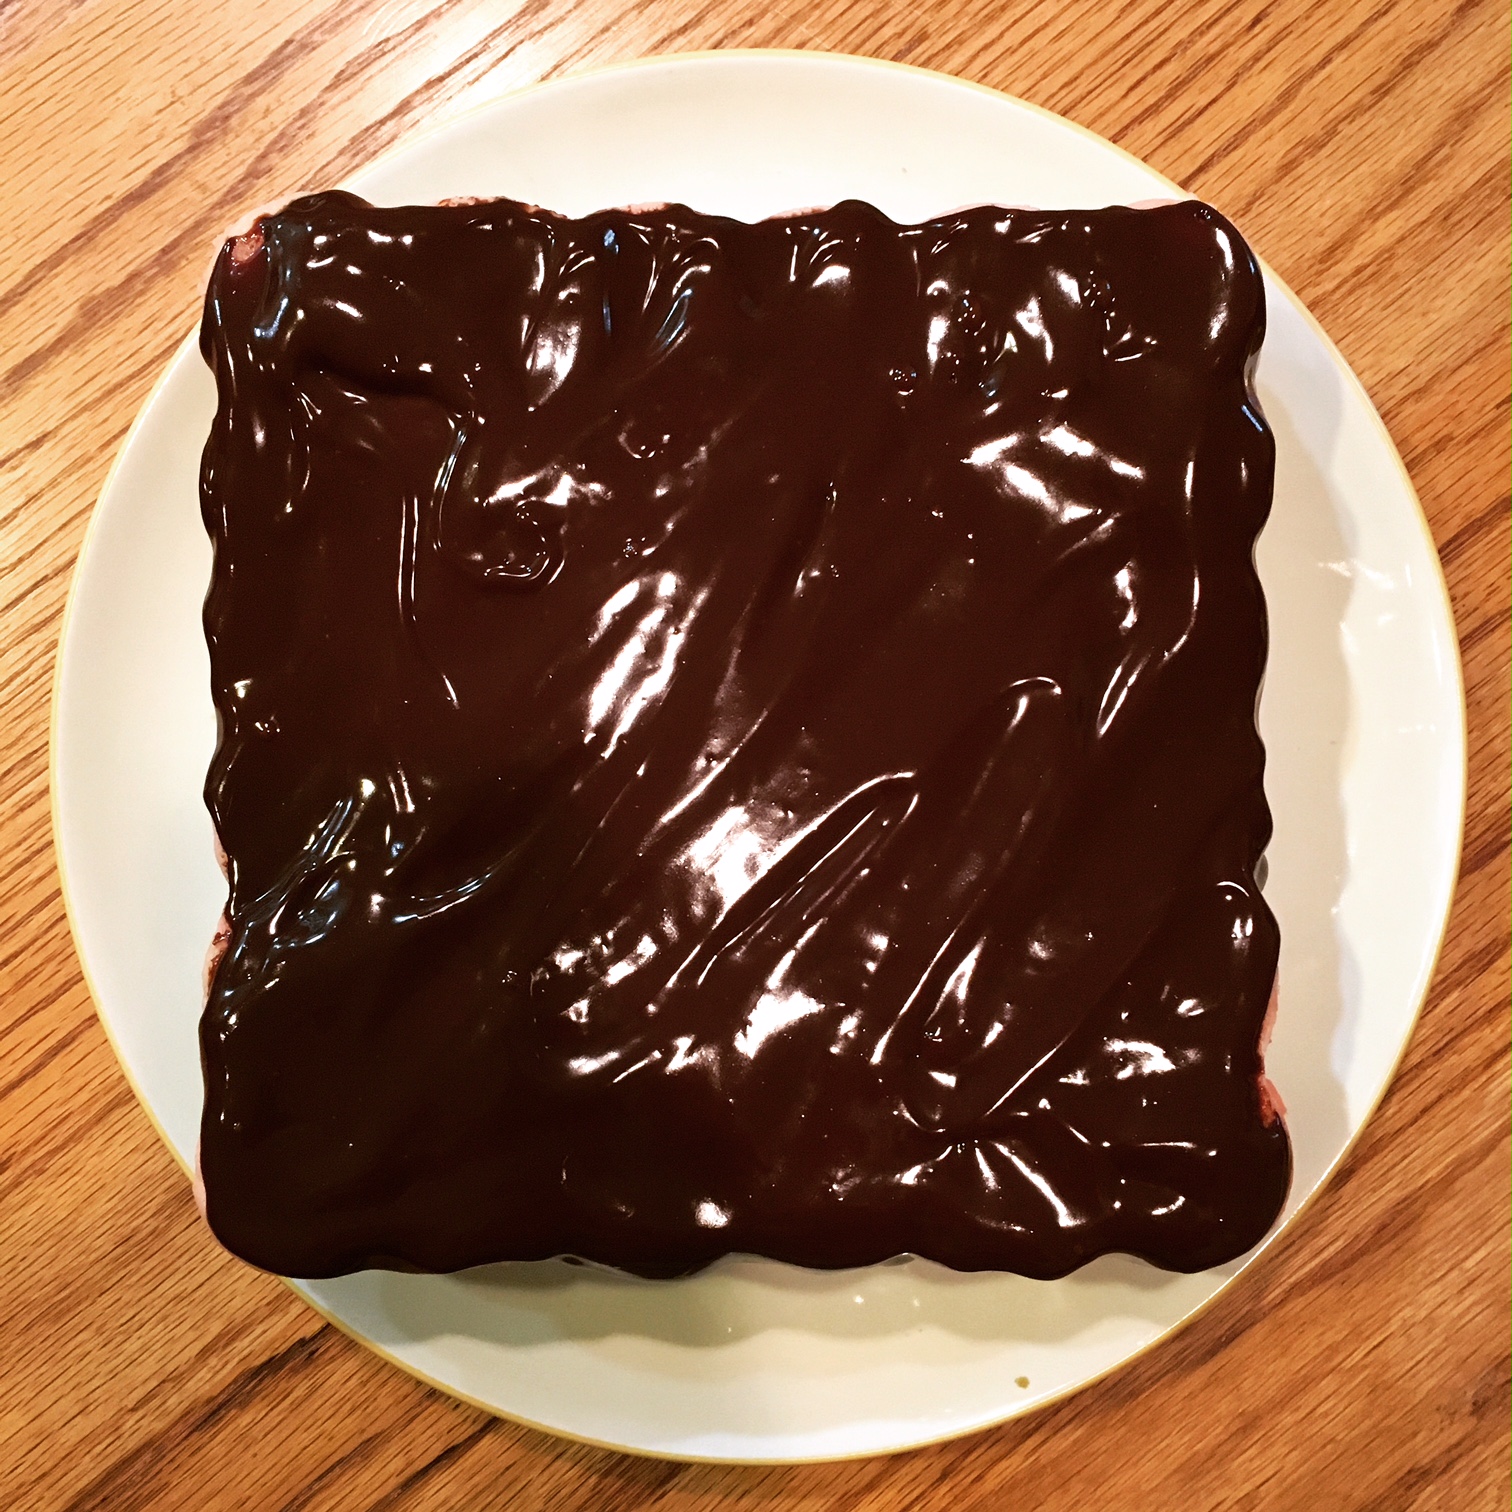
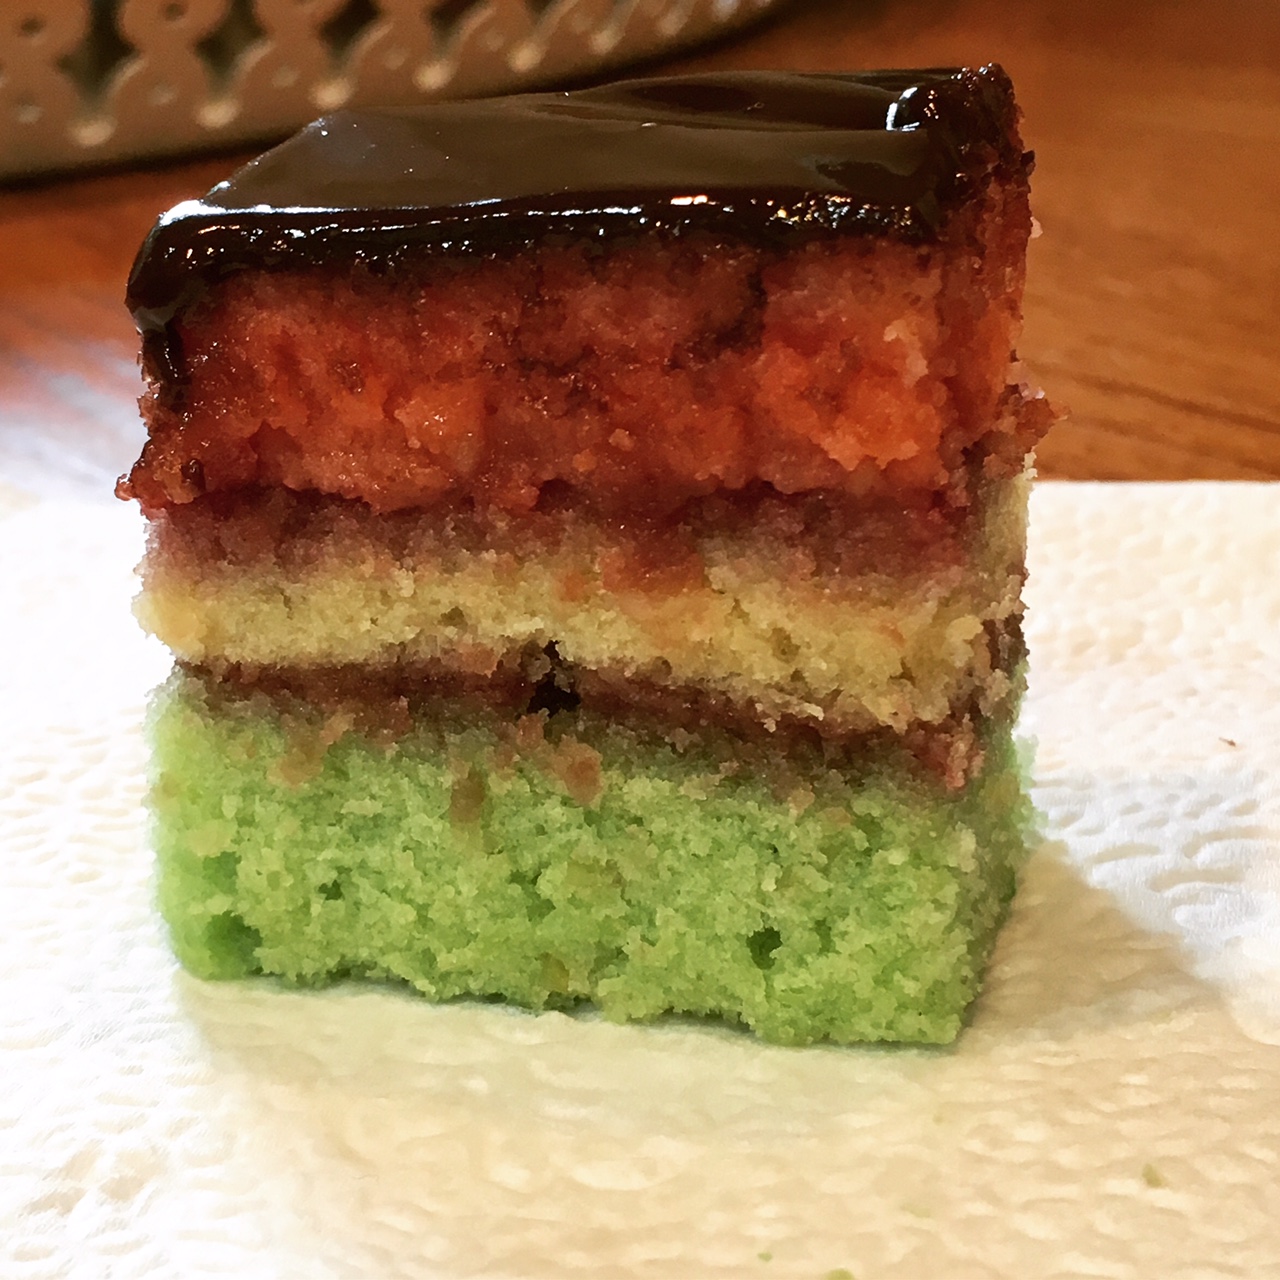
As with Sally and Gillian’s story, Franny and Jet’s includes a beloved aunt as well. In the summer of Franny’s seventeenth year, family tradition takes all three siblings to the Massachusetts home of their Aunt Isabelle, where they eat cake for breakfast and stay up as late as they like. It is also there that they learn how to unlock their powers and about their family’s past. Isabelle’s tipsy chocolate cake, which she bakes with copious amounts of rum, makes an impression as well - for the sisters continue to make it even when they move back home to New York City. (Sometimes leaving out the rum, when children are invited.)

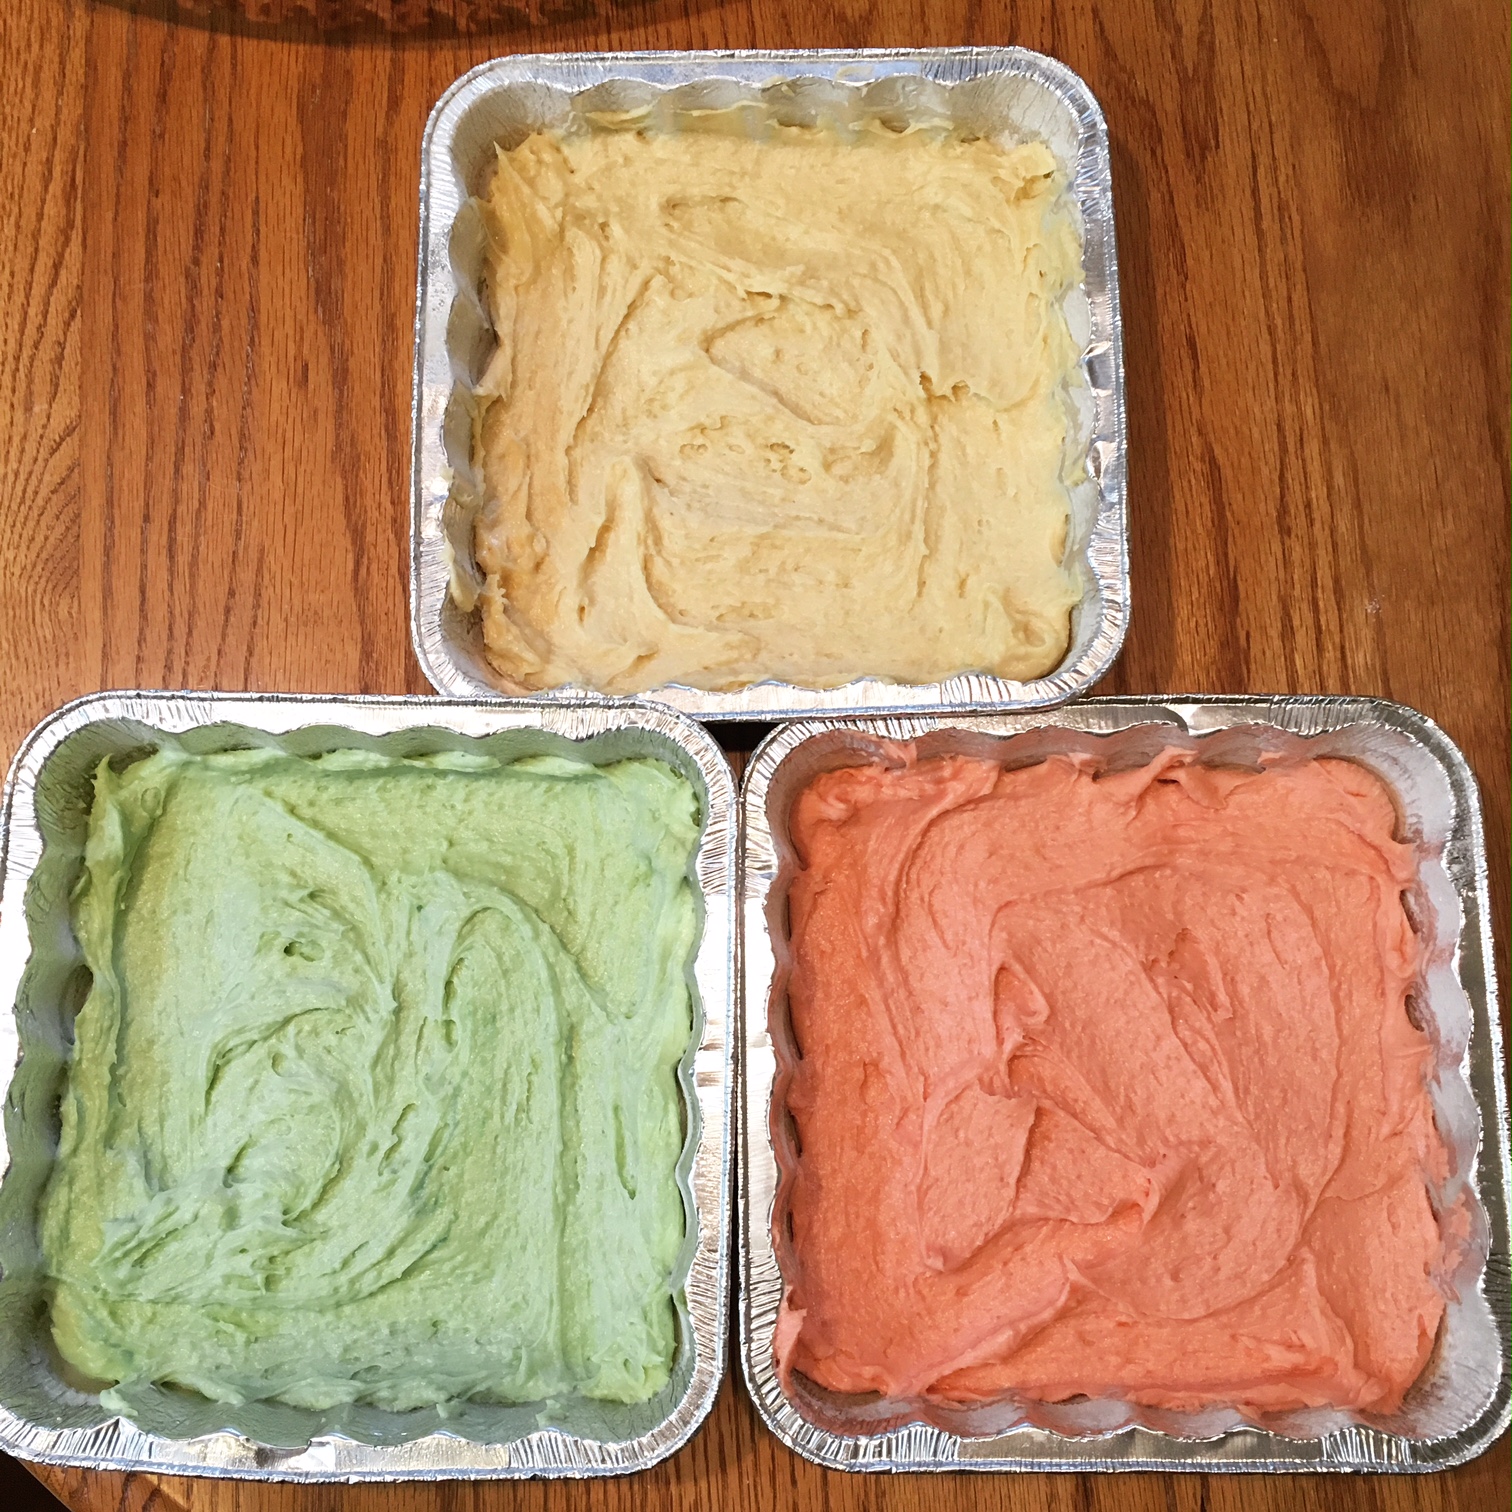
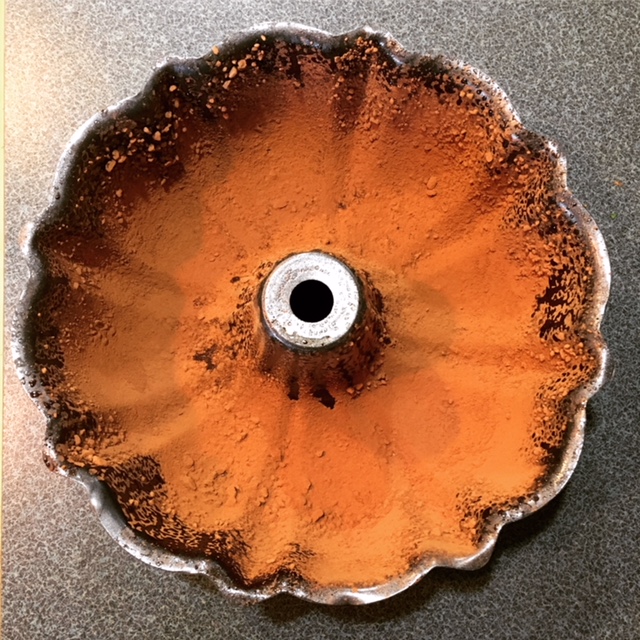
I found a recipe from The Crumby Kitchen for a chocolate bundt cake filled with rum, both baked in and covered in a rum-soaked glaze. It looked easy enough, and most of all, it sounded delicious. To start, I sprayed my bundt pan with cooking spray and dusted it with cocoa powder.

Then, I preheated my oven to 325 degrees F and combined the dry ingredients in a bowl - sifted flour, baking soda, baking powder and salt. In a large saucepan over medium heat, I mixed the butter, buttermilk, hot chocolate, rum, cocoa powder, and cinnamon, nutmeg and ground cloves. I stirred it together, and once the butter melted, I whisked in the brown and granulated sugars until they dissolved. I removed the pan from the heat and allowed it to cool for at least 5 minutes before transferring the mixture to a large bowl.

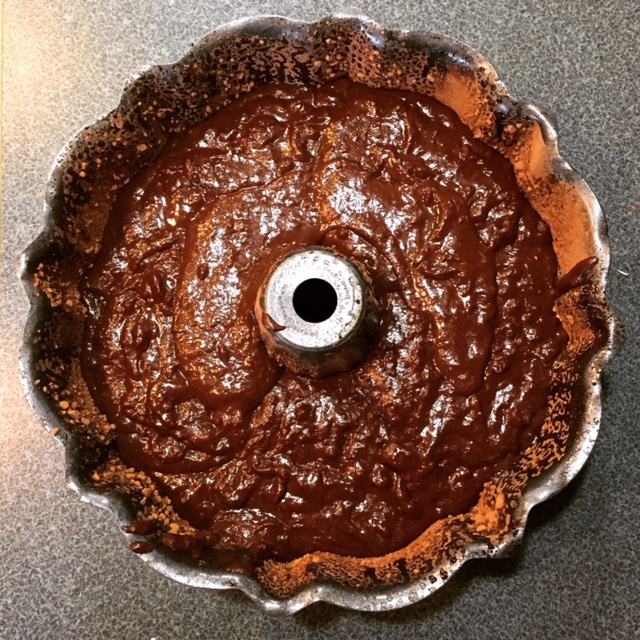
In a small bowl, I whisked together the eggs and vanilla. I added it to the cooled chocolate rum mixture in the larger bowl, stirring until combined. I added the dry ingredients to the large bowl of wet ingredients and stirred it until it was just combined. The batter was slightly lumpy as described. I poured it into the bundt pan.

The cake baked for about an hour. (Check after 50 minutes.) I let it cool while I started to make the glaze, for at least 20 minutes.

In a small saucepan, I dissolved brown sugar into heavy cream over medium-low heat before adding the rum. I let it come up to a simmer until the liquid reduced and the glaze thickened. The last step in the glaze was to add two tablespoons of butter, stirring until it melted.

Using a skewer, I poked a bunch of holes into the bottom and spooned the glaze over the cake. I let it sit for about 10 minutes so it would soak in, and I repeated this process twice more.

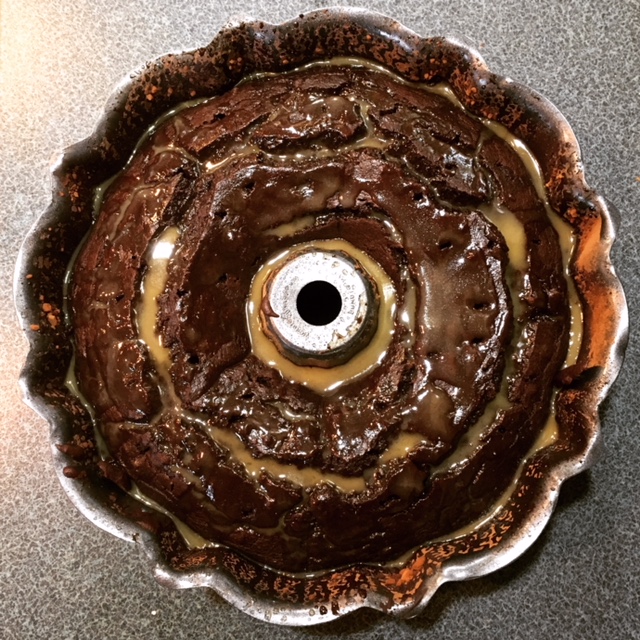
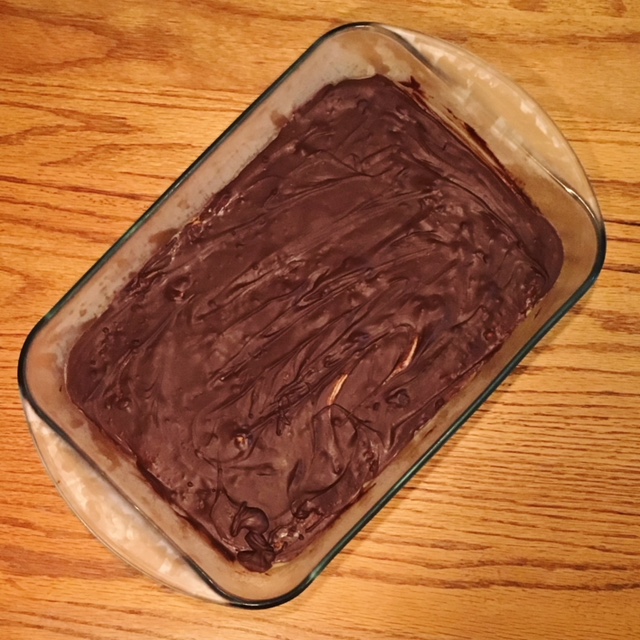
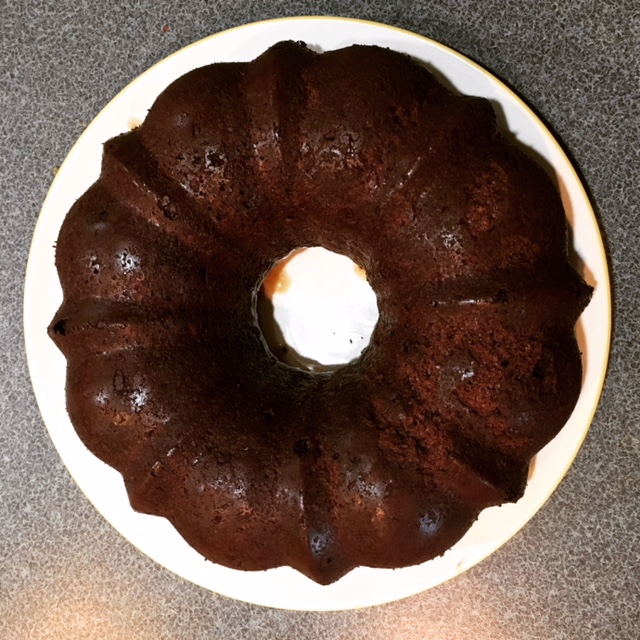
Finally, once the cake was cooled, I turned it out onto a plate. I covered the top of the bundt cake with the rest of the glaze.

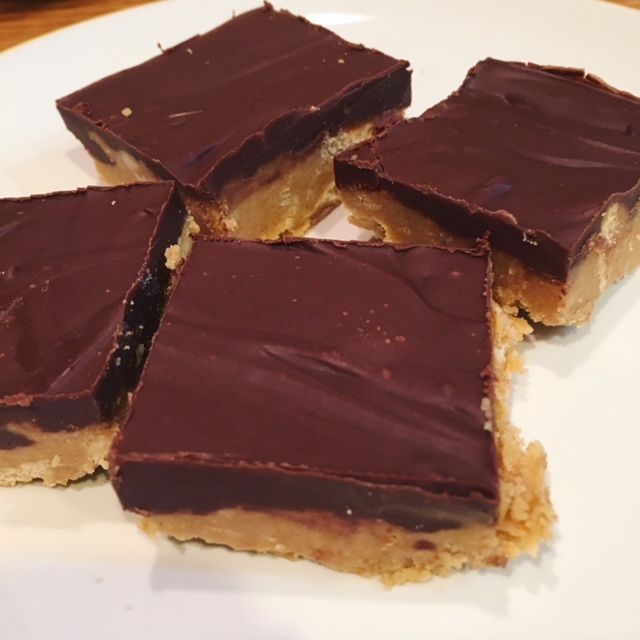
Even Julia Child got in on the action - I brought it to work so the whole office could enjoy the tipsy chocolate cake for our Halloween festivities. Both the cake and the costume were a hit.

I hope you all have a safe and happy Halloween!

Print Recipe

Tipsy Chocolate Cake

Prep Time30 minutes mins
Cook Time1 hour hr
Cooling Time30 minutes mins
Total Time1 hour hr 30 minutes mins
Course: Dessert

Ingredients

For the Cake:

  • 3 cups all-purpose flour sifted
  • 1 teaspoon baking powder
  • 1 teaspoon baking soda
  • ½ teaspoon salt
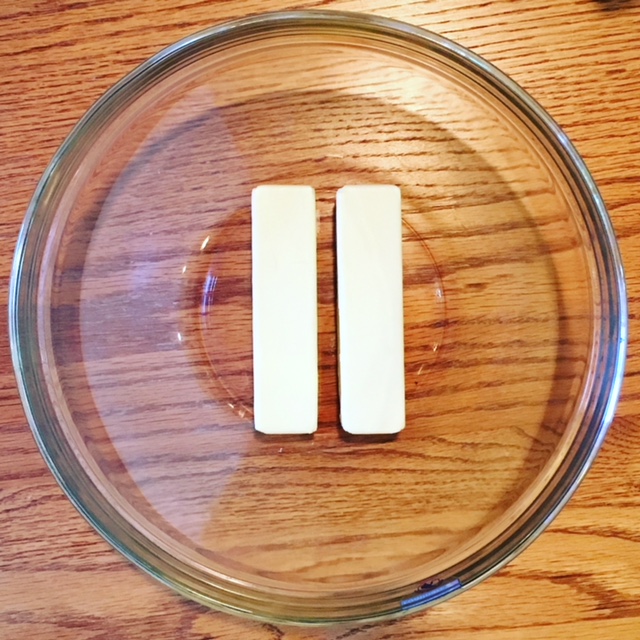
  • 3 sticks unsalted butter
  • 1½ cups buttermilk
  • 1 cup hot chocolate
  • ½ cup dark rum
  • 1½ cups plus 3 Tablespoons cocoa powder divided
  • 1 teaspoon cinnamon
  • ½ teaspoon nutmeg
  • ¼ teaspoon ground cloves
  • 1¾ cups brown sugar
  • ½ cup granulated sugar
  • 3 eggs room temperature
  • 2 teaspoons vanilla extract

For the Rum Glaze:

  • ½ cup brown sugar
  • ½ cup heavy cream
  • ½ cup rum
  • 2 Tablespoons butter

Special Tools:

  • 15- cup Bundt Pan

Instructions

To make the cake:

  • Preheat oven to 325 degrees F. Spray a 15-cup bundt pan with baking spray, then dust with 3 Tablespoons cocoa powder; set aside.
  • Whisk flour, baking soda, baking powder and salt together in a medium bowl; set aside.
  • In a large saucepan set over medium heat, combine butter, buttermilk, hot chocolate, rum, cocoa powder, and spices. Heat until butter melts and all ingredients come together, then whisk in sugars, stirring until dissolved. Cool mixture for 5 minutes, then transfer to a large mixing bowl.
  • In a small bowl, whisk together eggs and vanilla extract, and add to cooled chocolate rum mixture, stirring until combined.
  • Add flour mixture and stir until just combined - batter will be rather thin but slightly lumpy/bubbly.
  • Pour batter into prepared bundt pan. Bake for 50-60 minutes, or until a skewer inserted to the bottom comes out clean. Remove from oven and allow to cool for 20-30 minutes while you prepare the glaze.

To make the glaze:

  • In a small saucepan, dissolve brown sugar into cream over medium-low heat. When combined, add rum and set heat to low. Allow to simmer until liquid is reduced and thickens. Add butter and stir to melt, then remove from heat.
  • Using a skewer, poke multiple holes across the bottom of the cake. Spoon or brush buttered rum glaze on the cake, and allow to soak 5-10 minutes, then repeat with more glaze two more times. Let cake soak & cool 20-30 minutes.
  • When cake is cooled, turn it out onto a cake plate. Brush top and sides of cake with remaining glaze, making multiple passes over it until it's all used up.
  • Top with whipped cream or ice cream if desired before serving. Enjoy!

Notes

Adapted from: The Crumby Kitchen

_______________

This post contains affiliate links. This does not increase the price you pay, but I may receive a small commission for any products you choose to buy. Purchases made through affiliate links help to cover my blogging costs. Thank you for helping to support The Hungry Bookworm! Full disclosure here.

Filed Under: book review, recipe Tagged With: alcohol, baking, dessert, fiction

Behind Her Eyes + Spaghetti Carbonara

October 28, 2017 by Megan 4 Comments

Every November, my Good Reads & Good Eats book club reads a spooky book. Since we meet on the first Tuesday of each month, this allows us to read it during October and our meeting usually ends up being right around Halloween. This year’s selection was Sarah Pinborough’s novel Behind Her Eyes. The thriller was released in January but it made for an excellent read this month, just creepy enough throughout with a twist at the end I didn’t see coming.

Thanks to the success of Gone Girl, the oft-called domestic thriller has become more and more popular, and generally, I try to avoid them. Gone Girl was so well-written and its twist both genuinely surprising and believable (which is harder to achieve than it may seem) that I’m usually disappointed in those that follow.

That being said, Behind Her Eyes was an intriguing read. I did get caught up in the story and it kept me wondering what exactly was going on and who to be skeptical of, but the devices it used (particularly toward the end) seemed over-the-top and unbelievable. Overall, Sarah Dickinson does a great job summing up how I feel on her blog, but beware of spoilers if you haven’t read the book and still want to.

Pinborough’s novel begins in the middle of David and Adele’s troubled marriage. After a recent move to London, David almost immediately begins an affair with Louise, who turns out to be his new receptionist. It’s not clear how Adele discovers his transgression, but she makes it a point to befriend Louise and tension begins to build. As more about Adele’s backstory is revealed, more questions arise. In the present day narrative, we’re left wondering who we can trust. I’ll stop here to avoid spoilers, but I think it achieved what it needed to for our book club in that it was mostly riveting and twisty and will certainly make for interesting discussion. I’m looking forward to hearing what everyone has to say about it.

In an attempt to create some domestic bliss (or at least throw David off her scent), Adele continues to make impressive home-cooked meals almost every evening. On one such evening, she whips up the deceptively easy Spaghetti Carbonara and serves it with a simple arugula salad. I grabbed a recipe from one of my favorite blogs, Damn Delicious, for the pasta and found one for the salad from Everyday Maven. The whole meal took about twenty minutes and only requires a minimum number of ingredients for one so impressive; it makes a perfect weeknight meal.

First, I set a large pot of water to bowl and then prepped the salad. I chopped a half cup of cherry tomatoes in half and tossed them in a large bowl with arugula and the lemon zest. I love Trader Joe’s arugula because it’s the perfect amount for a dinner salad and it’s already pre-washed. In a separate small bowl, I combined the ingredients for the dressing - olive oil, balsamic vinegar, and salt and pepper. With the salad mostly set, I turned to the pasta.

Once the water was boiling, I salted it and added the spaghetti to the pot. In a small bowl, I whisked together the eggs and Parmesan and set it aside. I added my diced pancetta (or bacon, if that’s what you’re using) to a heated skillet and allowed it to crisp up for several minutes, before adding my minced garlic.

You’re going to want to make sure your pasta is cooked and drained before you add the garlic. Here is where you need to begin working quickly. Even though this recipe is easy, the eggs leave some room for error. You don't want them to scramble; they should become a part of the creamy sauce, indistinguishable from the pasta itself. 

To my pancetta and garlic, I added my pasta and the egg-Parmesan mixture, using a pair of tongs to toss and combine everything. I seasoned with salt and pepper, before adding a bit of pasta water, tossing and checking the consistency.

With that all set, I re-whisked my dressing, poured it on the arugula and tossed my salad. Best dishes are both served immediately.

Spaghetti Carbonara

  • Servings: 4
  • Time: 20 minutes
  • Print

Ingredients

  • 8 ounces spaghetti
  • 2 large eggs
  • ½ cup freshly grated Parmesan
  • 4 slices bacon, diced [or diced pancetta, about 4 ounces]
  • 4 cloves garlic, minced
  • Kosher salt and freshly ground black pepper, to taste
  • 2 tablespoons chopped fresh parsley leaves (optional)

Directions

  1. In a large pot of boiling salted water, cook pasta according to package instructions; reserve 1/2 cup water and drain well.
  2. In a small bowl, whisk together eggs and Parmesan; set aside.
  3. Heat a large skillet over medium high heat. Add bacon and cook until brown and crispy, about 6-8 minutes; reserve excess fat.
  4. Stir in garlic until fragrant, about 1 minute. Reduce heat to low.
  5. Working quickly, stir in pasta and egg mixture, and gently toss to combine; season with salt and pepper, to taste. Add reserved pasta water, one tablespoon at a time, until desired consistency is reached.
  6. Serve immediately, garnished with parsley, if desired.


From: Damn Delicious

Arugula Salad with Lemon Balsamic Dressing

  • Servings: 4
  • Time: 5 minutes
  • Print

Ingredients

  • ½ pound arugula
  • ½ cup grape or cherry tomatoes, washed and halved
  • zest of a whole medium lemon
  • ¼ cup extra virgin olive oil
  • 2 Tablespoons balsamic vinegar
  • ¼ teaspoon kosher salt
  • 5 to 6 turns freshly ground black pepper

Directions

  1. In a large salad or mixing bowl, combine arugula, halved grape tomatoes and the zest of an entire medium lemon.
  2. In a separate bowl, whisk olive oil, balsamic vinegar, salt and pepper together until well mixed.
  3. When ready to serve, pour dressing over salad, toss until well coated. Serve and Enjoy!

From: Everyday Maven

Filed Under: book review, recipe Tagged With: book club, dinner, easy prep, fiction, five ingredients or less, pasta, salad, thriller, veggies

Kitchens of the Great Midwest + Peanut Butter Bars

October 21, 2017 by Megan 2 Comments

Based on the title alone, Kitchens of the Great Midwest seemed like a book I, lover of food, resident of the Midwest, would thoroughly enjoy. The Goodreads description also seemed promising: “When Lars Thorvald's wife, Cynthia, falls in love with wine--and a dashing sommelier--he's left to raise their baby, Eva, on his own. He's determined to pass on his love of food to his daughter--starting with puréed pork shoulder. As Eva grows, she finds her solace and salvation in the flavors of her native Minnesota...Each chapter in J. Ryan Stradal's startlingly original debut tells the story of a single dish and character, at once capturing the zeitgeist of the Midwest, the rise of foodie culture, and delving into the ways food creates community and a sense of identity. By turns quirky, hilarious, and vividly sensory, Kitchens of the Great Midwest is an unexpected mother-daughter story about the bittersweet nature of life--its missed opportunities and its joyful surprises.” I tracked it down, dug right in and...

If you don’t already know where I’m going with this, I’m sorry to say, I didn’t thoroughly enjoy it, or really like it all. I think it’s one thing if a story doesn’t live up to the hype - in this case, I’d heard good things and it had almost a 4.0 on Goodreads - but it’s another thing entirely if the blurb is completely mismatched with the story that’s actually told.

Spoiler Alert! (Click for more.)
Each chapter did delve into the story of a single dish and character, as promised, but unfortunately, the way it was done felt very disjointed. Eva, as much as I wanted to like her, was hard to rally behind. Her success felt inauthentic, and her presence as she flitted in and out of chapters felt forced. I also found myself wishing for more recipes, or perhaps, recipes that were a bit more central to the story.

In the end, one of the chapters I enjoyed the most was the one featuring Pat Prager, a very Midwestern mom who enjoys cooking for a crowd and does so from the heart. I also thought this chapter provided a stark contrast between the world Eva now cooked in and the world of everyday Midwestern food. In Kitchens, Pat is locally famous for her wonderful, award-winning peanut butter bars that sounded amazing even on the page. I knew I had to make them too.

Though they were very central to the story, no recipe was included, so I found a 5-ingredient recipe from Chef Savvy that was no fuss and no bake - perfect for the warm weather we’re somehow still having in October. True to Pat’s tendencies, I also made them for a crowd; I brought them to work for a coworkers birthday. (And, yes, they were a hit!)

I started by melting the 2 sticks of butter the recipe requires in a large bowl.

While that melted in the microwave, I got some aggression out by crumbling up 2 cups worth of graham crackers (this was about 12 crackers, or half a box). You can do this however you prefer - a food processor will provide the most consistently-sized and likely finest chunks - but I opted to toss them in a plastic Ziploc bag and crush them with my hands. (You could also use a rolling pin.) My chunks weren’t consistent, but I liked the way it added texture to the finished product.

To the same bowl where I’d melted the butter, I added the crushed graham crackers, a cup of peanut butter and 1½ cups of powdered sugar.

I combined them all well with a large spatula and spread the mixture into my prepared 9x13 pin. Then, in a smaller bowl, I added the other half cup of peanut butter and 1½ cups of semi-sweet chocolate chips. These too went in the microwave to melt.

Once the chocolate was melted and combined with the peanut butter, I poured that mixture over the peanut butter mixture already spread in the pan. I smoothed it with a spatula and set it in the fridge to set.

After a few hours, I took the peanut butter bars out of the fridge to taste-test before bringing them to work the next day. (You can’t bring a birthday dessert to work without first knowing that it’s worth bringing.) This was a bit hard to slice right out of the fridge - you’ll want to use a sharp knife, and make sure you have a good grip on the pan.

As I said before, these were an absolute hit at work, and luckily they were easy enough that I could bring them again! Keep this recipe in your back pocket - it’s great for family get-togethers, potlucks or book clubs.

Peanut Butter Chocolate Bars

  • Servings: 12-18
  • Time: 20 minutes
  • Print

Ingredients

  • 2 sticks butter (1 cup), melted
  • 1½ cups powdered sugar
  • 1 cup creamy peanut butter
  • 2 cups graham crackers, crushed
  • ½ cup creamy peanut butter
  • 1½ cups semi-sweet chocolate chips

Directions

  1. Spray a 9 x 13 pan with cooking spray. Set aside.
  2. Add butter, powdered sugar, 1 cup of peanut butter and crushed graham crackers in a large bowl. Mix to combine and layer into the prepared pan.
  3. Put the ½ cup of peanut butter and chocolate chips into a small bowl. Microwave in 15 second intervals until fully melted, stirring to combine as you go.
  4. Pour the chocolate peanut butter mixture on top of the layer in the pan and smooth with a rubber spatula.
  5. Place in the refrigerator to firm up for an hour.
  6. When ready to serve, cut into squares and enjoy!

From: Chef Savvy

Filed Under: book review, recipe Tagged With: dessert, fiction, five ingredients or less

Practical Magic + Apple Tart with Black Pepper

October 14, 2017 by Megan 5 Comments

Maybe I watched Practical Magic a little on the young side (it came out when I was 12), but ever since then I’ve loved it. Even though it’s not exactly a traditional Halloween movie, I make it a point to watch every fall season. Next week, in fact, I have a movie date with Deanna to watch it together because she’s never seen it and she needs to. This post isn’t about the movie, though, it’s about the book, which I didn’t even realize was a thing until I heard about the prequel The Rules of Magic coming out a couple of months ago.

Excited about the prequel, I hunted down Alice Hoffman’s book Practical Magic, sure I would love it as much as I did the movie. I definitely enjoyed it, but it’s different than I was expecting. The movie’s plot is so ingrained in me at this point, that it didn’t occur to me that the book wouldn’t follow it as well. Obviously, movies change book plots all the time, often to the disappointment of the reader - it’s just that usually I don’t watch the movie (over and over and over) before reading the book. So I was a bit blind-sided, and the irony is not lost on me.  

All that being said, the book is worth picking up. (This NPR review of the prequel describes the differences in Practical Magic book vs. movie wonderfully, the journalist in a similar situation to me.) Hoffman’s writing style is lovely. She crafts a beautiful story of sisterhood and magic that’s perfect for cozy fall reading. I haven’t read anything else she’s written, but I’m looking forward to trying some of her other novels - I’ve heard good things. And, of course, I'm still excited to read The Rules of Magic too. 

Have any of you read or seen Practical Magic? I’d be interested to hear from those of you who read the book before the movie which you prefer. Any other Hoffman novels you’d recommend?  

At one point in the novel, one of the sisters, Sally, makes an apple tart with her secret ingredient, black pepper. And though it’s midsummer in the story, this recipe seemed perfect to make at this time of year. Local apple orchards are bursting at the seams, and I was itching to make an apple dessert anyway. Black pepper as an addition intrigued me. I found a recipe online that included it in an apple galette and used it as a basis for my own version, mostly so I would be able to better estimate how much black pepper to include.

To keep it simple, I used store bought pie crust. Feel free to make your own, if you’re so inclined. First, I prepped my apples, which Scott and I had picked up at a local cider mill the weekend before. I used Gala because I like those and we had also bought them for snacking, but any baking apple would work just as well.

I don’t have an apple peeler contraption and my vegetable peeler wasn’t getting the job done, so I opted to make my tart a bit more “rustic” and left the apples unpeeled. I sliced them pretty thinly and tossed them with lemon juice, some sugar and a bit of freshly ground black pepper (more on the coarse side).

I laid the pie crust on a parchment lined baking sheet, piled the apples on the middle of it, and folded the crust over around the edges. To help it become a more rich golden brown, I brushed the crust with an egg wash before baking.

I covered the tart loosely with a tented piece of aluminum foil and put the tart in a 375-degree oven to bake for about an hour. I set my timer for 45 minutes and checked it every 20 minutes or so. Once it seemed close to being done, I removed the foil and allowed it to bake for another 10 or 15 minutes without, so the crust would get some good color.

It smelled amazing, but I patiently allowed it to cool completely before serving. I cut into 6 slices (though it could certainly be cut into smaller or larger pieces, depending on the size of your family/party). We enjoyed it without any additions, but it would absolutely be delicious with a scoop of vanilla or cinnamon ice cream while it’s still a bit warm from the oven.

What’s your favorite apple recipe in the fall?

Apple Tart with Black Pepper

  • Servings: 6
  • Time: 1½ hours
  • Print

Ingredients

  • 1 pie crust (use your own recipe, or use refrigerated store bought)
  • 3 - 4 medium apples, cored and sliced (¼” - ½” thick)
  • 2 TBS granulated sugar
  • ½ tsp freshly ground black pepper
  • 1 TBS lemon juice
  • 1 egg, mixed with a little bit of water

Directions

  1. Preheat the oven to 375 degrees F.
  2. Prepare the apples and toss them with the sugar, black pepper, and lemon juice.
  3. Place dough on parchment paper or a silicone mat on a baking sheet. Arrange the apples in the center of the dough, leaving about an inch border. Fold the extra dough over the sides of the tart.
  4. Brush the crust lightly with an egg wash.
  5. Cover the tart loosely with aluminum foil and bake for about 45 minutes to an hour. After when there are about 15 minutes left (apples should be soft, dough should be mostly cooked), remove the foil to allow the dough to become golden.
  6. Let cool completely before serving. Best served at room temperature. Enjoy!

Adapted from: Earth Powered Family

Notes: It’s not much more work to make 2 tarts at a time, especially if you’re using store bought crust. Plan to use 6 medium apples and double the sugar, pepper and lemon juice. Divide apples evenly between both crusts. Baking time shouldn’t change.

You can peel your apples if desired, but with thin slices, it doesn’t affect the texture much to leave them on. Plus, it makes it much quicker!


This post contains affiliate links. Full disclosure here.

Filed Under: book review, recipe Tagged With: 5 ingredients or less, baking, contemporary, dessert, easy prep, fiction, fruit

How to Find Love in a Bookshop + Gingerbread Books

September 30, 2017 by Megan Leave a Comment

I think fall may be officially here (weather-wise), and I’m pretty excited about it. Fall is the best time of year for baking and soups and comfy sweaters and cozy books. Bring it on! Veronica Henry’s How to Find Love in a Bookshop is one such cozy book, and as chance would have it, an excellent conduit for baking as well.

From the description, Nightingale Books is an idyllic bookshop - one I definitely wouldn’t mind spending a few hours in! Set up in the Cotswolds by Julius Nightingale and now passed on to his daughter Emilia, it’s a charming little store, one that is everything to the townspeople. As the story unfolds, we discover more about Julius, Emilia, the employees of the bookstore, the local chef, the lady of the manor, and so many more.

It really is as if we’re welcomed into the town alongside them. In its entirety, it reminded me a bit of Stars Hollow crossed with Love Actually. The end wraps up quite neatly but that didn’t bother me at all. Quite the opposite, I may have been disappointed if this wonderful story didn’t leave me feeling as cozy at the end as it had throughout.  

A heartwarming novel like this one definitely deserves something welcoming to accompany it, and though the story features a magnificent chef who makes mouthwatering food throughout, the recipe that stuck out to me most was the gingerbread (cookie) books she created near the end. It just felt so perfect to create cookie books to go along with a novel about a bookshop.

I’m not the best decorator, so the descriptions of the beautiful, intricately detailed cookies made me a bit nervous, but I decided to push along anyway. I found a recipe for soft gingerbread cookies from Bless This Mess, ordered a couple of adorable book-shaped cookie cutters - an open book and a stack of books - and got to work.

To start, I put my softened butter in a large bowl and creamed it, adding the sugar gradually. Then, I added an egg, the molasses and white vinegar, beating until well-blended.

I used a mesh colander to sift the dry ingredients into the wet ingredients. Because the one I have only holds about 1 cup, first I did 2 cups of flour, followed by all of the spices, salt and baking powder, and then the remainder of the flour.

Once the cookie dough was well-blended, I wrapped it in plastic wrap and allowed it to chill in the fridge for about 45 minutes. (Note: I ended up needing an additional cup of flour because my dough was too sticky to properly roll and cut out. I realized this after refrigeration and several attempts to roll it and cut it. I then added the additional cup of flour, allowed it to chill again.)

Since I prefer my gingerbread cookies soft, I followed the suggestion from the original recipe and kept the dough approximately ¼” thick when I rolled it out. Using my adorable book-shaped cookie cutters, I ended up making just under 30 cookies. The amount of cookies you get will depend on the size of your cutters. Mine were about 3-4 inches.

I baked each batch for about 11 minutes, allowed them to cool, and set to decorating. After a few practice cookies, which Scott was only too happy to help taste-test, I decorated some cookies worth photographing. I created a tribute to this week’s book, and of course, one for the blog. 🙂

Soft Gingerbread Cookies

  • Servings: approx. 2 dozen (3-4 inch cookies)
  • Time: 50 minutes
  • Print

Ingredients

  • 1 cup butter, at room temperature
  • 1 cup sugar
  • 1 egg
  • 1 cup dark molasses
  • 2 Tablespoons white vinegar
  • 5 cups flour
  • 1½ teaspoons baking soda
  • ½ teaspoon salt
  • 2 teaspoons ground ginger
  • 1 teaspoon ground cinnamon
  • 1 teaspoon ground cloves

Directions

  1. Cream butter, adding sugar gradually. Beat until well combined and light and fluffy, about 3 minutes.
  2. Beat in egg, molasses, and vinegar.
  3. Sift all of the dry ingredients together and then blend sifted dry ingredients into the wet ingredients.
  4. Divide the dough into two even pieces, wrap each piece of dough in plastic wrap, and refrigerate for 30 to 90 minutes.
  5. When the dough is done chilling, preheat oven to 350 degrees. Working in sections, roll the dough 1/2″ thick on a floured surface; cut into desired shapes. Place shapes on a baking sheet lined with parchment paper or a baking mat.
  6. Bake at 350 degrees for 10-12 minutes. Let the cookies cool on the pan for 5 minutes and then move to a cooling rack.
  7. Repeat with remaining dough. Decorate cooled cookies with royal or buttercream icing, or eat them as they are.

From: Bless This Mess

Notes: If you like your gingerbread on the crispy side, roll it 1/4″ thick and bake for 11-12 minutes. If you like it nice and soft (though still very sturdy), roll the dough 1/2″ thick and bake for 10 minutes. If you play around with the thickness of the dough and the baking time, you’ll discover a cookie that meets your liking.


This post contains affiliate links. Full disclosure here.

Filed Under: book review, recipe Tagged With: baking, books about books, chick lit, cookies, dessert, fiction, quick read

The Summer of Impossible Things + Italian Rainbow Cookies

September 22, 2017 by Megan 1 Comment

Imagine my surprise when a few months ago, I came across another Hungry Bookworm blog since that’s my blog’s name! We bloggers introduced ourselves and I found out that she’s based in England, and where my blog was named to evoke a combination of food and books, hers was named after the beloved children’s book The Hungry Caterpillar. We decided to try our hand at a collaboration, reviewing the same book and posting our own thoughts. If you'd like to check out her post on this novel, go here. (If anyone’s visiting from Julie’s blog, welcome!)

I chose our first title, opting for a British book I had heard amazing things about: The Summer of Impossible Things by Rowan Coleman. It wasn’t easy to find over here in the states for free (fair warning, readers), but since it wasn’t in the library and I really wanted to give it a try, I bit the bullet and bought it from Amazon, which did have a few copies available. As you all know, I don’t usually buy books before knowing I like them, but I’m glad I took a chance on this one!

This book is along the lines of other “realistic time travel” love stories, as I call them - books like The Time Traveler’s Wife and movies like the lovely About Time - though it’s not exactly a traditional love story. If you’ve seen the movie Frequency, it’s more akin to that. Coleman’s novel is about a daughter’s seemingly impossible quest to save her mother - with a will and power she didn’t even realize she had.

I found this book to be very immersive, and though it’s a concept I’ve seen (and loved) in many other stories, I thought it was accomplished in its own unique way. I didn’t expect the love story that develops, but I quite enjoyed it. And not to give it away too much, but it was the inspiration behind the recipe I chose to make - at some point in 1977, our main character Luna stumbles into someone who works in (and I think eventually owns) an Italian bakery.

Though they’re not mentioned in the book, when I think of Italian pastries, I often think of the popular tri-color, or rainbow cookies, and their pop of color reminded me of the seventies. Instead of finding a recipe online, like I often do, I turned to a good friend (and fellow food lover), who graciously shared their family recipe with me. These cookies intimidated me, but I was assured they were very easy. My friend makes them every Christmas, and he’s right, I had no reason to be nervous about them.

First, I began with the almond paste and sugar, crumbling them together in the food processor. This recipe was the perfect opportunity to use some almond paste that I’d made myself, primarily because I couldn’t find it in the store when I looked for a previous recipe, but I’m told it’s not that hard to find. (Perhaps I was looking in the wrong spot, but if you have the same problem, it is quite easy to make; recipe link below.)

Then, I transferred my almond paste and sugar mixture to a bowl and beat in the softened butter (2 sticks). I also beat in the eggs, 1 at a time, making sure it was well-blended before I stirred in the flour. It was time to color the batter, so I split my batter into 3 different bowls and, using food coloring, colored one of the bowls pink and one of the bowls green. The third bowl remained uncolored.

I spread each batter evenly in its own pan before popping into a preheated 350 degree F oven for about 11 minutes.

While the layers baked, I made the chocolate glaze by heating semi-sweet chocolate and heavy cream in the microwave. I then set it aside to cool. I also heated the raspberry jam (my preferred flavor, but you can use apricot instead) in a small saucepan until it was smooth and spreadable.

I turned each layer out onto the cooling rack, and once it had cooled a bit and was no longer warm to the touch - about 10 to 15 minutes - I began assembling the final cookie. Green layer goes on the bottom.

I spread about half of the jam (I heated approximately a cup) on top of the green, added the white layer, pressed gently, and spread the rest of the jam on top of that.

Then, I added the final layer - the pink layer, pressed gently and topped with the chocolate glaze.

This does need to sit for about 30 more minutes, to make sure the glaze sets before slicing it into pieces, so I had to be patient. Once cooled, first order of business is to trim the edges and then they can be sliced, resulting in these little cookies as my final product.

Mine turned out a bit thicker than I remember them being when I had eaten them in the past. They’re still delicious, but more than a mouthful’s worth of cookie - mine are better eaten with a fork, like a tiny cake. (Please see my notes below on pan size.) These are a quite cakelike cookie, and more delicious than I recall as well, so they’re definitely worth a try. Thank you so much to my friend, for sharing their recipe with me and the blog! I hope our novel’s Italian bakery owner would be proud. 🙂

Tri-Color Cookies (Italian Rainbow Cookies)

  • Servings: 50-72 cookies
  • Time: about an hour
  • Print

Ingredients

  • 1 cup sugar
  • 1 can/tube (8 oz) almond paste*
  • 1 cup butter (no substitutions), softened
  • 4 large eggs
  • 2 cups flour
  • 6 drops red food color
  • 4 drops green food color
  • For assembly and the glaze:

  • ⅓ cup heavy cream
  • 3 oz. semi-sweet baking chocolate, chopped
  • Apricot or raspberry jam (seedless)

Directions

  1. Lightly coat three 8x8** pans foil baking pans with vegetable cooking spray and dust with flour.
  2. In a food processor, pulse the sugar and almond paste until the almond paste is crumbled and broken into small pieces. Transfer the mixture to a large bowl.
  3. Beat in butter, scraping the bowl with a rubber spatula, until smooth. Beat in eggs, 1 at a time, blending well after each addition. Stir in flour.
  4. Divide batter evenly into 3 bowls. Tint 1 bowl of batter pink (food color amounts above are a guide and can be adjusted as needed to achieve correct color) and tint 1 bowl of batter light green. The last bowl will remain uncolored.
  5. Evenly spread each type of batter onto its own prepared pan. Bake for approximately 11 minutes, or until the top springs back when gently pressed with finger. Allow each pan to cool slightly before inverting onto a cooling rack.
  6. Meanwhile, make the glaze. Microwave the heavy cream and chocolate in a small bowl on high for 1 minutes. Stir until smooth. Let cool until slightly thickened, about 30 minutes.
  7. Heat the jam in a small saucepan on the stove, until it’s no longer gloopy.
  8. Once the layers have cooled for about 10-15 minutes, place green layer on a plate or serving tray. Brush the top with half of the heated jam. Top with the white layer and gently press. Brush remaining jam over the white layer and top with the pink layer, press gently.
  9. Spread cooled glaze over the top of the layered cookie. Let stand for at least 30 minutes so the glaze can set.
  10. With a serrated knife, trim the edges. Cut crosswise into six 2-inch wide strips. Cut each strip into 12 slices.

From: A friend’s family recipe

Notes: *If you prefer to make your own almond paste, that’s what I did for a previous recipe. It’s really easy and leftovers can be frozen for up to 3 months. Use this recipe from Taste of Home. **If you are doubling the recipe, use the larger foil pans, 11½ x 16½. However, if you still want to make only a single batch, I would recommend using 9x9 pans instead so the cookies are not quite as thick as mine ended up. 😛

This post contains affiliate links. Full disclosure here.

Filed Under: book review, recipe Tagged With: baking, contemporary, cookies, dessert, fiction

  • « Go to Previous Page
  • Go to page 1
  • Interim pages omitted …
  • Go to page 19
  • Go to page 20
  • Go to page 21
  • Go to page 22
  • Go to page 23
  • Interim pages omitted …
  • Go to page 30
  • Go to Next Page »

Primary Sidebar

About

The Hungry Bookworm brings together literature and food. Megan has an insatiable appetite for both.

As C.S. Lewis said, “Eating and reading are two pleasures that combine admirably.” Enjoy!

  • Bloglovin
  • Facebook
  • Instagram
  • Pinterest

Subscribe

Don't miss out on bookish content, exclusive giveaways, and of course, book club-friendly recipes. Get notified of new posts via email.

Join 2879 subscribers.

Search for Ingredients, Recipes, or Books

Recent Posts

  • Subscriber Box Review: Literati Book Club - Roxane Gay's Audacious Book Club
  • Arsenic and Adobo + Ensaymada
  • Review of The Kindred Spirits Supper Club
  • Kids Edition: Sometimes I Like to Curl Up in a Ball + "Dirt" Pudding Cups
  • The Midnight Library + Broccoli and Ricotta Toast

Goodreads

Tags

5 ingredients or less appetizer baking book club book list book of the month books about food bread breakfast brunch chicken contemporary cookies cultural dessert dinner dinner party dystopia easy prep favorites fiction fruit historical fiction holiday ice cream linkup lunch meat memoir mini review nonfiction pasta quick read reading challenge science fiction seafood show us your books side dish snack soup TBR list thriller top ten tuesday vegetarian veggies

Archives

Other Great Book Blogs

Literary Quicksand
Never Enough Novels
Death by Tsundoku
Professional Reader 25 Book Reviews
Privacy & Cookies: This site uses cookies. By continuing to use this website, you agree to their use.
To find out more, including how to control cookies, see here: Cookie Policy

Footer Widget Header

Megan’s Instagram

Copyright © 2025 · Hungry Bookworm