• Skip to primary navigation
  • Skip to main content
  • Skip to primary sidebar
  • Home
  • Reviews
    • Book Index
    • Fiction
    • Non-Fiction
    • Top Ten Tuesdays
The Hungry Bookworm

The Hungry Bookworm

reading + eating

  • Recipes
    • Drinks
    • Snacks, Sides & Apps
    • Main Dishes
    • Desserts
    • 5 Ingredients or Less
  • About
    • Meet Megan
    • How I Rate
    • Review Policy
    • Contact

fiction

They Both Die at the End + French Toast

December 9, 2017 by Megan 2 Comments

Imagine a world where you knew exactly which day you would die but not how - on the morning of your death, you get a phone call with the warning and are instructed to make the most of it. That’s the premise behind Adam Silvera’s They Both Die at the End, a young adult dystopian novel. I devoured it in a single day.

On the morning of September 5, a representative from Death-Cast calls both Mateo and Rufus - two teenage boys - and informs them that their End Day is here. They each set off to live their best life on their last day on Earth, not knowing exactly how or when it will come to an end. Interestingly (and one of the things I loved most about Silvera’s concept), a whole economy has grown up around this knew End Day phenomenon, and it is through the app Last Friend, that Mateo and Rufus find each other.

Together, they set about tying up loose ends, experiencing new things and enjoying a last meal to fuel them through their adventures. Some may not appreciate knowing how it all ends before even picking up the novel, but don’t let that hold you back. The ending was not what I was expecting, and I found that the anticipation of the end-point kept the momentum going as I read. If you enjoyed the movie Stranger Than Fiction, which I very much did, that’s the closest approximation I can think of to knowing a plot point and not having it ruin the rest of the experience for you.

Of course, knowing a recipe would end up tagging along with my review, Rufus and Mateo’s most memorable meal on their End Day was important to me. At a hole-in-the-wall diner, they order what I can only hope was an amazing grilled chicken salad (which wouldn’t be my first choice, to be honest) and French toast with a side of French fries (now we’re getting somewhere…).

The French toast obviously stood out to me - yes, grilled chicken salad can be very delicious, but I would really rather not endure a last day without carbs. For those of you who followed my Thanksgiving Readathon, you’ll know I adored Molly Wizenberg’s A Homemade Life. Coincidentally, in it, she included a recipe for her father’s French toast, alongside a whole chapter describing its deliciousness. I knew this had to be the recipe I used here, because a last meal absolutely has to be the best. It did not disappoint, and I can only hope the boys’ French toast was just as amazing.

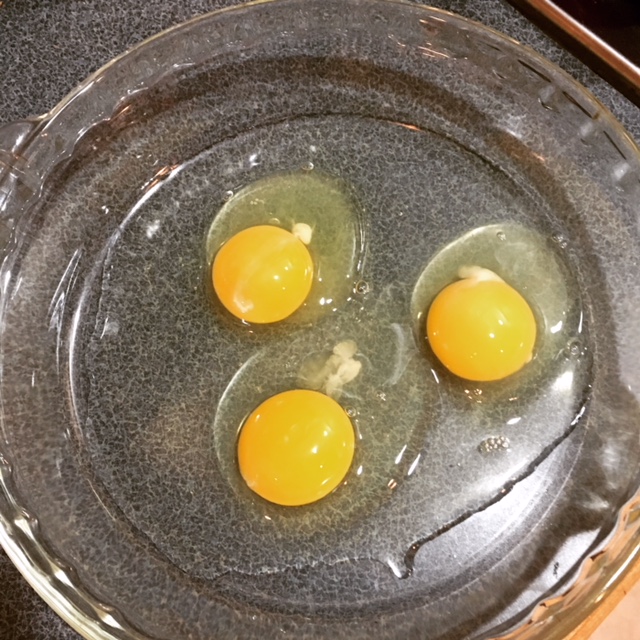
To start, I dug out my cast iron skillet and glugged in some canola oil, making sure to completely cover the bottom, per Molly’s instruction. Then, I cracked 3 eggs into a Pyrex pie dish, which I would ultimately use to coat the bread.
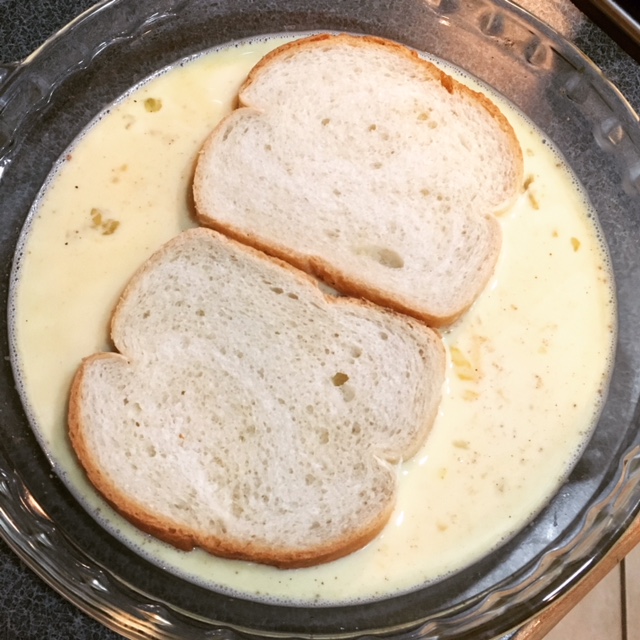
To the eggs, I added milk, sugar, vanilla, salt and nutmeg, whisking it all together. While the oil heated up, I added two slices of bread to the egg mixture, letting it soak for about 45 seconds or so on each side. (I unfortunately was unable to find a loaf of bread that wasn’t pre-sliced, so they weren’t cut diagonally, but I still think it worked well.)
Then, carefully, using tongs, I placed each slice into the hot oil. It bubbled as it should’ve, which was a good sign. I let it cook for between 1 and 2 minutes on each side.

When each pair of slices was finished, I placed them on a plate lined with paper towels. We had these for a quick dinner one night after work, but they were so easy, that I wouldn’t hesitate to make them on a sleepy weekend morning. I haven’t made a lot of French toast myself, but I have eaten it quite often at restaurants, and this was probably the best I’ve ever had. I can definitely see us adding it to the rotation, especially when we’re looking for a little simple indulgence.

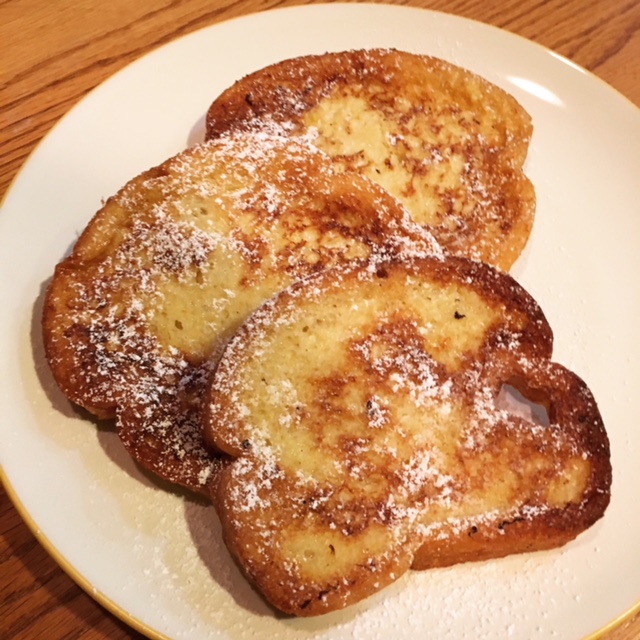
To finish, I dusted the slices with some powdered sugar, which is something I love from years of ordering French toast at restaurants. I’m actually always disappointed when it appears on my table without a white dusting. Of course, we also covered them with syrup and dug right in.
Last Meal French Toast

  • Servings: 6-8 slices
  • Time: 20 minutes
  • Print

Ingredients

  • 3 large eggs
  • 1 cup whole milk
  • 1 tablespoon sugar
  • 1 teaspoon vanilla extract
  • ¼ teaspoon salt
  • pinch of freshly ground nutmeg
  • canola or other flavorless oil, for frying
  • 6 to 8 slices day-old bread, cut on the diagonal, about ¾ inch thick
  • pure maple syrup, for serving
  • powdered sugar, for serving (optional)

Directions

  1. Break the eggs into a wide, shallow bowl or an 8-inch square Pyrex dish. Whisk the eggs to break up the yolks. Add the milk, sugar, vanilla, salt and nutmeg and whisk to blend.
  2. Place a heavy large skillet - preferably cast iron - over medium-high heat, and pour in enough oil to completely cover the bottom of the skillet. Let the oil heat until you can feel the warmth radiating from it when you hold your hand close over the pan. To test the heat, dip the tip of a finger into the egg mixture - not the oil! - and flick a drop into the oil. If it sizzles, it’s ready.
  3. Meanwhile, when the oil is almost hot enough, put 2 to 3 slices of bread into the egg mixture, allowing them to rest for 30 seconds to 1 minute per side. They should feel heavy and thoroughly saturated, but they shouldn’t be falling apart.
  4. Carefully, using tongs, place the slices in the skillet. They should sizzle upon contact, and the oil should bubble busily around the edges. Watch carefully: with hot oil like this, the slices can burn more quickly than you would think. Cook until the underside of the each slice is golden brown, 1 to 2 minutes. Carefully flip and cook until the second side is golden, another 1 to 2 minutes. Remove to a plate lined with paper towel, and allow to sit for a minute or two before serving.
  5. Repeat with remaining bread. If, at any point, the bread starts to burn before it has a chance to brown nicely, turn the heat back a little. You want to keep it nice and hot, but not smoking.
  6. If desired, dust with powdered sugar. Serve with maple syrup.

Slightly adapted from: Molly Wizenberg’s A Homemade Life, featured on pages 39 - 40 as Burg’s French Toast

Recipe Notes: Bread should always be a day or two old. Make sure it has a soft, light crumb and isn’t too dense. When pouring in the oil, make sure it completely coats the bottom of the pan.


This post contains affiliate links. Full disclosure here.
Filed Under: book review, recipe Tagged With: bread, breakfast, dystopia, fiction, vegetarian, young adult

Turtles All the Way Down + Spiral Mac 'n' Cheese

December 5, 2017 by Megan Leave a Comment

John Green has written many young adult novels, including one of my favorites, The Fault in Our Stars. He has a unique way of tackling both the everyday and the unexpected parts of the lives of teenagers. His latest novel, Turtles All the Way Down, is no exception. Like other teenagers, Aza tries her best in school, has an understanding best friend, and doesn’t know exactly what to do when she finds herself in a relationship. Aza also lives with obsessive-compulsive disorder and an often crippling level of anxiety, much of which was drawn from Green’s own experiences.

Because of that, Turtles tells an excellent, unique story. Admittedly, some of the scenes where Aza is having obsessive thoughts were hard to read. It almost felt like I was in her head, and in those moments, I read as if hiding behind split fingers - not wanting to go on but wanting to know what happened all the same. I admire Green’s willingness to not only discuss his own mental health issues but to write about them too, in a way that’s real.

Stories like these help to make mental health something that’s okay to talk about. The existence of a likeable character that readers can connect to and empathize with can help teenagers (and adults) realize that mental illness is not something to be embarrassed or ashamed of. In Green’s own words, “it’s important for people to hear from [those] who have good fulfilling lives and manage chronic mental illness as part of those good fulfilling lives.” And because of that, it is absolutely a book worth picking up - even if you aren’t familiar with John Green, even if you don’t usually read YA.

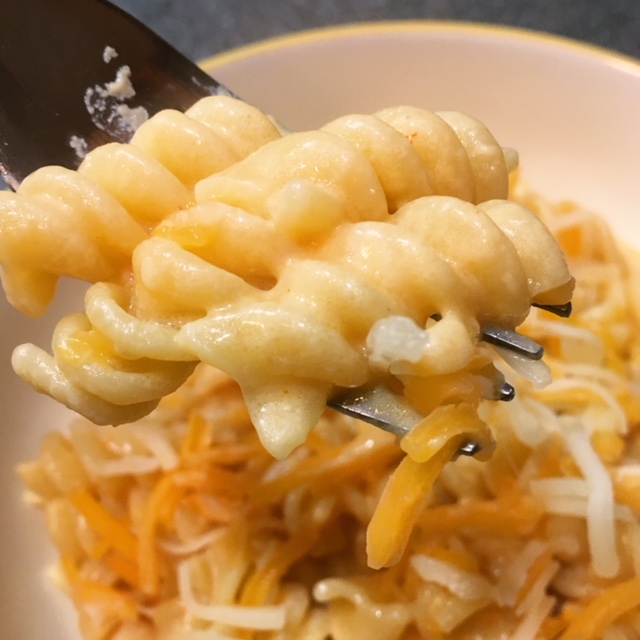
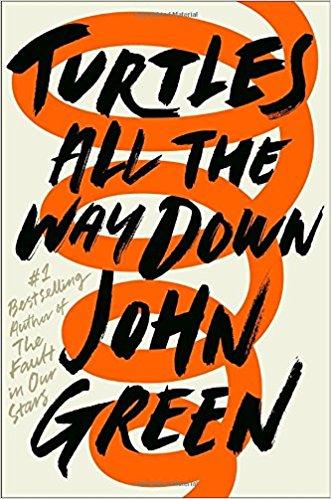
Honestly, the first thing I thought of when I looked at this book's cover was spiral macaroni and cheese. I think they eat it once over the course of the story, but in the end, I couldn’t get it out of my head and no other foods really stood out to me. So, no surprise, that’s what I decided to make. I found an easy recipe from Famished Fish and set to work for a quick, easy dinner one night.

To start, I brought my water to a boil and cooked my noodles according to the package instructions. The original recipe called for rotini, but I also think cavatappi would work great here.

While the noodles cooked, I made the sauce. I melted butter in a pan and then added flour to create a roux. To that, I added the dried mustard and paprika, slowly stirring in 1 cup of milk, so that it could fully incorporate with the roux and remain thick.

Then, I added in the remaining 2 cups of milk slowly, along with the salt and a dash of Worcestershire sauce. I continued cooking the sauce, stirring occasionally for about 5 minutes more or so, until it thickened. I stirred in three-quarters of the cheese so it melted and became incorporated.

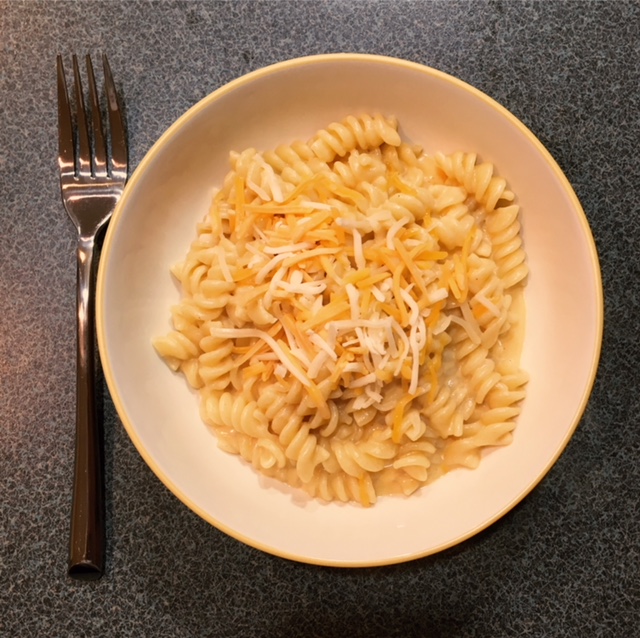
I drained the finished noodles and poured the cheese sauce on top, stirring until the noodles were fully covered. To serve, I spooned the mac 'n' cheese into bowls and topped each with a sprinkling of shredded cheese.

It was delicious! And so easy that I’ll definitely be adding it to my repertoire.

Creamy Spiral Mac 'n' Cheese

  • Servings: 4-6
  • Time: 15 minutes
  • Print

Ingredients

  • 16 oz uncooked spiral noodles (rotini or cavatappi)
  • ¼ cup butter
  • ¼ cup flour
  • ½ tsp mustard
  • ½ tsp paprika
  • 1 tsp salt
  • dash of Worcestershire sauce
  • 3 cups milk, divided
  • 2 cups sharp cheddar cheese, divided

Directions

  1. Add uncooked pasta to a large pot of boiling water. Cook 9-11 minutes, according to package directions.
  2. Meanwhile, in a medium saucepan set over medium heat, melt the butter. When butter has melted, stir in flour to create a roux.
  3. Slowly stir in 1 cup of milk along with the mustard and paprika. Stir and cook until the mixture thickens. Add the remaining 2 cups of milk and the salt and Worcestershire sauce. Cook and stir 5 minutes until has thickened.
  4. Stir in 1½ cups of the sharp cheddar cheese. Stir the sauce until the cheese has melted.
  5. Drain the pasta and return to large pot. Carefully pour the cheese sauce over the cooked pasta. Stir gently to combine the cheese sauce and pasta.
  6. Ladle the macaroni and cheese spirals into a large serving bowl and sprinkle with the remaining ½ cup of sharp cheddar cheese.
  7. Serve immediately.

Adapted from: Famished Fish

This post contains affiliate links. Full disclosure here.

Filed Under: book review, recipe Tagged With: contemporary, dinner, easy prep, fiction, lunch, pasta, quick read, tough topics, vegetarian, young adult

The Music Shop + French Onion Soup

December 2, 2017 by Megan Leave a Comment

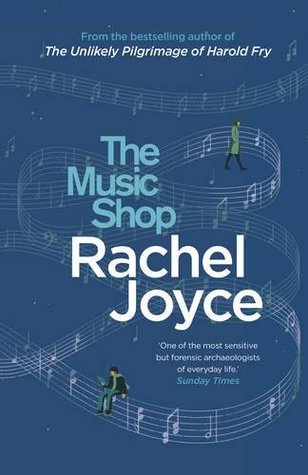
If there are any music lovers out there, this book is for you. Rachel Joyce’s The Music Shop was similar in feel to The Storied Life of AJ Fikry, which I adored, except in place of a bookshop and bookworms you have a music shop and musicians (or at the very least, those who appreciate music). Though this book doesn’t hit shelves until January, I was lucky enough to get an early copy.


In a rundown neighborhood that smells of cheese and onion, in 1988, Frank is struggling to keep his music shop open. It is the age of the CD and though records are losing their appeal, Frank’s shop is something special. As a true connoisseur of music, he is able to recommend exactly the tracks his customers need, even if they didn’t know it was what they were looking for.

One day, a mysterious woman enters his shop, arousing the interest of the surrounding shop owners, who often congregate at Frank’s. He begins teaching her about music and everything begins to change. This novel has a wonderful, quirky set of characters and tells a heartwarming story. I only wish I was more into music, because I would have appreciated it that much more.

Though the book made the neighborhood’s pervasive smell of cheese and onion sound like a bad thing, I’ll admit it really just had me craving French onion soup. Full of caramelized onions and covered with melty cheese, nothing could be more delicious! I pulled out my trusty recipe from The Pioneer Woman, which I’ve been using for a few years now, and got to work creating my own cheesy, onion-y smells in the kitchen.

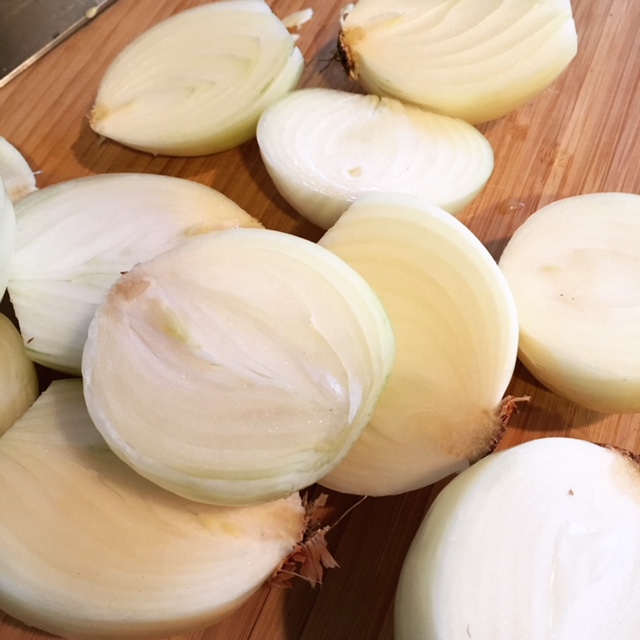
To start, I always slice my onions, since it takes a bit of time and I usually can’t finish slicing them all in the time it takes the butter to melt. I used 6 medium yellow onions, because that’s what I had on-hand, but if you’re buying them specifically for this recipe, you can substitute a few less large onions.

I melted a half stick of butter in my Dutch oven. (Ree uses a whole stick of butter, but over time I’ve adapted the recipe and use just half of that. Since we usually have leftovers, I’ve found that that much butter creates a pretty thick - and unappetizing - layer of solidified fat on top of the soup when it gets cold. It tastes just as good with half a stick, and is probably healthier too!)

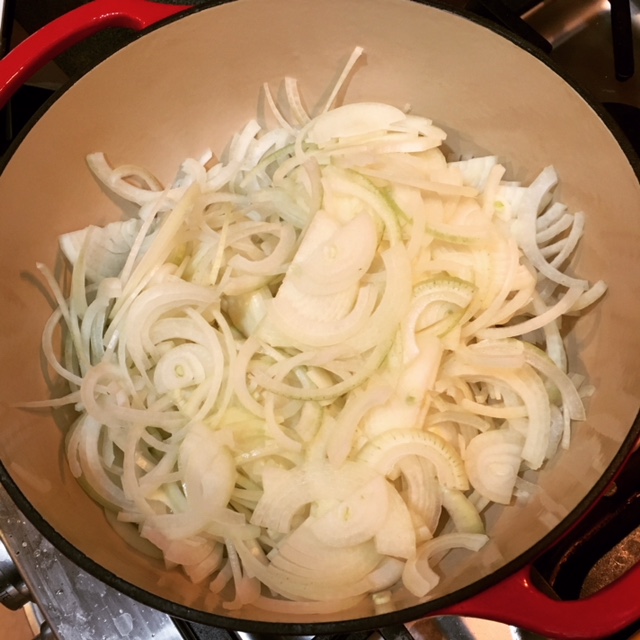
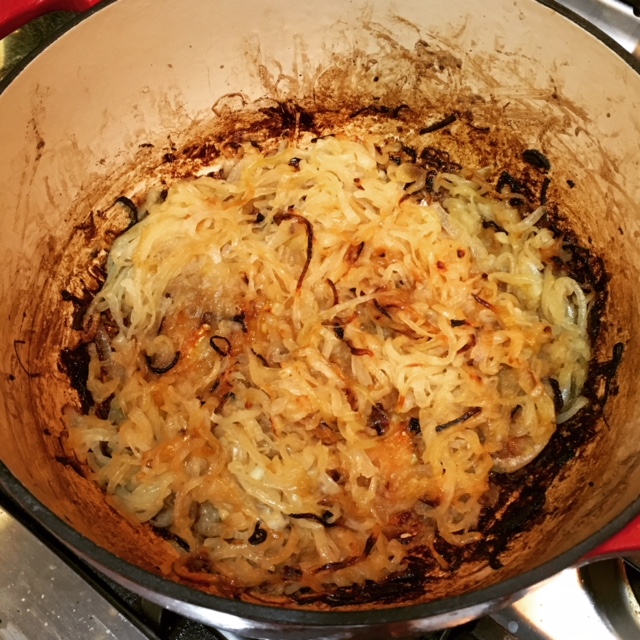
To the melted butter, I added my sliced onions, which take up quite a lot of room in the Dutch oven - don’t worry! They’ll cook down considerably. I stir/toss the onions with a spoon to make sure they’re all pretty well coated in the butter and then I let them cook for about 20 minutes over medium-low heat while covered.

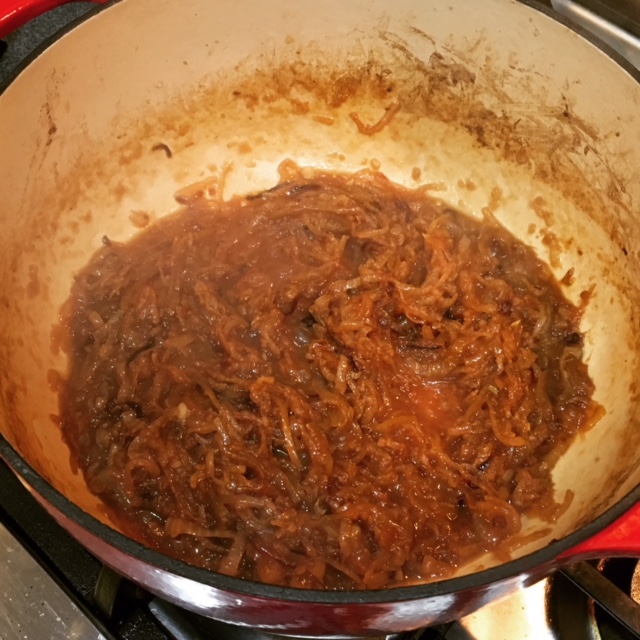
After they’ve cooked down a bit, it’s time to put them into a 400 degree oven, where they’ll cook for an hour minimum. I like to cook mine for closer to an hour and a half to really allow them to caramelize. My favorite thing about this recipe is that it’s perfect for lazy weekend days - it takes a while to make, but most of that time is hands-off. What you get in the end is a delicious, comforting soup.

Back on the stovetop, over medium heat, I used a wooden spoon to scrape off some of the brown bits, which are full of flavor. Carefully add a generous cup of dry white wine to the pot, all while scraping the flavor off the bottom and sides. (If you’re concerned about potential fire hazard, since alcohol is flammable, you can briefly turn off the heat, add the wine, and turn the heat back on. With such a large/deep pot, I don’t find that to be necessary.) I let that mixture cook down until the alcohol is mostly cooked off, about 5 minutes.

To the onions, I added the chicken and beef broths, minced garlic and a dash of Worcestershire sauce. I allowed the soup to simmer for between 30 and 45 minutes.

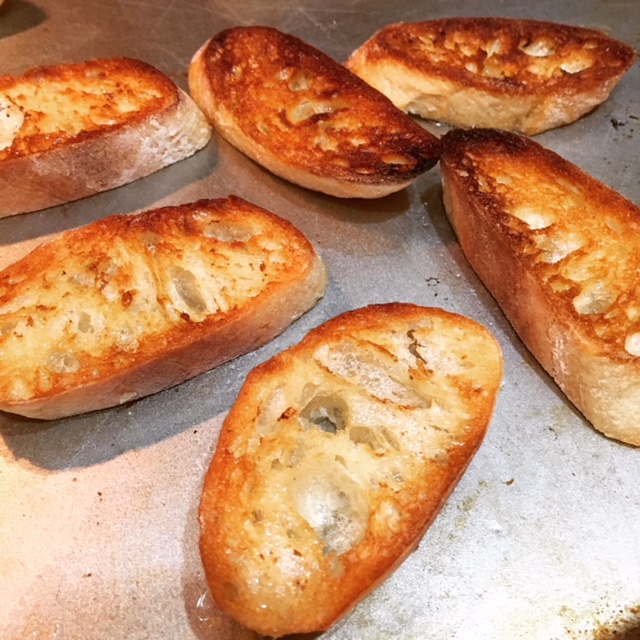
Meanwhile, with about 15 minutes left on the soup, I prepped the bread to use on top of the soup. I sliced about half of a baguette, making sure to keep them on the thicker side. (I like to freeze the other half of the baguette for the next time I make the soup, or for another recipe.) I put them under the broiler for a few minutes, until they began to brown and get crispy.

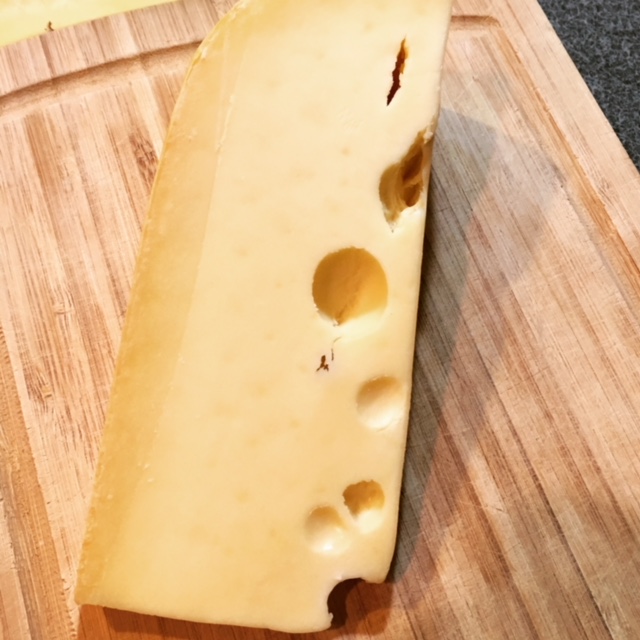
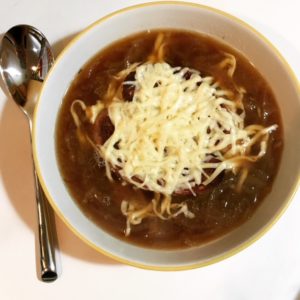
When the soup was finished, I ladled it into a bowl for each of us, set two pieces of bread on top and covered that generously with grated cheese. (I used a nutty Swiss from Trader Joe’s, since they were out of my usual shredded mix - see notes. If the mix is unavailable or you’re not near a TJs and budget is a factor, Swiss is a great substitute for Gruyere, which usually runs $10/lb or more.)

Since my bowls aren’t oven safe, I used my old trick of popping each bowl into the microwave for a minute or less - I suggest watching through the door - until the cheese is melted. You don’t get the nice browning that you get under the broiler, but the meltiness is really what I’m looking for in a French onion soup anyway. Hope you enjoy!

French Onion Soup

  • Servings: 6
  • Time: 2 hours, 20 minutes
  • Print

Ingredients

  • ½ stick butter
  • 4 large or 6 medium yellow onions, halved root to tip and thinly sliced
  • 1 cup (generous) dry white wine
  • 4 cups low sodium chicken broth
  • 4 cups beef broth
  • 4 cloves minced garlic
  • dash of Worcestershire sauce
  • Several thick slices of baguette
  • 5 ounces weight (to 7 Ounces) Gruyere cheese, grated

Directions

  1. Melt butter in a heavy soup pot or Dutch oven over medium-low heat. Add onions and cook, covered, for 20 minutes. Meanwhile, preheat oven to 400 degrees.
  2. Place pot into the oven with the lid slightly ajar to ensure the onions will brown. Allow onions to cook in the oven for 1 to 1 ½ hours, stirring at least once during the cooking process so onions won’t stick and burn.
  3. Remove pot from oven and place back on stovetop over medium heat. Stir, scraping off all the brown, flavorful bits. Turn off heat and pour in wine. Turn heat back to medium. (If you do this carefully, you don’t need to turn off the heat.) Cook wine for 5 minutes, allowing it to reduce. 4. Add broths, Worcestershire sauce and minced garlic and reduce heat to low. Simmer for 30 to 45 minutes.
  4. Butter one side of the bread slices and broil over low heat, allowing bread to brown and become crispy.
  5. When soup is ready, ladle into bowl or ramekin. Place crispy bread on top, and then sprinkle generously with grated cheese. Broil until cheese is melted and bubbly. (Alternatively, if you don’t have oven-safe bowls, you can place in microwave for 30 - 60 seconds, or until melted.)
  6. Serve immediately.

Adapted from: The Pioneer Woman

Notes: I prefer the Swiss/Gruyere shredded cheese mix from Trader Joe’s, if there is one near you. It’s more cost effective and saves you the trouble of grating. Additionally, you can substitute vegetable broth for the chicken broth if you prefer. If you only have stocks on-hand, I’ve also used them in place of the broth(s), and the result is much the same - just check the taste and adjust seasoning as needed.


This post contains affiliate links. Full disclosure here.

Filed Under: book review, recipe Tagged With: bread, comfort food, dinner, fiction, lunch, quick read, soup, veggies

The Word Exchange + Mini Pineapple Upside-Down Cakes

November 29, 2017 by Megan 1 Comment

For those of you who read my recent Top Ten Tuesday, where I covered books I’m thankful for, you’ll recognize today’s title. Alena Graedon’s debut novel is a dystopia called The Word Exchange. It had been on my TBR list for a little while now, but I forget how it got there. I remember adding it to the consideration set for our office’s Diversity Book Club when we were selecting from various dystopias one month. It didn’t win then, and honestly, it may have taken me a lot longer to get to it if not for my good friend Deanna suggesting it for our most recent book club meeting (outside of work).

Though I ended up loving The Word Exchange, it wasn’t an instant hit for me. I struggled a bit through the first couple of chapters; I even warned our book club to get started sooner rather than later and break out the dictionary. The language was complicated (purposefully, I found out later) and those chapters were dense. But, after about 50 pages or so, I began getting into the story and was suddenly hooked.

Graedon describes a near-future where the death of print has happened and handheld devices are taking over society. Furthermore, people begin to rely on something called The Word Exchange, where people makeup definitions and words in a sort of online marketplace. Anana works with her father at the North American Dictionary of the English Language, and when he goes missing, she finds herself in a world where language is quickly losing meaning. She enlists her bookish coworker Bart in the search for her father and answers - trying to avoid contracting the rapidly spreading “word flu” all the while.

The combination of the importance of language and our reliance on technology was done quite skillfully, in a way that still haunts me whenever the novel comes to mind. I’ve tried to be more conscious of my use of technology - particularly my cell phone and social media - since finishing this book. Not that any of it is bad in and of itself, just that it’s important to me to not become dependent on these, particularly as a way of passing time. As I learned over the recent Thanksgiving Readathon, putting down my phone gives me a lot more time to focus on something more worthwhile - like spending time with family or reading.

Anana’s father’s favorite fruit is a pineapple, and if you’re wondering why I know that, it’s actually a bit of thing throughout the book. Anana’s name, in fact, means pineapple when an s is added to the end. I knew almost immediately they would be a huge part of what I made to go along with the book. If I’m remembering correctly, pineapple upside-down cake was his favorite dessert. I decided to make it in mini form, thinking that would be easier. (In the end, I don’t think that’s the case.)

It was really important to me to find a recipe that used the rings rather than the chunks, and so after a bit of research, I found this one from Baker by Nature. I started the whole process by ordering some jumbo muffin tins from Amazon - the jumbo ones are required so that the pineapple rings can fit in the bottom.

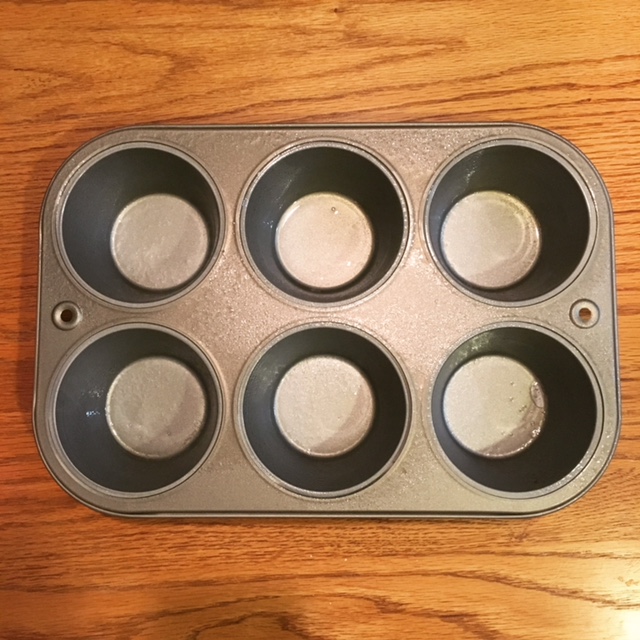
They arrived in time for me to make the mini cakes for our book club meeting, so I got to work the night before. I preheated the oven and greased the jumbo tins.

Then I mixed together the cake batter. I combined the eggs with the sugars and rum, beating until smooth. To that I added the pineapple juice, just stirring it in. Separately, I sifted together the dry ingredients, and then added them into the wet ingredients, whisking until just combined.

In a small saucepan, I made the topping for the cakes. I melted butter and then added brown sugar, rum and salt, stirring while it cooked.

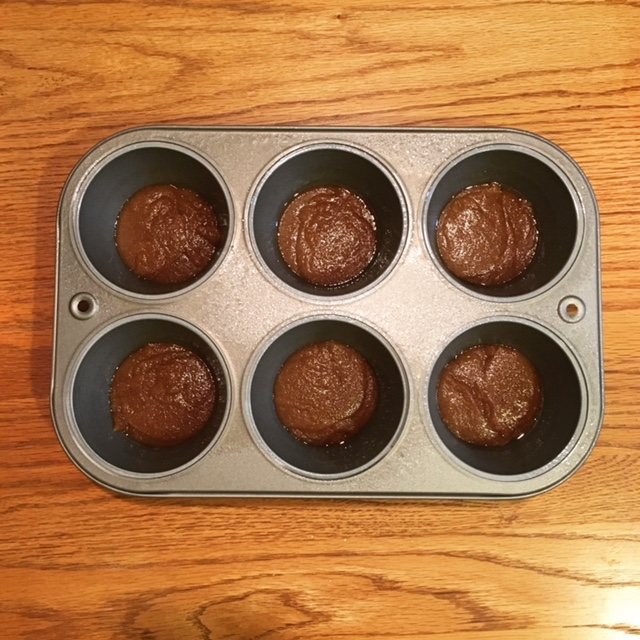
I added the topping to the bottom of the jumbo tins (because they’ll be flipped upside-down later!) to start.

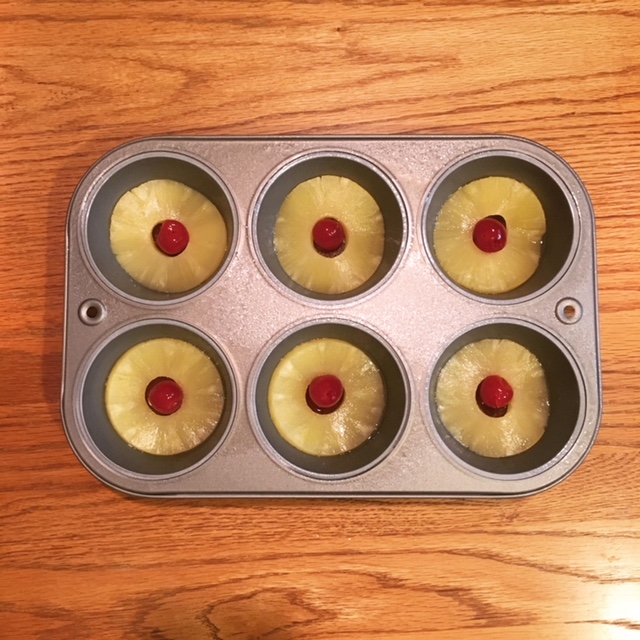
Then, I added in the pineapple rings on top of that, with a maraschino cherry in the middle of each.

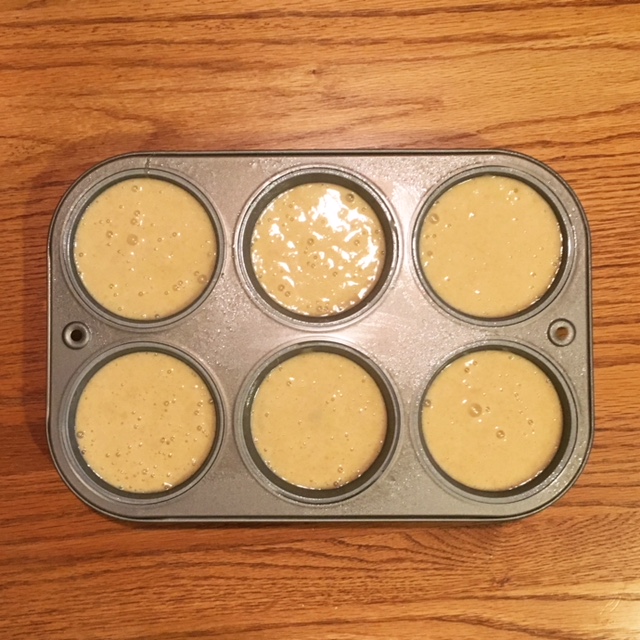
Finally, I added the cake batter, filling them roughly ¾ of the way full.

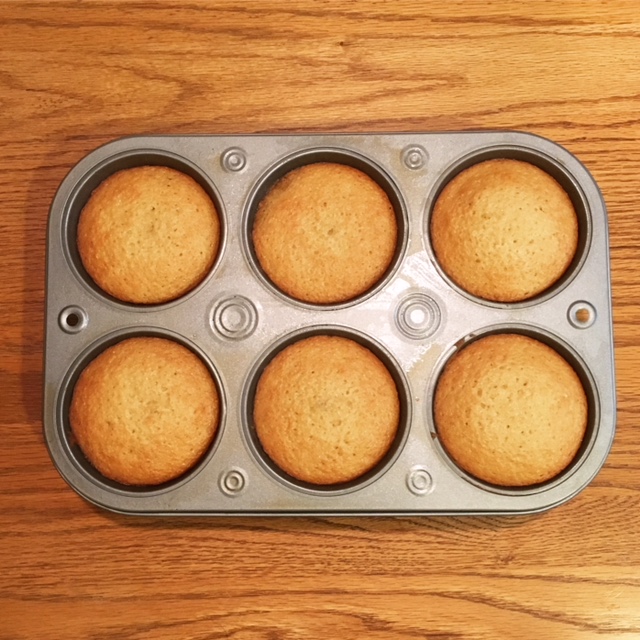
I baked the cakes for about 20 minutes and then pulled them out of the oven to cool.

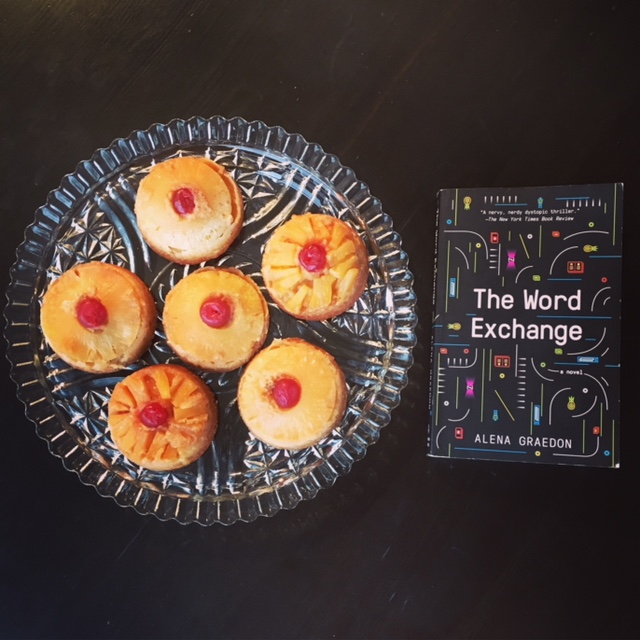
They cooled in the pan for 5 minutes before it was time to turn them out to cool on a rack. I want to caution you to be very careful when flipping your pans. If you have two tins of 6 cakes each, please do them individually and not at the same time - even if you think you can manage it. The topping is VERY hot and still ooey gooey, which I can tell you from personal experience makes a huge mess if something goes awry and it happens to get all over the kitchen.

It is important to place the cooling rack within a baking pan with a lip. Place that upside down on top of the muffin tin and then quickly and carefully flip that over so that the pan and cooling rack are on the bottom. Repeat with the other rack/pan/muffin tin.

I hadn’t had pineapple upside-down cake before, and I was pleasantly surprised at how much I liked it. Anana’s dad was onto something!

Mini Pineapple Upside-Down Cakes

  • Servings: 12
  • Time: 30 minutes
  • Print

Ingredients

  • 4 large eggs, at room temperature
  • 1¼ cups granulated sugar
  • ¼ cup dark brown sugar, packed
  • ½ cup pineapple juice
  • 2 teaspoons rum (or pure vanilla extract)
  • 1½ cups all purpose flour
  • 2¼ teaspoons baking powder
  • ½ teaspoon cinnamon
  • ¼ teaspoon salt
  • 2 tablespoons cornstarch
  • 6 tablespoons unsalted butter
  • 1½ cups dark brown sugar (packed)
  • 1 teaspoon rum (or vanilla extract)
  • ⅛ teaspoon salt
  • 12 pineapple rings
  • 12 maraschino cherries

Directions

  1. Preheat oven to 350 degrees (F). Generously spray a 12-mold jumbo muffin tin with non-stick cooking spray; set aside.
  2. Crack the eggs into a large mixing bowl; whisk smooth. Add in the granulated sugar, brown sugar, and rum (or vanilla), and beat smooth. Stir in pineapple juice and set aside.
  3. In a separate bowl, sift together the flour, baking powder, cinnamon, salt, and cornstarch. Gradually add the dry ingredients into the wet ingredients and whisk until just combined. Be sure not to over mix here! Set mixture aside while you make the topping.
  4. For the topping: In a small sauce pan, melt the butter over medium heat. Add in the brown sugar, rum, and salt, and cook for 1 minute, whisking constantly. Remove from heat.
  5. Spoon 2 tablespoons of the topping mixture into the bottom of each muffin tin; place a pineapple ring on top, then place a cherry in the middle of each pineapple ring. Divide the cake batter evenly among the prepared tins, fill each muffin tin 3/4 of the way full.
  6. Bake for 20-22 minutes, or until the tops are puffed and golden brown, and a toothpick inserted in the center of the cake comes out clean.
  7. Remove from the oven and cool in pan for 5 minutes. Gently run a knife around the edge of each cake to help loosen any stuck bits, then gently place a wire cooling rack on top and quickly flip over. You will want to place the cooling rack on a large sheet pan before doing this, to help make it less messy. Serve cakes warm or at room temperature.

From: Baker by Nature

Recipe Notes: Rum may be substituted with pure vanilla extract. Cakes are best eaten the day they are made, but may be stored in the fridge, in an airtight container, or on a plate covered tightly with plastic wrap, for up to 3 days.


Filed Under: book review, recipe Tagged With: baking, dessert, dystopia, fiction, fruit

The Red Tent + Honeyed Cake

November 18, 2017 by Megan 2 Comments

Anita Diamant’s The Red Tent has been on my radar since I read The Boston Girl earlier this year. Several people recommended it to me, so I bought it at my library’s used book sale in the spring. I finally got around to reading it, and though I was expecting a bit of a grueling read - it’s set in biblical times - I was pleasantly surprised.

In this piece of historical fiction, Diamant explores the life of Dinah, who is briefly mentioned in the Bible as the only daughter of Jacob (father of a dozen sons). The Red Tent starts with the story of Dinah’s mothers, the four wives of Jacob - Leah, Rachel, Zilpah, and Bilhah - and continues into her life as she grows up and leaves the land of her father.

For the most part, the lives of women are glossed over in the Bible, and this novel takes an interesting look at what life might’ve been like for a woman of that time. It gives several strong female characters a voice when the book in which Dinah first appears did not and thoughtfully portrays the unique relationships that women have with one another. It also offers a different, and dare-I-say feminist, perspective on a Christian narrative in which things may not have been exactly as depicted.

In Jacob’s camp - which is how I thought of it, as it was rambling and full of tents and animals - the family usually ate quite well. In an interview Diamant said, “There’s a lot of food in The Red Tent...To not write about food...is to not talk about women’s experience.” They depend on the land for food, and the selection seemed quite abundant. There is mention of olives, lamb, figs, pomegranates, barley, mint, and of course, honeyed cake.

Honeyed cake, in fact, was mentioned a few times, and though it was given little description, I was intrigued. I wanted to make it try it myself. After a Google search, I finally settled on a recipe from Genius Kitchen for a recipe that seemingly dripped with honey. (And drip with honey, it did!)

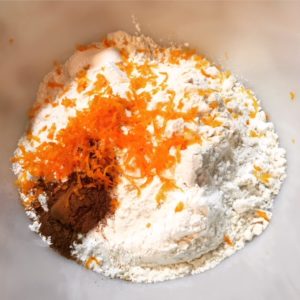
To start, I combined the dry ingredients - flour, baking powder, salt, cinnamon and some orange zest. The orange zest smelled absolutely amazing while I prepared the rest of the ingredients.

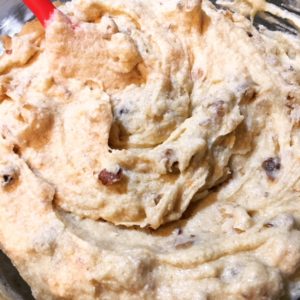
In a different bowl, I creamed the butter with the sugar and then added in the four eggs, one at a time. To these ingredients, I added the dry mix, mixing just until incorporated. Then, I added the chopped walnuts.

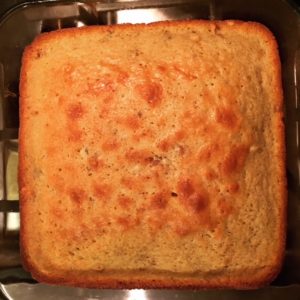
I poured the batter into a prepared square pan and set it to bake for 40 minutes in a 350-degree oven.

Meanwhile, I began making the honey sauce. This recipe uses quite a bit of honey, which can be expensive, but otherwise the ingredients are pretty run-of-the-mill baking ingredients. Still, we used almost half of this little honey bear.

In a saucepan, I combined 1 cup of honey, 1 cup of white sugar and ¾ cup of water. I let it simmer for about 5 minutes before adding the lemon juice and bringing it to a boil. Please use a medium-sized saucepan. When it gets boiling, it can boil over easily and quickly - it’s not as easy to tame as boiling water. And it’s possible you’ll get a sticky mess all over your stove, like I happened to do. Anyway, once it was finished cooking for 2 minutes, I removed it from the heat, where it say until the cake was ready.

After the cake finished baking, I removed it from the oven and allowed it to cool for 15 minutes.

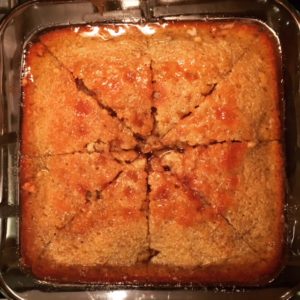
I then cut it into triangles. The original recipe recommends diamonds, but I’ll admit I wasn’t sure how to accomplish that. I’m not sure shape matters that much, though the more cuts, the more honey will soak through the cake. Regardless, after cutting the cake, I covered it with honey sauce. I used about a third at a time and did my best to allow it to soak in before covering it with the next third. (This requires some patience.)

I found the cake to taste a bit like Fruit Loops (probably from the orange zest). Overall, it was quite good but very sticky.

Greek Honey Cake

  • Servings: 12
  • Time: 55 minutes
  • Print

Ingredients

  • 1 cup all-purpose flour
  • 1½ teaspoons baking powder
  • ¼ teaspoon salt
  • ½ teaspoon ground cinnamon
  • 1 teaspoon orange zest
  • ¾ cup butter
  • ¾ cup white sugar
  • 3 eggs
  • ¼ cup milk
  • 1 cup chopped walnuts
  • 1 cup white sugar
  • 1 cup honey
  • ¾ cup water
  • 1 teaspoon lemon juice

Directions

  1. Preheat oven to 350 degrees F. Grease and flour a 9 inch square pan. Combine the flour, baking powder, salt, cinnamon and orange rind. Set aside.
  2. In a large bowl, cream together the butter and 3/4 cup sugar until light and fluffy. Beat in the eggs one at a time. Beat in the flour mixture alternately with the milk, mixing just until incorporated. Stir in the walnuts.
  3. Pour batter into prepared pan. Bake in the preheated oven for 40 minutes, or until a toothpick inserted into the center of the cake comes out clean. Allow to cool for 15 minutes, then cut into diamond shapes. Pour honey syrup over the cake.
  4. For the Honey Syrup: In a saucepan, combine honey, 1 cup sugar and water. Bring to a simmer and cook 5 minutes. Stir in lemon juice, bring to a boil and cook for 2 minutes.

From: Genius Kitchen

This post contains affiliate links. Full disclosure here.
Filed Under: book review, recipe Tagged With: baking, dessert, feminism, fiction, historical fiction

Beasts of Extraordinary Circumstance + Sponge Cake with Forest Berries

November 7, 2017 by Megan 5 Comments

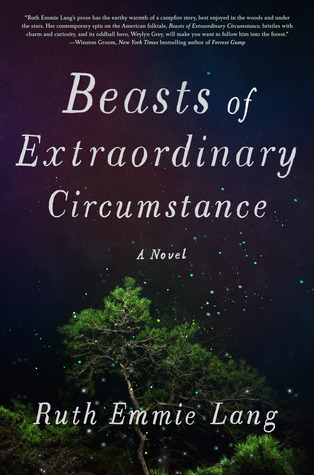
One of my favorite things about Book of the Month (among the many) is the opportunity members sometimes get to read a book before it’s released to the rest of the world. Ruth Emmie Lang’s wonderfully unexpected novel Beasts of Extraordinary Circumstance, which will be released next week on November 14th, was one of the October selections, and honestly, I was planning to share this post with you then, but I enjoyed this book so immensely, I couldn’t wait.

Lang’s imaginative novel follows Weylen Grey, a young orphan who was raised by wolves, as he grows up and travels the country looking for his true home. Each section of the story (set in a new year and different location) is told by those around Weylen - young Mary who befriends him in the woods while making deliveries for her father; a teacher who is taken aback by the student refusing to sit in a desk; an inexperienced mayor whose town is faced with an impending hurricane.

Judge Steph Ortiz, who chose this book for BOTM, described Beasts as “so comfortable and uplifting” and said it was “exactly the book [she] needed right now, and it made [her] so happy [she] wanted to howl at the moon.” After finishing the phenomenal The Rules of Magic, I was ready to be swept away again. A book that made me extraordinarily happy was exactly what I was looking for, and this one didn’t disappoint!

Unlike many of the other books I recommend, which while amazing are often full of tough topics, this novel left me with a wonderfully cozy feeling, and seriously, if you haven’t stopped and pre-ordered it yet, I’d suggest you do so now. It’s an excellent debut; I can’t wait to see what else Lang cooks up in the future.

Speaking of cooking (you had to know that was coming, right?), I decided to whip up a whimsical dessert to go along with this fairy tale novel. On one of her visits to the forest to see Weylen, Mary brings with her a freshly baked sponge cake, which they eat with hand-picked berries. I found a slightly fancy-sounding but down-to-earth-looking sponge cake recipe from Vikalinka and knew it would be a perfect fit.     

The only tweak I made to her recipe was to add some additional berries to the compote (and in decorating). In fact, I started by making the berry compote, adding the raspberries and blackberries to a small saucepan with a touch of water and some sugar. After about 15 minutes, I smushed the berries up a bit because there didn’t seem to be much thickening occurring. I let it continue cooking for another 10 minutes or so before following the rest of the directions. I used my food processor to blend the mixture until smooth, pushed it through a fine sieve and set it aside.

To make the cake, I started by preheating my oven to 350 degrees F and greasing my cake pans. (I didn’t line them with parchment paper, like the original recipe directs, but I didn’t have any issues getting the cakes out of my pans once they were cooled.)

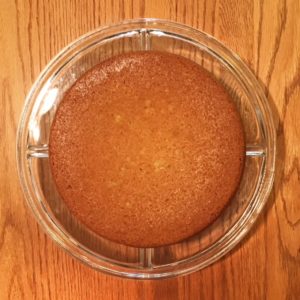
In a large bowl, I mixed the butter and sugar until light and fluffy, adding the eggs one at a time and mixing for about a minute each. Finally, I added the vanilla and lemon zest.

In a separate bowl, I combined my dry ingredients, sifting together the flour, baking powder, baking soda and salt. I added the dry ingredients to the wet ingredients, mixing well. The end result was a very thick batter (according to Vikalinka, it should be the consistency of buttercream frosting).

I scooped approximately half into each cake pan and then used my kitchen scale to ensure they were even (about 2 pounds each, including the pan). It wasn’t specified in the original recipe, but I had some minor concerns they wouldn’t spread out due to thickness, so I used a scraper to spread the batter as evenly as I could in each pan. Then, the cakes went into the oven for about 30 minutes.

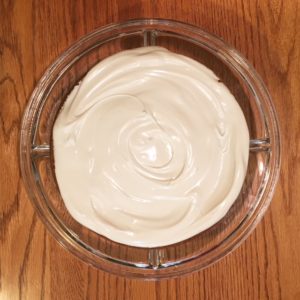
Meanwhile, I made the mascarpone cream. I used a hand mixer to whip the chilled mascarpone with the powdered sugar and vanilla extract for about 2 minutes. To that mixture, I added the whipping cream and whipped for a few more minutes until it was stiff. I covered the bowl and put it in the fridge to stay cool while the cake finished baking and cooled.

Once the cakes were out of the oven, I allowed them to cool on a baking rack for 20 minutes, before turning them out so they could cool completely. I was a bit nervous about assembly (since I’m not usually the best cake decorator), but this cake features a very unfussy decor and is perfect for an imprecise decorator such as myself.

To start, I placed one of the cooled cakes on a cake stand. I covered that with a thick layer of the mascarpone cream (I ended up having a little bit left… it seemed like a lot when I was decorating).

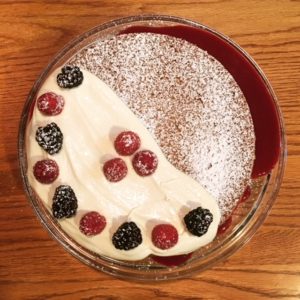
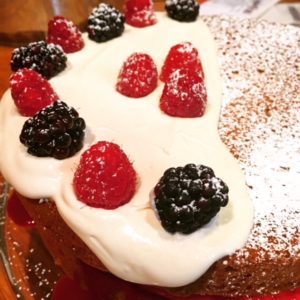
On top of the layer of cream, I poured the berry compote and spread it a bit with a cake spreader. (Mine ended up being somewhat thinner than it appeared in the original recipe, but it still tasted delicious, and made for a lovely garnish on the plate afterward.) Atop the filling, I added the second cake and began the decorating process. I used some of the leftover cream on about half of the cake, used leftover berries to make a design and dusted the whole thing with a bit of powdered sugar.

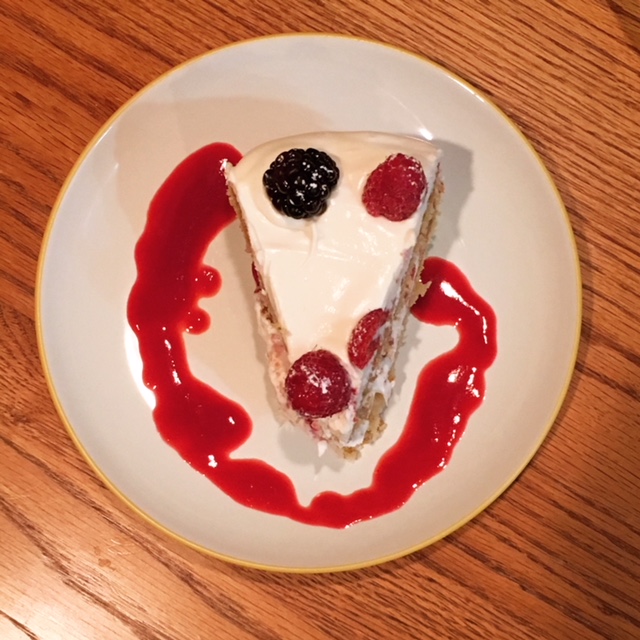
The finished cake may not have been as gorgeous as I had hoped, but it still looked impressive (in my opinion). More importantly, it tasted amazing. This is definitely a cake I’d like to try again.

Sponge Cake with Forest Berry Compote

  • Servings: 8
  • Time: 1 hour 15 minutes
  • Print

Ingredients

  • 1⅕ cup blackberries and raspberries
  • ⅕ cup sugar
  • 2 tbs water
  • 1 cup butter, softened and unsalted
  • 1⅓ cup granulated sugar
  • 4 eggs, large
  • 2 tsp vanilla bean paste or extract, divided
  • 1¾ cup flour
  • 2½ tsp baking powder
  • ½ tsp baking soda
  • ½ tsp salt
  • zest of 1 lemon
  • 1 cup mascarpone, chilled
  • ¼ cup powdered sugar
  • ¾ cup whipping cream

To make the forest berry compote

  1. In a small saucepan combine berries, sugar and water. Smash berries and cook over low heat for 15 minutes until the syrup coats a spoon.
  2. Remove from the heat and process in a food processor or a blender until smooth.
  3. Push through a fine sieve to get rid of the seeds and set aside.

To make the cake

  1. Preheat the oven to 350 degrees F, grease two 8" round cake pans and line with parchment paper, set aside.
  2. In the bowl of a stand mixer cream softened butter with sugar until light and fluffy.
  3. Start adding eggs one by one, whipping until well combined after each addition for about a minute.
  4. Add 1 tsp vanilla bean paste/extract and lemon zest.
  5. Combine sifted flour, baking soda and powder and salt in a separate bowl.
  6. Add dry ingredients to the wet ingredients, mix well, stopping the mixer and scraping sides and the bottom of the bowl.
  7. Divide the batter between two pans. Weigh them to get exactly the same cake in size.
  8. Bake in the oven for 30-35 minutes or until cake tester comes out clean.
  9. Remove from the oven and set on a wire rack to cool for 20 minutes, then remove from the pan and cool completely.

To make the mascarpone cream

  1. Whip chilled mascarpone with powdered sugar and 1 tsp vanilla bean paste/extract for 1-2 minutes until well combined.
  2. Then add whipping cream and whip for 2 more minutes until stiff.
  3. Cover and refrigerate until ready to use.

Assembling the cake

  1. Spread mascarpone cream on the bottom layer of the cake.
  2. Pour the berry compote on top and gently spread with a offset spatula.
  3. Top with another cake layer and dust with some powdered sugar for the traditional look. Optional: top a portion with leftover mascarpone cream and/or berries.

Slightly adapted from: Vikalinka

This post contains affiliate links. Full disclosure here.
Filed Under: book review, recipe Tagged With: baking, book of the month, fiction, fruit, magical realism

  • « Go to Previous Page
  • Go to page 1
  • Interim pages omitted …
  • Go to page 18
  • Go to page 19
  • Go to page 20
  • Go to page 21
  • Go to page 22
  • Interim pages omitted …
  • Go to page 30
  • Go to Next Page »

Primary Sidebar

About

The Hungry Bookworm brings together literature and food. Megan has an insatiable appetite for both.

As C.S. Lewis said, “Eating and reading are two pleasures that combine admirably.” Enjoy!

  • Bloglovin
  • Facebook
  • Instagram
  • Pinterest

Subscribe

Don't miss out on bookish content, exclusive giveaways, and of course, book club-friendly recipes. Get notified of new posts via email.

Join 2879 subscribers.

Search for Ingredients, Recipes, or Books

Recent Posts

  • Subscriber Box Review: Literati Book Club - Roxane Gay's Audacious Book Club
  • Arsenic and Adobo + Ensaymada
  • Review of The Kindred Spirits Supper Club
  • Kids Edition: Sometimes I Like to Curl Up in a Ball + "Dirt" Pudding Cups
  • The Midnight Library + Broccoli and Ricotta Toast

Goodreads

Tags

5 ingredients or less appetizer baking book club book list book of the month books about food bread breakfast brunch chicken contemporary cookies cultural dessert dinner dinner party dystopia easy prep favorites fiction fruit historical fiction holiday ice cream linkup lunch meat memoir mini review nonfiction pasta quick read reading challenge science fiction seafood show us your books side dish snack soup TBR list thriller top ten tuesday vegetarian veggies

Archives

Other Great Book Blogs

Literary Quicksand
Never Enough Novels
Death by Tsundoku
Professional Reader 25 Book Reviews
Privacy & Cookies: This site uses cookies. By continuing to use this website, you agree to their use.
To find out more, including how to control cookies, see here: Cookie Policy

Footer Widget Header

Megan’s Instagram

Copyright © 2025 · Hungry Bookworm