• Skip to primary navigation
  • Skip to main content
  • Skip to primary sidebar
  • Home
  • Reviews
    • Book Index
    • Fiction
    • Non-Fiction
    • Top Ten Tuesdays
The Hungry Bookworm

The Hungry Bookworm

reading + eating

  • Recipes
    • Drinks
    • Snacks, Sides & Apps
    • Main Dishes
    • Desserts
    • 5 Ingredients or Less
  • About
    • Meet Megan
    • How I Rate
    • Review Policy
    • Contact

dessert

How to Find Love in a Bookshop + Gingerbread Books

September 30, 2017 by Megan Leave a Comment

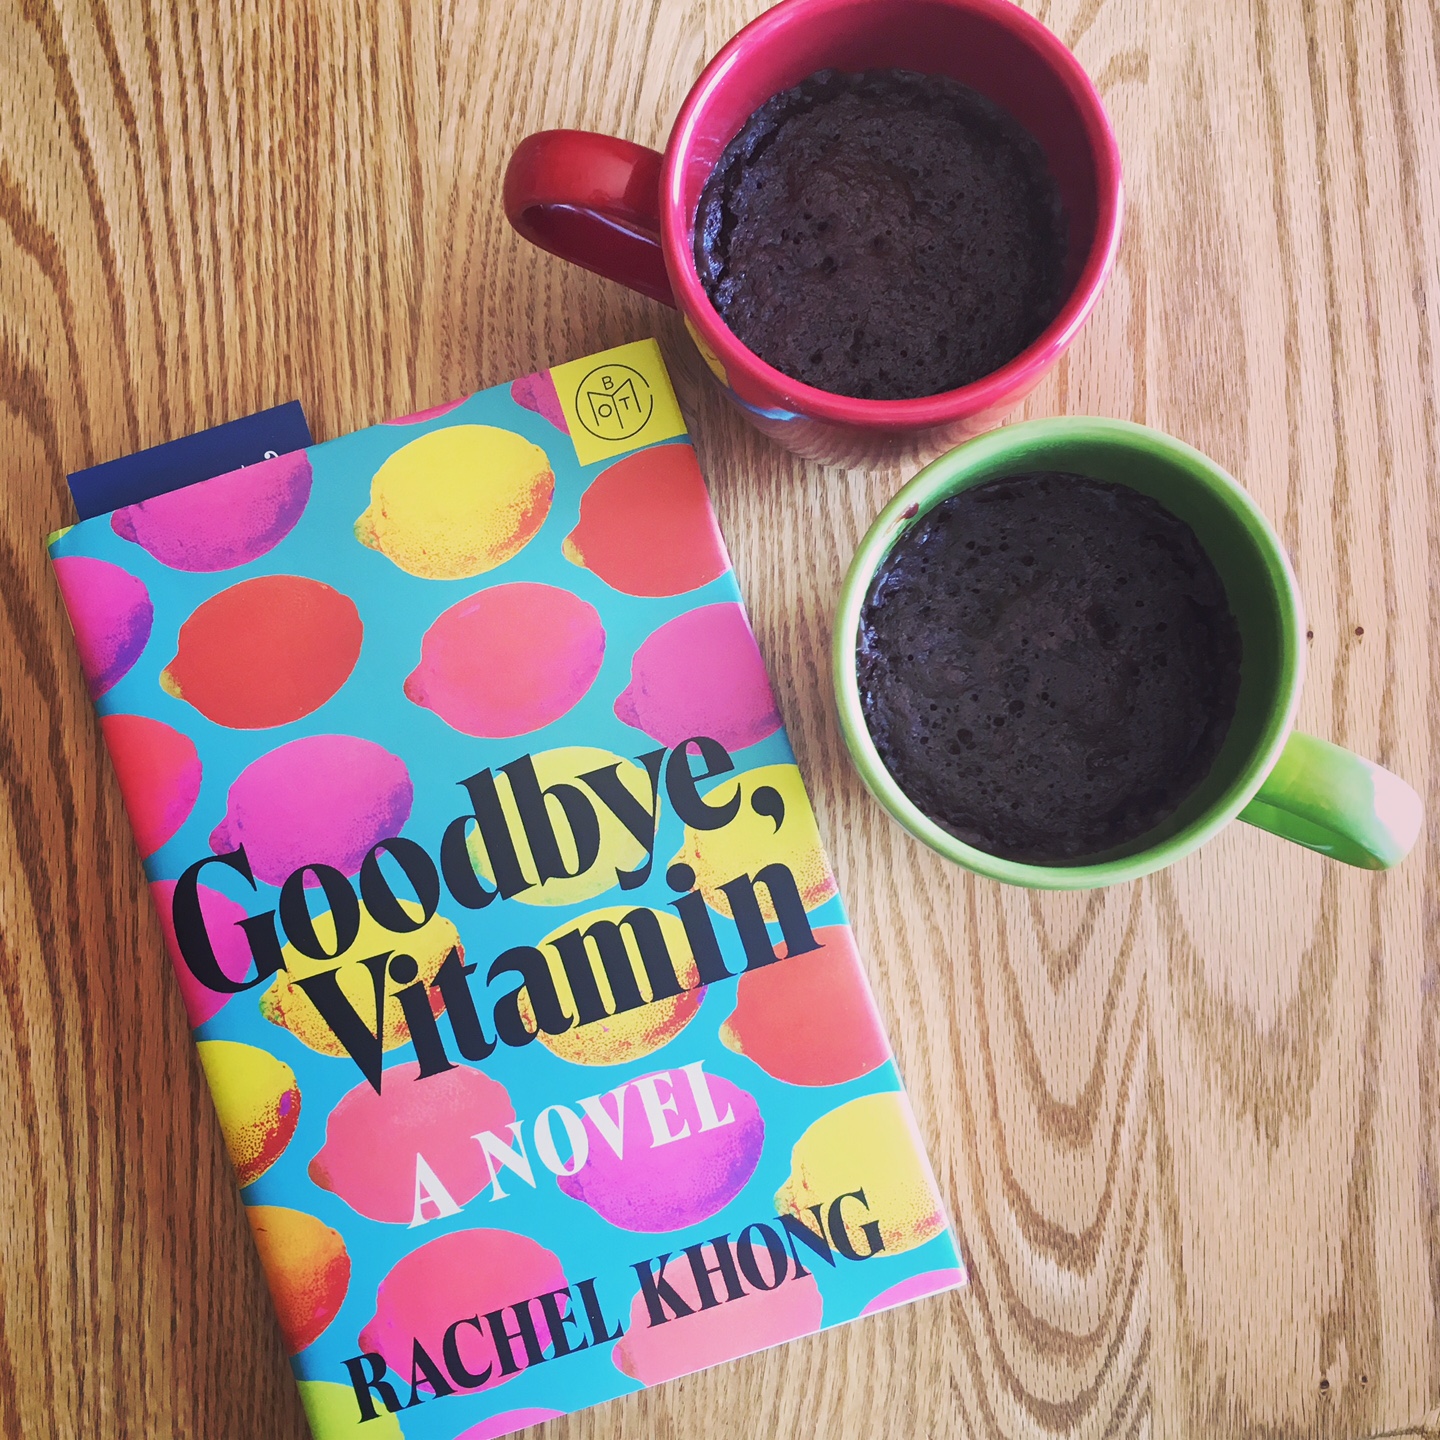
I think fall may be officially here (weather-wise), and I’m pretty excited about it. Fall is the best time of year for baking and soups and comfy sweaters and cozy books. Bring it on! Veronica Henry’s How to Find Love in a Bookshop is one such cozy book, and as chance would have it, an excellent conduit for baking as well.

From the description, Nightingale Books is an idyllic bookshop - one I definitely wouldn’t mind spending a few hours in! Set up in the Cotswolds by Julius Nightingale and now passed on to his daughter Emilia, it’s a charming little store, one that is everything to the townspeople. As the story unfolds, we discover more about Julius, Emilia, the employees of the bookstore, the local chef, the lady of the manor, and so many more.

It really is as if we’re welcomed into the town alongside them. In its entirety, it reminded me a bit of Stars Hollow crossed with Love Actually. The end wraps up quite neatly but that didn’t bother me at all. Quite the opposite, I may have been disappointed if this wonderful story didn’t leave me feeling as cozy at the end as it had throughout.  

A heartwarming novel like this one definitely deserves something welcoming to accompany it, and though the story features a magnificent chef who makes mouthwatering food throughout, the recipe that stuck out to me most was the gingerbread (cookie) books she created near the end. It just felt so perfect to create cookie books to go along with a novel about a bookshop.

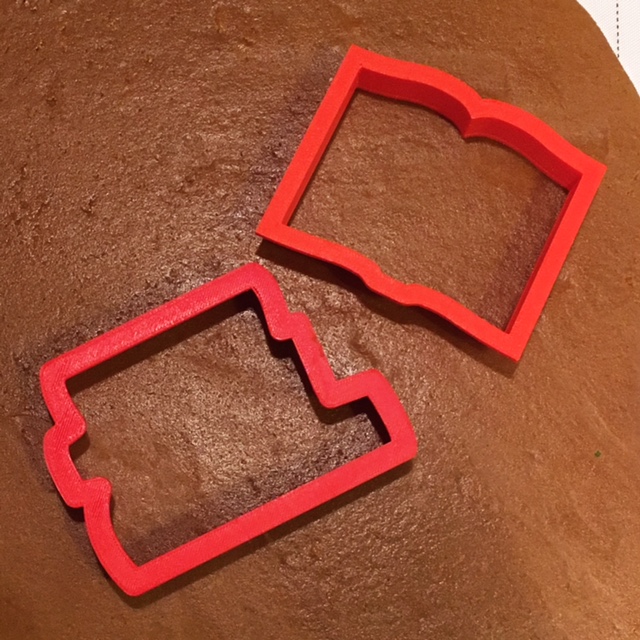
I’m not the best decorator, so the descriptions of the beautiful, intricately detailed cookies made me a bit nervous, but I decided to push along anyway. I found a recipe for soft gingerbread cookies from Bless This Mess, ordered a couple of adorable book-shaped cookie cutters - an open book and a stack of books - and got to work.

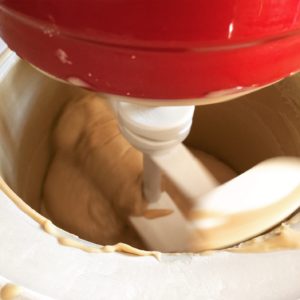
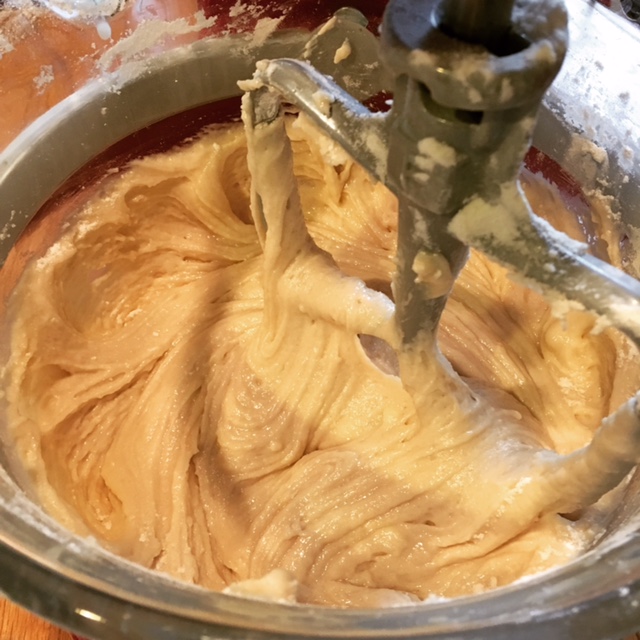
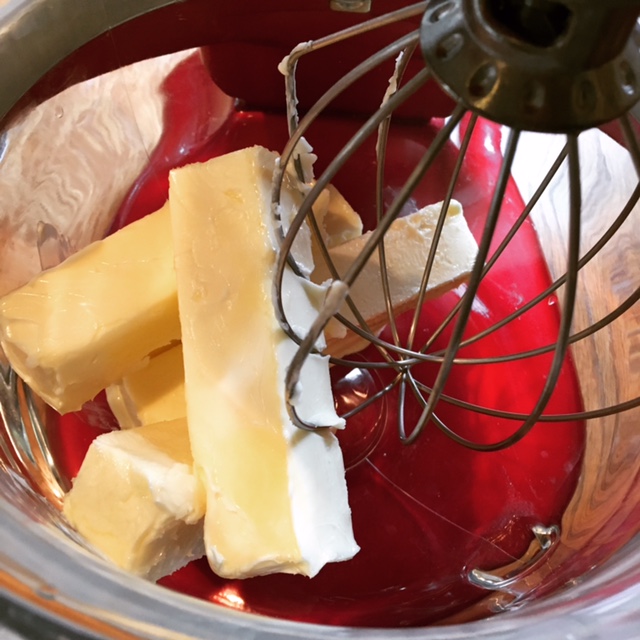
To start, I put my softened butter in a large bowl and creamed it, adding the sugar gradually. Then, I added an egg, the molasses and white vinegar, beating until well-blended.

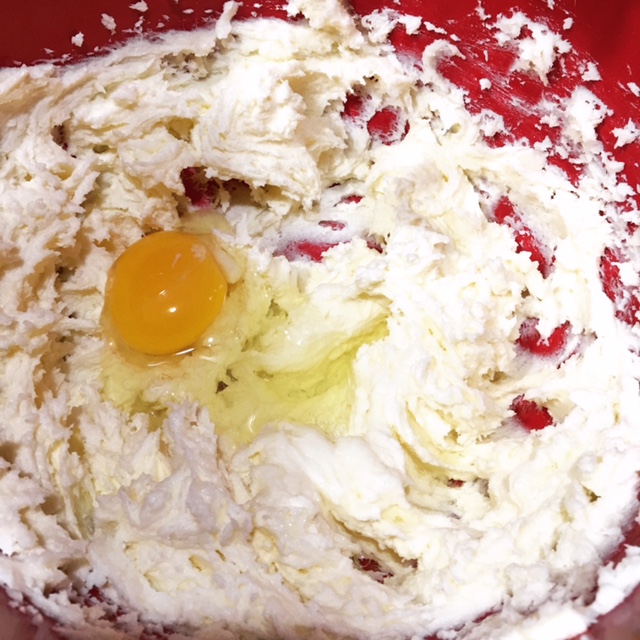
I used a mesh colander to sift the dry ingredients into the wet ingredients. Because the one I have only holds about 1 cup, first I did 2 cups of flour, followed by all of the spices, salt and baking powder, and then the remainder of the flour.

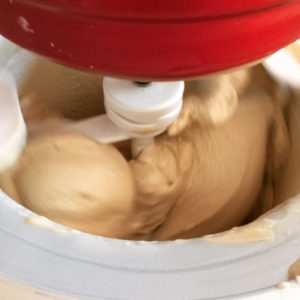
Once the cookie dough was well-blended, I wrapped it in plastic wrap and allowed it to chill in the fridge for about 45 minutes. (Note: I ended up needing an additional cup of flour because my dough was too sticky to properly roll and cut out. I realized this after refrigeration and several attempts to roll it and cut it. I then added the additional cup of flour, allowed it to chill again.)

Since I prefer my gingerbread cookies soft, I followed the suggestion from the original recipe and kept the dough approximately ¼” thick when I rolled it out. Using my adorable book-shaped cookie cutters, I ended up making just under 30 cookies. The amount of cookies you get will depend on the size of your cutters. Mine were about 3-4 inches.

I baked each batch for about 11 minutes, allowed them to cool, and set to decorating. After a few practice cookies, which Scott was only too happy to help taste-test, I decorated some cookies worth photographing. I created a tribute to this week’s book, and of course, one for the blog. 🙂

Soft Gingerbread Cookies

  • Servings: approx. 2 dozen (3-4 inch cookies)
  • Time: 50 minutes
  • Print

Ingredients

  • 1 cup butter, at room temperature
  • 1 cup sugar
  • 1 egg
  • 1 cup dark molasses
  • 2 Tablespoons white vinegar
  • 5 cups flour
  • 1½ teaspoons baking soda
  • ½ teaspoon salt
  • 2 teaspoons ground ginger
  • 1 teaspoon ground cinnamon
  • 1 teaspoon ground cloves

Directions

  1. Cream butter, adding sugar gradually. Beat until well combined and light and fluffy, about 3 minutes.
  2. Beat in egg, molasses, and vinegar.
  3. Sift all of the dry ingredients together and then blend sifted dry ingredients into the wet ingredients.
  4. Divide the dough into two even pieces, wrap each piece of dough in plastic wrap, and refrigerate for 30 to 90 minutes.
  5. When the dough is done chilling, preheat oven to 350 degrees. Working in sections, roll the dough 1/2″ thick on a floured surface; cut into desired shapes. Place shapes on a baking sheet lined with parchment paper or a baking mat.
  6. Bake at 350 degrees for 10-12 minutes. Let the cookies cool on the pan for 5 minutes and then move to a cooling rack.
  7. Repeat with remaining dough. Decorate cooled cookies with royal or buttercream icing, or eat them as they are.

From: Bless This Mess

Notes: If you like your gingerbread on the crispy side, roll it 1/4″ thick and bake for 11-12 minutes. If you like it nice and soft (though still very sturdy), roll the dough 1/2″ thick and bake for 10 minutes. If you play around with the thickness of the dough and the baking time, you’ll discover a cookie that meets your liking.


This post contains affiliate links. Full disclosure here.

Filed Under: book review, recipe Tagged With: baking, books about books, chick lit, cookies, dessert, fiction, quick read

The Summer of Impossible Things + Italian Rainbow Cookies

September 22, 2017 by Megan 1 Comment

Imagine my surprise when a few months ago, I came across another Hungry Bookworm blog since that’s my blog’s name! We bloggers introduced ourselves and I found out that she’s based in England, and where my blog was named to evoke a combination of food and books, hers was named after the beloved children’s book The Hungry Caterpillar. We decided to try our hand at a collaboration, reviewing the same book and posting our own thoughts. If you'd like to check out her post on this novel, go here. (If anyone’s visiting from Julie’s blog, welcome!)

I chose our first title, opting for a British book I had heard amazing things about: The Summer of Impossible Things by Rowan Coleman. It wasn’t easy to find over here in the states for free (fair warning, readers), but since it wasn’t in the library and I really wanted to give it a try, I bit the bullet and bought it from Amazon, which did have a few copies available. As you all know, I don’t usually buy books before knowing I like them, but I’m glad I took a chance on this one!

This book is along the lines of other “realistic time travel” love stories, as I call them - books like The Time Traveler’s Wife and movies like the lovely About Time - though it’s not exactly a traditional love story. If you’ve seen the movie Frequency, it’s more akin to that. Coleman’s novel is about a daughter’s seemingly impossible quest to save her mother - with a will and power she didn’t even realize she had.

I found this book to be very immersive, and though it’s a concept I’ve seen (and loved) in many other stories, I thought it was accomplished in its own unique way. I didn’t expect the love story that develops, but I quite enjoyed it. And not to give it away too much, but it was the inspiration behind the recipe I chose to make - at some point in 1977, our main character Luna stumbles into someone who works in (and I think eventually owns) an Italian bakery.

Though they’re not mentioned in the book, when I think of Italian pastries, I often think of the popular tri-color, or rainbow cookies, and their pop of color reminded me of the seventies. Instead of finding a recipe online, like I often do, I turned to a good friend (and fellow food lover), who graciously shared their family recipe with me. These cookies intimidated me, but I was assured they were very easy. My friend makes them every Christmas, and he’s right, I had no reason to be nervous about them.

First, I began with the almond paste and sugar, crumbling them together in the food processor. This recipe was the perfect opportunity to use some almond paste that I’d made myself, primarily because I couldn’t find it in the store when I looked for a previous recipe, but I’m told it’s not that hard to find. (Perhaps I was looking in the wrong spot, but if you have the same problem, it is quite easy to make; recipe link below.)

Then, I transferred my almond paste and sugar mixture to a bowl and beat in the softened butter (2 sticks). I also beat in the eggs, 1 at a time, making sure it was well-blended before I stirred in the flour. It was time to color the batter, so I split my batter into 3 different bowls and, using food coloring, colored one of the bowls pink and one of the bowls green. The third bowl remained uncolored.

I spread each batter evenly in its own pan before popping into a preheated 350 degree F oven for about 11 minutes.

While the layers baked, I made the chocolate glaze by heating semi-sweet chocolate and heavy cream in the microwave. I then set it aside to cool. I also heated the raspberry jam (my preferred flavor, but you can use apricot instead) in a small saucepan until it was smooth and spreadable.

I turned each layer out onto the cooling rack, and once it had cooled a bit and was no longer warm to the touch - about 10 to 15 minutes - I began assembling the final cookie. Green layer goes on the bottom.

I spread about half of the jam (I heated approximately a cup) on top of the green, added the white layer, pressed gently, and spread the rest of the jam on top of that.

Then, I added the final layer - the pink layer, pressed gently and topped with the chocolate glaze.

This does need to sit for about 30 more minutes, to make sure the glaze sets before slicing it into pieces, so I had to be patient. Once cooled, first order of business is to trim the edges and then they can be sliced, resulting in these little cookies as my final product.

Mine turned out a bit thicker than I remember them being when I had eaten them in the past. They’re still delicious, but more than a mouthful’s worth of cookie - mine are better eaten with a fork, like a tiny cake. (Please see my notes below on pan size.) These are a quite cakelike cookie, and more delicious than I recall as well, so they’re definitely worth a try. Thank you so much to my friend, for sharing their recipe with me and the blog! I hope our novel’s Italian bakery owner would be proud. 🙂

Tri-Color Cookies (Italian Rainbow Cookies)

  • Servings: 50-72 cookies
  • Time: about an hour
  • Print

Ingredients

  • 1 cup sugar
  • 1 can/tube (8 oz) almond paste*
  • 1 cup butter (no substitutions), softened
  • 4 large eggs
  • 2 cups flour
  • 6 drops red food color
  • 4 drops green food color
  • For assembly and the glaze:

  • ⅓ cup heavy cream
  • 3 oz. semi-sweet baking chocolate, chopped
  • Apricot or raspberry jam (seedless)

Directions

  1. Lightly coat three 8x8** pans foil baking pans with vegetable cooking spray and dust with flour.
  2. In a food processor, pulse the sugar and almond paste until the almond paste is crumbled and broken into small pieces. Transfer the mixture to a large bowl.
  3. Beat in butter, scraping the bowl with a rubber spatula, until smooth. Beat in eggs, 1 at a time, blending well after each addition. Stir in flour.
  4. Divide batter evenly into 3 bowls. Tint 1 bowl of batter pink (food color amounts above are a guide and can be adjusted as needed to achieve correct color) and tint 1 bowl of batter light green. The last bowl will remain uncolored.
  5. Evenly spread each type of batter onto its own prepared pan. Bake for approximately 11 minutes, or until the top springs back when gently pressed with finger. Allow each pan to cool slightly before inverting onto a cooling rack.
  6. Meanwhile, make the glaze. Microwave the heavy cream and chocolate in a small bowl on high for 1 minutes. Stir until smooth. Let cool until slightly thickened, about 30 minutes.
  7. Heat the jam in a small saucepan on the stove, until it’s no longer gloopy.
  8. Once the layers have cooled for about 10-15 minutes, place green layer on a plate or serving tray. Brush the top with half of the heated jam. Top with the white layer and gently press. Brush remaining jam over the white layer and top with the pink layer, press gently.
  9. Spread cooled glaze over the top of the layered cookie. Let stand for at least 30 minutes so the glaze can set.
  10. With a serrated knife, trim the edges. Cut crosswise into six 2-inch wide strips. Cut each strip into 12 slices.
From: A friend’s family recipe

Notes: *If you prefer to make your own almond paste, that’s what I did for a previous recipe. It’s really easy and leftovers can be frozen for up to 3 months. Use this recipe from Taste of Home. **If you are doubling the recipe, use the larger foil pans, 11½ x 16½. However, if you still want to make only a single batch, I would recommend using 9x9 pans instead so the cookies are not quite as thick as mine ended up. 😛

This post contains affiliate links. Full disclosure here.

Filed Under: book review, recipe Tagged With: baking, contemporary, cookies, dessert, fiction

Goodbye, Vitamin + The Most Dangerous Chocolate Cake in the World

September 5, 2017 by Megan 2 Comments

I finally got around to reading my July Book of the Month selection, a debut novel by Rachel Khong titled Goodbye, Vitamin, and it was such a quick read that it felt like I barely had it open before I was finished. It is both funny and touching, following a year in the life of 30-year-old Ruth as she quits her job and moves back home to spend time with her father who was recently diagnosed with Alzheimer’s.

Khong’s writing style is unassuming, and the results are comical and endearing. Ruth’s struggle isn’t one that I personally relate to, but it felt truthful and hopeful at the same time. When she arrives home just after Christmas, Ruth unhappily discovers that her mom has become afraid of cooking at home, convinced that her husband’s memory loss was caused by not only the packaged ingredients but the pots and pans themselves. After taking some time to get her bearings (and get over the heartbreak of her recently called-off engagement), Ruth throws herself into caretaking and doing whatever she can to help improve her father’s memory.

At one point, Ruth attempts to make a jellyfish-centric meal to help stave off further dementia, and while it’s not a success, it doesn’t stop her culinary adventures. In an email forward, she stumbles across THE MOST DANGEROUS CHOCOLATE CAKE IN THE WORLD, so-named because “from the moment you decide to make it until you sit down to eat is above 5 minutes!” Armed with a mug and a microwave, she makes it one day and sends a picture of the results to her forward-happy friend. I knew I wanted to make it too.

I can’t be sure, but I may have found the exact recipe Khong references in the novel. Both the one in Goodbye, Vitamin and the one I found online from the lovely Ree Drummond require 3 Tablespoons of chocolate chips, and I knew I was on the right track. Though I suppose it’s entirely possible all mug cakes have the same requirement, I was still pretty excited about it.

I actually brought all of the ingredients (and mugs) over to my sister’s house last weekend to try it out. We were belatedly celebrating her birthday together, and I thought chocolate cake was the perfect addition to our already fun-filled Sister Day.

I used a separate bowl to combine all the ingredients before scraping them into each mug, but the recipe calls for them to go straight into the mug, so do whatever you think works best. I wanted to make sure everything was well-combined (no lumps), but on the other hand, I had slightly more cleanup.

First, I mixed my dry ingredients - 3 Tablespoons each of all-purpose flour and sugar, 2 Tablespoons of cocoa powder, ¼ teaspoon of baking powder and a pinch of salt - using a mini whisk. Then, I added the wet ingredients - 3 Tablespoons each of milk and vegetable oil followed by a splash of vanilla. I made sure those were well-combined before adding 3 Tablespoons of chocolate chips.

I poured the mixture into one of the waiting mugs and put it in the microwave for 90 seconds. As Ruth remarked in the novel, “they look[ed] like beautiful souffles fresh out of the microwave.” I made 3 all together, one for each of us (my brother-in-law included), and after snapping some pictures while they cooled for a few minutes, we dug in.

They were delicious, and yes, absolutely dangerous. We finished them in a hurry!

I’m not normally a huge chocolate cake fan, but this wasn’t too decadent nor too much. It would go great with a scoop of ice cream, and it’s super easy to make for just the 2 of us - no tempting leftovers! Also, if you’re craving some chocolate in the summer, there’s no need to heat up the whole house with the oven.

The Most Dangerous Chocolate Cake in the World

  • Servings: 1
  • Time: 5 minutes
  • Print

Ingredients

  • 3 Tablespoons all-purpose flour
  • 3 Tablespoons sugar
  • 2 Tablespoons cocoa powder
  • ¼ teaspoon baking powder
  • Pinch of salt
  • 3 Tablespoons milk
  • 3 Tablespoons vegetable oil
  • Splash of vanilla extract
  • 3 Tablespoons chocolate chips

Directions

  1. Put the flour, sugar, cocoa powder, baking powder and salt in a 12-ounce microwave-safe ceramic mug. Blend thoroughly with a fork or small whisk. Add the milk, vegetable oil and vanilla and blend until smooth. Stir in the chocolate chips.
  2. Microwave on high for 90 seconds. Do not overcook or the cake will be dry. Let cool for 2 to 3 minutes before eating.

From: Ree Drummond, The Pioneer Woman

If you like your cake a little less rich, feel free to reduce the chocolate chips to 2 Tablespoons instead.


This post contains affiliate links. Full disclosure here.

Filed Under: book review, recipe Tagged With: book of the month, contemporary, dessert, fiction, quick read

Geek Love + Sharp Cheddar Popcorn and Cotton Candy Ice Cream

August 12, 2017 by Megan Leave a Comment

Before I get started on today's post, I want to announce the winner of my first ever Hungry Bookworm Giveaway, in honor of my 1 Year Anniversary (which I still can't get over!). But, without further ado...

Congratulations, Laura!

I'm so happy to have made your day with your win. Your copy of Pachinko has already shipped, and you should receive it soon! (More details emailed to you as well.) Thank you to everyone who participated, subscribers new and old! It is much appreciated, and I hope you continue to enjoy my posts week after week. 🙂 Now onto another review and recipe!

_________________________

While usually I got to my own to-be-read list when picking book club selections, sometimes I try to be a little more open-minded. In this most recent case, I stumbled upon a Buzzfeed list that sounded like a perfect fit for book clubs - Books You Won’t Be Able To Stop Thinking About usually equals good discussion. As a bonus, I’d already a handful of them and liked most of them, so I filed it away for future use.

I don’t remember exactly what prompted me to choose Geek Love, but that’s how we got here. Katherine Dunn’s novel tells the story of an extremely unique family. At best, the Binewski family runs a traveling carnival and unique is probably a generous understatement. The parents, Al and Lil, despise “norms” and stop at nothing to breed their odd children, who go on to become acts in the Binewski freak show. Though many of the children died in the attempts at their creation, five remain. Arty, also known as Aquaboy, has flippers instead of hands and feet. The twins, Elly and Iphy, are conjoined. Chick, though a disappointment at first, is discovered to have telekinetic powers. And Olympia, our narrator, is a hunchbacked albino dwarf.   

Like a car accident, I often wanted to look away, but I couldn’t help myself. It was gruesome and unbelievable, and honestly, so incredibly imaginative on Dunn’s part. It’s hard to explain many of my reactions to the book without sharing plot points, though a lot of it had me going, “Wait, what?” It wasn’t perfect, and I didn’t love it, but like the list that drew me to it, I will definitely never forget this one.

Though food was only mentioned in the periphery, as Dunn described the hustle and bustle of the midway, you could almost smell the freshly-made popcorn and the sugary-sweetness of the cotton candy. I went with a Sharp Cheddar Cheese Popcorn recipe to serve at book club, alongside the rest of the snacks, and later on I made some blue-ish Cotton Candy Ice Cream to accompany the book as well.

Both recipes were really quite easy, which is always nice. To start with the popcorn, I popped a half cup of kernels on the stove top just by following directions on the container itself.


Then, I combined the butter, garlic powder and salt in a saucepan, allowing it to melt. Once it began to simmer, I poured it over the popped popcorn, as directed, and stirred until it was all well-coated.

Then, with the popcorn on a sheet pan, I covered it with freshly grated extra sharp cheddar cheese and placed it in the oven under the broiler for a few minutes until the cheese was melted. I transferred most of it to a bowl (and snacked on the rest until everyone arrived!) and served it up.

The cotton candy ice cream was significantly easier than the Earl Grey Ice Cream I had made just before trying this recipe. If you’re looking for an easy way to get into the ice cream game, I’d recommend this one - it’s basically foolproof.

First, I combined the sugar and milk with a whisk, until the sugar was dissolved. Then, I added the vanilla, whipping cream and cotton candy syrup. (I used a pink syrup, and since I wanted it to be blue, I also added some blue food coloring in this step.) Once the mixture was well-combined, I poured it into my ready-to-go ice cream attachment and let it do its thing.


After 30 minutes, the ice cream was done...except that I prefer it to be a bit more on the hard side, so I stuck it in the freezer for a handful of hours before I actually was able to dig in. It was nothing like the ice cream I’d made before - where that was dense and rich, this was airy and light in flavor. Initially, I wasn’t sure I liked it as much, but the more I ate, the more I enjoyed it. Light and airy is exactly how cotton candy should be, regardless of if you’re eating the candy itself or an ice cream version of it. I ended up loving it 🙂

Sharp Cheddar Cheese Popcorn

  • Servings: 2-4
  • Time: 15 minutes
  • Print

Ingredients

  • ½ cup popcorn kernels, popped
  • ¼ cup butter
  • ⅛ tsp garlic powder
  • ¼ -½ tsp kosher salt
  • 3 oz sharp cheddar cheese, finely shredded

Directions

  1. In a small saucepan, combine butter, garlic powder and salt. Melt butter and heat until starting to simmer.
  2. Pour butter over popcorn. Stir until all popcorn is evenly coated.
  3. Spread popcorn on a sheet pan, sprinkle with finely shredded cheese (I used a microplane zester to shred mine). Stir it around until evenly distributed.
  4. Place rack in the center of the oven and turn broiler to low. Cook popcorn until cheese is melted (about 2-3 minutes). Watch carefully so it does not burn.
  5. Pour cheesy popcorn into bowl and mix. Enjoy!

Adapted from: Houseful of Homemade

Cotton Candy Ice Cream

  • Servings: 6
  • Time: 35 minutes
  • Print

Ingredients

  • ¾ cup granulated sugar
  • 1 cup whole milk
  • 2 cup heavy whipping cream
  • ½ cup cotton candy syrup (I used Jelly Belly Cotton Candy Syrup)
  • 1 tsp vanilla extract
  • food coloring (optional)

Directions

  1. Before mixing ingredients, be sure that your chosen ice cream maker is ready to churn ice cream (attachments frozen, ice added, etc).
  2. In a medium bowl, whisk together milk and sugar until sugar is dissolved.
  3. Pour vanilla, heavy whipping cream, and cotton candy syrup into the bowl and whisk until combined.
  4. If using food coloring: Depending on the brand of cotton candy syrup you used, the mixture might already have a pink hue. If you'd like the ice cream to be pink, keep this in mind - you won't need to add much pink food coloring to get your desired color. If you'd like the ice cream to be another color than pink, don't worry - as pictured, I used blue food coloring, and only had to add a few drops to achieve a nice light blue color. No matter what color you're using, add the food coloring slowly (one drop at a time) and whisk thoroughly between each until the desired color is reached. Also, the hue of the cream should be a few shades darker than the color you'd like the final ice cream to be, as the whipped and frozen cream will appear lighter. TIP: If you're still worried how your chosen color will look, add a little bit of the cotton candy syrup and milk to a separate glass or bowl and test your food coloring with it.

  5. Pour the mixed ice cream mixture into the chilled bowl/attachment of your ice cream maker.
  6. Churn ice cream for 25-30 minutes or until desired consistency is reached. If you'd like soft ice cream, serve cotton candy ice cream immediately. If you'd like firmer ice cream, transfer the ice cream to your chosen storage container and let it freeze for another 4-6 hours.
From: Homemade Hooplah

This post contains affiliate links. Full disclosure here.

Filed Under: book review, of interest, recipe Tagged With: book club, dessert, easy prep, fiction, ice cream, snack

Jane of Austin + Earl Grey Ice Cream

July 25, 2017 by Megan 2 Comments

Though I read Pride and Prejudice in high school and loved it, I haven’t explored Jane Austen beyond that. I own copies of both Persuasion and Sense and Sensibility, but have yet to crack them open! (I know, I know…) So, when I was given the opportunity to read Jane of Austin: A Novel of Sweet Tea and Sensibility through Blogging for Books, I didn’t want to pass it up. After all, it’s about tea, which I love, and it seemed like it would be a nice modern dip into another Austen classic.

Jane and her sister Celia own a successful, adorable tea shop in San Francisco. But after being forced out, they head to their cousins in Texas with their younger sister Margot in tow, hoping to start afresh and recreate their tea shop magic there. Of course, Texas brings new men and intrigue, triumphs and defeats. I can’t compare it to the original, but I recognized a lot of Austen-style plot points, and of course, the sisterly bond can’t be missed. It was a breezy, enjoyable read, perfect for summer.

Probably the best of all was that this is the novel that finally led me to ice cream, completely unexpectedly. It was sheer inspiration! Definitive proof I shouldn’t try to force it, and excellent news that I can officially-officially forever be done with The Country of Ice Cream Star.  Though the book included several recipes throughout, none of them were exactly what I was looking for. I really thought a tea-based dessert would be lovely, and given the heat of the summer, I settled on Earl Grey Ice Cream.

First, I combined the whole milk, half and half and sugar in a medium saucepan. Once that seemed heated through - but wasn’t boiling, I added my 6 Earl Grey tea bags and allowed them to steep for 20 minutes with the cover on. I stirred it approximately every 7 minutes, though you may not need to be that precise.

I removed the tea bags and turned the heat up again. In a small bowl, I whisked together 5 egg yolks and vanilla extract. When the milk mixture was warmed, I took 2 Tablespoons and added it to the eggs, whisking constantly. After about 10 seconds, I added another 2 Tablespoons, whisked and repeated. After the ratios were roughly equal (or four times), I added the milk mixture into the eggs and whisked until it was all combined.

Then, I returned the mixture to the saucepan, cooking it over medium heat, while stirring constantly. I was slightly terrified it would burn, but with constant vigilance (and scraping the bottom and the sides), it all worked out. Once it thickened somewhat - and could coat the back of a wooden spoon - I poured it into a large, wide bowl through a fine strainer. I set the bowl in the fridge to cool, uncovered.

After it had sat for a little while and was no longer steaming, I added plastic wrap. It might not be necessary, but I didn’t want to create condensation.

This was the first time I got to use the ice cream maker attachment for my KitchenAid mixer - woo hoo! The directions require you to have it freeze for at least 15 hours beforehand, which I maybe should have read prior to letting my custard mixture chill for 8 hours. Good to know for next time!

Once the ice cream bowl was frozen enough, I set to work. (You should follow your own ice cream maker’s instructions from this point forward.) I turned the mixer to Stir and began adding the custard-y liquid to the bowl, which was a little more complicated than I would’ve liked, but luckily, spilling was minimal.

The whole process after that was very easy. I let it Stir and work itself into ice cream over the next 30 minutes, only checking in on it out of curiosity and for pictures.

Once it was finished, I scraped the ice cream into my insulated ice cream container and allowed it to freeze for another 2 hours. (Seriously, ice cream making is not for the impatient… If you want ice cream in a hurry, run to the store instead.)

It looked pretty good coming out of the freezer after (almost) two hours (if I’m being honest), but my patience was undergoing a major test, and after two days in the making, I was ready to dig in!

I took two scoops and couldn’t be more excited to give it a taste. It’s definitely tea-flavored, so if you’re not a fan, this probably isn’t for you. But I loved it! The ice cream did my favorite tea justice, and I think Jane Woodward would be proud.

Earl Grey Ice Cream

  • Servings: 3-5
  • Time: 6 hours, 20 minutes (mostly inactive)
  • Print

Ingredients

  • 1 cup whole milk
  • 2 cups half and half
  • ¾ cup sugar
  • 6 Earl Grey tea bags
  • 5 egg yolks
  • 1 tsp. vanilla extract

Directions

  1. In a small saucepan, warm the milk, half and half, and sugar over medium-heat, stirring occasionally. Once the milk is steaming (but not boiling), remove pan from heat. Place the tea bags into the pan, cover and steep at room temperature for 15-20 minutes, stirring occasionally. Remove tea bags, then return to medium heat.
  2. Meanwhile, in a separate bowl, whisk together the egg yolks and vanilla until frothy. Once the milk mixture is rewarmed, add 2 TBSP of the hot milk mixture to the eggs, and quickly whisk in until combined. Repeat 2-3 more times with more of the milk mixture, then gradually pour in the remainder of the milk mixture into the egg yolks and whisk quickly until combined.
  3. Return the new milk/egg mixture to the saucepan, and cook over medium heat, stirring and scraping the bottom of the pan constantly until the mixture thickens to a custard and coats the back of a wooden spoon.
  4. Immediately strain through a fine-mesh strainer, and then refrigerate until completely cooled (at least 6-8 hours).
  5. Freeze with an ice cream maker according to manufacturer’s instructions.

From: Gimme Some Oven

I prefer Twinings Earl Grey flavor, but feel free to use whichever brand of tea you like best. If you’re unable to make the ice cream within 6-8 hours of refrigerating the custard, it will last for up to 2 days. Be sure to keep it tightly covered.

I received this book from the Blogging for Books program in exchange for this review. This post contains affiliate links. Full disclosure here.

Filed Under: book review, recipe Tagged With: chick lit, contemporary, dessert, fiction, ice cream, quick read

Lots of Candles, Plenty of Cake + Funfetti Cake

June 1, 2017 by Megan 5 Comments

I added Anna Quindlen’s memoir Lots of Candles, Plenty of Cake to my to-read list almost four years ago. I don’t remember my reasoning for wanting to read it back then, but I know that I decided to finally rescue it from my too-long list - which currently sits at 436 books - because I wanted to make a cake.

Quindlen_Lots-of-Candles-Plenty-of-Cake.jpg

I knew nothing of Quindlen when I began reading, and over the course of her “memoir,” I can’t say I know that much more about her. Really it seemed more like a carryover from her columns in the New York Times as she described them - a collection of her thoughts on life and aging, coupled with bits of advice.

Perhaps I wasn’t exactly the target market for this book - I am roughly half her age, really just at the beginning of my career, not yet married and currently without children. I’m still figuring a lot of things out, and while in some ways she is too, we are figuring out very different things about life. I was able to glean a few interesting insights from her writing, but ultimately, I think this book is one I’d like to try again a couple of decades down the road.

The cake I envisioned when I chose this book was a towering cake ablaze with an unsafe amount of candles. So, I began my recipe search by buying four dozen tall, skinny, colorful candles to cover my imaginary cake. (Thank you, Amazon!) After all, candles do come first in the title - lots of them - and the plenty of cake comes second.

With the candles secured, I sought out a recipe for funfetti cake and found a great one from Sugar Spun Run. The homemade, triple-layer cake suited my needs perfectly. Now, I just had to execute…

I started the night before by setting out my frozen sticks of butter to soften overnight. Between the frosting and the cake, there was so much butter (over a pound and a half!). In the morning, I preheated my oven, separated my eggs and floured the pans to get started.

Then, I added the butter for the cake (1 stick, plus 1 tablespoon) to the stand mixer and beat until creamy. In went the sugar and oil, beaten until well-combined and creamy. I used a scraper on the sides of the bowl and added in the vanilla extract.

In a separate bowl, I whisked together the flour, baking powder and salt. Then, as instructed, I alternated between adding the flour and the milk to the butter-sugar mixture in the mixer, beating on medium speed until combined.

IMG_3094

I whipped the egg whites into stiff peaks and measured out a half cup of sprinkles to add to the cake batter.

IMG_3095

I gently folded them into the batter until both the egg whites and sprinkles were well-incorporated and the funfetti batter was complete.

IMG_3097

I only had 2 cake pans, so I put my best estimate of one-third of the batter into each of my cake pans, saving the last third to bake after the first two layers were finished. I baked them together for about 35 minutes, using a toothpick to test each one before allowing them to cool. After 15 minutes, I removed each cake layer from the pan so they could finish cooling on a rack. Then, I baked my last layer.

IMG_3098

After all of the cake layers were out of the oven and cooling, I set to work on my frosting. First, allll of the butter - 6 softened sticks - went into the stand mixer. (I increased the recipe by 50%, according to the recommendation, so I wouldn’t run out. I ended up having more than enough - please read my notes in the recipe.)

IMG_3099

Once the butter was creamy, I added salt and beat for about 20 more seconds. I did my best to add the powdered sugar gradually without making a mess, but I wasn’t quite successful. My lovely red mixer looked like it had been in a snowball fight by the time I was done! I let it incorporate approximately 1 cup at a time and then added in the vanilla extract.

My cake layers weren’t 100% even because I had had to estimate, so I started with the thickest layer at the bottom. I frosted the top of that, placed the next layer and frosted that, before placing the last layer and frosting the top and sides of the entire cake. As suggested, I put the cake with the crumb coat into the freezer for about 15 minutes before finishing the frosting with a final thicker layer.

IMG_3100

The last step to decorating the cake - but certainly not the least! - was adding the sprinkles. I watched quite a few tutorials on the best way to add the sprinkles without making a mess. My frosted cake was on a cardboard cake round, so I set that on a cooling rack nested into a baking sheet with sides. I cupped my dominant hand (in my case, my left) and filled it with sprinkles, carefully tipping them onto the side of the cake. Most of the extras fell into the baking sheet as expected!

I continued to rotate and sprinkle until the entire bottom third of the cake was covered in sprinkles. Lastly, I carefully covered the outside of the top of the cake with a thick line of sprinkles to match the bottom. It was easier than I expected it to be! And, as someone who is usually terrified of cake-decorating, I found that sprinkles not only do sprinkles look super festive, they cover a lot of errors. 🙂

IMG_3101

Last but not least, it was time for the candles. I didn’t end up using all of the four dozen candles I bought, but I covered the cake pretty well. The candles looked impressive. I have honestly never been more proud of a cake I’ve made - especially from scratch. Hope you enjoy it as much as Scott, my sister and brother-in-law, and my co-workers did! (I know I didn’t have to twist any arms, but thanks to all for taste-testing.)

Triple-Layer Funfetti Cake

  • Servings: 14
  • Time: 1 hour, 30 minutes
  • Print

Cake Ingredients

  • 9 TBS butter, softened
  • 3 cups sugar
  • 1 cup canola oil (vegetable oil would also work)
  • 4 tsp vanilla extract
  • 4 cups + 2 TBS all-purpose flour
  • 4½ tsp baking powder
  • 1½ tsp salt
  • 1½ cup milk
  • 9 egg whites (room temperature preferred)
  • ½ cup sprinkles

Buttercream Frosting Ingredients

  • 1 lb unsalted butter, softened to room temperature
  • ¼ tsp salt
  • 6 cups powdered sugar
  • 6 TBS heavy cream
  • 2 tsp vanilla extract

Cake Directions

  1. Preheat oven to 350F and prepare 3 8-inch round cake pans by generously greasing and flouring. Be sure to shake out excess flour.
  2. In stand mixer, beat butter on medium-low speed until creamy.
  3. Add sugar and oil and beat until all ingredients are well-combined and creamy.
  4. Scrape down the sides and bottom of the bowl and then stir in your vanilla.
  5. In separate bowl, whisk together your flour, baking powder, and salt.
  6. Measure out your milk. Then, with mixer on medium speed, gradually alternate between adding the flour mixture and the milk, starting and ending with the flour mixture. Stir until each one is almost completely combined before adding the next. Pause occasionally to scrape down sides and bottom of bowl.
  7. In separate bowl, combine your egg whites and, with a hand-mixer on high-speed, beat until stiff peaks form.
  8. Using a spatula, gently fold your egg whites and sprinkles into your batter. Take care to scrape the sides and bottom of the bowl so that ingredients are well-combined, and take care not to over-mix.
  9. Evenly divide cake batter into prepared pans.
  10. Bake on 350F for 35-40 minutes, or until a toothpick inserted in the center of each cake layer comes out clean or with few crumbs (should not be wet). For best results, rotate your cake pans halfway through baking to ensure even baking. Cakes will be a light golden brown when done.
  11. Remove cakes from oven and allow to cool in pans for 15 minutes. Run a butter knife around the inside rim of each pan and invert each onto a cooling rack. Allow to cool completely before frosting.

Frosting Directions

  1. In stand mixer, beat butter on medium-speed until creamy.
  2. Add salt and beat again for about 20 seconds.
  3. Gradually, about 1 cup at a time, add powdered sugar, waiting until each cup is completely mixed before adding the next cup.
  4. Then, 2 tablespoons at a time, add the heavy cream on medium-high speed, waiting until each addition is well-combined before adding the next 2 tablespoons.
  5. Add vanilla extract and stir on medium-high for 30 seconds.
  6. Transfer one layer of your cooled cake to serving platter. Use frosting to ice the top. Add the next layer, ice the top of that. Add your third layer on top and ice the top, and then do a thin "crumb coating" around the entire cake.
  7. Transfer to freezer for 10-15 minutes, then remove and apply a clean, thick coat of frosting around the entire cake.

From: Sugar Spun Run

Original recipe based on this technique from I Am Baker to frost cakes. She recommended increasing the above frosting recipe by 50% to ensure full coverage, but I had a TON leftover. I don’t like overly frosted cakes, but mine was still well-frosted according to taste testers (a good amount), so it’s up to you and your preferences.

This cake may also be made in 3 9" pans, just decrease the baking time. Start checking the cakes for doneness at 25 minutes.


P.S. It will apparently take me only 8 years (a shockingly short amount of time!) to finish my TBR list...assuming I don’t add any more books. If you’d like to calculate your own TBR time, check out Read It Forward’s calculator. Let me know in the comments how many years of reading you have ahead of you!

Screen Shot 2017-05-26 at 12.40.27 PM


This post contains affiliate links. Full disclosure here. 

Filed Under: book review, recipe Tagged With: baking, celebration, dessert, memoir, quick read

  • « Go to Previous Page
  • Go to page 1
  • Interim pages omitted …
  • Go to page 10
  • Go to page 11
  • Go to page 12
  • Go to page 13
  • Go to page 14
  • Go to Next Page »

Primary Sidebar

About

The Hungry Bookworm brings together literature and food. Megan has an insatiable appetite for both.

As C.S. Lewis said, “Eating and reading are two pleasures that combine admirably.” Enjoy!

  • Bloglovin
  • Facebook
  • Instagram
  • Pinterest

Subscribe

Don't miss out on bookish content, exclusive giveaways, and of course, book club-friendly recipes. Get notified of new posts via email.

Join 2879 subscribers.

Search for Ingredients, Recipes, or Books

Recent Posts

  • Subscriber Box Review: Literati Book Club - Roxane Gay's Audacious Book Club
  • Arsenic and Adobo + Ensaymada
  • Review of The Kindred Spirits Supper Club
  • Kids Edition: Sometimes I Like to Curl Up in a Ball + "Dirt" Pudding Cups
  • The Midnight Library + Broccoli and Ricotta Toast

Goodreads

Tags

5 ingredients or less appetizer baking book club book list book of the month books about food bread breakfast brunch chicken contemporary cookies cultural dessert dinner dinner party dystopia easy prep favorites fiction fruit historical fiction holiday ice cream linkup lunch meat memoir mini review nonfiction pasta quick read reading challenge science fiction seafood show us your books side dish snack soup TBR list thriller top ten tuesday vegetarian veggies

Archives

Other Great Book Blogs

Literary Quicksand
Never Enough Novels
Death by Tsundoku
Professional Reader 25 Book Reviews
Privacy & Cookies: This site uses cookies. By continuing to use this website, you agree to their use.
To find out more, including how to control cookies, see here: Cookie Policy

Footer Widget Header

Megan’s Instagram

Copyright © 2025 · Hungry Bookworm