• Skip to primary navigation
  • Skip to main content
  • Skip to primary sidebar
  • Home
  • Reviews
    • Book Index
    • Fiction
    • Non-Fiction
    • Top Ten Tuesdays
The Hungry Bookworm

The Hungry Bookworm

reading + eating

  • Recipes
    • Drinks
    • Snacks, Sides & Apps
    • Main Dishes
    • Desserts
    • 5 Ingredients or Less
  • About
    • Meet Megan
    • How I Rate
    • Review Policy
    • Contact

easy prep

Turtles All the Way Down + Spiral Mac 'n' Cheese

December 5, 2017 by Megan Leave a Comment

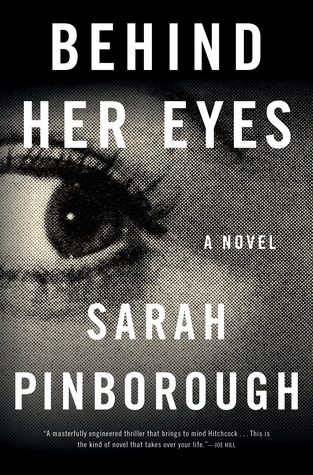
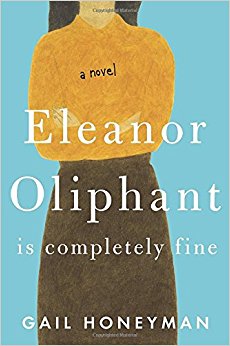
John Green has written many young adult novels, including one of my favorites, The Fault in Our Stars. He has a unique way of tackling both the everyday and the unexpected parts of the lives of teenagers. His latest novel, Turtles All the Way Down, is no exception. Like other teenagers, Aza tries her best in school, has an understanding best friend, and doesn’t know exactly what to do when she finds herself in a relationship. Aza also lives with obsessive-compulsive disorder and an often crippling level of anxiety, much of which was drawn from Green’s own experiences.

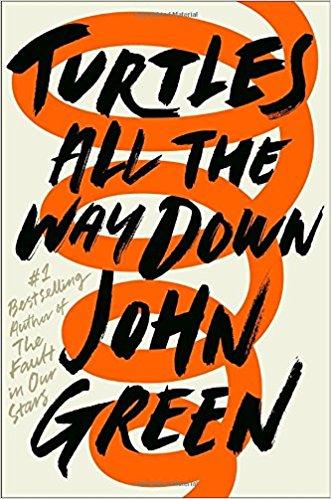
Because of that, Turtles tells an excellent, unique story. Admittedly, some of the scenes where Aza is having obsessive thoughts were hard to read. It almost felt like I was in her head, and in those moments, I read as if hiding behind split fingers - not wanting to go on but wanting to know what happened all the same. I admire Green’s willingness to not only discuss his own mental health issues but to write about them too, in a way that’s real.

Stories like these help to make mental health something that’s okay to talk about. The existence of a likeable character that readers can connect to and empathize with can help teenagers (and adults) realize that mental illness is not something to be embarrassed or ashamed of. In Green’s own words, “it’s important for people to hear from [those] who have good fulfilling lives and manage chronic mental illness as part of those good fulfilling lives.” And because of that, it is absolutely a book worth picking up - even if you aren’t familiar with John Green, even if you don’t usually read YA.

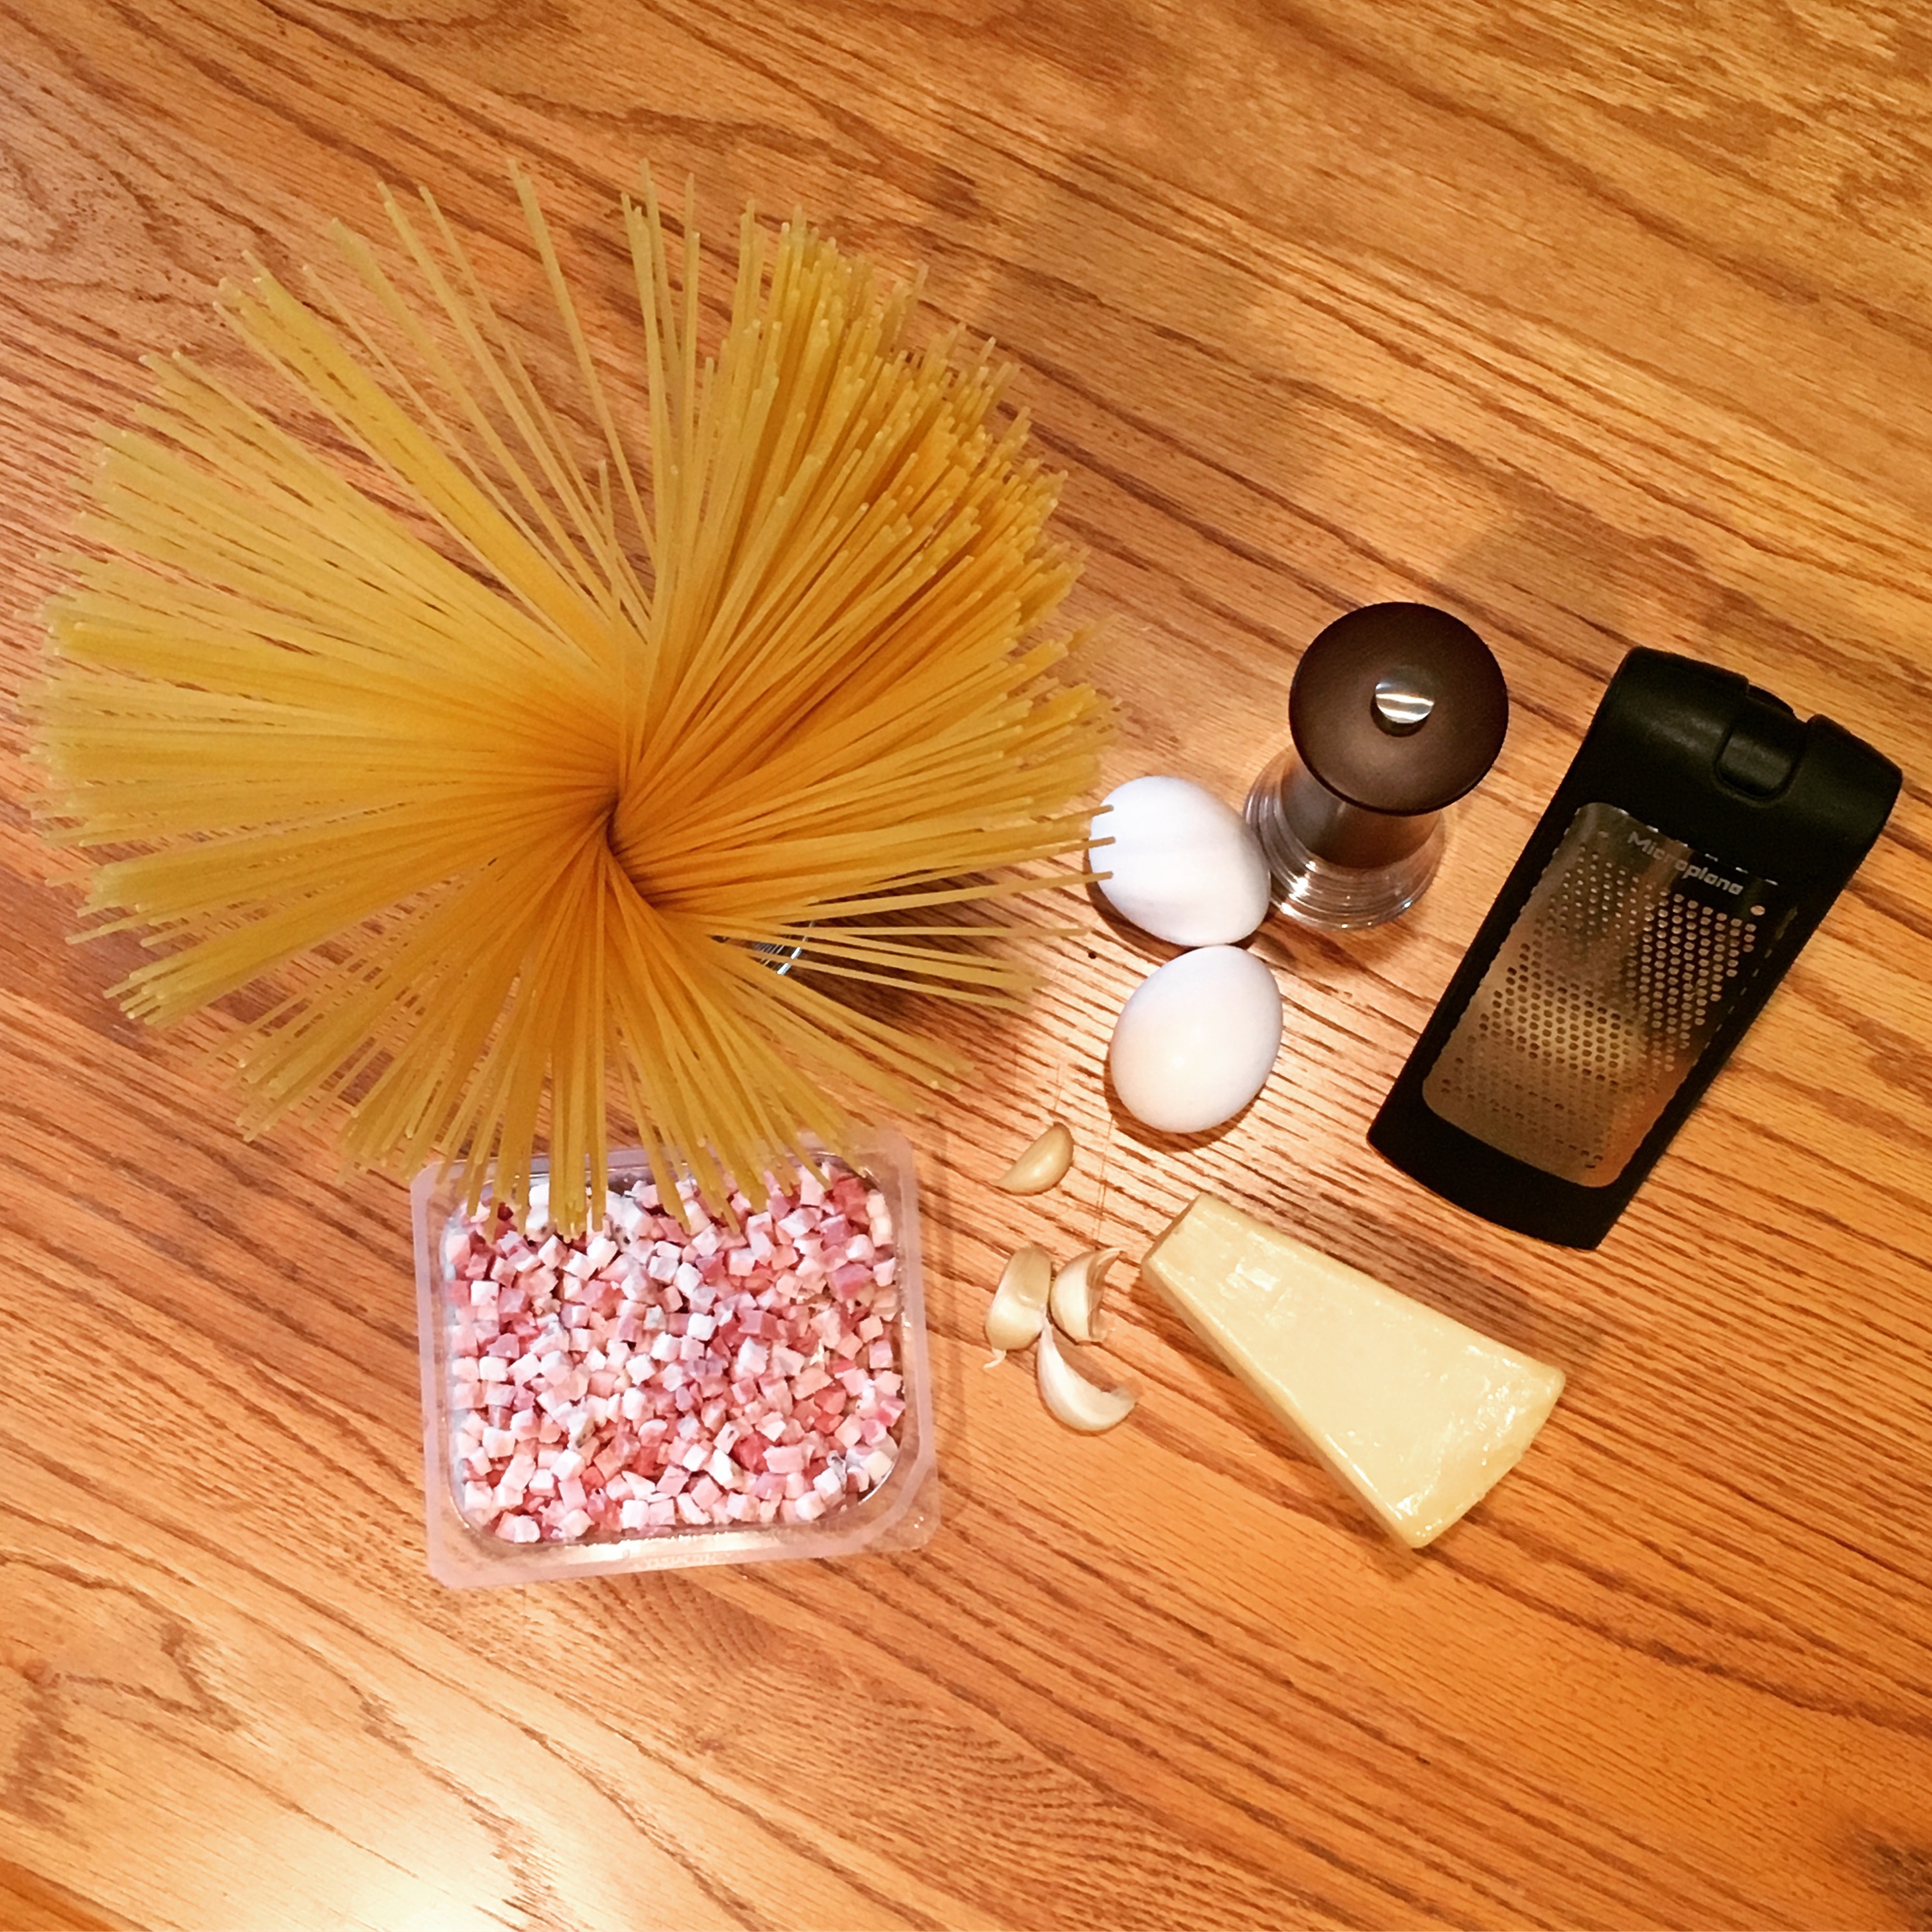
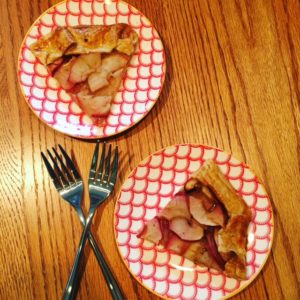
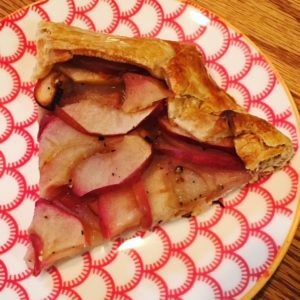
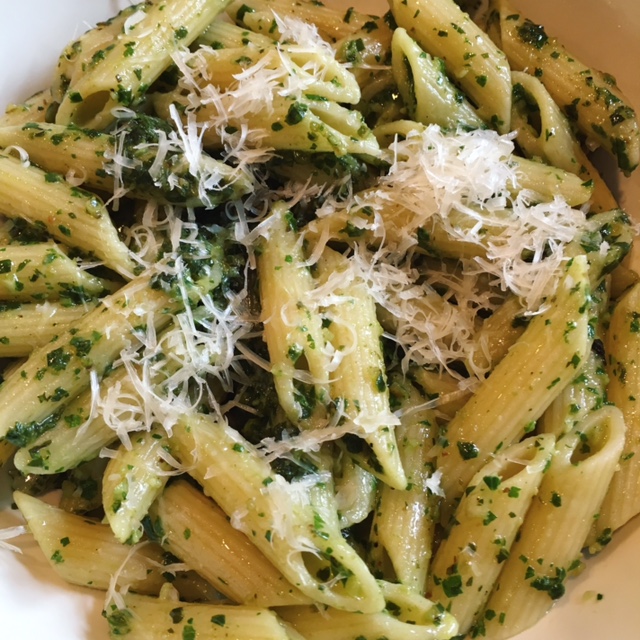
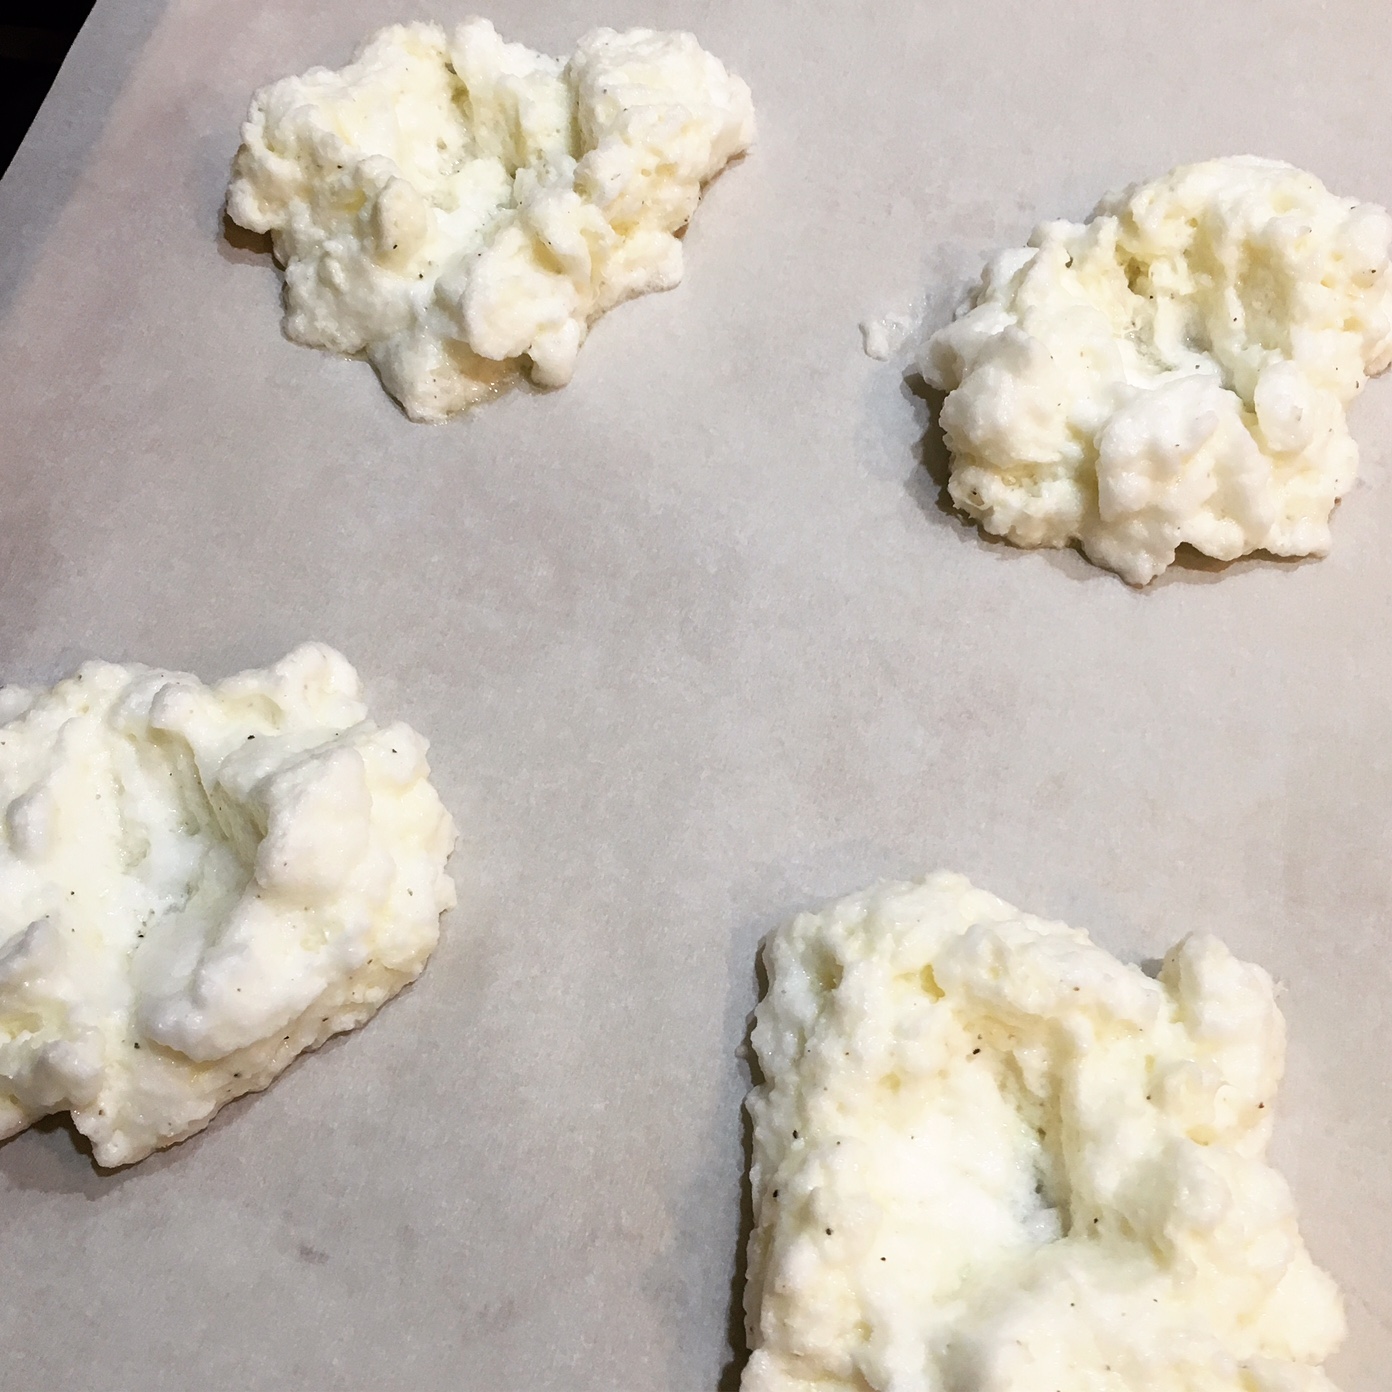
Honestly, the first thing I thought of when I looked at this book's cover was spiral macaroni and cheese. I think they eat it once over the course of the story, but in the end, I couldn’t get it out of my head and no other foods really stood out to me. So, no surprise, that’s what I decided to make. I found an easy recipe from Famished Fish and set to work for a quick, easy dinner one night.

To start, I brought my water to a boil and cooked my noodles according to the package instructions. The original recipe called for rotini, but I also think cavatappi would work great here.

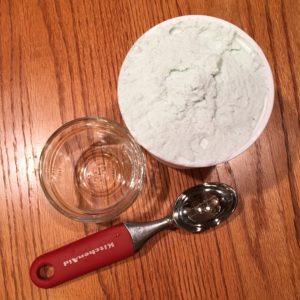
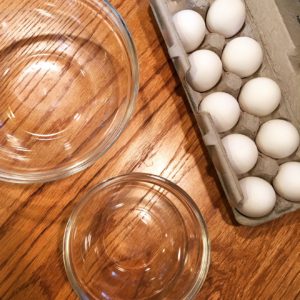
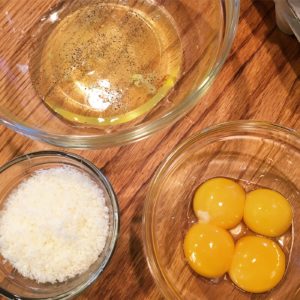
While the noodles cooked, I made the sauce. I melted butter in a pan and then added flour to create a roux. To that, I added the dried mustard and paprika, slowly stirring in 1 cup of milk, so that it could fully incorporate with the roux and remain thick.

Then, I added in the remaining 2 cups of milk slowly, along with the salt and a dash of Worcestershire sauce. I continued cooking the sauce, stirring occasionally for about 5 minutes more or so, until it thickened. I stirred in three-quarters of the cheese so it melted and became incorporated.

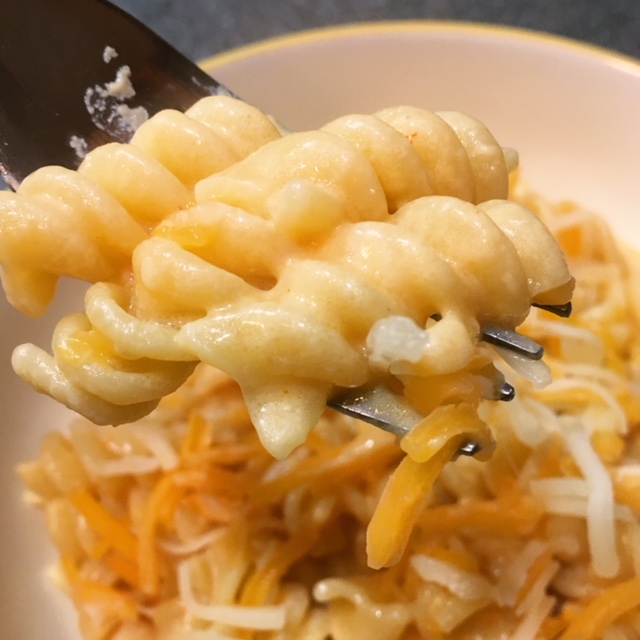
I drained the finished noodles and poured the cheese sauce on top, stirring until the noodles were fully covered. To serve, I spooned the mac 'n' cheese into bowls and topped each with a sprinkling of shredded cheese.

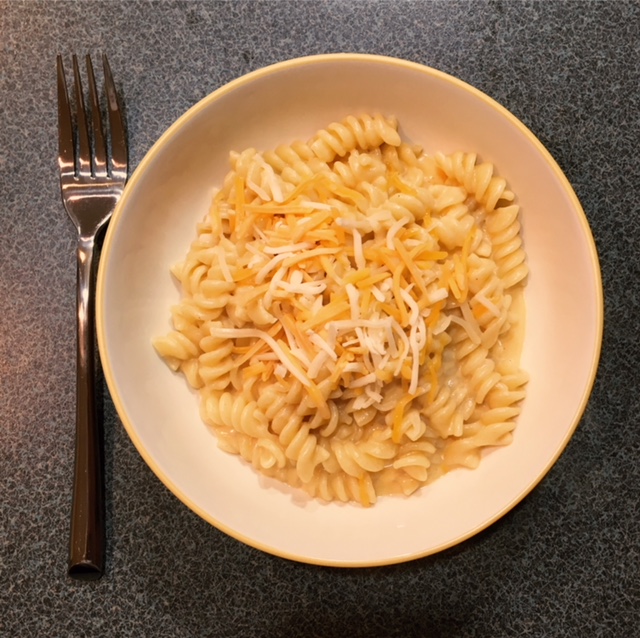
It was delicious! And so easy that I’ll definitely be adding it to my repertoire.

Creamy Spiral Mac 'n' Cheese

  • Servings: 4-6
  • Time: 15 minutes
  • Print

Ingredients

  • 16 oz uncooked spiral noodles (rotini or cavatappi)
  • ¼ cup butter
  • ¼ cup flour
  • ½ tsp mustard
  • ½ tsp paprika
  • 1 tsp salt
  • dash of Worcestershire sauce
  • 3 cups milk, divided
  • 2 cups sharp cheddar cheese, divided

Directions

  1. Add uncooked pasta to a large pot of boiling water. Cook 9-11 minutes, according to package directions.
  2. Meanwhile, in a medium saucepan set over medium heat, melt the butter. When butter has melted, stir in flour to create a roux.
  3. Slowly stir in 1 cup of milk along with the mustard and paprika. Stir and cook until the mixture thickens. Add the remaining 2 cups of milk and the salt and Worcestershire sauce. Cook and stir 5 minutes until has thickened.
  4. Stir in 1½ cups of the sharp cheddar cheese. Stir the sauce until the cheese has melted.
  5. Drain the pasta and return to large pot. Carefully pour the cheese sauce over the cooked pasta. Stir gently to combine the cheese sauce and pasta.
  6. Ladle the macaroni and cheese spirals into a large serving bowl and sprinkle with the remaining ½ cup of sharp cheddar cheese.
  7. Serve immediately.

Adapted from: Famished Fish

This post contains affiliate links. Full disclosure here.

Filed Under: book review, recipe Tagged With: contemporary, dinner, easy prep, fiction, lunch, pasta, quick read, tough topics, vegetarian, young adult

Behind Her Eyes + Spaghetti Carbonara

October 28, 2017 by Megan 4 Comments

Every November, my Good Reads & Good Eats book club reads a spooky book. Since we meet on the first Tuesday of each month, this allows us to read it during October and our meeting usually ends up being right around Halloween. This year’s selection was Sarah Pinborough’s novel Behind Her Eyes. The thriller was released in January but it made for an excellent read this month, just creepy enough throughout with a twist at the end I didn’t see coming.

Thanks to the success of Gone Girl, the oft-called domestic thriller has become more and more popular, and generally, I try to avoid them. Gone Girl was so well-written and its twist both genuinely surprising and believable (which is harder to achieve than it may seem) that I’m usually disappointed in those that follow.

That being said, Behind Her Eyes was an intriguing read. I did get caught up in the story and it kept me wondering what exactly was going on and who to be skeptical of, but the devices it used (particularly toward the end) seemed over-the-top and unbelievable. Overall, Sarah Dickinson does a great job summing up how I feel on her blog, but beware of spoilers if you haven’t read the book and still want to.

Pinborough’s novel begins in the middle of David and Adele’s troubled marriage. After a recent move to London, David almost immediately begins an affair with Louise, who turns out to be his new receptionist. It’s not clear how Adele discovers his transgression, but she makes it a point to befriend Louise and tension begins to build. As more about Adele’s backstory is revealed, more questions arise. In the present day narrative, we’re left wondering who we can trust. I’ll stop here to avoid spoilers, but I think it achieved what it needed to for our book club in that it was mostly riveting and twisty and will certainly make for interesting discussion. I’m looking forward to hearing what everyone has to say about it.

In an attempt to create some domestic bliss (or at least throw David off her scent), Adele continues to make impressive home-cooked meals almost every evening. On one such evening, she whips up the deceptively easy Spaghetti Carbonara and serves it with a simple arugula salad. I grabbed a recipe from one of my favorite blogs, Damn Delicious, for the pasta and found one for the salad from Everyday Maven. The whole meal took about twenty minutes and only requires a minimum number of ingredients for one so impressive; it makes a perfect weeknight meal.

First, I set a large pot of water to bowl and then prepped the salad. I chopped a half cup of cherry tomatoes in half and tossed them in a large bowl with arugula and the lemon zest. I love Trader Joe’s arugula because it’s the perfect amount for a dinner salad and it’s already pre-washed. In a separate small bowl, I combined the ingredients for the dressing - olive oil, balsamic vinegar, and salt and pepper. With the salad mostly set, I turned to the pasta.

Once the water was boiling, I salted it and added the spaghetti to the pot. In a small bowl, I whisked together the eggs and Parmesan and set it aside. I added my diced pancetta (or bacon, if that’s what you’re using) to a heated skillet and allowed it to crisp up for several minutes, before adding my minced garlic.

You’re going to want to make sure your pasta is cooked and drained before you add the garlic. Here is where you need to begin working quickly. Even though this recipe is easy, the eggs leave some room for error. You don't want them to scramble; they should become a part of the creamy sauce, indistinguishable from the pasta itself. 

To my pancetta and garlic, I added my pasta and the egg-Parmesan mixture, using a pair of tongs to toss and combine everything. I seasoned with salt and pepper, before adding a bit of pasta water, tossing and checking the consistency.

With that all set, I re-whisked my dressing, poured it on the arugula and tossed my salad. Best dishes are both served immediately.

Spaghetti Carbonara

  • Servings: 4
  • Time: 20 minutes
  • Print

Ingredients

  • 8 ounces spaghetti
  • 2 large eggs
  • ½ cup freshly grated Parmesan
  • 4 slices bacon, diced [or diced pancetta, about 4 ounces]
  • 4 cloves garlic, minced
  • Kosher salt and freshly ground black pepper, to taste
  • 2 tablespoons chopped fresh parsley leaves (optional)

Directions

  1. In a large pot of boiling salted water, cook pasta according to package instructions; reserve 1/2 cup water and drain well.
  2. In a small bowl, whisk together eggs and Parmesan; set aside.
  3. Heat a large skillet over medium high heat. Add bacon and cook until brown and crispy, about 6-8 minutes; reserve excess fat.
  4. Stir in garlic until fragrant, about 1 minute. Reduce heat to low.
  5. Working quickly, stir in pasta and egg mixture, and gently toss to combine; season with salt and pepper, to taste. Add reserved pasta water, one tablespoon at a time, until desired consistency is reached.
  6. Serve immediately, garnished with parsley, if desired.


From: Damn Delicious

Arugula Salad with Lemon Balsamic Dressing

  • Servings: 4
  • Time: 5 minutes
  • Print

Ingredients

  • ½ pound arugula
  • ½ cup grape or cherry tomatoes, washed and halved
  • zest of a whole medium lemon
  • ¼ cup extra virgin olive oil
  • 2 Tablespoons balsamic vinegar
  • ¼ teaspoon kosher salt
  • 5 to 6 turns freshly ground black pepper

Directions

  1. In a large salad or mixing bowl, combine arugula, halved grape tomatoes and the zest of an entire medium lemon.
  2. In a separate bowl, whisk olive oil, balsamic vinegar, salt and pepper together until well mixed.
  3. When ready to serve, pour dressing over salad, toss until well coated. Serve and Enjoy!

From: Everyday Maven

Filed Under: book review, recipe Tagged With: book club, dinner, easy prep, fiction, five ingredients or less, pasta, salad, thriller, veggies

Practical Magic + Apple Tart with Black Pepper

October 14, 2017 by Megan 5 Comments

Maybe I watched Practical Magic a little on the young side (it came out when I was 12), but ever since then I’ve loved it. Even though it’s not exactly a traditional Halloween movie, I make it a point to watch every fall season. Next week, in fact, I have a movie date with Deanna to watch it together because she’s never seen it and she needs to. This post isn’t about the movie, though, it’s about the book, which I didn’t even realize was a thing until I heard about the prequel The Rules of Magic coming out a couple of months ago.

Excited about the prequel, I hunted down Alice Hoffman’s book Practical Magic, sure I would love it as much as I did the movie. I definitely enjoyed it, but it’s different than I was expecting. The movie’s plot is so ingrained in me at this point, that it didn’t occur to me that the book wouldn’t follow it as well. Obviously, movies change book plots all the time, often to the disappointment of the reader - it’s just that usually I don’t watch the movie (over and over and over) before reading the book. So I was a bit blind-sided, and the irony is not lost on me.  

All that being said, the book is worth picking up. (This NPR review of the prequel describes the differences in Practical Magic book vs. movie wonderfully, the journalist in a similar situation to me.) Hoffman’s writing style is lovely. She crafts a beautiful story of sisterhood and magic that’s perfect for cozy fall reading. I haven’t read anything else she’s written, but I’m looking forward to trying some of her other novels - I’ve heard good things. And, of course, I'm still excited to read The Rules of Magic too. 

Have any of you read or seen Practical Magic? I’d be interested to hear from those of you who read the book before the movie which you prefer. Any other Hoffman novels you’d recommend?  

At one point in the novel, one of the sisters, Sally, makes an apple tart with her secret ingredient, black pepper. And though it’s midsummer in the story, this recipe seemed perfect to make at this time of year. Local apple orchards are bursting at the seams, and I was itching to make an apple dessert anyway. Black pepper as an addition intrigued me. I found a recipe online that included it in an apple galette and used it as a basis for my own version, mostly so I would be able to better estimate how much black pepper to include.

To keep it simple, I used store bought pie crust. Feel free to make your own, if you’re so inclined. First, I prepped my apples, which Scott and I had picked up at a local cider mill the weekend before. I used Gala because I like those and we had also bought them for snacking, but any baking apple would work just as well.

I don’t have an apple peeler contraption and my vegetable peeler wasn’t getting the job done, so I opted to make my tart a bit more “rustic” and left the apples unpeeled. I sliced them pretty thinly and tossed them with lemon juice, some sugar and a bit of freshly ground black pepper (more on the coarse side).

I laid the pie crust on a parchment lined baking sheet, piled the apples on the middle of it, and folded the crust over around the edges. To help it become a more rich golden brown, I brushed the crust with an egg wash before baking.

I covered the tart loosely with a tented piece of aluminum foil and put the tart in a 375-degree oven to bake for about an hour. I set my timer for 45 minutes and checked it every 20 minutes or so. Once it seemed close to being done, I removed the foil and allowed it to bake for another 10 or 15 minutes without, so the crust would get some good color.

It smelled amazing, but I patiently allowed it to cool completely before serving. I cut into 6 slices (though it could certainly be cut into smaller or larger pieces, depending on the size of your family/party). We enjoyed it without any additions, but it would absolutely be delicious with a scoop of vanilla or cinnamon ice cream while it’s still a bit warm from the oven.

What’s your favorite apple recipe in the fall?

Apple Tart with Black Pepper

  • Servings: 6
  • Time: 1½ hours
  • Print

Ingredients

  • 1 pie crust (use your own recipe, or use refrigerated store bought)
  • 3 - 4 medium apples, cored and sliced (¼” - ½” thick)
  • 2 TBS granulated sugar
  • ½ tsp freshly ground black pepper
  • 1 TBS lemon juice
  • 1 egg, mixed with a little bit of water

Directions

  1. Preheat the oven to 375 degrees F.
  2. Prepare the apples and toss them with the sugar, black pepper, and lemon juice.
  3. Place dough on parchment paper or a silicone mat on a baking sheet. Arrange the apples in the center of the dough, leaving about an inch border. Fold the extra dough over the sides of the tart.
  4. Brush the crust lightly with an egg wash.
  5. Cover the tart loosely with aluminum foil and bake for about 45 minutes to an hour. After when there are about 15 minutes left (apples should be soft, dough should be mostly cooked), remove the foil to allow the dough to become golden.
  6. Let cool completely before serving. Best served at room temperature. Enjoy!

Adapted from: Earth Powered Family

Notes: It’s not much more work to make 2 tarts at a time, especially if you’re using store bought crust. Plan to use 6 medium apples and double the sugar, pepper and lemon juice. Divide apples evenly between both crusts. Baking time shouldn’t change.

You can peel your apples if desired, but with thin slices, it doesn’t affect the texture much to leave them on. Plus, it makes it much quicker!


This post contains affiliate links. Full disclosure here.

Filed Under: book review, recipe Tagged With: 5 ingredients or less, baking, contemporary, dessert, easy prep, fiction, fruit

Eleanor Oliphant is Completely Fine + Pasta al Pesto

August 19, 2017 by Megan 6 Comments

I first heard about Gail Honeyman’s novel Eleanor Oliphant is Completely Fine when someone suggested it for one of my book clubs. I jotted it down, added it to the poll for September, hopped on the library wait list (just in case), and didn’t think much more about it. I’m actually glad I came into it with no real expectations because the whole experience turned out to be a pleasant surprise.

Eleanor Oliphant has worked in finance in the same small company her entire career. She is socially awkward and a bit of a curmudgeon, who is very reliant on her routine. A routine which includes eating pasta with pesto for dinner every night and drinking vodka until she passes out most weekends. Despite all of her peculiarities, Eleanor on the page is quite charming. My heart warmed to her, and I found myself laughing out loud on several occasions.

I’m excited to see what the rest of the book club thinks of Eleanor. I hope they enjoy her as much as I did! And while we chose to visit an Irish pub for our book discussion (as close to a British pub as we could find), I opted to make Eleanor’s favorite staple for today’s post - pasta with pesto.

I very much doubt she makes her own, but I couldn’t exactly plop some store bought pesto onto some pasta and call it a day. (However, if I had to make a recommendation for store bought pesto, I quite enjoy Trader Joe’s Pesto alla Genovese.) The pesto recipe I chose was so easy and delicious though, that I’ve been thinking of taking up my herb-growing again, just so I could have an abundance of basil and make this more often.

Best of all, it uses walnuts which are much more affordable than pine nuts - I think Eleanor would approve of that choice. To start, I toasted the garlic until it had some little brown spots.

Then, I moved them out of the pan to cool and toasted the walnuts as well. While those cooled, I assembled the rest of my ingredients - basil, parsley, grated parmesan, olive oil and salt and pepper.

I added everything to my food processor and blended everything until smooth.

I ended up having to add just a touch more olive oil, but use your best judgment as it comes together. Taste and season with additional salt and pepper if necessary.

I tossed some ribbed penne pasta (great for the pesto to cling to) with my freshly made sauce, dished it up and topped with some extra parmesan cheese for good measure.

Use your pasta of choice, and if you have any leftover pesto, it will keep in the fridge for a short while, or it can be frozen. Enjoy!

Basil Walnut Pesto

  • Servings: 8
  • Time: 15 minutes
  • Print

Ingredients

  • 6 cloves garlic unpeeled
  • ½ cup walnuts
  • 4 cup packed fresh basil leaves
  • 2 cup packed fresh parsley
  • ½ cup Parmesan cheese
  • 1 cup olive oil
  • Salt and freshly ground pepper

Directions

  1. Toast the garlic cloves in their skin in a small skillet over medium heat, shaking often, until brown spots form, about 5 minutes. Remove to a small bowl to cool before peeling.
  2. Meanwhile, return the skillet to medium heat and add walnuts. Toast until fragrant, 5 to 10 minutes, shaking frequently to prevent scorching. Remove from heat.
  3. Combine peeled garlic, walnuts, basil, parsley, parmesan cheese, and olive oil in a blender or food processor; blend until smooth.
  4. Season to taste with salt and pepper.
  5. Serve as a topping on pasta (3/4 c. pesto per pound of pasta), as a spread on sandwiches, or as a garnish to soups.

From: Culinary Hill

This post contains affiliate links. Full disclosure here.

Filed Under: book review, recipe Tagged With: book club, contemporary, easy prep, fiction, quick read, sauce

Geek Love + Sharp Cheddar Popcorn and Cotton Candy Ice Cream

August 12, 2017 by Megan Leave a Comment

Before I get started on today's post, I want to announce the winner of my first ever Hungry Bookworm Giveaway, in honor of my 1 Year Anniversary (which I still can't get over!). But, without further ado...

Congratulations, Laura!

I'm so happy to have made your day with your win. Your copy of Pachinko has already shipped, and you should receive it soon! (More details emailed to you as well.) Thank you to everyone who participated, subscribers new and old! It is much appreciated, and I hope you continue to enjoy my posts week after week. 🙂 Now onto another review and recipe!

_________________________

While usually I got to my own to-be-read list when picking book club selections, sometimes I try to be a little more open-minded. In this most recent case, I stumbled upon a Buzzfeed list that sounded like a perfect fit for book clubs - Books You Won’t Be Able To Stop Thinking About usually equals good discussion. As a bonus, I’d already a handful of them and liked most of them, so I filed it away for future use.

I don’t remember exactly what prompted me to choose Geek Love, but that’s how we got here. Katherine Dunn’s novel tells the story of an extremely unique family. At best, the Binewski family runs a traveling carnival and unique is probably a generous understatement. The parents, Al and Lil, despise “norms” and stop at nothing to breed their odd children, who go on to become acts in the Binewski freak show. Though many of the children died in the attempts at their creation, five remain. Arty, also known as Aquaboy, has flippers instead of hands and feet. The twins, Elly and Iphy, are conjoined. Chick, though a disappointment at first, is discovered to have telekinetic powers. And Olympia, our narrator, is a hunchbacked albino dwarf.   

Like a car accident, I often wanted to look away, but I couldn’t help myself. It was gruesome and unbelievable, and honestly, so incredibly imaginative on Dunn’s part. It’s hard to explain many of my reactions to the book without sharing plot points, though a lot of it had me going, “Wait, what?” It wasn’t perfect, and I didn’t love it, but like the list that drew me to it, I will definitely never forget this one.

Though food was only mentioned in the periphery, as Dunn described the hustle and bustle of the midway, you could almost smell the freshly-made popcorn and the sugary-sweetness of the cotton candy. I went with a Sharp Cheddar Cheese Popcorn recipe to serve at book club, alongside the rest of the snacks, and later on I made some blue-ish Cotton Candy Ice Cream to accompany the book as well.

Both recipes were really quite easy, which is always nice. To start with the popcorn, I popped a half cup of kernels on the stove top just by following directions on the container itself.


Then, I combined the butter, garlic powder and salt in a saucepan, allowing it to melt. Once it began to simmer, I poured it over the popped popcorn, as directed, and stirred until it was all well-coated.

Then, with the popcorn on a sheet pan, I covered it with freshly grated extra sharp cheddar cheese and placed it in the oven under the broiler for a few minutes until the cheese was melted. I transferred most of it to a bowl (and snacked on the rest until everyone arrived!) and served it up.

The cotton candy ice cream was significantly easier than the Earl Grey Ice Cream I had made just before trying this recipe. If you’re looking for an easy way to get into the ice cream game, I’d recommend this one - it’s basically foolproof.

First, I combined the sugar and milk with a whisk, until the sugar was dissolved. Then, I added the vanilla, whipping cream and cotton candy syrup. (I used a pink syrup, and since I wanted it to be blue, I also added some blue food coloring in this step.) Once the mixture was well-combined, I poured it into my ready-to-go ice cream attachment and let it do its thing.


After 30 minutes, the ice cream was done...except that I prefer it to be a bit more on the hard side, so I stuck it in the freezer for a handful of hours before I actually was able to dig in. It was nothing like the ice cream I’d made before - where that was dense and rich, this was airy and light in flavor. Initially, I wasn’t sure I liked it as much, but the more I ate, the more I enjoyed it. Light and airy is exactly how cotton candy should be, regardless of if you’re eating the candy itself or an ice cream version of it. I ended up loving it 🙂

Sharp Cheddar Cheese Popcorn

  • Servings: 2-4
  • Time: 15 minutes
  • Print

Ingredients

  • ½ cup popcorn kernels, popped
  • ¼ cup butter
  • ⅛ tsp garlic powder
  • ¼ -½ tsp kosher salt
  • 3 oz sharp cheddar cheese, finely shredded

Directions

  1. In a small saucepan, combine butter, garlic powder and salt. Melt butter and heat until starting to simmer.
  2. Pour butter over popcorn. Stir until all popcorn is evenly coated.
  3. Spread popcorn on a sheet pan, sprinkle with finely shredded cheese (I used a microplane zester to shred mine). Stir it around until evenly distributed.
  4. Place rack in the center of the oven and turn broiler to low. Cook popcorn until cheese is melted (about 2-3 minutes). Watch carefully so it does not burn.
  5. Pour cheesy popcorn into bowl and mix. Enjoy!

Adapted from: Houseful of Homemade

Cotton Candy Ice Cream

  • Servings: 6
  • Time: 35 minutes
  • Print

Ingredients

  • ¾ cup granulated sugar
  • 1 cup whole milk
  • 2 cup heavy whipping cream
  • ½ cup cotton candy syrup (I used Jelly Belly Cotton Candy Syrup)
  • 1 tsp vanilla extract
  • food coloring (optional)

Directions

  1. Before mixing ingredients, be sure that your chosen ice cream maker is ready to churn ice cream (attachments frozen, ice added, etc).
  2. In a medium bowl, whisk together milk and sugar until sugar is dissolved.
  3. Pour vanilla, heavy whipping cream, and cotton candy syrup into the bowl and whisk until combined.
  4. If using food coloring: Depending on the brand of cotton candy syrup you used, the mixture might already have a pink hue. If you'd like the ice cream to be pink, keep this in mind - you won't need to add much pink food coloring to get your desired color. If you'd like the ice cream to be another color than pink, don't worry - as pictured, I used blue food coloring, and only had to add a few drops to achieve a nice light blue color. No matter what color you're using, add the food coloring slowly (one drop at a time) and whisk thoroughly between each until the desired color is reached. Also, the hue of the cream should be a few shades darker than the color you'd like the final ice cream to be, as the whipped and frozen cream will appear lighter. TIP: If you're still worried how your chosen color will look, add a little bit of the cotton candy syrup and milk to a separate glass or bowl and test your food coloring with it.

  5. Pour the mixed ice cream mixture into the chilled bowl/attachment of your ice cream maker.
  6. Churn ice cream for 25-30 minutes or until desired consistency is reached. If you'd like soft ice cream, serve cotton candy ice cream immediately. If you'd like firmer ice cream, transfer the ice cream to your chosen storage container and let it freeze for another 4-6 hours.
From: Homemade Hooplah

This post contains affiliate links. Full disclosure here.

Filed Under: book review, of interest, recipe Tagged With: book club, dessert, easy prep, fiction, ice cream, snack

Cloud Atlas + Cloud Eggs

August 3, 2017 by Megan 1 Comment

My friend Deanna, who you may know recognize from my short series of Gilmore posts, absolutely loves David Mitchell’s Cloud Atlas. I had read one of his other novels a while back and wasn’t a fan, so when she actually let me borrow it (an embarrassingly long time) ago, I was reluctant to read it and find it underwhelming. But, I finally decided I should rip off the bandaid, so to speak, and recently gave it a try. It was definitely not underwhelming.

Cloud Atlas David Mitchell Book Cover

Cloud Atlas is a complicated story five spanning centuries, going from the 1800s to the distant future and back again. Each character has only two chapters, one where they’re introduced as we move through the future and one as we head back in time to the beginning. (Excepting one, of course, who is there only in the middle of the story.) It’s a very interesting concept, and I probably wouldn’t have chosen to start it on a boat in the middle of the 1800s, but it is what it is. Thankfully, Deanna had warned me about the first chapter, and though it took quite a while to get into, I persevered.

As with all books, there were characters I liked better than others and some i disliked altogether. The problem with the structure, however, was that I was stuck with the ones I didn’t really like for a long time in a row and then I had to “look forward to” seeing them again on the boomerang back. The novel was also a little too self-aware for my taste. Mitchell wrote a lot of commentary on the structure and the characters and the meaning of it all into his own characters’ mouths and thoughts, which I typically don’t enjoy.

I know my review isn’t exactly glowing, but I didn’t hate it. I’m actually glad I read it, and I can see why Deanna (and others) like it so much. The story it tells is very intriguing. Weirdly, it made me want to see the movie for a different and visual perspective. It also made me want to make some cloud eggs. A book that fit perfectly with the latest hipster trend - what luck! (Kidding, but only a little bit.)

In my research, I found a recipe that wasn’t too intimidating (though most of them seemed mostly doable). I also found an interesting article from NPR that made me feel a lot better about the whole cloud egg trend. Wouldn’t you know it, what’s old is new again - in food as in everything else.

To start, I preheated my oven to 450 degrees and assembled my ingredients and bowls. I separate the old-fashioned way (hands only), so I just had a couple of bowls to divide the whites and yolks into.

Eggs, Cheese, Breakfast

With the whites separated, I seasoned them with salt and pepper and used a hand mixer to whip them into stiff peaks. I carefully folded in the Parmesan cheese. On the baking sheet, I made 4 separate mounds of the whipped whites and indented them so my yolks would have somewhere to lie later.

Egg Whites, Cloud Eggs, Baking

After they baked for 3 minutes, I took the sheet out of the oven and added one egg yolk to each egg white cloud. It went back into the oven for 3 more minutes, until the yolks were set. I served with toast, perfect to mop up the runny yolks.

Eggs, Breakfast, Brunch, Cloud Eggs
Eggs, Breakfast, Brunch, Cloud Eggs, Toast, Jam, Jelly

Cloud Eggs

  • Servings: 2
  • Time: 20 minutes
  • Print

Ingredients

  • 4 large eggs
  • salt and freshly ground black pepper
  • ½ cup freshly grated Parmesan
  • 3 TBS finely chopped fresh chives, for garnish (optional)

Directions

  1. Preheat oven to 450 degrees F and line a large baking sheet with parchment paper. Spray lightly with baking spray.
  2. Separate egg whites and egg yolks, placing the egg whites in a large bowl and each yolk in its own small bowl.
  3. Season the egg whites with salt and pepper. Using a whisk or a hand mixer, beat the egg whites until stiff peaks form. Gently fold in Parmesan.
  4. On the prepared baking sheet, create 4 mounds of egg whites and indent the centers of each to look like nests. Bake until slightly golden, about 3 minutes.
  5. Carefully add an egg yolk to the center of each egg white cloud. Season yolk with salt and pepper. Bake until the yolks are just set, about 3 minutes more. Garnish with chives, if using, and serve immediately.

Adapted from: Delish

The original recipe doesn’t call for spray the parchment paper, but I found that my finished eggs were a bit difficult to get off after baking. Additionally, the original recipe has you add all egg yolks to one bowl - obviously this creates less dish cleaning afterward, but it’s much trickier to get them out later without breaking them. (I broke two, despite being extremely careful.) The call is ultimately yours, but be careful!


PLUS: If you haven't entered for your chance to win a free book yet, there's still time! Enter my 1 Year Anniversary Giveaway through Friday, 8/11. More details in Sunday's post.

This post contains affiliate links. Full disclosure here.

Filed Under: book review, recipe Tagged With: baking, breakfast, brunch, easy prep, fiction, long read

  • « Go to Previous Page
  • Go to page 1
  • Interim pages omitted …
  • Go to page 9
  • Go to page 10
  • Go to page 11
  • Go to page 12
  • Go to Next Page »

Primary Sidebar

About

The Hungry Bookworm brings together literature and food. Megan has an insatiable appetite for both.

As C.S. Lewis said, “Eating and reading are two pleasures that combine admirably.” Enjoy!

  • Bloglovin
  • Facebook
  • Instagram
  • Pinterest

Subscribe

Don't miss out on bookish content, exclusive giveaways, and of course, book club-friendly recipes. Get notified of new posts via email.

Join 2879 subscribers.

Search for Ingredients, Recipes, or Books

Recent Posts

  • Subscriber Box Review: Literati Book Club - Roxane Gay's Audacious Book Club
  • Arsenic and Adobo + Ensaymada
  • Review of The Kindred Spirits Supper Club
  • Kids Edition: Sometimes I Like to Curl Up in a Ball + "Dirt" Pudding Cups
  • The Midnight Library + Broccoli and Ricotta Toast

Goodreads

Tags

5 ingredients or less appetizer baking book club book list book of the month books about food bread breakfast brunch chicken contemporary cookies cultural dessert dinner dinner party dystopia easy prep favorites fiction fruit historical fiction holiday ice cream linkup lunch meat memoir mini review nonfiction pasta quick read reading challenge science fiction seafood show us your books side dish snack soup TBR list thriller top ten tuesday vegetarian veggies

Archives

Other Great Book Blogs

Literary Quicksand
Never Enough Novels
Death by Tsundoku
Professional Reader 25 Book Reviews
Privacy & Cookies: This site uses cookies. By continuing to use this website, you agree to their use.
To find out more, including how to control cookies, see here: Cookie Policy

Footer Widget Header

Megan’s Instagram

Copyright © 2025 · Hungry Bookworm