• Skip to primary navigation
  • Skip to main content
  • Skip to primary sidebar
  • Home
  • Reviews
    • Book Index
    • Fiction
    • Non-Fiction
    • Top Ten Tuesdays
The Hungry Bookworm

The Hungry Bookworm

reading + eating

  • Recipes
    • Drinks
    • Snacks, Sides & Apps
    • Main Dishes
    • Desserts
    • 5 Ingredients or Less
  • About
    • Meet Megan
    • How I Rate
    • Review Policy
    • Contact

Megan

The Kitchen House + Cracklin' Bread

June 17, 2017 by Megan 4 Comments

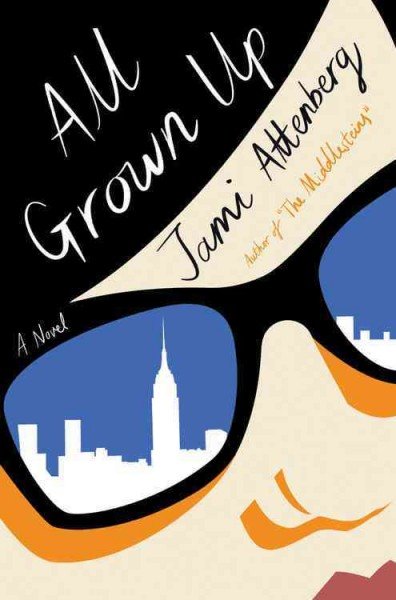
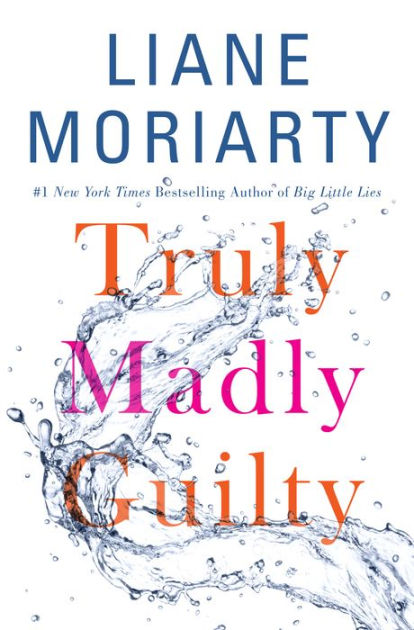
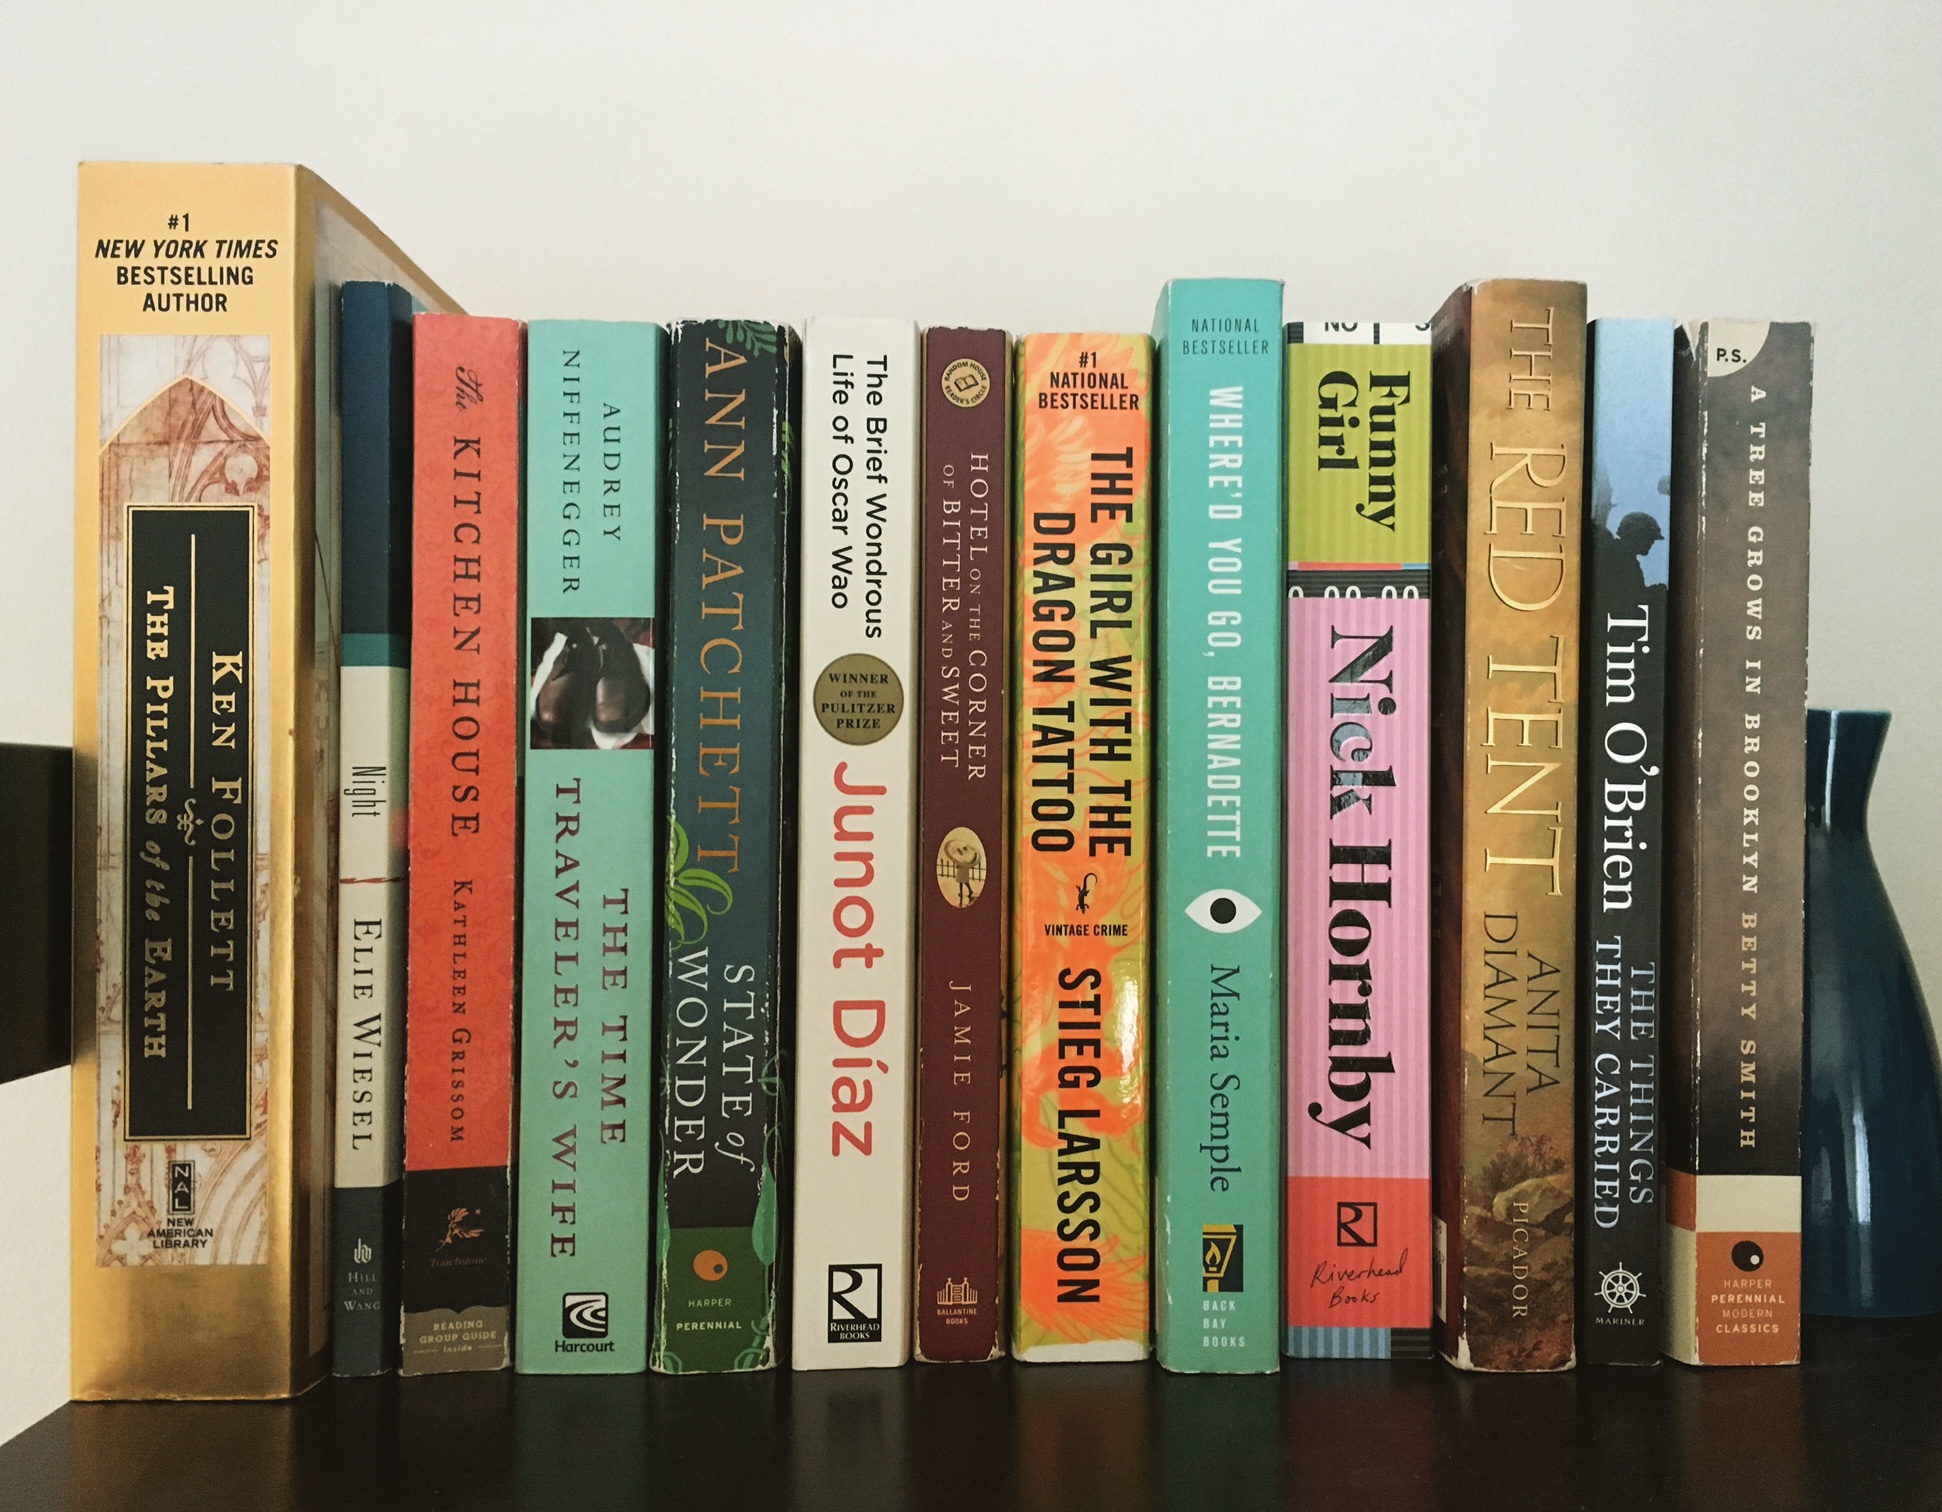
As you may know from my latest life update, Scott and I recently moved into our first house. The following Monday, I ventured out to find the local library and become a member. I also found out about an upcoming semi-annual used book sale hosted by the Friends of the Library - it was just a few weeks away, and I was so excited I hadn’t missed it! I ended up buying 13 books that day and The Kitchen House was one of them.

the-kitchen-house.jpg

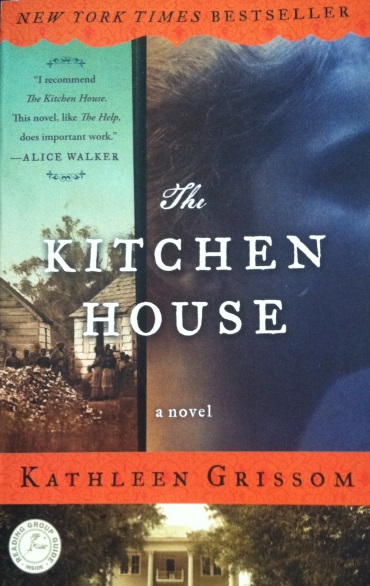
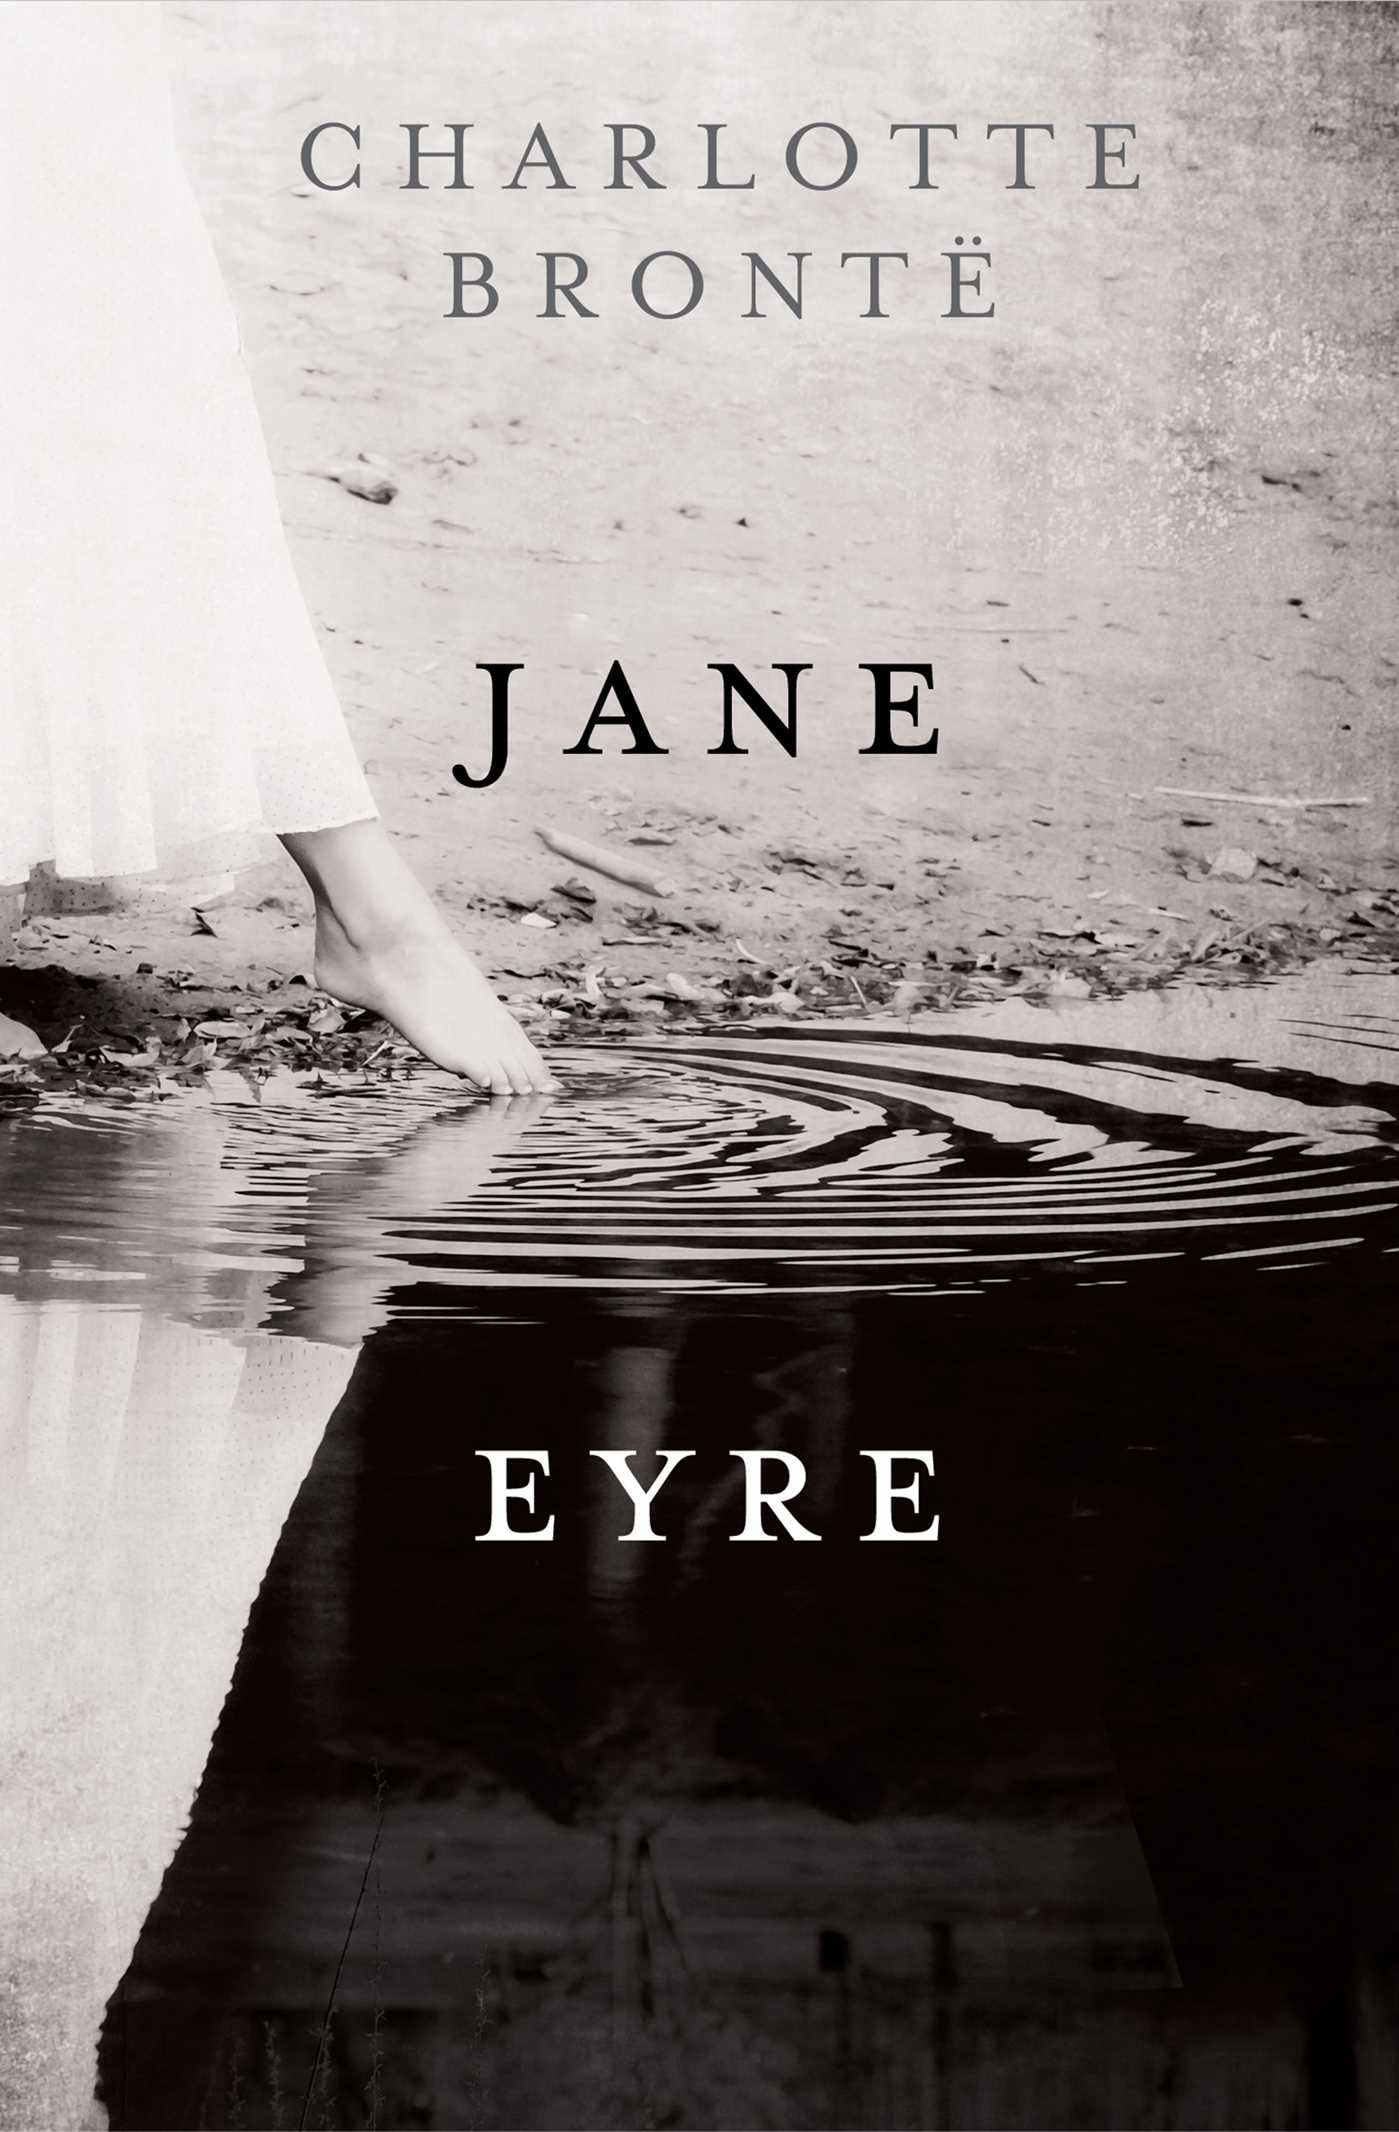
I’d read about half of the books I bought and took a gamble on the other half. Not sure of where to start, I posted the haul on my online book club’s page and was overwhelmed with suggestions to start with Kathleen Grissom’s novel; so I did. It’s not exactly the expected tale of Southern plantation life, and I loved it all the more for that.

After her parents die on the journey from Ireland to the States, newly-orphaned Lavinia is taken in by the master of a tobacco plantation and placed under the care of Belle, a slave in the kitchen house. Though she lives and works with them, the difference between Lavinia and her adopted family becomes more and more clear as she grows up. She is given opportunities that are intended to improve her life, including whisking her off the plantation and providing her with an education.  

Eventually, the bond Lavinia shares with her adopted family puts them all in a precarious situation and tough choices must be made. I found myself rooting for Lavinia, Belle and every one of their family members.

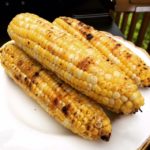
Early on, Belle makes cracklin’ bread, cornbread with “crunchy bits of pork fat” mixed in. Lavinia and Fanny ate the cracklin’ “with zeal” and, from that point on, all I could think about was making my own cracklin’ bread. I couldn’t get my hands on any cracklin’, nor was I exactly sure of how to go about finding the pork bits to make it, so I unfortunately had to substitute with bacon crumbles. Don’t worry, the recipe I found from Southern Living said it’s okay, but maybe it’s just trying to make northerners like me feel better.

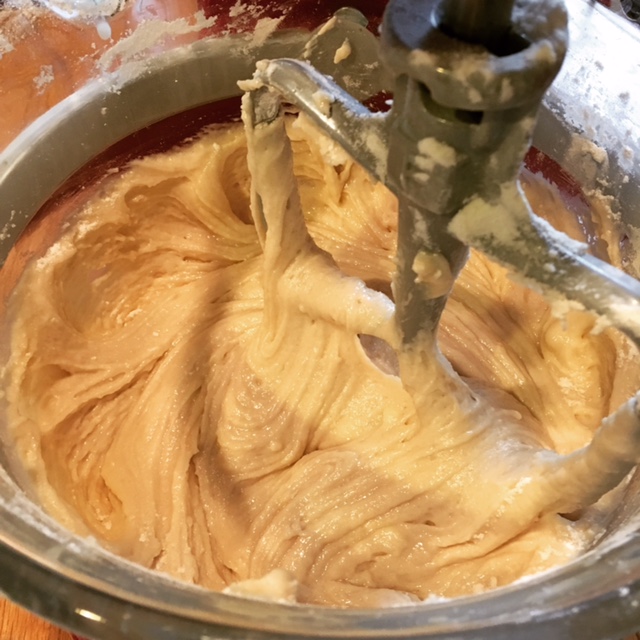
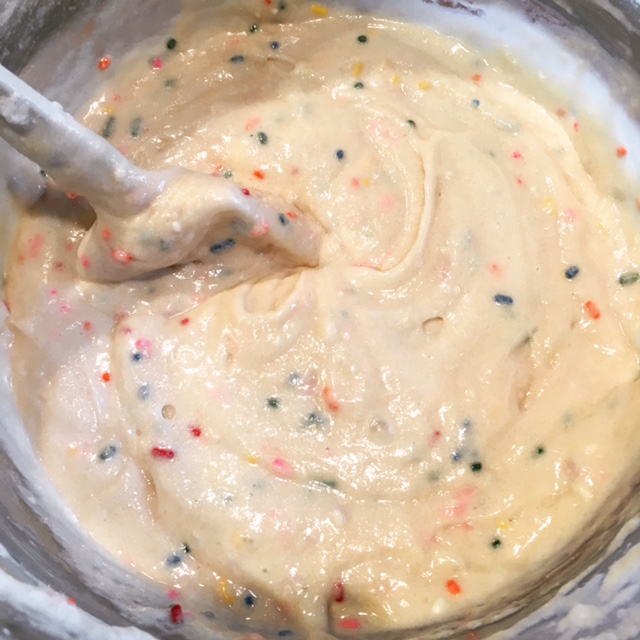
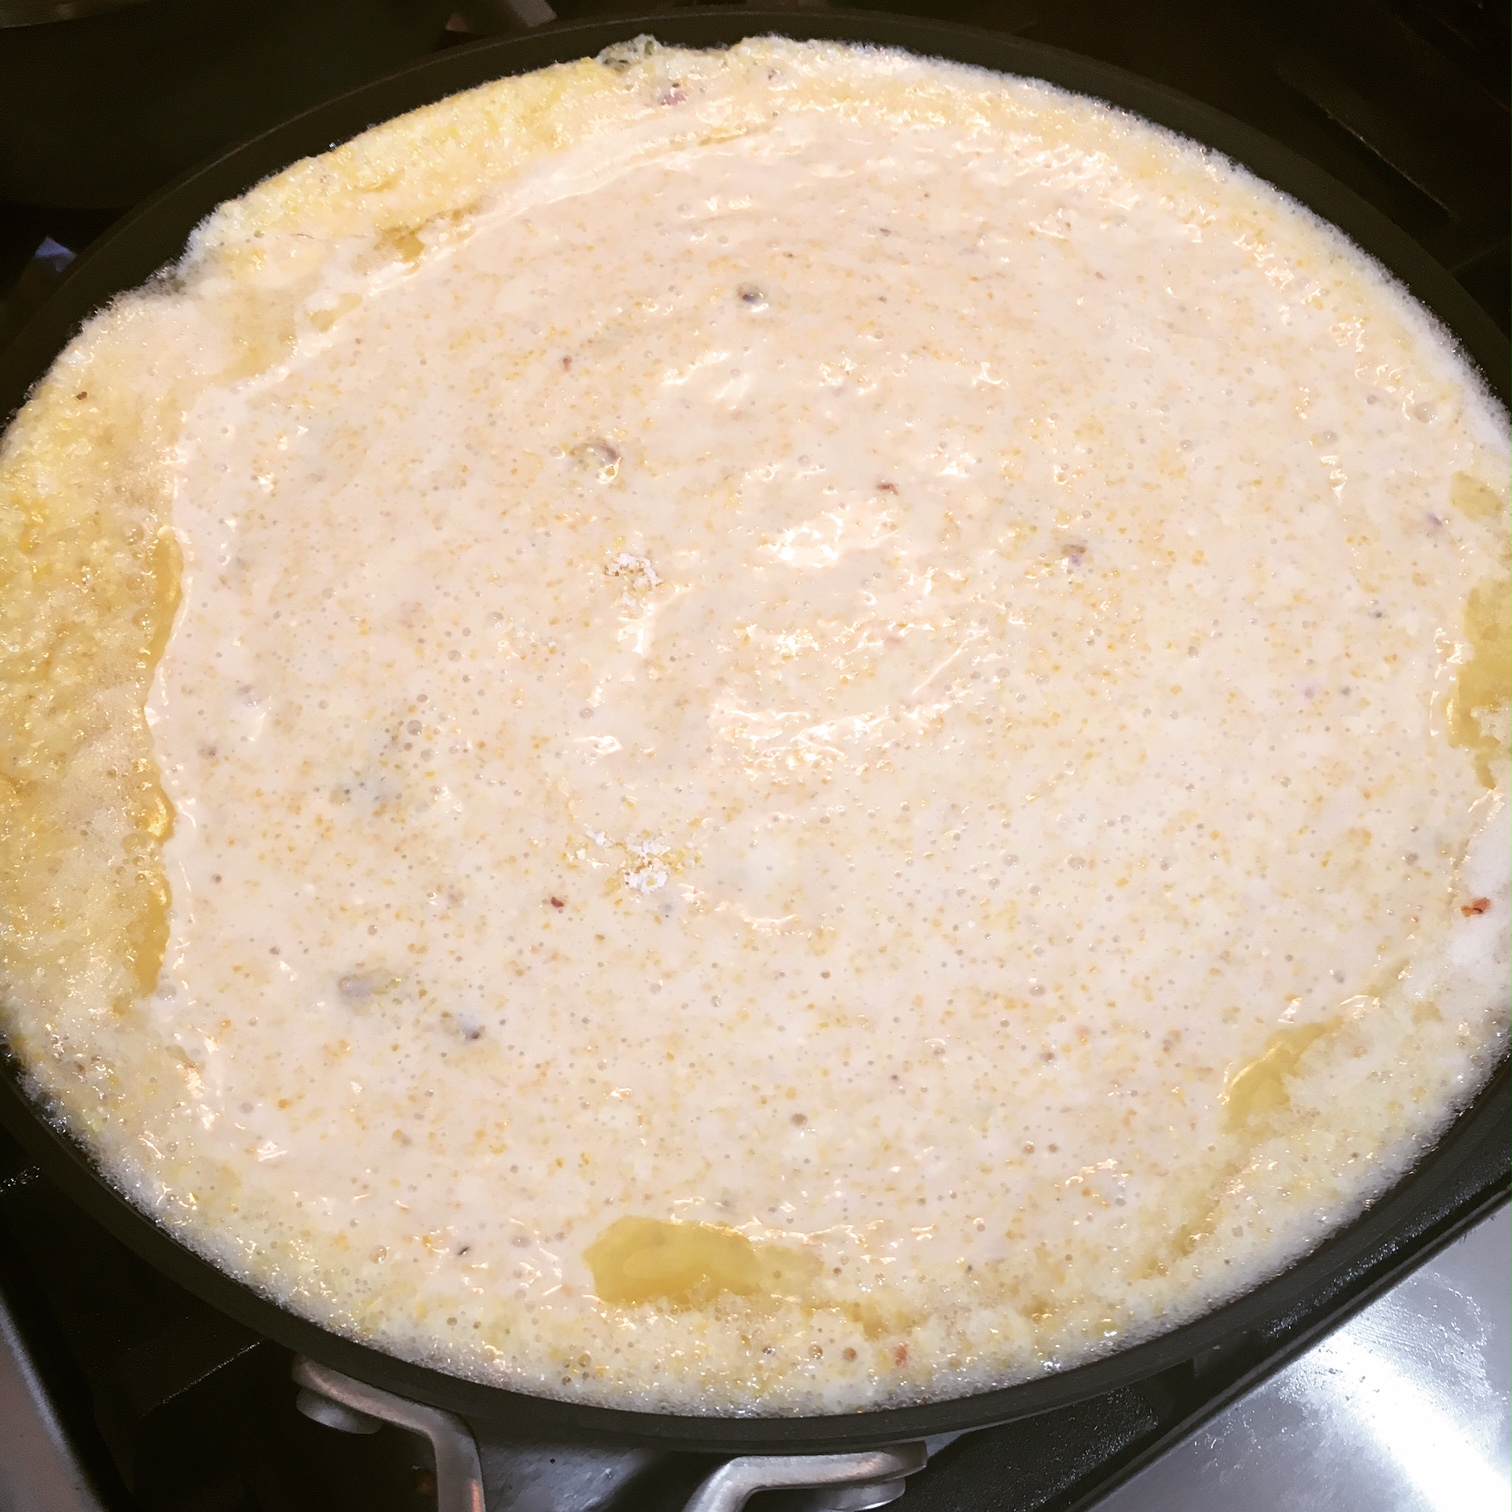
It was very easy to make, and I started by rendering down my bacon. Once it cooled a bit, I chopped it into small crumbly bits. I preheated the oven to 425 and melted the butter in my skillet.

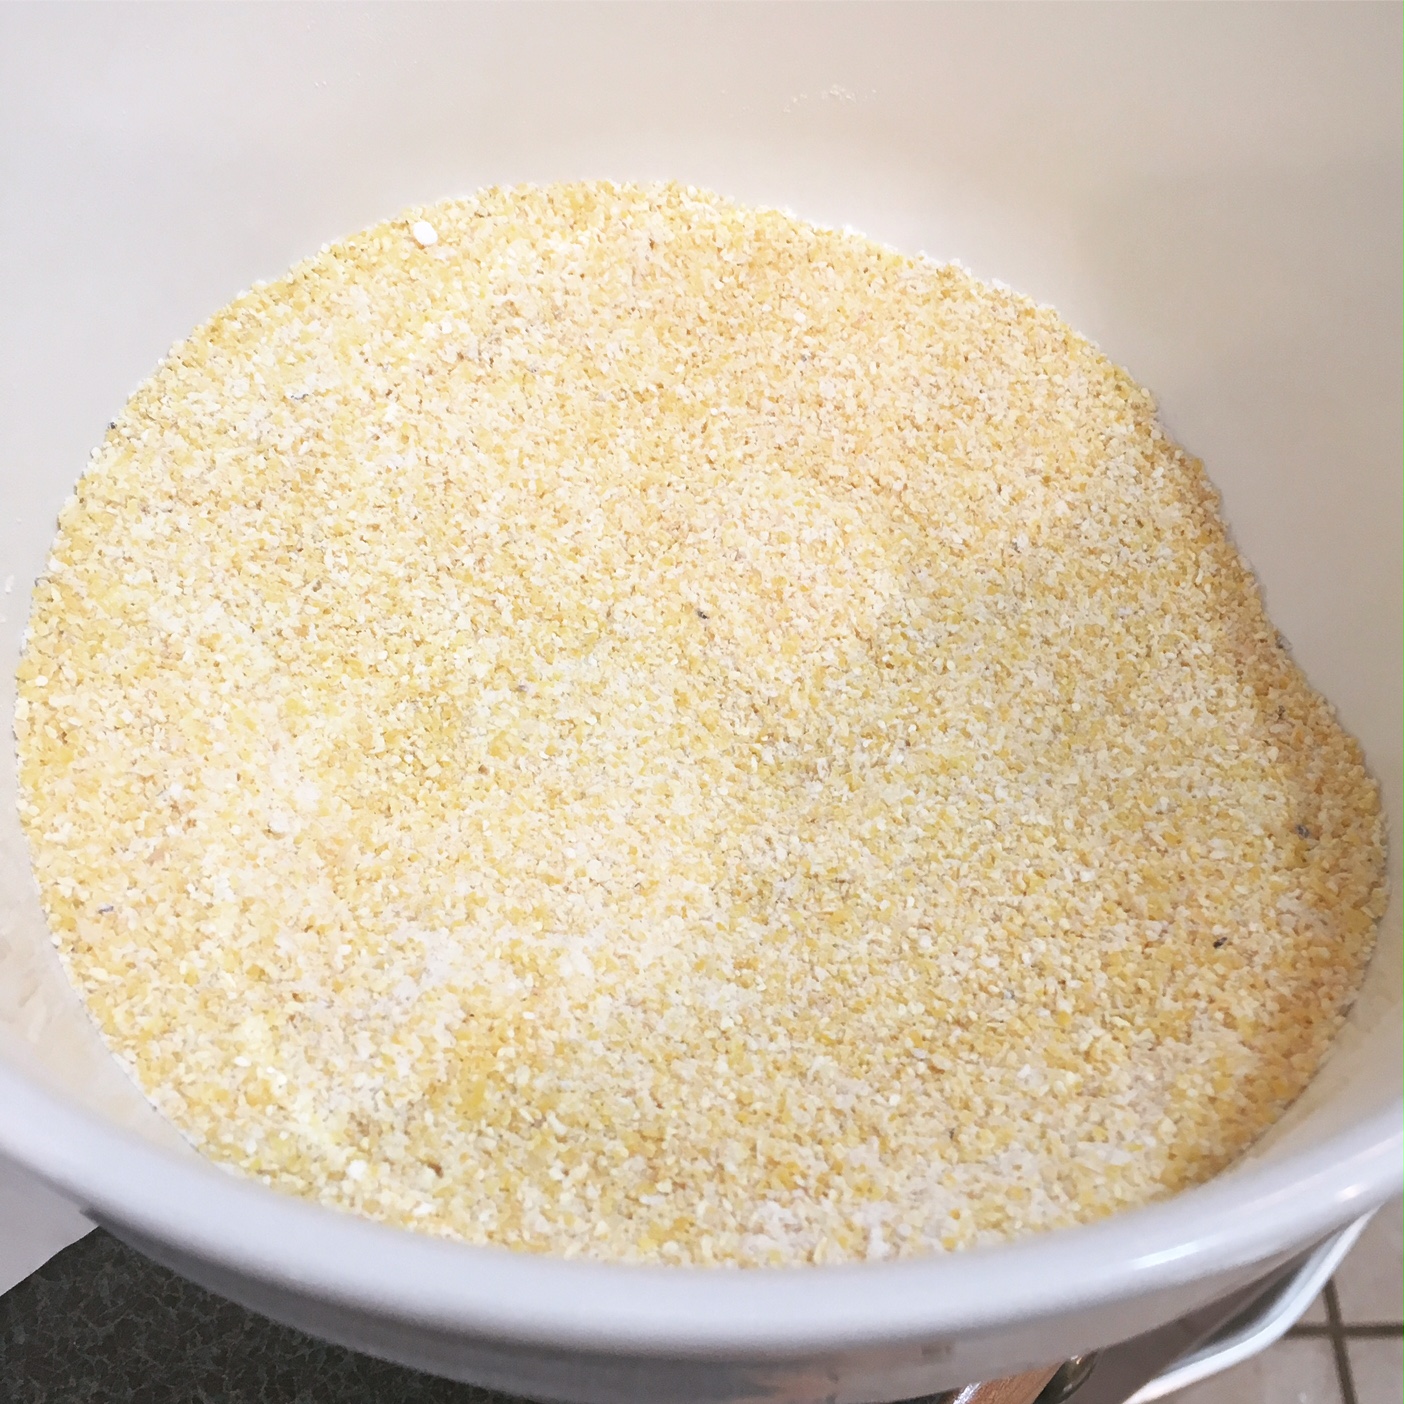
In a bowl, I used a whisk to mix the cornmeal, baking powder and salt (making my own self-rising cornmeal) with the flour.

IMG_3276

In a separate bowl, I mixed together the buttermilk and eggs before adding to the well in the middle of my dry ingredients. I added the crumbled bacon as well and stirred until just wet. I poured the whole mixture into the hot skillet.

IMG_3277

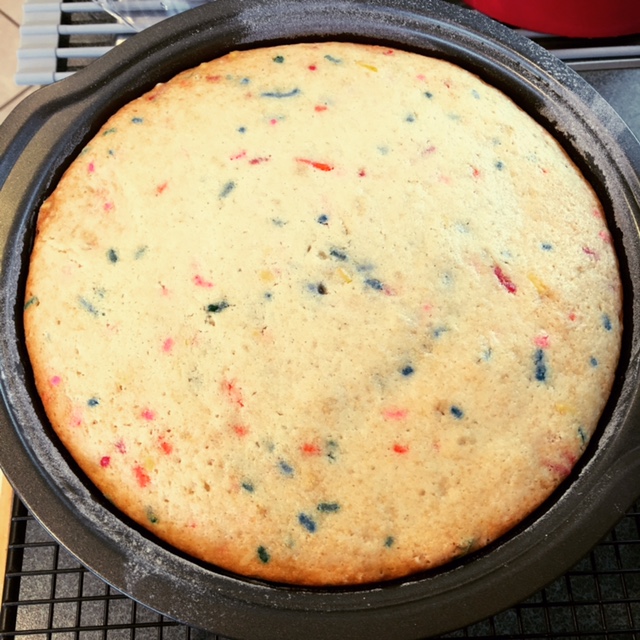
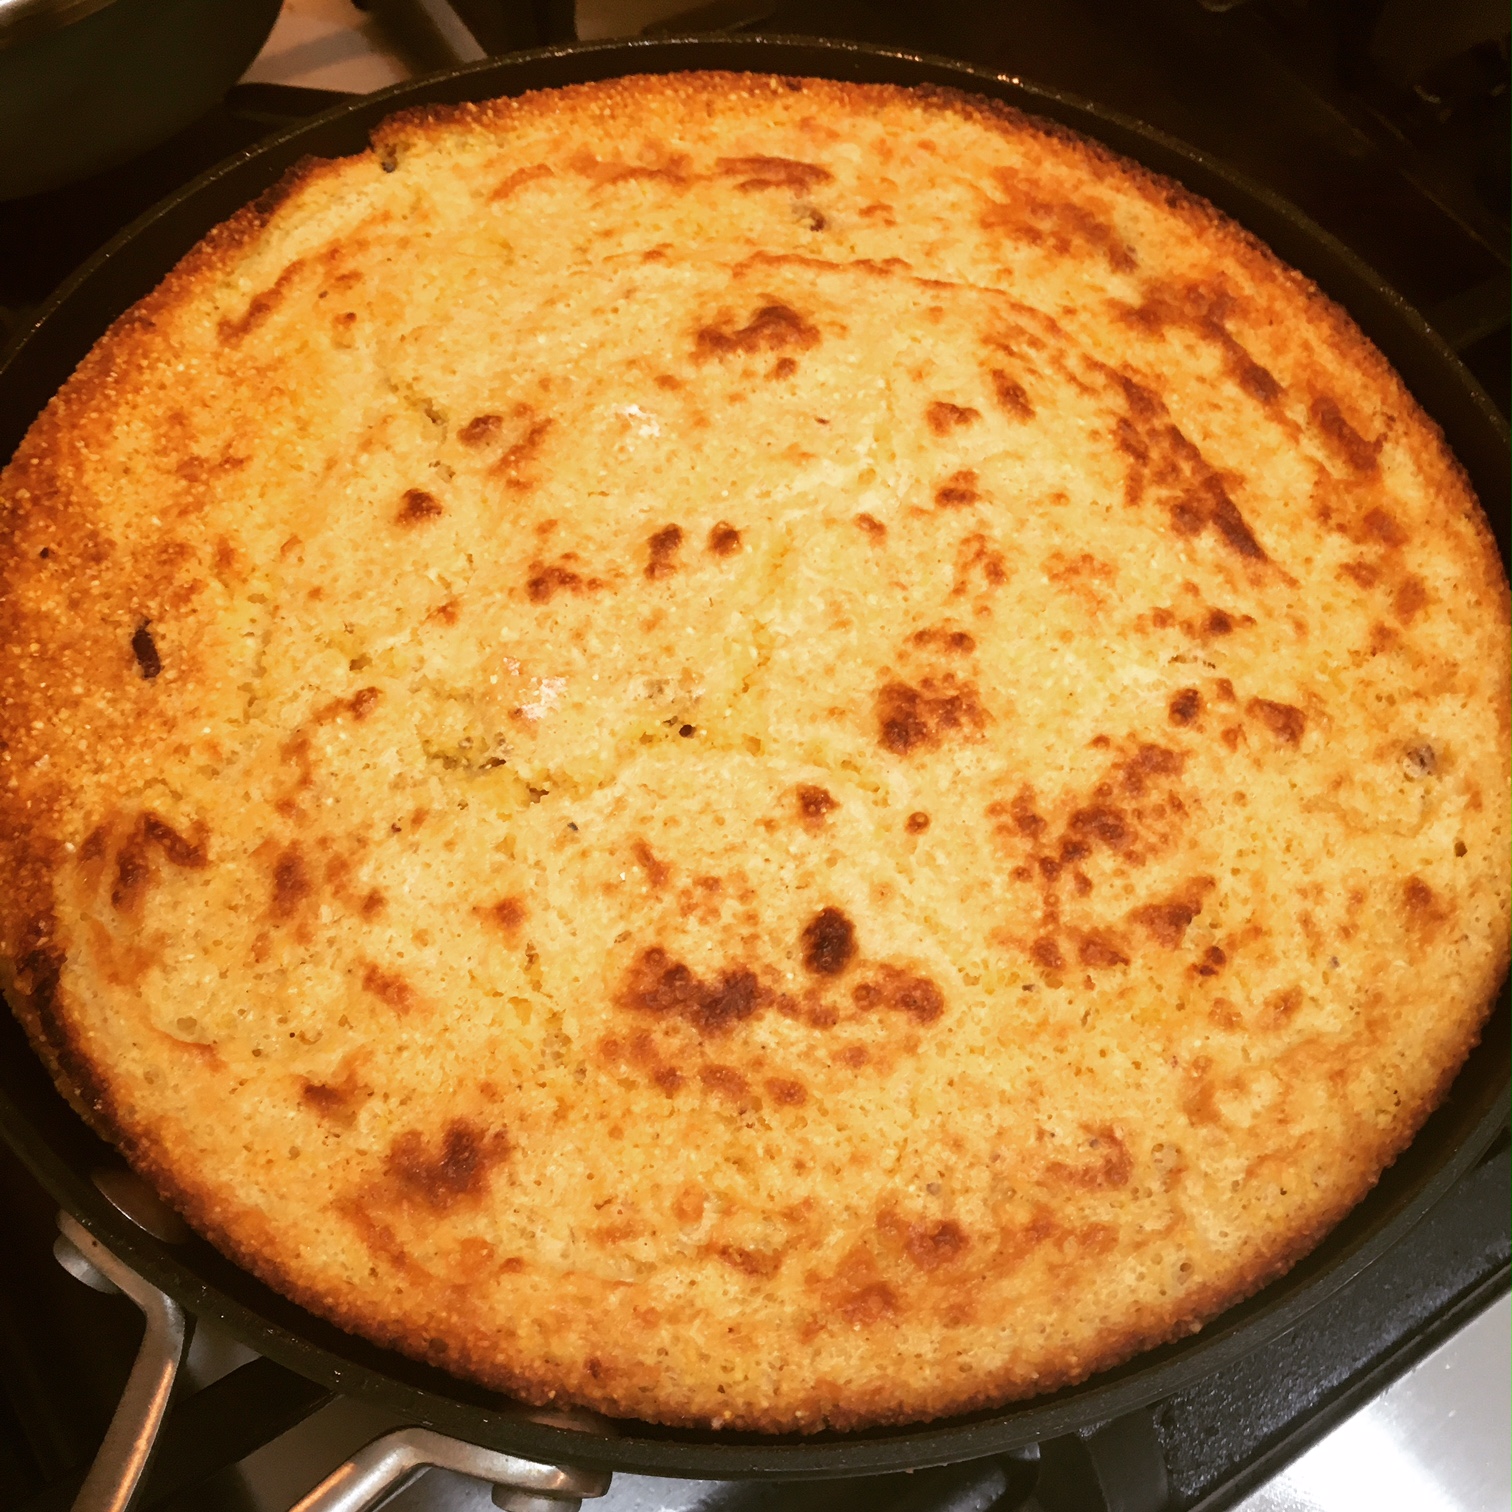
After baking for about 25 minutes, the cracklin’ bread was a beautiful golden brown.

IMG_3278

Grannie’s Cracklin’ Bread

  • Servings: 8-10
  • Time: 40 minutes
  • Print

Ingredients

  • ¼ cup butter or margarine
  • 2 cups self-rising cornmeal*
  • ½ cup all-purpose flour
  • 2½ cups buttermilk
  • 2 large eggs, lightly beaten
  • 1 cup cracklings**

Directions

  1. Place butter in a 9-inch cast-iron skillet (or other oven-safe skillet), and heat in a 425° oven for 4 minutes.
  2. Combine cornmeal and flour in a large bowl; make a well in center of mixture.
  3. Stir together buttermilk, eggs, and cracklings; add to dry ingredients, stirring just until moistened. Pour over melted butter in hot skillet.
  4. Bake at 425° for 25 to 30 minutes or until golden brown.

From: Southern Living, by way of MyRecipes.com

*If you don’t have self-rising cornmeal, you can make your own by adding 1 TBS of baking powder and 1 tsp of salt to 2 cups of regular cornmeal.

**1 cup cooked, crumbled bacon (12 to 15 slices) may be substituted for cracklings.


Here is the rest of my book haul. What should I dive into next?

IMG_3057.JPG

This post contains affiliate links. Full disclosure here.

Filed Under: book review, recipe Tagged With: bread, historical fiction, meat, side dish

Show Us Your Books - June Edition

June 13, 2017 by Megan 16 Comments

Show-Us-Your-Books

This is my first time participating in the Show Us Your Books linkup, but I’m excited to be a part of the conversation and hopefully meet more bloggers who love reading as much as I do. (Thanks to Heather of Heather’s Hurrah for telling me about it!)

Linkup Guidelines:
This linkup happens the second Tuesday of every month. The next is Tuesday, July 11, 2017.
1. Please visit and comment with both of your hosts, Jana & Steph
2. Please display the button or link back to me and the linkup hosts on your blog post
3. Please visit a few other blogs who've linked up and get some book talk going!

I guess the best place to start is what I’ve read over the past month.

Engrossing Reads

Becoming Nicole: The Transformation of an American Family - I think I’ve mentioned before that my office has a Diversity Book Club, and though I was gunning for The Golden Boy to win as our recent pick, this book proved to be an excellent nonfiction version of the same story. It’s definitely an eye-opening read, and one that I would recommend.

The Kitchen House - I bought this book on May 19th at my new local library’s used book sale (along with 12 other books!) and, on the many, many recommendations from one of my online book clubs, I didn’t wait long to dive right in. It’s been awhile since I’ve read a piece of historical fiction that I truly enjoyed. I can’t wait to tell you more about it in my blog post later this week!

The Royal We - part The Prince & Me, part William and Kate’s love story, and basically every girl’s princess dreams come true, this novel was the perfect read to kick-off summer. Filled with drama, I couldn’t help but get sucked in as an American girl studying abroad (why couldn’t that happen to me?!) unexpectedly meets her real Prince Charming and takes us along for the ride. I sped through it.

Lilac Girls - Perhaps “enjoyed” is the wrong way to describe a WWII Holocaust novel, but for such intense subject matter, I still couldn’t put it down. I wouldn’t normally put a 3-star book in this category, but if it weren’t for Caroline’s chapters, I would’ve given this book four. I really wanted to try cooking with lilacs for this one, but unfortunately I started reading it about a month too late. Stay tuned to see what I do make 🙂

The Sisters Chase - In a Facebook group of fellow bookworms, this book was talked up as the best selection for June’s Book of the Month so, of course, it’s the one I selected. It was a super quick read and had a twist that I didn't see coming.

Passed the Time Just Fine

Truly Madly Guilty - Liane Moriarty’s latest installment was a hot commodity when it came out, and with HBO’s Big Little Lies just finishing up, I couldn’t wait to read it. It probably suffered from a little bit of over-hype or high expectations, but it was pretty good. Plus, it led to some delicious “shrimp on the barbie” and you can’t beat that!  

Lots of Candles, Plenty of Cake - I usually pick up a book to read because the story sounds good and I want to actually read the story, but occasionally I really want to make something specific for the blog, and I find a book to fit that bill. This book was one of those, and it was all about the cake. Anna Quindlen’s memoir wasn’t bad, but it just wasn’t for me, right now.

Not Worth It

The Unbearable Lightness of Being - Phew, this one was hard to get through! I’m sure you know the feeling - if it wasn’t for book club, it definitely would’ve ended up in the didn’t finish column.

All Grown Up - Luckily a short and easy read, I just didn’t empathize with the characters (or like them very much) and the immature attitude of the main character, who is very not grown up, was frustrating.

Did Not Finish

None this month - I persevered!

Currently Reading

Cloud Atlas - This is one of my friend Deanna's favorite books and I've been hanging onto it for far too long. I figure it's about time I started it, so she can have it back. I'm not even finished with the first chapter (which admittedly isn't easy to get into), but I'm hoping for the best. I'm also looking forward to *maybe* making some goofy sort of cloud egg recipe (like this one), but we'll have to see where the story takes me...

The Country of Ice Cream Star - I got sucked in by the title of this one too, and (surprise!) I really wanted to make ice cream to go with it. I got about 10% in and dropped it in favor of four other books, but now it seems like it's time to give it another try. It may end up in the “did not finish” pile…

Until next month!

Life According to Steph
This post contains affiliate links. Full disclosure here. 

Filed Under: of interest Tagged With: book list, linkup, mini review, show us your books

All Grown Up + Grown-Up Ramen

June 6, 2017 by Megan 1 Comment

There was a time before my blog, and before I became obsessed with Goodreads, that I kept track of what I read with a Google spreadsheet. It was pretty simple - title, author, notes, date finished and a Y/N column for whether or not I’d recommend it. That spreadsheet is my only memory of the last time I read a Jami Attenberg novel and my succinct reaction was “the ending was predictable; I cared about exactly zero of the characters.” Four years later, with her novel All Grown Up, I found myself having deja vu.

9780544824249_custom-378e8da65f06b2846e6b6c01b27adf75e2edb10f-s400-c85

Andrea is a thirty-nine-year-old single woman without children. She wanted to be an artist, but instead finds herself in an unfulfilling career so she can pay the rent. In New York City, that’s not remarkably unusual. What is remarkably unusual about Andrea is that she refuses to grow up, and the people around her think that’s perfectly alright.  

I didn’t find it predictable, though perhaps I should have - a 40-year-old woman who still acts like someone fresh out of college can’t be expected to grow up at that late stage - but I didn’t care about any of the characters. In the end, I found Andrea’s life and the novel on the whole quite sad, but on the plus side, Attenberg’s writing was lovely and made the less than 200 pages easy to get through.

In a transformation like the one I hoped Andrea would have, I turned a college classic into something a bit more put-together, a posh NYC favorite - Grown-up Ramen Noodles. I found a recipe from Fork Knife Swoon to go off of and set to work.  

To start, I began cooking a chicken breast seasoned with salt and pepper in a skillet with olive oil. Once the rounded side was browned - about 7 minutes - I flipped it over and cooked the other side for another 5 minutes or so. I transferred it to a small foil-lined baking sheet and placed it in my preheated 375-degree oven to finish cooking.

IMG_3231

While the chicken was cooking, I began my broth and set the water for my eggs to boil. In a medium saucepan, I heated some toasted sesame oil before adding minced garlic and ginger. I allowed those to cook for a few minutes until fragrant. Then, I added the soy sauce and rice cooking wine, stirring to combine. After another minute, I added the chicken broth, covered the pan and brought it all to a boil.

Once boiling, I turned down the heat and allowed it to simmer for 5 minutes. I added the dried mushrooms and let the broth continue to simmer. Meanwhile, I removed the chicken from the oven and set it aside. I also added the two eggs to the separate pan of boiling water and set a timer for 7 minutes.

I used this time to prep my scallions and seaweed, and once the chicken had rested, I cut it into slices.

IMG_3232

After 10 minutes, I removed the mushrooms and placed them in the waiting bowls. (If I had sliced them, I would’ve done so here. If I was making this again, I would slice the mushrooms into more bite-size pieces, as noted in the recipe below.) I also placed the eggs into an ice bath so they could cool before peeling.

I added the dried ramen noodles into the prepared ramen broth, discarding the flavoring packets that come with the noodles. (College memories!) You could cook the noodles in plain boiling water instead, but I have always preferred to make them in the broth/flavoring to impart some of that flavor on the noodles.

IMG_3233

Once the noodles are ready, carefully place them in each bowl and top with the broth. Carefully peel each egg, slice in half and place in the bowls on top of the noodles and mushrooms. Add the sliced chicken, scallions and seaweed. Serve and enjoy!

IMG_3234

Grown-Up Chicken Ramen

  • Servings: 2
  • Time: 1 hour
  • Print

Ingredients

  • 1 large boneless, skinless chicken breast
  • kosher salt and freshly-ground black pepper, to season
  • 1 TBS unsalted butter, or olive oil
  • 2 tsp sesame oil
  • 2 tsp fresh ginger, minced
  • 3 tsp fresh garlic, minced
  • 3 TBS low-sodium soy sauce
  • 2 TBS rice cooking wine
  • 4 cups chicken stock or broth
  • ½ - 1 oz dried shitake mushrooms
  • 1-2 tsp sea salt, to taste
  • 2 large eggs
  • 1/2 cup scallions, sliced
  • 2 (3 oz) packs dried ramen noodles
  • optional: roasted seaweed snacks, in ribbons, for serving

Directions

  1. Cook the chicken: Preheat the oven to 375 degrees F. Season the chicken generously with salt and pepper. Melt the butter (or heat olive oil) in an oven-safe skillet over medium heat. Add the chicken breast, round side down, and cook until golden brown and it releases easily from the pan, about 5-7 minutes. Flip the chicken over and cook for another 4-5 minutes, until golden.
  2. Transfer the skillet to the oven and roast for 15-20 minutes, until the chicken is cooked through. (If you don’t have an oven-safe skillet, you may transfer the chicken to a small baking sheet lined with foil.) Remove from the oven, transfer the chicken to a plate and cover with foil until ready to serve.

  3. Make the ramen broth: Heat the sesame oil in a large pot over medium heat, until shimmering. Add the garlic and ginger, and cook for a few minutes until softened. Add the soy sauce and rice wine, and stir to combine. Cook for another minute. Add the stock, cover, and bring to boil. Remove the lid, and let simmer uncovered for 5 minutes, then add the dried mushrooms. Simmer gently for another 10 minutes, and season with salt, to taste.
  4. Otherwise, take the mushrooms out of the broth using tongs, and carefully, slice them into thick bite-size slices on a cutting board. (For particularly large mushrooms, you may cut them in half before slicing.) Place in bowls for serving.

  5. Make the soft-boiled eggs: Fill a pot with enough water to cover the eggs, and bring to a boil. Gently lower the eggs (still cold from the fridge) into the boiling water, and let simmer for 7 minutes (for a slightly-runny yoke) or 8 minutes (for a soft, but set-up yoke).
  6. Meanwhile, fill a large bowl with ice water. When the timer finishes, transfer the eggs to the ice bath to stop the cooking process. Wait at least 5 minutes, or until cool enough to handle, then carefully peel away the shell and slice in half, lengthwise. Set aside until ready to serve.

  7. Assemble the ramen bowls: Meanwhile, chop the scallions and slice the seaweed snacks into ribbons (if using). Slice the chicken into thin pieces. Set aside. When the eggs are in the ice bath, add the ramen noodles to the broth. Cook for approximately 3 minutes, until soft, then divide the noodles into two large bowls, next to the mushrooms. Add the ramen broth, dividing evenly. Top each bowl with half of the sliced chicken breast, a soft boiled egg each, fresh scallions and the seaweed. Serve immediately.

Adapted from: Fork Knife Swoon

To save some time, or if you’re making this on a warm day like I was, substitute pre-made rotisserie chicken.


This post contains affiliate links. Full disclosure here. 

Filed Under: book review, recipe Tagged With: book club, chicken, contemporary, dinner, fiction, lunch, quick read, soup

Lots of Candles, Plenty of Cake + Funfetti Cake

June 1, 2017 by Megan 5 Comments

I added Anna Quindlen’s memoir Lots of Candles, Plenty of Cake to my to-read list almost four years ago. I don’t remember my reasoning for wanting to read it back then, but I know that I decided to finally rescue it from my too-long list - which currently sits at 436 books - because I wanted to make a cake.

Quindlen_Lots-of-Candles-Plenty-of-Cake.jpg

I knew nothing of Quindlen when I began reading, and over the course of her “memoir,” I can’t say I know that much more about her. Really it seemed more like a carryover from her columns in the New York Times as she described them - a collection of her thoughts on life and aging, coupled with bits of advice.

Perhaps I wasn’t exactly the target market for this book - I am roughly half her age, really just at the beginning of my career, not yet married and currently without children. I’m still figuring a lot of things out, and while in some ways she is too, we are figuring out very different things about life. I was able to glean a few interesting insights from her writing, but ultimately, I think this book is one I’d like to try again a couple of decades down the road.

The cake I envisioned when I chose this book was a towering cake ablaze with an unsafe amount of candles. So, I began my recipe search by buying four dozen tall, skinny, colorful candles to cover my imaginary cake. (Thank you, Amazon!) After all, candles do come first in the title - lots of them - and the plenty of cake comes second.

With the candles secured, I sought out a recipe for funfetti cake and found a great one from Sugar Spun Run. The homemade, triple-layer cake suited my needs perfectly. Now, I just had to execute…

I started the night before by setting out my frozen sticks of butter to soften overnight. Between the frosting and the cake, there was so much butter (over a pound and a half!). In the morning, I preheated my oven, separated my eggs and floured the pans to get started.

Then, I added the butter for the cake (1 stick, plus 1 tablespoon) to the stand mixer and beat until creamy. In went the sugar and oil, beaten until well-combined and creamy. I used a scraper on the sides of the bowl and added in the vanilla extract.

In a separate bowl, I whisked together the flour, baking powder and salt. Then, as instructed, I alternated between adding the flour and the milk to the butter-sugar mixture in the mixer, beating on medium speed until combined.

IMG_3094

I whipped the egg whites into stiff peaks and measured out a half cup of sprinkles to add to the cake batter.

IMG_3095

I gently folded them into the batter until both the egg whites and sprinkles were well-incorporated and the funfetti batter was complete.

IMG_3097

I only had 2 cake pans, so I put my best estimate of one-third of the batter into each of my cake pans, saving the last third to bake after the first two layers were finished. I baked them together for about 35 minutes, using a toothpick to test each one before allowing them to cool. After 15 minutes, I removed each cake layer from the pan so they could finish cooling on a rack. Then, I baked my last layer.

IMG_3098

After all of the cake layers were out of the oven and cooling, I set to work on my frosting. First, allll of the butter - 6 softened sticks - went into the stand mixer. (I increased the recipe by 50%, according to the recommendation, so I wouldn’t run out. I ended up having more than enough - please read my notes in the recipe.)

IMG_3099

Once the butter was creamy, I added salt and beat for about 20 more seconds. I did my best to add the powdered sugar gradually without making a mess, but I wasn’t quite successful. My lovely red mixer looked like it had been in a snowball fight by the time I was done! I let it incorporate approximately 1 cup at a time and then added in the vanilla extract.

My cake layers weren’t 100% even because I had had to estimate, so I started with the thickest layer at the bottom. I frosted the top of that, placed the next layer and frosted that, before placing the last layer and frosting the top and sides of the entire cake. As suggested, I put the cake with the crumb coat into the freezer for about 15 minutes before finishing the frosting with a final thicker layer.

IMG_3100

The last step to decorating the cake - but certainly not the least! - was adding the sprinkles. I watched quite a few tutorials on the best way to add the sprinkles without making a mess. My frosted cake was on a cardboard cake round, so I set that on a cooling rack nested into a baking sheet with sides. I cupped my dominant hand (in my case, my left) and filled it with sprinkles, carefully tipping them onto the side of the cake. Most of the extras fell into the baking sheet as expected!

I continued to rotate and sprinkle until the entire bottom third of the cake was covered in sprinkles. Lastly, I carefully covered the outside of the top of the cake with a thick line of sprinkles to match the bottom. It was easier than I expected it to be! And, as someone who is usually terrified of cake-decorating, I found that sprinkles not only do sprinkles look super festive, they cover a lot of errors. 🙂

IMG_3101

Last but not least, it was time for the candles. I didn’t end up using all of the four dozen candles I bought, but I covered the cake pretty well. The candles looked impressive. I have honestly never been more proud of a cake I’ve made - especially from scratch. Hope you enjoy it as much as Scott, my sister and brother-in-law, and my co-workers did! (I know I didn’t have to twist any arms, but thanks to all for taste-testing.)

Triple-Layer Funfetti Cake

  • Servings: 14
  • Time: 1 hour, 30 minutes
  • Print

Cake Ingredients

  • 9 TBS butter, softened
  • 3 cups sugar
  • 1 cup canola oil (vegetable oil would also work)
  • 4 tsp vanilla extract
  • 4 cups + 2 TBS all-purpose flour
  • 4½ tsp baking powder
  • 1½ tsp salt
  • 1½ cup milk
  • 9 egg whites (room temperature preferred)
  • ½ cup sprinkles

Buttercream Frosting Ingredients

  • 1 lb unsalted butter, softened to room temperature
  • ¼ tsp salt
  • 6 cups powdered sugar
  • 6 TBS heavy cream
  • 2 tsp vanilla extract

Cake Directions

  1. Preheat oven to 350F and prepare 3 8-inch round cake pans by generously greasing and flouring. Be sure to shake out excess flour.
  2. In stand mixer, beat butter on medium-low speed until creamy.
  3. Add sugar and oil and beat until all ingredients are well-combined and creamy.
  4. Scrape down the sides and bottom of the bowl and then stir in your vanilla.
  5. In separate bowl, whisk together your flour, baking powder, and salt.
  6. Measure out your milk. Then, with mixer on medium speed, gradually alternate between adding the flour mixture and the milk, starting and ending with the flour mixture. Stir until each one is almost completely combined before adding the next. Pause occasionally to scrape down sides and bottom of bowl.
  7. In separate bowl, combine your egg whites and, with a hand-mixer on high-speed, beat until stiff peaks form.
  8. Using a spatula, gently fold your egg whites and sprinkles into your batter. Take care to scrape the sides and bottom of the bowl so that ingredients are well-combined, and take care not to over-mix.
  9. Evenly divide cake batter into prepared pans.
  10. Bake on 350F for 35-40 minutes, or until a toothpick inserted in the center of each cake layer comes out clean or with few crumbs (should not be wet). For best results, rotate your cake pans halfway through baking to ensure even baking. Cakes will be a light golden brown when done.
  11. Remove cakes from oven and allow to cool in pans for 15 minutes. Run a butter knife around the inside rim of each pan and invert each onto a cooling rack. Allow to cool completely before frosting.

Frosting Directions

  1. In stand mixer, beat butter on medium-speed until creamy.
  2. Add salt and beat again for about 20 seconds.
  3. Gradually, about 1 cup at a time, add powdered sugar, waiting until each cup is completely mixed before adding the next cup.
  4. Then, 2 tablespoons at a time, add the heavy cream on medium-high speed, waiting until each addition is well-combined before adding the next 2 tablespoons.
  5. Add vanilla extract and stir on medium-high for 30 seconds.
  6. Transfer one layer of your cooled cake to serving platter. Use frosting to ice the top. Add the next layer, ice the top of that. Add your third layer on top and ice the top, and then do a thin "crumb coating" around the entire cake.
  7. Transfer to freezer for 10-15 minutes, then remove and apply a clean, thick coat of frosting around the entire cake.

From: Sugar Spun Run

Original recipe based on this technique from I Am Baker to frost cakes. She recommended increasing the above frosting recipe by 50% to ensure full coverage, but I had a TON leftover. I don’t like overly frosted cakes, but mine was still well-frosted according to taste testers (a good amount), so it’s up to you and your preferences.

This cake may also be made in 3 9" pans, just decrease the baking time. Start checking the cakes for doneness at 25 minutes.


P.S. It will apparently take me only 8 years (a shockingly short amount of time!) to finish my TBR list...assuming I don’t add any more books. If you’d like to calculate your own TBR time, check out Read It Forward’s calculator. Let me know in the comments how many years of reading you have ahead of you!

Screen Shot 2017-05-26 at 12.40.27 PM


This post contains affiliate links. Full disclosure here. 

Filed Under: book review, recipe Tagged With: baking, celebration, dessert, memoir, quick read

Foodie Book Tag: Books + Cookies

May 28, 2017 by Megan 5 Comments

I wasn't tagged in this, but I came across a post from The Sassy Book Geek and loved the idea of this, so I wanted to get in on this book tag as kickstart to using them myself. Plus, it combines two of my favorite things - books and food!

The Rules:

  • In addition to linking back to the person who tagged you, it would be awesome if you link back to Nicole’s original post!
  • Pick a book that corresponds to the cookie’s ‘theme’.
  • Tag 1-3 people.
  • Have fun!

The Cookies:

  • Chocolate Chip: A Classic Book That You Love or Really Enjoyed (interpret classic how you want, it can be a classic written 100 years ago or 20 years ago)
  • Thin Mints: A Fandom That You Really Want to ‘Join’ AND/OR a Hyped-Up Book You Want To Read (your source(s) of a book being hyped can be from anywhere)
  • Shortbread: An Author You Can’t Get Enough Of
  • Samoas/Caramel DeLites: An Emotional Rollercoaster (this cookie was hard … so any book that made you feel more than one emotion, strongly. The choice of emotions is up to you)
  • Oreos: A Book Whose Cover Was Better Than The Story OR Vice Versa, Where The Story Was Better Than Its Cover
  • Tagalongs/Peanut Butter Patties: A Book That Wasn’t What You Expected (good, bad, or just different, interpret how you wish)
  • Snickerdoodles: A Book You May Never Stop Rereading/ Loving
  • Bonus: Choose a cookie I didn’t list and make up a question!

My Books:

Chocolate Chip: Jane Eyre is amazing, and when I first read it I wasn't expecting to love it as much as I did.

jane-eyre-9781471134784_hr.jpg

Thin Mints: Pachinko by Min Jin Lee has been getting a lot of hype since it came out. I even got a free copy through a company book club, so I have no excuse not to dig in soon. Looking forward to it!

media.hdp.hbgusa.jpg

Shortbread: Fredrik Backman. I've only read 2 of his books, but I loved them both! Looking forward to reading more, especially Beartown (which was almost my Thin Mints choice.)

0d9bd1386eb0b965a6805cadac36a955.jpg

Samoas/Caramel DeLites: A Walk to Remember. This was before I realized how formulaic Mr. Sparks can be, but I literally laughed out loud reading this book and of course it made me cry too. Still one of my favorites.  bookcover-680x1020.jpg

Oreos: I thought Welcome to Braggsville had an awesome cover, and though we had a great book club discussion around it, the narrative style didn't do it for me. I wasn't a fan.

9780062302120_custom-02b2307e51fe69252971540140d28888bdcc2d5b-s400-c85.jpg

Tagalongs/Peanut Butter Patties: Neil Gaiman's Neverwhere. Wasn't sure what to expect when I started this one (another book club selection), but I ended up really enjoying it! Really immersive story-telling, interesting world creation.

51QovlC41OL._SX317_BO1,204,203,200_.jpg

Snickerdoodles: This is easy - I could read Harry Potter over and over again! In a world, where I rarely re-read books, I have re-read the HP series several times. (I don't own this set below, but it's my dream set!

Harry-Potter-covers.jpg

My Bonus Cookie (courtesy of the Girl Scouts) - Lemonades: A book that's refreshing, whether it be a new outlook, a fun idea/concept, or just a breezy read to cleanse the palate

For me, Where'd You Go Bernadette fits this bill. Semple writes in a unique style, and I found it to be a humorous, quick read.

13526165.jpg

My Tags:

Cinnamon Tangles

Book Hippie

Sophie at Blame Chocolate

Enjoy!


Filed Under: of interest Tagged With: book list, book tag, cookies, dessert, mini review

Truly Madly Deeply + Grilled Shrimp and Corn

May 25, 2017 by Megan 2 Comments

“It all began at a barbecue.” And so Liane Moriarty’s latest novel begins. It seemed innocent enough, but with a title like Truly Madly Guilty, I knew it wouldn’t stay that way for long. I have been a fan of Moriarty’s ever since I read her best-seller Big Little Lies in 2015. With the HBO series adaptation recently wrapping up, I was excited for more when my hold finally came through at the library.

9781250069818_p0_v3_s1200x630

For those of you who have seen or read Big Little Lies, the setup is similar. It becomes quickly apparent that something bad has happened, but it’s less clear who it happened to and what exactly it is. Over the course of a slow, every-other-chapter build, the consequences of a normal, spur-of-the-moment backyard barbeque become all too real.

I would consider some of Moriarty’s other novels to be quick-paced beach reads, despite her ability to sneak tough, sometimes dark subjects into an otherwise light, reality TV-style wrapper. Though the title Truly Madly Guilty definitely screams “get out your sunnies!” I didn’t get the same vibe this time.

The plot moved too slowly for me, and it’s real strength was in its character building. The relationships were messy and complicated in a way that felt authentic because it wasn’t over-the-top. By the end of the novel, I definitely appreciated its subtlety though it wasn’t what I expected going in.

But, since it all started with a barbecue, I used that as my recipe inspiration. And, since it took place in Australia, I couldn’t resist making (get your Aussie accent ready!) shrimp on the barbie. I was also mostly just excited to have an excuse to use our new grill on the deck.

I found a simple recipe for Lemon Garlic Shrimp Kabobs from one of my faves Damn Delicious, and even though she bakes hers in the oven, I was easily able to adapt it to a grill. Alongside Grilled “Crack Corn,” this could easily impress at your next outdoor get-together! The best part about both of these recipes is that they don’t require a lot prep and they grill up in under 15 minutes.

To start, I shucked my corn and speared my shrimp and lemons onto the skewers. (I used metal, but if you’re using bamboo or wooden skewers, make sure you soak them first.) I chose to do a lemon slice on each end and 4-5 shrimp in the middle, but you can mix it up however you think it works best.

Then, Scott put the corn on the grill, since it took slightly longer than the shrimp, while I made the sauce for the corn and the shrimp.

To make sauce for the corn, I simply combined already melted butter with brown sugar, cayenne pepper, salt and black pepper. I whisked it up really well and brought it outside to the grill. Scott began basting the corn and put the shrimp on.

Back in the kitchen, I made the sauce/glaze for the shrimp skewers. In a small saucepan, I melted some butter. To that, I added lemon juice, minced garlic and dried basil, oregano and thyme. I also seasoned it with salt and pepper - I used a generous pinch and a turn or two of freshly ground black pepper. After a couple of minutes, it was fragrant and ready.

We allowed the corn to cook while the shrimp finished up, even though it was basically finished - a little extra color never hurt anyone. Be sure your shrimp is fully cooked through, but be careful not to overcook it as it can be tough and chewy. The shrimp should be a nice pink color.

Both recipes were really delicious and really easy. Perfect for entertaining a small group, or a relaxing summer evening outside. I hope everyone has a safe, sunny Memorial Day weekend! See you next week!

IMG_3107

Lemon Garlic Shrimp Kabobs

  • Servings: 6
  • Time: 20 minutes
  • Print

Ingredients

  • 1½ pounds medium shrimp, peeled and deveined
  • 2-4 lemons, thinly sliced and halved
  • kosher salt and freshly ground black pepper, to taste
  • ¼ cup unsalted butter, melted
  • ¼ cup freshly squeezed lemon juice
  • 4 cloves garlic, minced
  • ½ tsp dried oregano
  • ½ tsp dried thyme
  • ½ tsp dried basil
  • 2 TBS chopped fresh parsley leaves

Directions

  1. Thread shrimp and lemon halves onto skewers. In a medium saucepan, over medium high heat, melt butter. Stir in lemon juice, garlic, oregano, thyme and basil until fragrant, about 2 minutes; season with salt and pepper, to taste. (If you have a side burner on your grill, you can do this while the shrimp cooks.)
  2. Preheat grill to medium-high heat. Oil grates and add shrimp.
  3. Grill each side for about 3-4 minutes on each side, until cooked through.
  4. Serve shrimp skewers immediately, brushed with butter mixture and garnished with parsley, if desired.


From: Damn Delicious

Crack Corn

  • Servings: 6
  • Time: 15 minutes
  • Print

Ingredients

  • 6 ears corn, husked
  • 3 TBS brown sugar
  • 1 tsp cayenne pepper
  • salt
  • freshly ground black pepper
  • ¼ cup melted butter
  • lime wedges, for squeezing

Directions

  1. Heat grill to high. Oil grates and add corn. Grill for 5 minutes, turning occasionally.
  2. Meanwhile, in a small bowl, add brown sugar, cayenne pepper, salt, pepper and melted butter. Whisk together until combined.
  3. Baste corn, while grilling, until totally slathered in crack sauce. Grill until charred and tender, approximately 5 minutes more.
  4. Squeeze with lime and serve.

From: Delish.com

Filed Under: book review, of interest, recipe Tagged With: contemporary, drama, fiction, grilling, seafood, spicy, television series, veggies

  • « Go to Previous Page
  • Go to page 1
  • Go to page 2
  • Go to page 3
  • Go to page 4
  • Interim pages omitted …
  • Go to page 11
  • Go to Next Page »

Primary Sidebar

About

The Hungry Bookworm brings together literature and food. Megan has an insatiable appetite for both.

As C.S. Lewis said, “Eating and reading are two pleasures that combine admirably.” Enjoy!

  • Bloglovin
  • Facebook
  • Instagram
  • Pinterest

Subscribe

Don't miss out on bookish content, exclusive giveaways, and of course, book club-friendly recipes. Get notified of new posts via email.

Join 2879 subscribers.

Search for Ingredients, Recipes, or Books

Recent Posts

  • Subscriber Box Review: Literati Book Club - Roxane Gay's Audacious Book Club
  • Arsenic and Adobo + Ensaymada
  • Review of The Kindred Spirits Supper Club
  • Kids Edition: Sometimes I Like to Curl Up in a Ball + "Dirt" Pudding Cups
  • The Midnight Library + Broccoli and Ricotta Toast

Goodreads

Tags

5 ingredients or less appetizer baking book club book list book of the month books about food bread breakfast brunch chicken contemporary cookies cultural dessert dinner dinner party dystopia easy prep favorites fiction fruit historical fiction holiday ice cream linkup lunch meat memoir mini review nonfiction pasta quick read reading challenge science fiction seafood show us your books side dish snack soup TBR list thriller top ten tuesday vegetarian veggies

Archives

Other Great Book Blogs

Literary Quicksand
Never Enough Novels
Death by Tsundoku
Professional Reader 25 Book Reviews
Privacy & Cookies: This site uses cookies. By continuing to use this website, you agree to their use.
To find out more, including how to control cookies, see here: Cookie Policy

Footer Widget Header

Megan’s Instagram

Copyright © 2025 · Hungry Bookworm