• Skip to primary navigation
  • Skip to main content
  • Skip to primary sidebar
  • Home
  • Reviews
    • Book Index
    • Fiction
    • Non-Fiction
    • Top Ten Tuesdays
The Hungry Bookworm

The Hungry Bookworm

reading + eating

  • Recipes
    • Drinks
    • Snacks, Sides & Apps
    • Main Dishes
    • Desserts
    • 5 Ingredients or Less
  • About
    • Meet Megan
    • How I Rate
    • Review Policy
    • Contact

veggies

Behind Her Eyes + Spaghetti Carbonara

October 28, 2017 by Megan 4 Comments

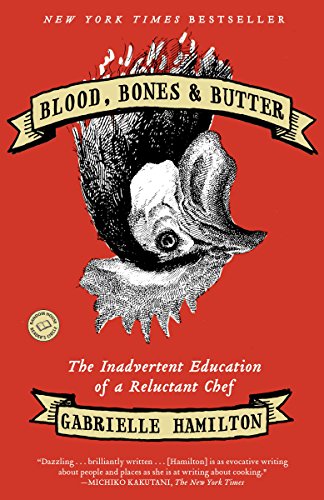
Every November, my Good Reads & Good Eats book club reads a spooky book. Since we meet on the first Tuesday of each month, this allows us to read it during October and our meeting usually ends up being right around Halloween. This year’s selection was Sarah Pinborough’s novel Behind Her Eyes. The thriller was released in January but it made for an excellent read this month, just creepy enough throughout with a twist at the end I didn’t see coming.

Thanks to the success of Gone Girl, the oft-called domestic thriller has become more and more popular, and generally, I try to avoid them. Gone Girl was so well-written and its twist both genuinely surprising and believable (which is harder to achieve than it may seem) that I’m usually disappointed in those that follow.

That being said, Behind Her Eyes was an intriguing read. I did get caught up in the story and it kept me wondering what exactly was going on and who to be skeptical of, but the devices it used (particularly toward the end) seemed over-the-top and unbelievable. Overall, Sarah Dickinson does a great job summing up how I feel on her blog, but beware of spoilers if you haven’t read the book and still want to.

Pinborough’s novel begins in the middle of David and Adele’s troubled marriage. After a recent move to London, David almost immediately begins an affair with Louise, who turns out to be his new receptionist. It’s not clear how Adele discovers his transgression, but she makes it a point to befriend Louise and tension begins to build. As more about Adele’s backstory is revealed, more questions arise. In the present day narrative, we’re left wondering who we can trust. I’ll stop here to avoid spoilers, but I think it achieved what it needed to for our book club in that it was mostly riveting and twisty and will certainly make for interesting discussion. I’m looking forward to hearing what everyone has to say about it.

In an attempt to create some domestic bliss (or at least throw David off her scent), Adele continues to make impressive home-cooked meals almost every evening. On one such evening, she whips up the deceptively easy Spaghetti Carbonara and serves it with a simple arugula salad. I grabbed a recipe from one of my favorite blogs, Damn Delicious, for the pasta and found one for the salad from Everyday Maven. The whole meal took about twenty minutes and only requires a minimum number of ingredients for one so impressive; it makes a perfect weeknight meal.

First, I set a large pot of water to bowl and then prepped the salad. I chopped a half cup of cherry tomatoes in half and tossed them in a large bowl with arugula and the lemon zest. I love Trader Joe’s arugula because it’s the perfect amount for a dinner salad and it’s already pre-washed. In a separate small bowl, I combined the ingredients for the dressing - olive oil, balsamic vinegar, and salt and pepper. With the salad mostly set, I turned to the pasta.

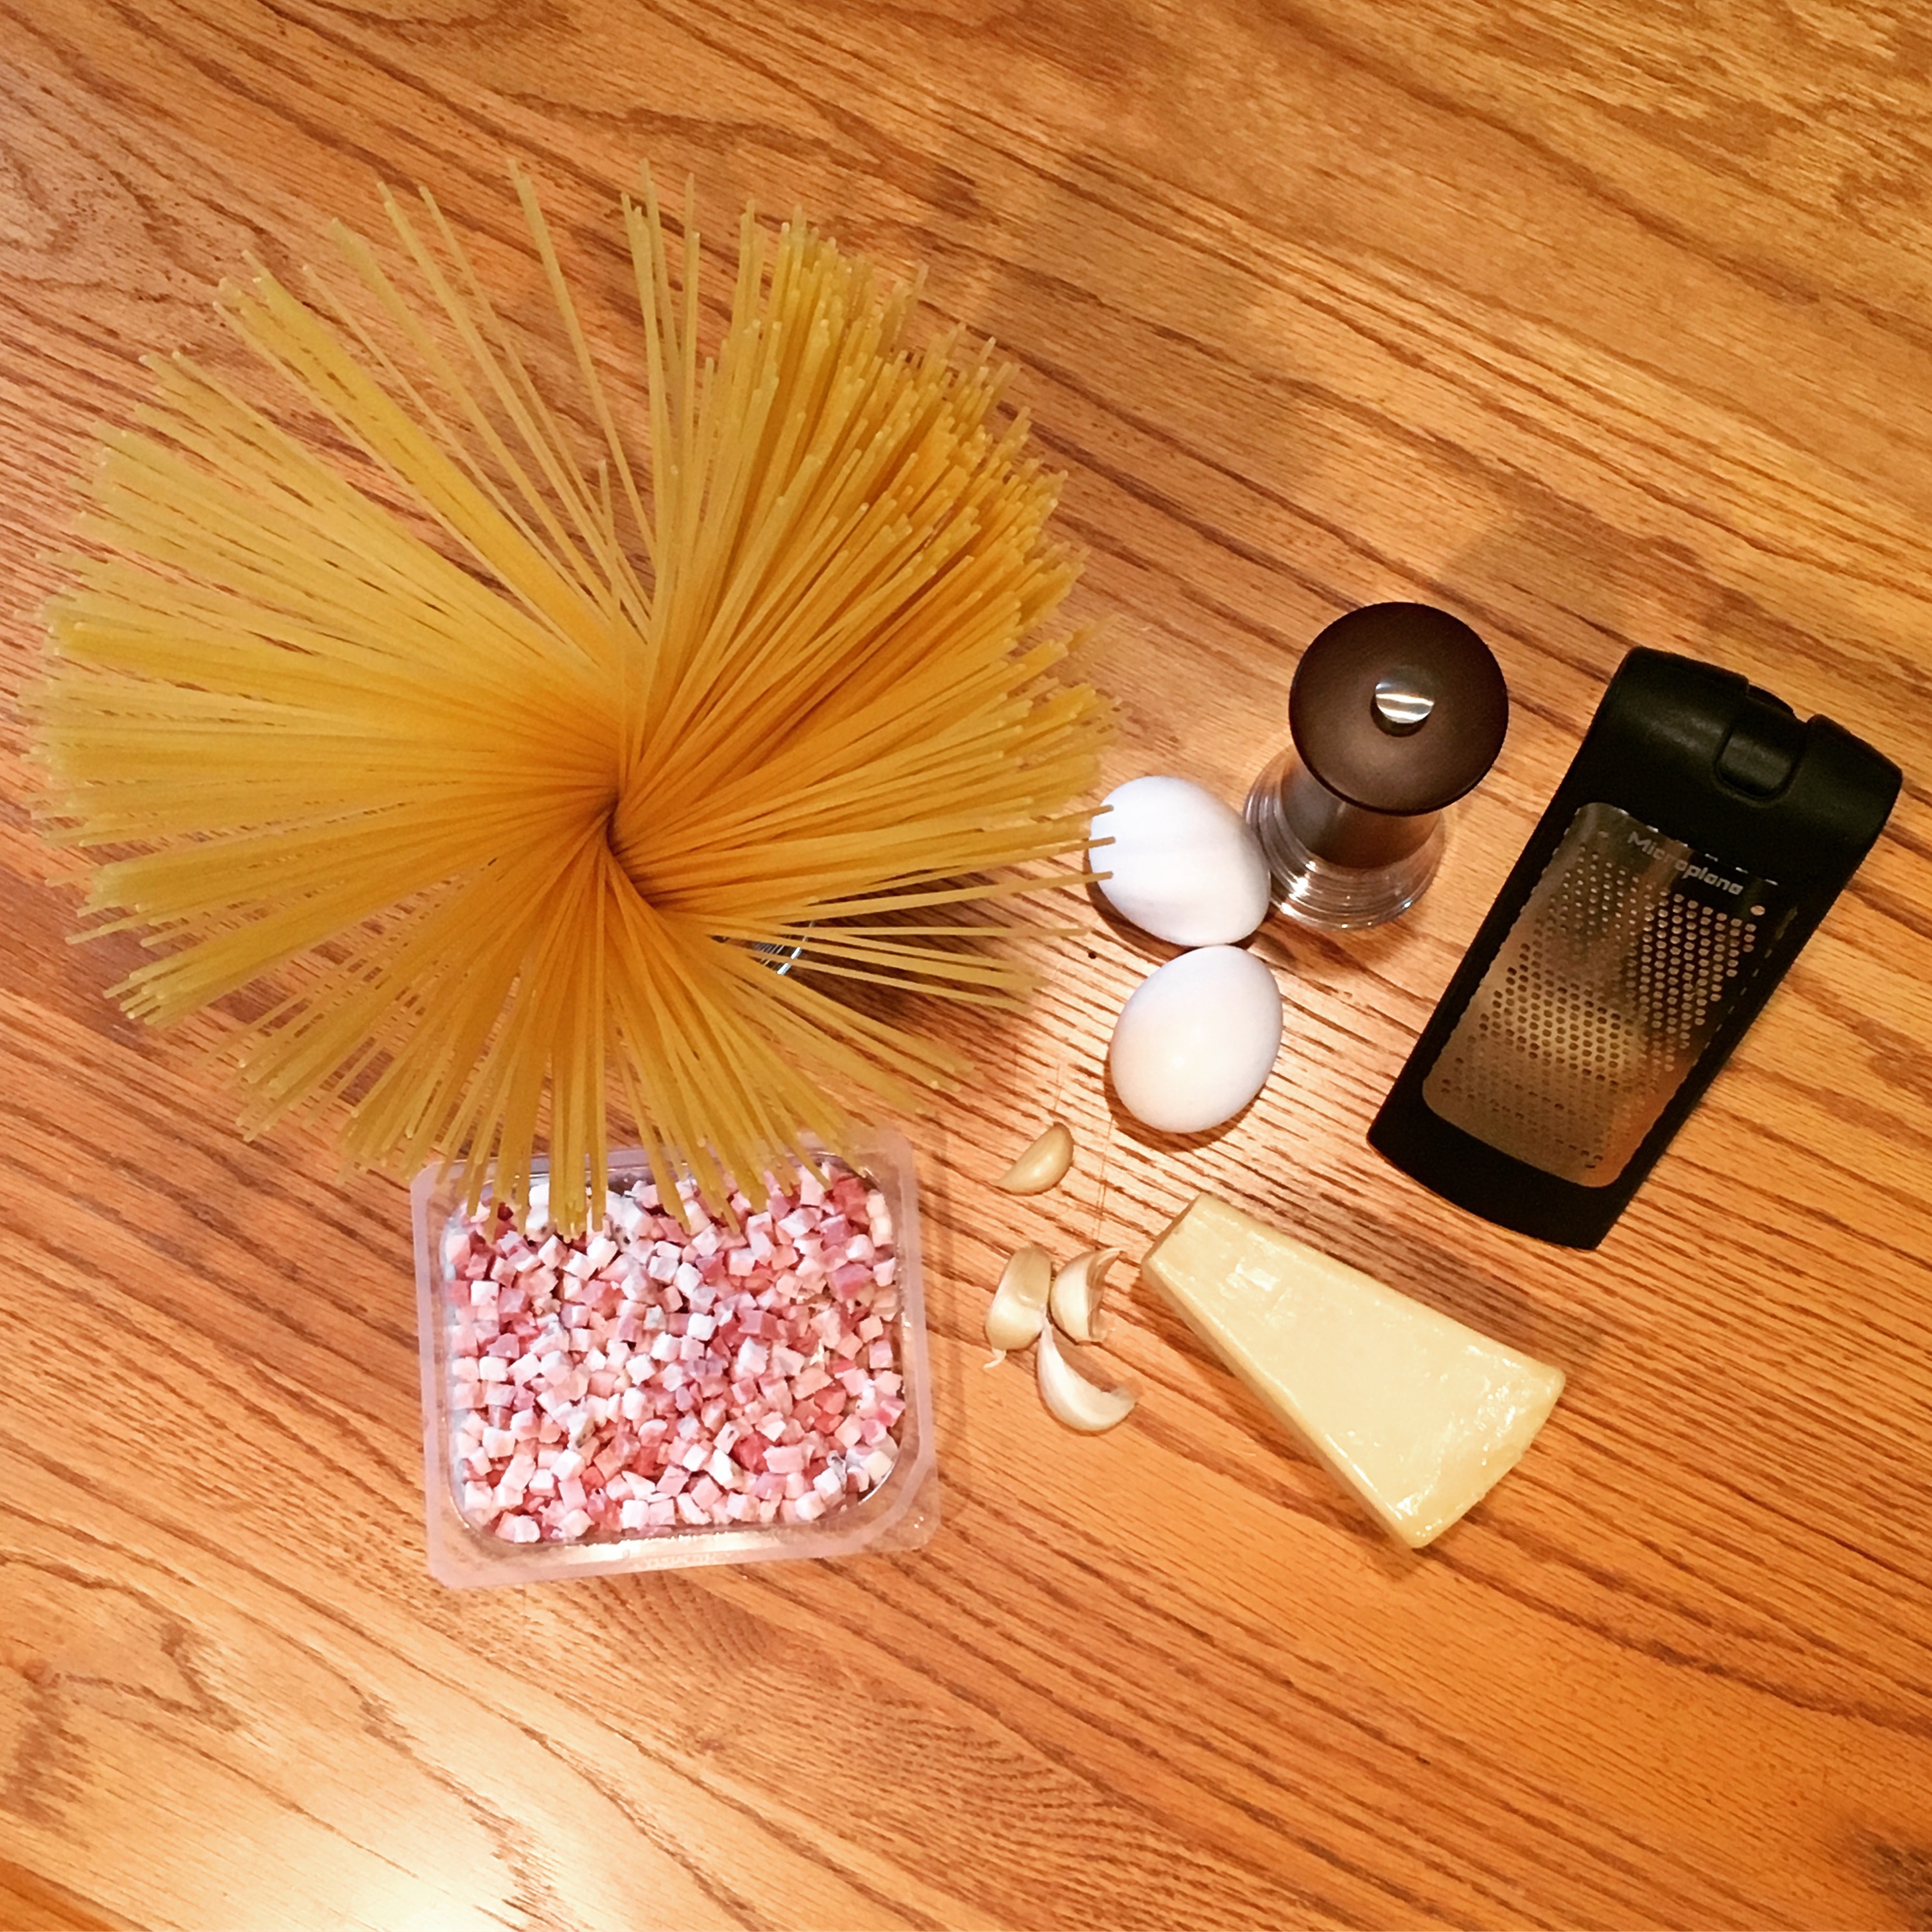
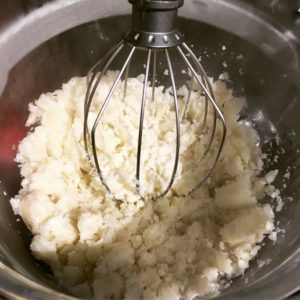
Once the water was boiling, I salted it and added the spaghetti to the pot. In a small bowl, I whisked together the eggs and Parmesan and set it aside. I added my diced pancetta (or bacon, if that’s what you’re using) to a heated skillet and allowed it to crisp up for several minutes, before adding my minced garlic.

You’re going to want to make sure your pasta is cooked and drained before you add the garlic. Here is where you need to begin working quickly. Even though this recipe is easy, the eggs leave some room for error. You don't want them to scramble; they should become a part of the creamy sauce, indistinguishable from the pasta itself. 

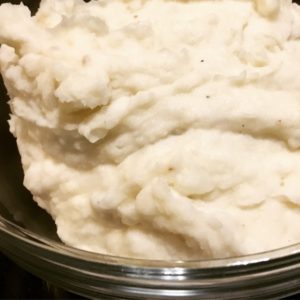
To my pancetta and garlic, I added my pasta and the egg-Parmesan mixture, using a pair of tongs to toss and combine everything. I seasoned with salt and pepper, before adding a bit of pasta water, tossing and checking the consistency.

With that all set, I re-whisked my dressing, poured it on the arugula and tossed my salad. Best dishes are both served immediately.

Spaghetti Carbonara

  • Servings: 4
  • Time: 20 minutes
  • Print

Ingredients

  • 8 ounces spaghetti
  • 2 large eggs
  • ½ cup freshly grated Parmesan
  • 4 slices bacon, diced [or diced pancetta, about 4 ounces]
  • 4 cloves garlic, minced
  • Kosher salt and freshly ground black pepper, to taste
  • 2 tablespoons chopped fresh parsley leaves (optional)

Directions

  1. In a large pot of boiling salted water, cook pasta according to package instructions; reserve 1/2 cup water and drain well.
  2. In a small bowl, whisk together eggs and Parmesan; set aside.
  3. Heat a large skillet over medium high heat. Add bacon and cook until brown and crispy, about 6-8 minutes; reserve excess fat.
  4. Stir in garlic until fragrant, about 1 minute. Reduce heat to low.
  5. Working quickly, stir in pasta and egg mixture, and gently toss to combine; season with salt and pepper, to taste. Add reserved pasta water, one tablespoon at a time, until desired consistency is reached.
  6. Serve immediately, garnished with parsley, if desired.


From: Damn Delicious

Arugula Salad with Lemon Balsamic Dressing

  • Servings: 4
  • Time: 5 minutes
  • Print

Ingredients

  • ½ pound arugula
  • ½ cup grape or cherry tomatoes, washed and halved
  • zest of a whole medium lemon
  • ¼ cup extra virgin olive oil
  • 2 Tablespoons balsamic vinegar
  • ¼ teaspoon kosher salt
  • 5 to 6 turns freshly ground black pepper

Directions

  1. In a large salad or mixing bowl, combine arugula, halved grape tomatoes and the zest of an entire medium lemon.
  2. In a separate bowl, whisk olive oil, balsamic vinegar, salt and pepper together until well mixed.
  3. When ready to serve, pour dressing over salad, toss until well coated. Serve and Enjoy!

From: Everyday Maven

Filed Under: book review, recipe Tagged With: book club, dinner, easy prep, fiction, five ingredients or less, pasta, salad, thriller, veggies

Pachinko + Kimchi

August 26, 2017 by Megan Leave a Comment

Pachinko, for those of you who don’t know (and I didn’t until I read Min Jin Lee’s novel of the same name), is a Japanese game of chance, a combination of pinball and a slot machine. Like the game it’s named for, Lee spins an epic tale that goes up and down, away and back again, all as the Korean family we follow move to Japan and either suffer or thrive there. The novel starts with the parents of our strong central female character Sunja and spans over seventy years and several generations.

I liked Pachinko, but despite being well-written, it wasn’t a particularly enjoyable read. Lee really put her characters through the ringer, and the suffering they experienced left me feeling very defeated. It was an interesting perspective on an immigration story - one we aren’t often exposed to here in the United States but one that didn’t leave me with much hope either.

It was a book we chose for our August book club, and I’ll admit I put it on the list because I already owned it (checking off that TBR!) and because I wanted to make and eat sushi. It turned out that while sushi did show up a couple of times in the novel, kimchi is what really made an impression. Sunja and her sister-in-law used their skills in the kitchen to make kimchi when times were tough, supporting their family the only way they could.

Kimchi, which is made of fermented vegetables - usually cabbage, requires about a minimum of a week to make. So, it was about two weeks ago that I set to work. I found a recipe that didn’t seem too intimidating and stopped by the trusty 168 Asian Mart (you may remember from my dumpling-making adventures) to gather all of the Korean-specific ingredients, such as salted shrimp and red pepper powder.

I chopped my cabbage into roughly 2-inch pieces, put them in a large bowl and sprinkled them with a generous amount of salt (half a cup), tossing the leaves to make sure they were well-coated. Then, I covered the cabbage with water - I ended up using about 15 cups - and covered the entire bowl with plastic wrap. I let it sit for about a day.

Then, I placed the cabbage in a colander, rinsed it and squeezed it out. While that sat, I combined all of the other ingredients in a large bowl - radish cut into matchsticks, scallions cut into 1-inch pieces, what seemed like a ton of Korean red pepper powder, fish sauce, minced ginger and garlic, Korean salted shrimp and a little bit of sugar.

Once it was well-combined, I added the cabbage and tossed it until it was well-coated and pretty red too. Then, I stuffed everything into my large glass jar and sealed it. I snapped a quick picture before I left it in the dark, cool basement for another full day.

Then, I opened the lid and allowed the gases to escape - the product of our fermentation process was quite pungent. I’d recommend doing this with the windows open, or in a very well-ventilated room. After about a half an hour, I sealed it back up and placed it in the fridge. The jar hung out in the fridge for about 10 days, until yesterday, when I opened it up to attempt to make kimchi fried rice.

You can use kimchi for a lot of different things, but the one I thought I might enjoy the most was kimchi fried rice. (Disclaimer: I’m not a huge kimchi fan to begin with.) Luckily, I was already familiar with fried rice from my Boston Girl blog entry earlier this year.

I ended up tweaking the recipe I found a little bit, but I loved the idea of serving it with an egg on top, so I had Scott fry some up while I put the finishing touches on the rice. The whole meal turned out really well - the kimchi added a little bit of an extra kick to the fried rice, and I liked it much more than I expected to! Now, we just have to figure out how to use the rest of the kimchi 🙂 Any suggestions, fellow foodies?

Basic Napa Cabbage Kimchi

  • Servings: 1½ quarts
  • Time: 25 minutes, plus about 4 days inactive soaking/fermenting time (up to one week)
  • Print

Ingredients

  • 1 (2-pound) napa cabbage
  • ½ cup kosher salt
  • about 12 cups cold water, plus more as needed
  • 8 ounces daikon radish, peeled and cut into 2-inch matchsticks
  • 4 medium scallions, ends trimmed, cut into 1-inch pieces (use all parts)
  • ⅓ cup Korean red pepper powder
  • ¼ cup fish sauce
  • ¼ cup peeled and minced fresh ginger (from about a 2-ounce piece)
  • 1 Tablespoon minced garlic cloves (from 6 to 8 medium cloves)
  • 2 teaspoons Korean salted shrimp, minced
  • 1½ teaspoons granulated sugar

Directions

  1. Cut the cabbage in half lengthwise, then crosswise into 2-inch pieces, discarding the root end. Place in a large bowl, sprinkle with the salt, and toss with your hands until the cabbage is coated. Add enough cold water to just cover (about 12 cups), making sure the cabbage is submerged (it’s OK if a few leaves break the surface). Cover with plastic wrap or a baking sheet and let sit at room temperature at least 12 hours and up to 24 hours.
  2. Place a colander in the sink, drain the cabbage, and rinse with cold water. Gently squeeze out the excess liquid and transfer to a medium bowl; set aside.
  3. Place the remaining ingredients in a large bowl and stir to combine. Add the cabbage and toss with your hands until evenly combined and the cabbage is thoroughly coated with the mixture.
  4. Pack the mixture tightly into a clean 2-quart or 2-liter glass jar with a tight-fitting lid and seal the jar. Let sit in a cool, dark place for 24 hours (the mixture may bubble). Open the jar to let the gases escape, then reseal and refrigerate at least 48 hours before eating. (Kimchi is best after fermenting about 1 week). Refrigerate for up to 1 month.

From: Chowhound

I used the kimchi to make Kimchi Fried Rice (from Rasa Malaysia), though it can be served as a side or in a variety of dishes.


This post contains affiliate links. Full disclosure here.

Filed Under: book review, recipe Tagged With: contemporary, cultural, drama, fiction, long read, side dish, spicy, veggies

Truly Madly Deeply + Grilled Shrimp and Corn

May 25, 2017 by Megan 2 Comments

“It all began at a barbecue.” And so Liane Moriarty’s latest novel begins. It seemed innocent enough, but with a title like Truly Madly Guilty, I knew it wouldn’t stay that way for long. I have been a fan of Moriarty’s ever since I read her best-seller Big Little Lies in 2015. With the HBO series adaptation recently wrapping up, I was excited for more when my hold finally came through at the library.

9781250069818_p0_v3_s1200x630

For those of you who have seen or read Big Little Lies, the setup is similar. It becomes quickly apparent that something bad has happened, but it’s less clear who it happened to and what exactly it is. Over the course of a slow, every-other-chapter build, the consequences of a normal, spur-of-the-moment backyard barbeque become all too real.

I would consider some of Moriarty’s other novels to be quick-paced beach reads, despite her ability to sneak tough, sometimes dark subjects into an otherwise light, reality TV-style wrapper. Though the title Truly Madly Guilty definitely screams “get out your sunnies!” I didn’t get the same vibe this time.

The plot moved too slowly for me, and it’s real strength was in its character building. The relationships were messy and complicated in a way that felt authentic because it wasn’t over-the-top. By the end of the novel, I definitely appreciated its subtlety though it wasn’t what I expected going in.

But, since it all started with a barbecue, I used that as my recipe inspiration. And, since it took place in Australia, I couldn’t resist making (get your Aussie accent ready!) shrimp on the barbie. I was also mostly just excited to have an excuse to use our new grill on the deck.

I found a simple recipe for Lemon Garlic Shrimp Kabobs from one of my faves Damn Delicious, and even though she bakes hers in the oven, I was easily able to adapt it to a grill. Alongside Grilled “Crack Corn,” this could easily impress at your next outdoor get-together! The best part about both of these recipes is that they don’t require a lot prep and they grill up in under 15 minutes.

To start, I shucked my corn and speared my shrimp and lemons onto the skewers. (I used metal, but if you’re using bamboo or wooden skewers, make sure you soak them first.) I chose to do a lemon slice on each end and 4-5 shrimp in the middle, but you can mix it up however you think it works best.

Then, Scott put the corn on the grill, since it took slightly longer than the shrimp, while I made the sauce for the corn and the shrimp.

To make sauce for the corn, I simply combined already melted butter with brown sugar, cayenne pepper, salt and black pepper. I whisked it up really well and brought it outside to the grill. Scott began basting the corn and put the shrimp on.

Back in the kitchen, I made the sauce/glaze for the shrimp skewers. In a small saucepan, I melted some butter. To that, I added lemon juice, minced garlic and dried basil, oregano and thyme. I also seasoned it with salt and pepper - I used a generous pinch and a turn or two of freshly ground black pepper. After a couple of minutes, it was fragrant and ready.

We allowed the corn to cook while the shrimp finished up, even though it was basically finished - a little extra color never hurt anyone. Be sure your shrimp is fully cooked through, but be careful not to overcook it as it can be tough and chewy. The shrimp should be a nice pink color.

Both recipes were really delicious and really easy. Perfect for entertaining a small group, or a relaxing summer evening outside. I hope everyone has a safe, sunny Memorial Day weekend! See you next week!

IMG_3107

Lemon Garlic Shrimp Kabobs

  • Servings: 6
  • Time: 20 minutes
  • Print

Ingredients

  • 1½ pounds medium shrimp, peeled and deveined
  • 2-4 lemons, thinly sliced and halved
  • kosher salt and freshly ground black pepper, to taste
  • ¼ cup unsalted butter, melted
  • ¼ cup freshly squeezed lemon juice
  • 4 cloves garlic, minced
  • ½ tsp dried oregano
  • ½ tsp dried thyme
  • ½ tsp dried basil
  • 2 TBS chopped fresh parsley leaves

Directions

  1. Thread shrimp and lemon halves onto skewers. In a medium saucepan, over medium high heat, melt butter. Stir in lemon juice, garlic, oregano, thyme and basil until fragrant, about 2 minutes; season with salt and pepper, to taste. (If you have a side burner on your grill, you can do this while the shrimp cooks.)
  2. Preheat grill to medium-high heat. Oil grates and add shrimp.
  3. Grill each side for about 3-4 minutes on each side, until cooked through.
  4. Serve shrimp skewers immediately, brushed with butter mixture and garnished with parsley, if desired.


From: Damn Delicious

Crack Corn

  • Servings: 6
  • Time: 15 minutes
  • Print

Ingredients

  • 6 ears corn, husked
  • 3 TBS brown sugar
  • 1 tsp cayenne pepper
  • salt
  • freshly ground black pepper
  • ¼ cup melted butter
  • lime wedges, for squeezing

Directions

  1. Heat grill to high. Oil grates and add corn. Grill for 5 minutes, turning occasionally.
  2. Meanwhile, in a small bowl, add brown sugar, cayenne pepper, salt, pepper and melted butter. Whisk together until combined.
  3. Baste corn, while grilling, until totally slathered in crack sauce. Grill until charred and tender, approximately 5 minutes more.
  4. Squeeze with lime and serve.

From: Delish.com

Filed Under: book review, of interest, recipe Tagged With: contemporary, drama, fiction, grilling, seafood, spicy, television series, veggies

All the Ugly and Wonderful Things + Mashed Potatoes

March 2, 2017 by Megan Leave a Comment

The title of All the Ugly and Wonderful Things really got it right. Bryn Greenwood’s novel is about a little girl, Wavy, whose father is a meth dealer. While the subject matter was ugly, I thought the writing in this novel was beautiful. I was captivated even though I often wanted to put it down for a bit of a mental break.

All-The-Ugly-And-Wonderful-Things-By-Bryn-Greenwood.jpg

Wavy’s life is hard for many reasons, not the least of which is that, at eight years old, she is essentially the caregiver for her little brother. And, because of the life she was born into, she spends most of the novel seeking out the love and safety most children take for granted. The central bright spot in the novel is Wavy’s relationship with one of her father’s gentle but tattooed employees, Kellen. Not without its own problems, it still gives her the protection she craves.

Wavy struggles to eat in front of people, and while she might not partake, she takes it upon herself to ensure there is good food on the table at home. Kellen brings her the ingredients she requests. One of her favorite things about his grocery shopping is that he doesn’t forget any items and he always brings real butter for the mashed potatoes.

In one of her letters to Kellen, Wavy devotes an entire paragraph to mashed potatoes, and so that’s what decided to make to complement her story. I found a recipe online for Creamy Mashed Potatoes, with lots of real butter, of course.

Since it was just the two of us, I cut the recipe in half. I peeled half of the potatoes in a 5-lb bag (about 6) and added them to a large pot of water. Once it came to a boil, I partially covered the pot with a lid and let it continue to boil for about 20 minutes. (Timing will vary.)

I drained the potatoes and put them into my stand mixer bowl, using the whisk attachment to break them up by hand.

Then, I put the bowl in place and attached the whisk, setting it on low speed. After 30 seconds, I switched it up to medium speed and began to add the hot milk. Next, I added the butter, 1 tablespoon at a time, until the potatoes were smooth and fluffy.  Finally, I poured in the salt, plus a little black pepper to taste.

Creamy Mashed Potatoes

  • Servings: 6-8, as a side
  • Time: 40 minutes
  • Print


From: Natasha’s Kitchen

Ingredients

  • 4 lbs (12 medium) russet potatoes, peeled
  • 1 ¼ cups hot milk
  • 2 sticks unsalted butter at room temperature (not melted)
  • 1 ½ tsp salt, or to taste
  • 1 TBS fresh parsley or chives, finely chopped for garnish (optional)

Directions

  1. Peel potatoes (cut potatoes in half if very large). If you want the potatoes to be the smoothest possible, you can take the time to remove the little knots from the potatoes with a small spoon or the tip of a potatoes peeler. Place potatoes in a large pot (5 Qt+) and add enough cold water to cover potatoes. Bring to a boil and cook partially covered until easily pierced with a knife (boil 20-25 minutes depending on the size of your potatoes; mine took 22 min).
  2. Drain well and transfer to the bowl of your stand mixer. Grab the whisk attachment and mash potatoes lightly by hand to break them up. Fit mixer with whisk attachment and start mixer on low speed 30 seconds then increase to medium and slowly drizzle in HOT milk.
  3. With mixer on, add softened butter 1 Tbsp at a time, waiting a few seconds between each addition. Potatoes should be whipped and fluffy. Finally add 1 1/2 tsp salt, or to taste.


To keep mashed potatoes warm until serving: cover potatoes and place into a warm oven or transfer to a slow cooker on the low setting to keep potatoes warm until ready to serve.

This post contains affiliate links. Full disclosure here.

Filed Under: book review, recipe Tagged With: contemporary, fiction, side dish, tough topics, veggies

Blood, Bones and Butter + Lamb Chops

October 26, 2016 by Megan Leave a Comment

I don’t just enjoy cooking and eating (and writing) about food, I also enjoy reading about it - whether it be literature, a piece of nonfiction or another blog. Most often in my case it comes in the form of a memoir, like my latest read, Blood, Bones and Butter: The Inadvertent Education of a Reluctant Chef. This was buried pretty deep on my to-read list (it’s been hanging out there since 2013) when Goodreads Deals brought it back to my attention. I finally added it to my collection and dug in.  

5170smcuhal

For me, nothing compares to extremely detailed descriptions of food that actually existed in real life, food that was often so life-changing that it has made its way to a book, tempting readers from the page. Gabrielle Hamilton’s memoir begins with one such powerful food memory.

She walks us through the preparation for her family’s annual lamb roast, which happened every spring when she was a child. Gabrielle describes her bohemian father, who brought her along to the butcher and later basted several whole lambs with a flavorful, dripping marinade over a crackling open fire. She talks lovingly of her now-estranged French mother who “instilled in [Gabrielle and her siblings] nothing but a total and unconditional pleasure in food and eating.”

Gabrielle didn’t set out to be a chef, but that’s exactly what she becomes. Out of desperation as a teenager, she begins working in a local kitchen, mostly learning on the job. A series of kitchens, a trip around the world and a Masters degree in writing later, she finds herself with an unexpected opportunity to open her own restaurant, and so she does.

Though full of descriptions that made my stomach rumble, Blood, Bones and Butter is about more than just cooking and kitchens. It’s about the family that Gabrielle came from, the family she works with, and the family she is beginning to make.

I kept coming back to the lamb roasts of her childhood. Lacking the backyard to roast an entire lamb, I found a recipe for French-inspired lamb chops and accompanied those with new potatoes and Brussels sprouts, both fresh from the farmers’ market this weekend.

The potato recipe calls for them to be peeled, and so I began there, knowing it could be a little time-consuming. It was, and it was also a little dangerous.

img_1577

Tiny potatoes leave little room to hold onto them while wielding a peeler. On top of which, once the skin is removed, they’re quite slippery. Potatoes were flying all over the counter! I eventually made it through (unscathed), cut them in half and put them in a small pot of water, covered by 1-inch.

Then I preheated the oven to 400 degrees F and began prepping the Brussels sprouts. Cut off the bottoms and remove the outer, dark green leaves, chopping the larger ones in half. (I prefer to keep small sprouts whole, but feel free to cut them in half as well.) Drizzle with olive oil and sprinkle with salt and freshly ground black pepper to taste. Toss on a foil-covered baking sheet until well-coated. They should roast for about 30-40 minutes, according to your preference. I recommend tossing/stirring about halfway through, so they brown more evenly. (Here they are pre-roasting.)

img_1579

With the sprouts in the oven, I began boiling the potatoes and focused on making the butter mixture for the lamb chops. Using a fork, I mixed together the softened butter, mustard, fresh thyme, lemon zest and salt and pepper. Once finished, I put the compound butter in the fridge to stay chilled. (Check the potatoes here and if they’re boiling, reduce heat to a simmer. Set timer for 10-12 minutes.)

img_1580

I readied my broiler pan, as directed, and placed the lamb chops on top. I seasoned generously with salt and pepper on both sides.

img_1581

With the broiler on high, I put them in for 8 minutes and set my attention to the shallot mixture for the potatoes. I minced a large shallot and mixed it with lemon juice and salt. I let this sit until the lamb chops were finished (about 15 minutes), before tossing with the chopped parsley and cooked potatoes.

img_1578

Having never made lamb chops, I found them easier to pull off than I initially expected. I also couldn’t get enough of the rich, buttery potatoes - those will definitely be going in the regular rotation!

img_1582

Happily, everything came together to make a fancier-than-usual weekend meal and the perfect addition to Scott’s birthday weekend. In a meal based on Blood, Bones and Butter, it became clear “you can never have too much butter.”*

Lamb Chops with Lemon, Thyme & Mustard Butter

  • Servings: 4
  • Time: 15 minutes
  • Print

From: Fine Cooking

Ingredients

  • 4 TBS unsalted butter, softened
  • 1 tsp whole-grain Dijon mustard
  • 1 tsp fresh thyme leaves, lightly chopped
  • ¾ tsp finely grated lemon zest
  • ⅛ tsp kosher salt; more as needed
  • ⅛ tsp freshly ground black pepper; more as needed
  • 8 lamb loin chops (1-1/2- to 2-inch-thick chops; about 3 lb.), trimmed

Directions

  1. In a small bowl, mash together the butter, mustard, thyme, zest, salt, and pepper until well combined. Refrigerate until ready to use.
  2. Position an oven rack 5 to 6 inches from the broiler element and heat the broiler to high. Line the bottom of a broiler pan with foil and replace the perforated top part of the pan. Arrange the chops on the pan. Season both sides of the lamb generously with salt and pepper.
  3. Broil until the first side is well browned, about 8 minutes. Turn the chops over with tongs and continue to broil until they’re well browned and the center is cooked to your liking, 3 to 5 minutes longer for medium rare (cut into a chop near the bone to check).
  4. Transfer the lamb to serving plates and top each chop with a dab of the flavored butter. Serve hot.

New Potatoes with Butter, Shallots & Chervil

  • Servings: 6
  • Time: 30 minutes
  • Print

Ingredients

  • 2 ¼ lb. small (2-inch) new potatoes, such as Yukon Gold or Yellow Finn, peeled and halved lengthwise (about 14 potatoes)
  • Kosher salt
  • 1 large shallot, minced (about 1/4 cup)
  • 2 tsp fresh lemon juice
  • 6 TBS unsalted butter, cut into 8 pieces, softened to room temperature
  • 2 TBS chopped fresh chervil or flat-leaf parsley
  • Freshly ground black pepper

Directions

  1. Put the potatoes in a medium pot, add water to cover by 1 inch, and season generously with about 2 TBS salt (the water should taste almost as salty as sea water).
  2. Bring to a boil, reduce the heat to a simmer, and gently cook the potatoes until tender when pierced with a fork, 10 to 12 minutes. (You want them to maintain their shape, so be careful not to overcook them.)
  3. Meanwhile, combine the shallot, lemon juice, and a pinch of salt in a small bowl, and let sit for at least 10 minutes (up to 2 hours).
  4. Drain the potatoes and return them to the warm pot. Immediately add the shallot mixture, butter, and chervil or parsley and gently stir to combine. Season with salt and pepper to taste and serve.


____

*From the wonderful movie, Julie & Julia - thank you, Nora Ephron

Filed Under: book review, recipe Tagged With: dinner, meat, memoir, nonfiction, veggies

  • « Go to Previous Page
  • Go to page 1
  • Go to page 2
  • Go to page 3

Primary Sidebar

About

The Hungry Bookworm brings together literature and food. Megan has an insatiable appetite for both.

As C.S. Lewis said, “Eating and reading are two pleasures that combine admirably.” Enjoy!

  • Bloglovin
  • Facebook
  • Instagram
  • Pinterest

Subscribe

Don't miss out on bookish content, exclusive giveaways, and of course, book club-friendly recipes. Get notified of new posts via email.

Join 2879 subscribers.

Search for Ingredients, Recipes, or Books

Recent Posts

  • Subscriber Box Review: Literati Book Club - Roxane Gay's Audacious Book Club
  • Arsenic and Adobo + Ensaymada
  • Review of The Kindred Spirits Supper Club
  • Kids Edition: Sometimes I Like to Curl Up in a Ball + "Dirt" Pudding Cups
  • The Midnight Library + Broccoli and Ricotta Toast

Goodreads

Tags

5 ingredients or less appetizer baking book club book list book of the month books about food bread breakfast brunch chicken contemporary cookies cultural dessert dinner dinner party dystopia easy prep favorites fiction fruit historical fiction holiday ice cream linkup lunch meat memoir mini review nonfiction pasta quick read reading challenge science fiction seafood show us your books side dish snack soup TBR list thriller top ten tuesday vegetarian veggies

Archives

Other Great Book Blogs

Literary Quicksand
Never Enough Novels
Death by Tsundoku
Professional Reader 25 Book Reviews
Privacy & Cookies: This site uses cookies. By continuing to use this website, you agree to their use.
To find out more, including how to control cookies, see here: Cookie Policy

Footer Widget Header

Megan’s Instagram

Copyright © 2025 · Hungry Bookworm