• Skip to primary navigation
  • Skip to main content
  • Skip to primary sidebar
  • Home
  • Reviews
    • Book Index
    • Fiction
    • Non-Fiction
    • Top Ten Tuesdays
The Hungry Bookworm

The Hungry Bookworm

reading + eating

  • Recipes
    • Drinks
    • Snacks, Sides & Apps
    • Main Dishes
    • Desserts
    • 5 Ingredients or Less
  • About
    • Meet Megan
    • How I Rate
    • Review Policy
    • Contact

historical fiction

Top Ten Tuesday - Books I Really Liked But Don't Remember Much/Anything About

January 23, 2018 by Megan 14 Comments

Hi everyone, and happy Tuesday! Welcome to my first Top Ten Tuesday of 2018. This is an original weekly blog meme that was created at The Broke and the Bookish but is now hosted over at The Artsy Reader Girl. I participate about once a month, but each week there is a new, fun bookish topic for bloggers to create literary lists about. If you’d like to know more about it, check it out here.

Today’s list is kind of funny, in that I’m not sure how much I can say about each book on it - I guess we’ll just have to see! To arrive at the 10 Books I Really Liked But Can’t Remember Anything/Much About, I culled through my Goodreads, starting at the highest rating and going down. (Reminder: here’s how I rate.)

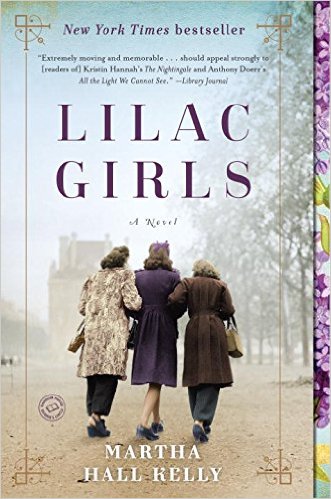
[Read more...] about Top Ten Tuesday - Books I Really Liked But Don't Remember Much/Anything About

Filed Under: of interest Tagged With: book list, contemporary, dystopia, fiction, historical fiction, top ten tuesday

The Guernsey Literary and Potato Peel Pie Society + Potato Peel Pie

January 16, 2018 by Megan 9 Comments

Recently, my book club elected to read Mary Ann Shaffer and Annie Barrow’s The Guernsey Literary and Potato Peel Pie Society, a charming piece of historical fiction about life on the British Channel Islands during and after WWII. It is a bit of a book about books, but more than that it’s about how literature can bring people together, unexpectedly, even in the worst of times.

In 1946 London, a mysterious man writes to Juliet Ashton because he somehow came to be in possession of one of her books and is looking for more by the same author, who he’s come to adore. Of course, as a reader, Juliet steps in to help him get the books he needs, and with that, she launches a friendly correspondence with him - and his fellow islanders. All of them belonged to an impromptu book club during the German wartime occupation of their home on Guernsey, and Juliet is beside herself to learn more about them.

While I was expecting a potentially difficult read, as many WWII novels tend to be (including The Nightingale and Lilac Girls), I was pleasantly surprised. There are some brief descriptions of time in the concentration camps, but it mostly serves as a way to provide the characters - who’ve survived the war at that point - with some closure. Book narratives that take place solely through letters can sometimes fall flat, but in this case, my whole book club enjoyed the choice. I thought it added to the charm.

Though the Guernsey Literary Society also boasts the name of a disgusting-sounding dish, the potato peel pie is mentioned only briefly in the novel. It is described as a pie made out of potato peels and something to do with beets. As I read, I was slightly horrified to think about making such a pie for this post. Luckily, I remembered my Book Club Cookbook and thought I recalled seeing this book listed in the index.

Sure enough! It listed a recipe for an “occupied” version, using just beets, potatoes (including the peels) and a bit of milk, but it also included a “non-occupied” version, which sounded delicious. I decided to make it for our book club meeting. 

Since we were meeting during the week and I don’t have a lot of time after work before everyone arrives, I got started the night before. Since the non-occupied version still includes potato peels, I made sure to scrub them thoroughly before peeling. Here is the after photo:

I peeled them as carefully as I could and layered them into the pie dish, making sure to completely cover the bottom.

While they baked in the oven, I cut the potatoes into large chunks and got them going in a pot of salted, boiling water on the stove.

After about 20 minutes in the oven, the potato peels were looking slightly crispy, so I pulled them out before they burned. I was surprised, however, to see that they’d all curled up and no longer completely covered the bottom of the pan - a bit of a disappointing crust in look only, as it still tasted delicious later.

Once the potatoes were fully cooked, I drained them and transferred them to a large bowl with some butter to mash them up with a hand mixer (my typical method, since I don’t actually own a manual masher). Then, I stirred in the milk, and once that was absorbed, added the cheddar cheese and sour cream as well.

Finally, I spread the whole mixture in the pie dish on top of the potato skins.

Because I wasn’t serving it until the next day, I covered it with plastic wrap and stored it in the fridge overnight. Then, prior to book club, I baked it for the first time. It was still cold from the fridge (not room temperature, or slightly warm as if I’d baked it immediately), so I cooked it for longer - closer to an hour.

Once it was melty, slightly bubbly on the edges with just a touch of brown on top, I removed it from the oven. My entire book club could smell it, and we were starving, so we didn’t wait the recommended 15 minutes before serving. It ended up being more like cheesy mashed potatoes - probably the best mashed potatoes I’ve ever had, honestly - than potato “pie” but everyone enjoyed it just the same. The crispy skins throughout added a pleasing texture.

From our book club to yours, we recommend checking out this charming novel before the movie comes to theaters in April. I, for one, always look forward to the opportunity to have a lively discussion about whether the book or movie is better (even though we all know the answer going in) - and who better to do that with than your favorite book-loving friends?

Print Recipe

Annie Barrow’s Non-Occupied Potato Peel Pie

Make the potato peel pie from The Guernsey Literary and Potato Peel Pie Society. 
Prep Time15 minutes mins
Cook Time1 hour hr 30 minutes mins
Total Time1 hour hr 45 minutes mins
Course: Main Course

Ingredients

  • 1½ - 2 pounds Yukon gold potatoes about 4 medium or 6 small potatoes
  • No beets
  • ½ cup milk
  • 1 stick butter, cut into pieces
  • 1¼ cups shredded cheddar cheese
  • and maybe some sour cream too, (about ¼ cup)

Instructions

  • Preheat oven to 400 degrees F.
  • Go ahead and use the peelings as the crust, but cook them first: Scrub potatoes and pat dry. Peel potato and lay peelings evenly in the bottom of a 9-inch pie pan. Place in oven and cook for about 15-20 minutes, because it would be nice if they were a little crispy. When they’re done, reduce oven heat to 350 degrees F.
  • In the meantime, place potatoes in a large pot, cover with salted water, and boil until they’re soft, however long that takes (about 30-40 minutes). Then, drain the potatoes and mash them up with the butter until they’re nice and fluffy. Add milk slowly and stir until milk is absorbed. Stir in that delicious cheese and the sour cream, too, if you want it (and who wouldn’t?).
  • Pour the potato mixture on top of the crispy skins. Then, put the pie in the oven for about 30 minutes until it’s all melty and glorious (and lightly browned). Allow to cool for about 15 minutes, until it sets. Serve warm. To reheat: Cover with foil and heat for 15-20 minutes in an oven preheated to 300 degrees F.

Notes

From: The Book Club Cookbook, pages 162-163
If, for whatever reason (say, book club), you need to make this the night before. I recommend stopping before you put the potato peel pie in the oven. Fill pan with the mashed potato mixture, cover with plastic wrap and refrigerate. Remove from the fridge while you preheat the oven to 350 degrees F. Bake for about 45 minutes to an hour (checking as you go) to ensure it’s heated through and then allow to cool before serving, per the above directions.

This post contains affiliate links. Full disclosure here.

Filed Under: book review, recipe Tagged With: baking, book club, fiction, historical fiction, vegetarian

The Red Tent + Honeyed Cake

November 18, 2017 by Megan 2 Comments

Anita Diamant’s The Red Tent has been on my radar since I read The Boston Girl earlier this year. Several people recommended it to me, so I bought it at my library’s used book sale in the spring. I finally got around to reading it, and though I was expecting a bit of a grueling read - it’s set in biblical times - I was pleasantly surprised.

In this piece of historical fiction, Diamant explores the life of Dinah, who is briefly mentioned in the Bible as the only daughter of Jacob (father of a dozen sons). The Red Tent starts with the story of Dinah’s mothers, the four wives of Jacob - Leah, Rachel, Zilpah, and Bilhah - and continues into her life as she grows up and leaves the land of her father.

For the most part, the lives of women are glossed over in the Bible, and this novel takes an interesting look at what life might’ve been like for a woman of that time. It gives several strong female characters a voice when the book in which Dinah first appears did not and thoughtfully portrays the unique relationships that women have with one another. It also offers a different, and dare-I-say feminist, perspective on a Christian narrative in which things may not have been exactly as depicted.

In Jacob’s camp - which is how I thought of it, as it was rambling and full of tents and animals - the family usually ate quite well. In an interview Diamant said, “There’s a lot of food in The Red Tent...To not write about food...is to not talk about women’s experience.” They depend on the land for food, and the selection seemed quite abundant. There is mention of olives, lamb, figs, pomegranates, barley, mint, and of course, honeyed cake.

Honeyed cake, in fact, was mentioned a few times, and though it was given little description, I was intrigued. I wanted to make it try it myself. After a Google search, I finally settled on a recipe from Genius Kitchen for a recipe that seemingly dripped with honey. (And drip with honey, it did!)

To start, I combined the dry ingredients - flour, baking powder, salt, cinnamon and some orange zest. The orange zest smelled absolutely amazing while I prepared the rest of the ingredients.

In a different bowl, I creamed the butter with the sugar and then added in the four eggs, one at a time. To these ingredients, I added the dry mix, mixing just until incorporated. Then, I added the chopped walnuts.

I poured the batter into a prepared square pan and set it to bake for 40 minutes in a 350-degree oven.

Meanwhile, I began making the honey sauce. This recipe uses quite a bit of honey, which can be expensive, but otherwise the ingredients are pretty run-of-the-mill baking ingredients. Still, we used almost half of this little honey bear.

In a saucepan, I combined 1 cup of honey, 1 cup of white sugar and ¾ cup of water. I let it simmer for about 5 minutes before adding the lemon juice and bringing it to a boil. Please use a medium-sized saucepan. When it gets boiling, it can boil over easily and quickly - it’s not as easy to tame as boiling water. And it’s possible you’ll get a sticky mess all over your stove, like I happened to do. Anyway, once it was finished cooking for 2 minutes, I removed it from the heat, where it say until the cake was ready.

After the cake finished baking, I removed it from the oven and allowed it to cool for 15 minutes.

I then cut it into triangles. The original recipe recommends diamonds, but I’ll admit I wasn’t sure how to accomplish that. I’m not sure shape matters that much, though the more cuts, the more honey will soak through the cake. Regardless, after cutting the cake, I covered it with honey sauce. I used about a third at a time and did my best to allow it to soak in before covering it with the next third. (This requires some patience.)

I found the cake to taste a bit like Fruit Loops (probably from the orange zest). Overall, it was quite good but very sticky.

Greek Honey Cake

  • Servings: 12
  • Time: 55 minutes
  • Print

Ingredients

  • 1 cup all-purpose flour
  • 1½ teaspoons baking powder
  • ¼ teaspoon salt
  • ½ teaspoon ground cinnamon
  • 1 teaspoon orange zest
  • ¾ cup butter
  • ¾ cup white sugar
  • 3 eggs
  • ¼ cup milk
  • 1 cup chopped walnuts
  • 1 cup white sugar
  • 1 cup honey
  • ¾ cup water
  • 1 teaspoon lemon juice

Directions

  1. Preheat oven to 350 degrees F. Grease and flour a 9 inch square pan. Combine the flour, baking powder, salt, cinnamon and orange rind. Set aside.
  2. In a large bowl, cream together the butter and 3/4 cup sugar until light and fluffy. Beat in the eggs one at a time. Beat in the flour mixture alternately with the milk, mixing just until incorporated. Stir in the walnuts.
  3. Pour batter into prepared pan. Bake in the preheated oven for 40 minutes, or until a toothpick inserted into the center of the cake comes out clean. Allow to cool for 15 minutes, then cut into diamond shapes. Pour honey syrup over the cake.
  4. For the Honey Syrup: In a saucepan, combine honey, 1 cup sugar and water. Bring to a simmer and cook 5 minutes. Stir in lemon juice, bring to a boil and cook for 2 minutes.

From: Genius Kitchen

This post contains affiliate links. Full disclosure here.

Filed Under: book review, recipe Tagged With: baking, dessert, feminism, fiction, historical fiction

The Heart's Invisible Furies + Custard Slice

October 5, 2017 by Megan 4 Comments

Generally, I do enjoy most of what I read. Sometimes I don’t, but luckily, sometimes the opposite is true and I love a book so much that I can’t shut up about it. John Boyne’s The Heart’s Invisible Furies is one such book. Readers, my second 5-star book of the year is here, and I couldn’t be more excited to share it with you!

I first heard about this book on my new favorite podcast, All the Books. (Thank you, Liberty Hardy! You’re always full of excellent recommendations.) So, when I saw it in my August BOTM selections, I knew I had to select it. When it showed up in the mail, I was surprised at its heft - it’s nearly 600 pages - and set it aside for nearly enough, thinking I didn’t have time to get into a difficult, long book. I waited a couple of weeks, but when I finally picked it up, I was captivated in just the first few pages and by the end of the first chapter, I was hooked.

The novel follows Cyril Avery beginning when he is still an unborn child in his mother’s womb in a small town in 1940s Ireland. When she is cast out by a cruel priest, she finds herself in Dublin, where she must make it on her own. Her circumstances almost require her to put Cyril up for adoption, and he is taken by a hunchbacked Redemptionist nun to the home of Maude and Charles Avery, an eccentric couple who aren’t exactly cut out for parenthood. From there, Cyril’s life takes both heartwarming and heart-wrenching turns, bringing us to modern day Ireland in truly spectacular and unforgettable fashion.

This book may be 592 pages, but I couldn’t put it down. I finished it in a weekend and have been talking about it ever since. Furies is filled with complex and varied characters, all memorable in their own way. As entertaining as this novel was - it absolutely had it’s laugh out loud moments - I should probably mention that, like my last 5-star favorite, it tackles some sensitive topics and was hard to read in parts. But to me, that is the beauty of Boyne’s novel; he expertly captured all the nuances of humanity, from the mundanely everyday to unexpected tragedy in a captivating way.

Finding a recipe to pair with such a sweeping saga wasn’t as hard as I expected it to be. Several key scenes throughout take place in a parliamentary tea shop where “cream slice” seems to be a popular menu item. After doing some research, I found it’s also known as custard slice. I was able to find a recipe from RTE, or the Raidió Teilifís Éireann in Ireland, which is a real television station where Cyril finds himself working at one point in the novel.

The recipe has quite a lot of steps, but the ingredients list is small and it’s not really that complicated, so don’t let the long recipe below fool you. It’s totally doable.

To start, I set out my frozen puff pastry sheets to thaw while I made my pastry cream. I poured the milk into a saucepan, added a vanilla pod split down the middle and let it come to a boil. In the meantime, I combined the sugar, egg yolks and cornstarch with a mixer, beating for a few minutes until it became pale and light.

Once the milk began boiling, I removed it from the heat and slowly added it to the egg mixture, whisking all the while. I added it back to the saucepan, bringing it up to a slow boil over low heat, stirring continuously. After several minutes, it thickened, so I removed it from the heat and added it to a wide bowl to cool more quickly. I covered it with cling wrap and placed it in the fridge.  

Once the puff pastry dough was thawed (able to be unfolded), I used a sharp knife to cut it down to an 8x8 square. (I don’t think this is entirely necessary, if you have a 9x9 pan, which I found I did after the fact. I’ve explained further in the recipe notes below.) Then, on two parchment-lined baking sheets, I baked them for about 10 minutes each, until they were lightly golden.

After they cooled, I placed one pastry in the bottom of my pan, which was lined with foil. Per the directions, I made sure to leave extra foil hanging out of the pan so the completed custard slice could be removed more easily later; this is definitely a big help. Then, I smoothed the cooled pastry cream over the bottom layer of puff pastry and placed the prettier looking pastry sheet on top. The assembled dessert went back into the fridge to set while I made the topping.

I combined powdered sugar with a small amount of cold water to create a drizzle-able icing. I also melted some dark chocolate (you could also use milk chocolate if you prefer) in a small bowl in the microwave, until it was thin enough to drizzle with a spoon.

First, I drizzled the icing diagonally across the top of the pastry. Then, turning the pastry 90 degrees, I drizzled the melted chocolate to create a criss-cross pattern with the icing.

I covered the completed custard slice and put it back in the fridge to set until we were ready to give it a try. Later that evening, I cut it into 8 rectangular slices and served as our dessert. We found it to be sort of messy to eat, and I would recommend using a fork and a knife, but it certainly was tasty. If you decide to give it a go, I hope you enjoy!

Have you read John Boyne’s novel yet? What did you think?

Vanilla Custard Slice

  • Servings: 8
  • Time: 45 minutes
  • Print

Ingredients

  • 2 sheets frozen puff pastry
  • 13 fl oz whole milk
  • 1 vanilla pod, split down the middle or 1 tsp vanilla extract
  • 6 Tablespoons (3 ounces) granulated sugar
  • 3 egg yolks
  • 3 Tablespoons cornstarch
  • pinch of salt
  • 2 Tablespoons, or 1 ounce, or unsalted butter, cut into small cubes
  • ¼ cup powdered sugar
  • ¼ cup melting chocolate or chocolate chips

Directions

  1. Make the crème pâtissière to begin: Pour the milk into a saucepan and add the split vanilla pod, if using. (If using the vanilla extract, add it in with the butter at the end.) Bring the milk mixture to the boil, then remove from the heat.
  2. Whisk the sugar, egg yolks and cornstarch together in a large bowl for about 2–3 minutes using a hand-held electric mixer until pale and light.
  3. Pour the hot milk onto the egg mixture, whisking continuously, and then return the mixture to the saucepan. Cook the mixture over a low heat, stirring continuously, until the mixture becomes thick. It should just come to a boil. If it boils unevenly or too quickly, it may become lumpy, in which case use a whisk to mix until smooth again.
  4. Remove the custard from the heat and pour into a bowl (push the mixture through a sieve if there are any lumps). Add the pinch of salt and the butter (and vanilla extract if using) and stir until melted and thoroughly combined.
  5. Leave to cool, cover with cling wrap and chill before using.
  6. Preheat the oven to 425 degrees F. Line two baking trays with parchment paper.
  7. If using frozen puff pastry sheets, these should already be approximately 9x9. If you have a 9x9 pan available, you can use as-is. If you only have (or prefer to use) an 8x8 pan, cut the puff pastry sheets so they will fit the smaller pan. Cut approximately 1 inch off two of the sides, forming an 8x8 square.
  8. Place each pastry sheet onto the lined baking trays, prick each piece a few times with a fork and chill for 10-15 minutes. Then, bake the pastry sheets for 10-15 minutes or until golden brown and crisp. Set aside to cool.
  9. While the pastry bakes, line your baking pan with foil, allowing plenty of extra foil at the sides to allow you to lift out the assembled slices. If you don't have a square tin, it's not the end of the world, just use the foil to make a base and sides.
  10. Place one pastry sheet in the bottom of the lined tin (reserve the prettiest piece for the top). Spread the crème pâtissière evenly onto the pastry in the baking tray before placing the other piece of pastry on top. Refrigerate while making the icing.
  11. For the icing, sift the icing sugar into a bowl. Stir in 3-4 teaspoons cold water – just enough to give you a thick, drizzling consistency – and set aside.
  12. Place the chocolate in a bowl sitting over a saucepan with a few centimetres of water. Bring the water up to the boil, then take off the heat and allow the chocolate to melt slowly. (Another option would be to heat in the microwave at defrost or 30% power in 30 minute increments, stirring until it becomes melted enough to drizzle. If using melting chocolate, follow directions on the bag.)
  13. Take the custard slice from the fridge to decorate. First, using a spoon, drizzle the icing diagonally across the pastry. Turn the pan 90-degrees and, using a different spoon, drizzle the chocolate across the pastry forming lines that criss-cross the icing lines. Repeat with icing and chocolate as desired/until you run out.
  14. Place the slice back into the fridge to set. Later, cut the finished custard slice into 8 pieces. Using the foil, carefully lift the portioned vanilla slices out of the tray and serve.

Adapted from: Rachel Allen, via RTE

Notes: This recipe was adapted for the US from a recipe created in Ireland. Measurements were converted when necessary to accommodate American cooks.


This post contains affiliate links. Full disclosure here.

Filed Under: book review, recipe Tagged With: baking, book of the month, contemporary, dessert, drama, historical fiction, tough topics

The Other Einstein + Serbian Hamburgers

August 31, 2017 by Megan 1 Comment

As the saying goes, beside every great man, there is a great woman. In many cases, those relationships are public and well-documented, as in the case of the Roosevelts. In the case of Albert Einstein, however, the life and accomplishments of his first wife Mileva are not widely known. A physicist and likely genius in her own right, her contributions to Albert’s theories has been debated in the physics world for decades. Marie Benedict’s novel The Other Einstein explores the life of this extraordinary woman a bit further.

Like the author before she dove into research, I hadn’t heard of this “other” Einstein before and I was intrigued when I learned about this novel last fall. The novel follows Mileva (or “Mitza”) from her time as the only female physics student at a Zurich university, where she meets Albert Einstein. Though she and Albert share dreams of living a bohemian life together of intellect and discovery, he doesn’t stand by her when his vision of success seems clearer without her.

As a feminist, the part of the novel I found the most particularly compelling was the meeting between Mitza and Madame Curie, where the differences between their husbands and situations could not be more clear. It is amazing how much can be accomplished by women when their husbands are not only supportive but treat them as true equals.

Mitza and her family were of Serbian descent and many new-to-me foods were mentioned through the novel. The one I bookmarked to make for today’s post was the pljeskavica, which when I looked it up later, was revealed to be a large hamburger. I found a few recipes, and though I borrowed from a few of them for inspiration, the one I most closely followed was from The Spruce.

First, I combined all of my ingredients to make the patties. I opted to use 1 pound each of ground beef and ground pork, but you can use a combination of beef, pork and lamb if you’d like (see recipe notes). To the meat, I added minced garlic, finely chopped onions, salt and paprika. I let the mixture sit in the refrigerator for a while before forming the patties.

I used a salad plate lined with parchment paper as my guide for sizing, using the paper to prevent the patties sticking to the plate or each other.

I grilled the burgers outside, approximately 7 minutes per side.

While they grilled, I prepared the pita bread by cutting it open partway to reveal the pocket. I also sliced some fresh tomato and lightly grilled some onions, being careful to not let them lose too much of their shape. Other serving suggestions include green onions, pickles and Kajmak cheese.

I slotted each cooked hamburger into a pita pocket and topped with my veggies and a dollop of quick homemade Kajmak.

Serbian Hamburger (Pljeskavica)

  • Servings: 4
  • Time: 30 minutes
  • Print

Ingredients

  • 1 pound ground beef chuck
  • ½ pound lean ground pork
  • ½ pound lean ground lamb
  • 2 cloves finely chopped garlic
  • ½ cup finely chopped onions
  • 1 ½ teaspoons salt
  • 1 tablespoon sweet or hot paprika

Directions

  1. In a large bowl, mix together ground beef, ground pork, ground lamb, garlic, onions, salt and sweet or hot paprika until thoroughly combined. Do not overmix because this will toughen the meat.
  2. Refrigerate meat mixture for several hours for the flavors to meld and for the mixture to firm.
  3. Heat a grill, indoor grill, broiler or skillet. Using slightly dampened hands, divide meat mixture into 6 portions. Form into thin patties, 9 inches by 1/2 inch or about the size of a small dinner plate.
  4. Cook pljeskavice about 7 minutes per side.
  5. Serve with green onions or chopped raw onion, tomatoes, ajvar, lepinje or pogacha bread and Serbian potato salad or cole slaw on the side. Some Serbs place the patty on a large bun like an American hamburger.

From: The Spruce

Note: Other recipes I read used the same amount of meat to make 4 patties, and so I ended up making just 4. This also kept the patties approximately as large as recommended - I used salad plates as my guide and did the best I could to get them that size.

If you can’t find ground lamb or don’t want to use it, I used a mixture of ground beef and ground pork, 1 pound each. The other recipes I found used only beef and pork as well.

Lastly, other recipes recommended using pita bread in place of lepinje, which is what I did. Though it made it slightly hard to photograph, I think it worked better than a traditional American bun would’ve given the size of the burger. The pita helped hold in all the toppings and didn’t fill us up too much with bread - the burger filled us up enough!


This post contains affiliate links. Full disclosure here.

Filed Under: book review, recipe Tagged With: dinner, fiction, historical fiction, lunch, meat

Lilac Girls + Poppy Seed Cake

July 8, 2017 by Megan 1 Comment

No matter how many WWII novels I read or stories I hear, I’m still astonished at the atrocities that took place and how many people were able to overcome and survive such horrifying ordeals. Though I usually devour these books, which are often natural page-turners, I find them hard to get through mentally. Martha Hall Kelly’s Lilac Girls was no exception.

Inspired by the real Caroline Farriday and a group of Polish prisoners called “the Rabbits,” this novel tells the story of three women whose lives intersect at the Ravensbruck, the only Nazi concentration camp for women. In alternating chapters, we follow Kasia, a Polish teenager who becomes one of the Rabbits; Herta Oberhauser, a German doctor stationed at Ravensbruck; and Caroline, a New York City socialite, who does her best to assist in the war effort from abroad.

Though I’d be interested in finding out more about the real Caroline, I found her chapters to be the least compelling. Honestly, her storyline was the reason I couldn’t give this book a full 4 stars on Goodreads. (I would’ve given it 3.5 if Goodreads allowed it, but they don’t - one of my pet peeves.) Kasia’s and Herta’s chapters, on the other hand, had me turning the page constantly. I liked that Kelly told the story from such different points of view.

In one of the bright spots at Ravensbruck, Kasia and her sister receive a package from their father and unwrapped it to find not only chocolate and a sign of hope, but some poppy-seed cake as well. As she put it, “Polish cake would be good medicine.” I hadn’t heard of poppy seed cake before, but I knew it was the recipe to make this time around. I found one from Jenny Can Cook and set to work.

Upon starting the recipe, I realized I only had half as many poppy seeds as I needed. I’d bought one 2.6 oz bottle of poppy seeds at the grocery store, because the pickings were slim. If you find yourself in the same situation, you may want to pick up two containers, or if you’re trying this for the first time, you may want to make a smaller loaf instead, like I did. When I made it, I adjusted the recipe and made a half-sized loaf instead of the full recipe (I included the full recipe below).

First, I ground the poppy seeds 2 Tablespoons at a time, until they were moist and looked a lot like wet coffee grounds. I added boiling water to a small bowl and stirred in the poppy seeds until they were all moistened, letting them stand uncovered. Then, using the same grinder, I ground up my toasted almonds.

In a large bowl, I combined the flour, yeast, sugar and salt. To that I added, the warmed milk (slightly less than 120 degrees F since I was using active dry yeast), followed by the oil and the egg. Using an electric mixer, I beat it on high for about 2 minutes, and then added in the extra flour, beating it until it formed a mass. Mine was slightly sticky when I transferred it to the board, so I ended up adding about a Tablespoon more of flour (to my halved recipe). I should’ve taken a picture of my messy dough fingers, but it wouldn’t have been safe to grab my phone to do so. Dough everywhere!

I kneaded it and let it rest for 10 minutes while I combined the filling. To the poppy seeds, I added the ground almonds, lemon and orange zests, sugar and vanilla extract.

I rolled the dough out to about 5” x 6” (again with the halved recipe) and spread the filling on the top, almost to the edges.

Then, I carefully rolled it, placed it seam-side down, and tucked the ends under, placing it on a parchment-lined baking sheet. I covered it with a cloth and left it untouched in a warm place (aka my upstairs on an 80-degree July day) for about an hour and a half.

I opted to top it with an egg wash and poppy seeds before baking, thinking the glaze might make it too sweet. It also didn’t seem like Papa’s bread for his girls would’ve included a glaze, but I could be wrong. If you prefer a glaze, see the recipe notes.

I baked it for slightly less than the recipe called for due to size, but even with halving the recipe, I think it could’ve used maybe 5 minutes longer (or 30 minutes total) in the oven. It was hard to let it cool for a long time once it came out of the oven, but trust me, it’s much better when it’s fully cooled. I also personally like the outside thirds of the bread better than the middle third.

I hope you enjoy! Have you read the Lilac Girls? What did you think?

Poppy Seed Cake

  • Servings: 1 loaf
  • Time: 2 hours, 45 minutes
  • Print

Dough Ingredients

  • 1½ cups bread (or all purpose) flour
  • 1 packet (2 tsp/7 gms/1/4 oz) yeast - instant or active dry yeast
  • ¼ cup sugar
  • ½ teaspoon salt
  • ⅔ cup 1% milk heated to 120-130° F for instant yeast (or 110-120°F for active dry)
  • 2 Tablespoons oil
  • 1 egg
  • about ¾ cup extra flour

Filling Ingredients

  • 1 cup poppy seeds
  • ⅓ cup boiling water
  • ¼ cup ground toasted almonds (20 count)
  • ½ cup sugar
  • ½ teaspoon vanilla extract
  • zest of ½ a lemon and ½ an orange

Directions

  1. Grind poppy seeds (see note below). Place in a small bowl, stir in boiling water & let stand uncovered.
  2. Grind almonds and set aside.
  3. Place flour, yeast, sugar, and salt in large mixing bowl.
  4. Stir in milk followed by oil and egg.
  5. Beat on high for 2 minutes. Stir in extra flour until dough forms a mass.
  6. Place dough on floured board and knead 100 turns (about 2 minutes). Cover and let rest 10 minutes.
  7. Meantime, add ground almonds, sugar, vanilla and zests to poppy seeds.
  8. Roll dough into a 10 x 12 shape. Spread filling almost to edges, roll starting at 10-inch end and place on parchment-lined baking sheet, seam side down. Pinch and tuck ends under.
  9. Cover with a towel and rise in a warm spot for 1½ hours or until double in size.
  10. Before making, brush with egg wash and sprinkle with additional poppy seeds.
  11. Preheat oven to 350° F and bake for 35 minutes. Allow to cool fully before slicing and serving.

From: Jenny Can Cook

Instead of coating the top with poppy seeds, if you prefer a sweeter bread you can add a glaze. Allow baked cake to cool for 10 minutes and drizzle with glaze, made using 1 cup powdered sugar and about 2 Tablespoons milk, added slowly.

If using a spice grinder, grind seeds slowly, about 2 Tablespoons at a time, until they feel moist – about 10 seconds per each portion. Scoop out any that stick to the bottom of the grinder as you go. Once they are all ground, use the same grinder to grind the almonds.


This post contains affiliate links. Full disclosure here.

Filed Under: book review, recipe Tagged With: baking, bread, drama, historical fiction, tough topics

  • « Go to Previous Page
  • Go to page 1
  • Interim pages omitted …
  • Go to page 4
  • Go to page 5
  • Go to page 6
  • Go to page 7
  • Go to page 8
  • Go to Next Page »

Primary Sidebar

About

The Hungry Bookworm brings together literature and food. Megan has an insatiable appetite for both.

As C.S. Lewis said, “Eating and reading are two pleasures that combine admirably.” Enjoy!

  • Bloglovin
  • Facebook
  • Instagram
  • Pinterest

Subscribe

Don't miss out on bookish content, exclusive giveaways, and of course, book club-friendly recipes. Get notified of new posts via email.

Join 2879 subscribers.

Search for Ingredients, Recipes, or Books

Recent Posts

  • Subscriber Box Review: Literati Book Club - Roxane Gay's Audacious Book Club
  • Arsenic and Adobo + Ensaymada
  • Review of The Kindred Spirits Supper Club
  • Kids Edition: Sometimes I Like to Curl Up in a Ball + "Dirt" Pudding Cups
  • The Midnight Library + Broccoli and Ricotta Toast

Goodreads

Tags

5 ingredients or less appetizer baking book club book list book of the month books about food bread breakfast brunch chicken contemporary cookies cultural dessert dinner dinner party dystopia easy prep favorites fiction fruit historical fiction holiday ice cream linkup lunch meat memoir mini review nonfiction pasta quick read reading challenge science fiction seafood show us your books side dish snack soup TBR list thriller top ten tuesday vegetarian veggies

Archives

Other Great Book Blogs

Literary Quicksand
Never Enough Novels
Death by Tsundoku
Professional Reader 25 Book Reviews
Privacy & Cookies: This site uses cookies. By continuing to use this website, you agree to their use.
To find out more, including how to control cookies, see here: Cookie Policy

Footer Widget Header

Megan’s Instagram

Copyright © 2025 · Hungry Bookworm