• Skip to primary navigation
  • Skip to main content
  • Skip to primary sidebar
  • Home
  • Reviews
    • Book Index
    • Fiction
    • Non-Fiction
    • Top Ten Tuesdays
The Hungry Bookworm

The Hungry Bookworm

reading + eating

  • Recipes
    • Drinks
    • Snacks, Sides & Apps
    • Main Dishes
    • Desserts
    • 5 Ingredients or Less
  • About
    • Meet Megan
    • How I Rate
    • Review Policy
    • Contact

breakfast

Cloud Atlas + Cloud Eggs

August 3, 2017 by Megan 1 Comment

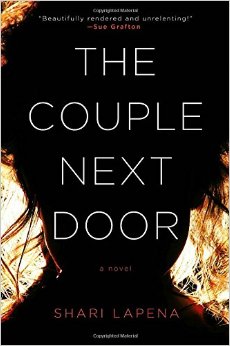
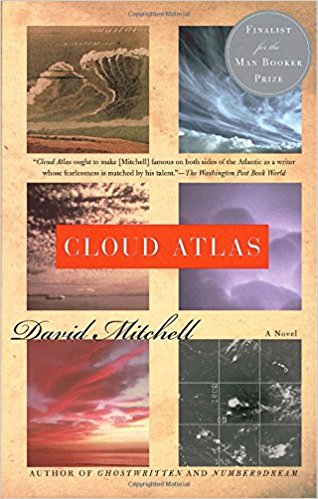
My friend Deanna, who you may know recognize from my short series of Gilmore posts, absolutely loves David Mitchell’s Cloud Atlas. I had read one of his other novels a while back and wasn’t a fan, so when she actually let me borrow it (an embarrassingly long time) ago, I was reluctant to read it and find it underwhelming. But, I finally decided I should rip off the bandaid, so to speak, and recently gave it a try. It was definitely not underwhelming.

Cloud Atlas David Mitchell Book Cover

Cloud Atlas is a complicated story five spanning centuries, going from the 1800s to the distant future and back again. Each character has only two chapters, one where they’re introduced as we move through the future and one as we head back in time to the beginning. (Excepting one, of course, who is there only in the middle of the story.) It’s a very interesting concept, and I probably wouldn’t have chosen to start it on a boat in the middle of the 1800s, but it is what it is. Thankfully, Deanna had warned me about the first chapter, and though it took quite a while to get into, I persevered.

As with all books, there were characters I liked better than others and some i disliked altogether. The problem with the structure, however, was that I was stuck with the ones I didn’t really like for a long time in a row and then I had to “look forward to” seeing them again on the boomerang back. The novel was also a little too self-aware for my taste. Mitchell wrote a lot of commentary on the structure and the characters and the meaning of it all into his own characters’ mouths and thoughts, which I typically don’t enjoy.

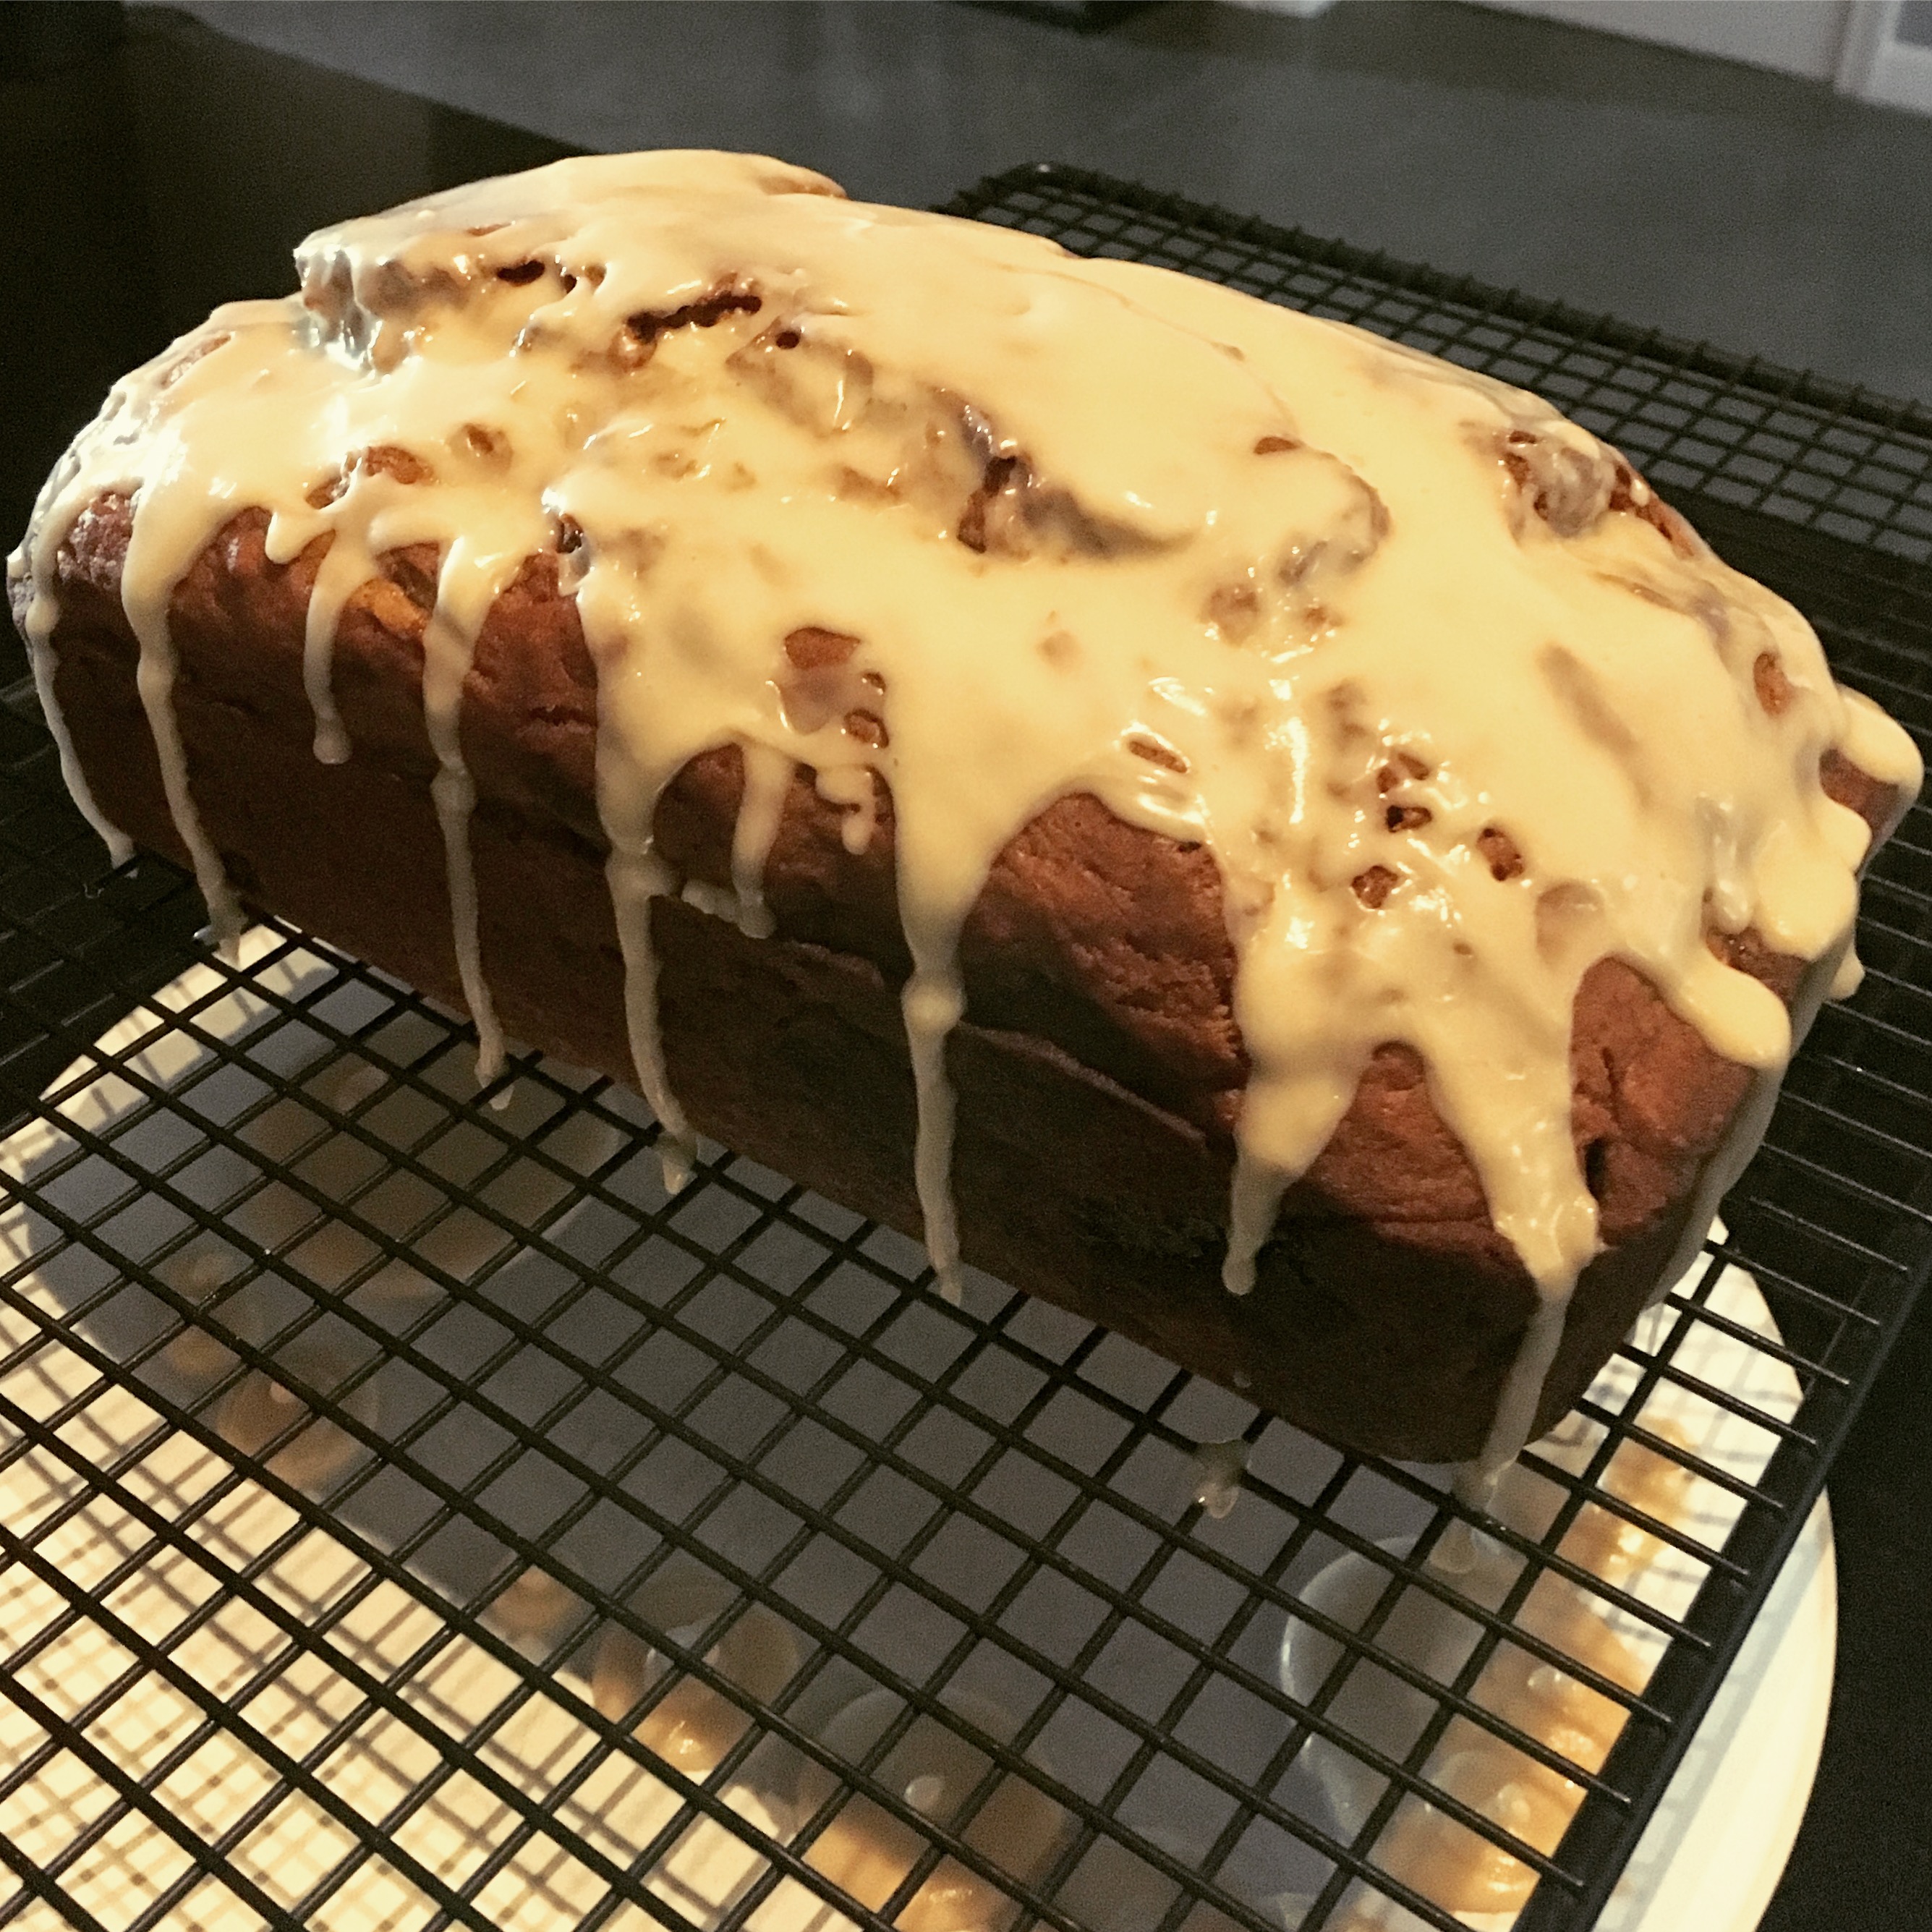
I know my review isn’t exactly glowing, but I didn’t hate it. I’m actually glad I read it, and I can see why Deanna (and others) like it so much. The story it tells is very intriguing. Weirdly, it made me want to see the movie for a different and visual perspective. It also made me want to make some cloud eggs. A book that fit perfectly with the latest hipster trend - what luck! (Kidding, but only a little bit.)

In my research, I found a recipe that wasn’t too intimidating (though most of them seemed mostly doable). I also found an interesting article from NPR that made me feel a lot better about the whole cloud egg trend. Wouldn’t you know it, what’s old is new again - in food as in everything else.

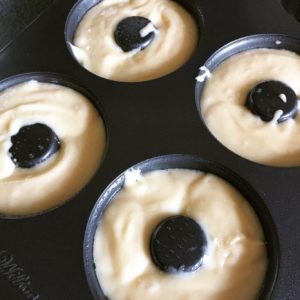
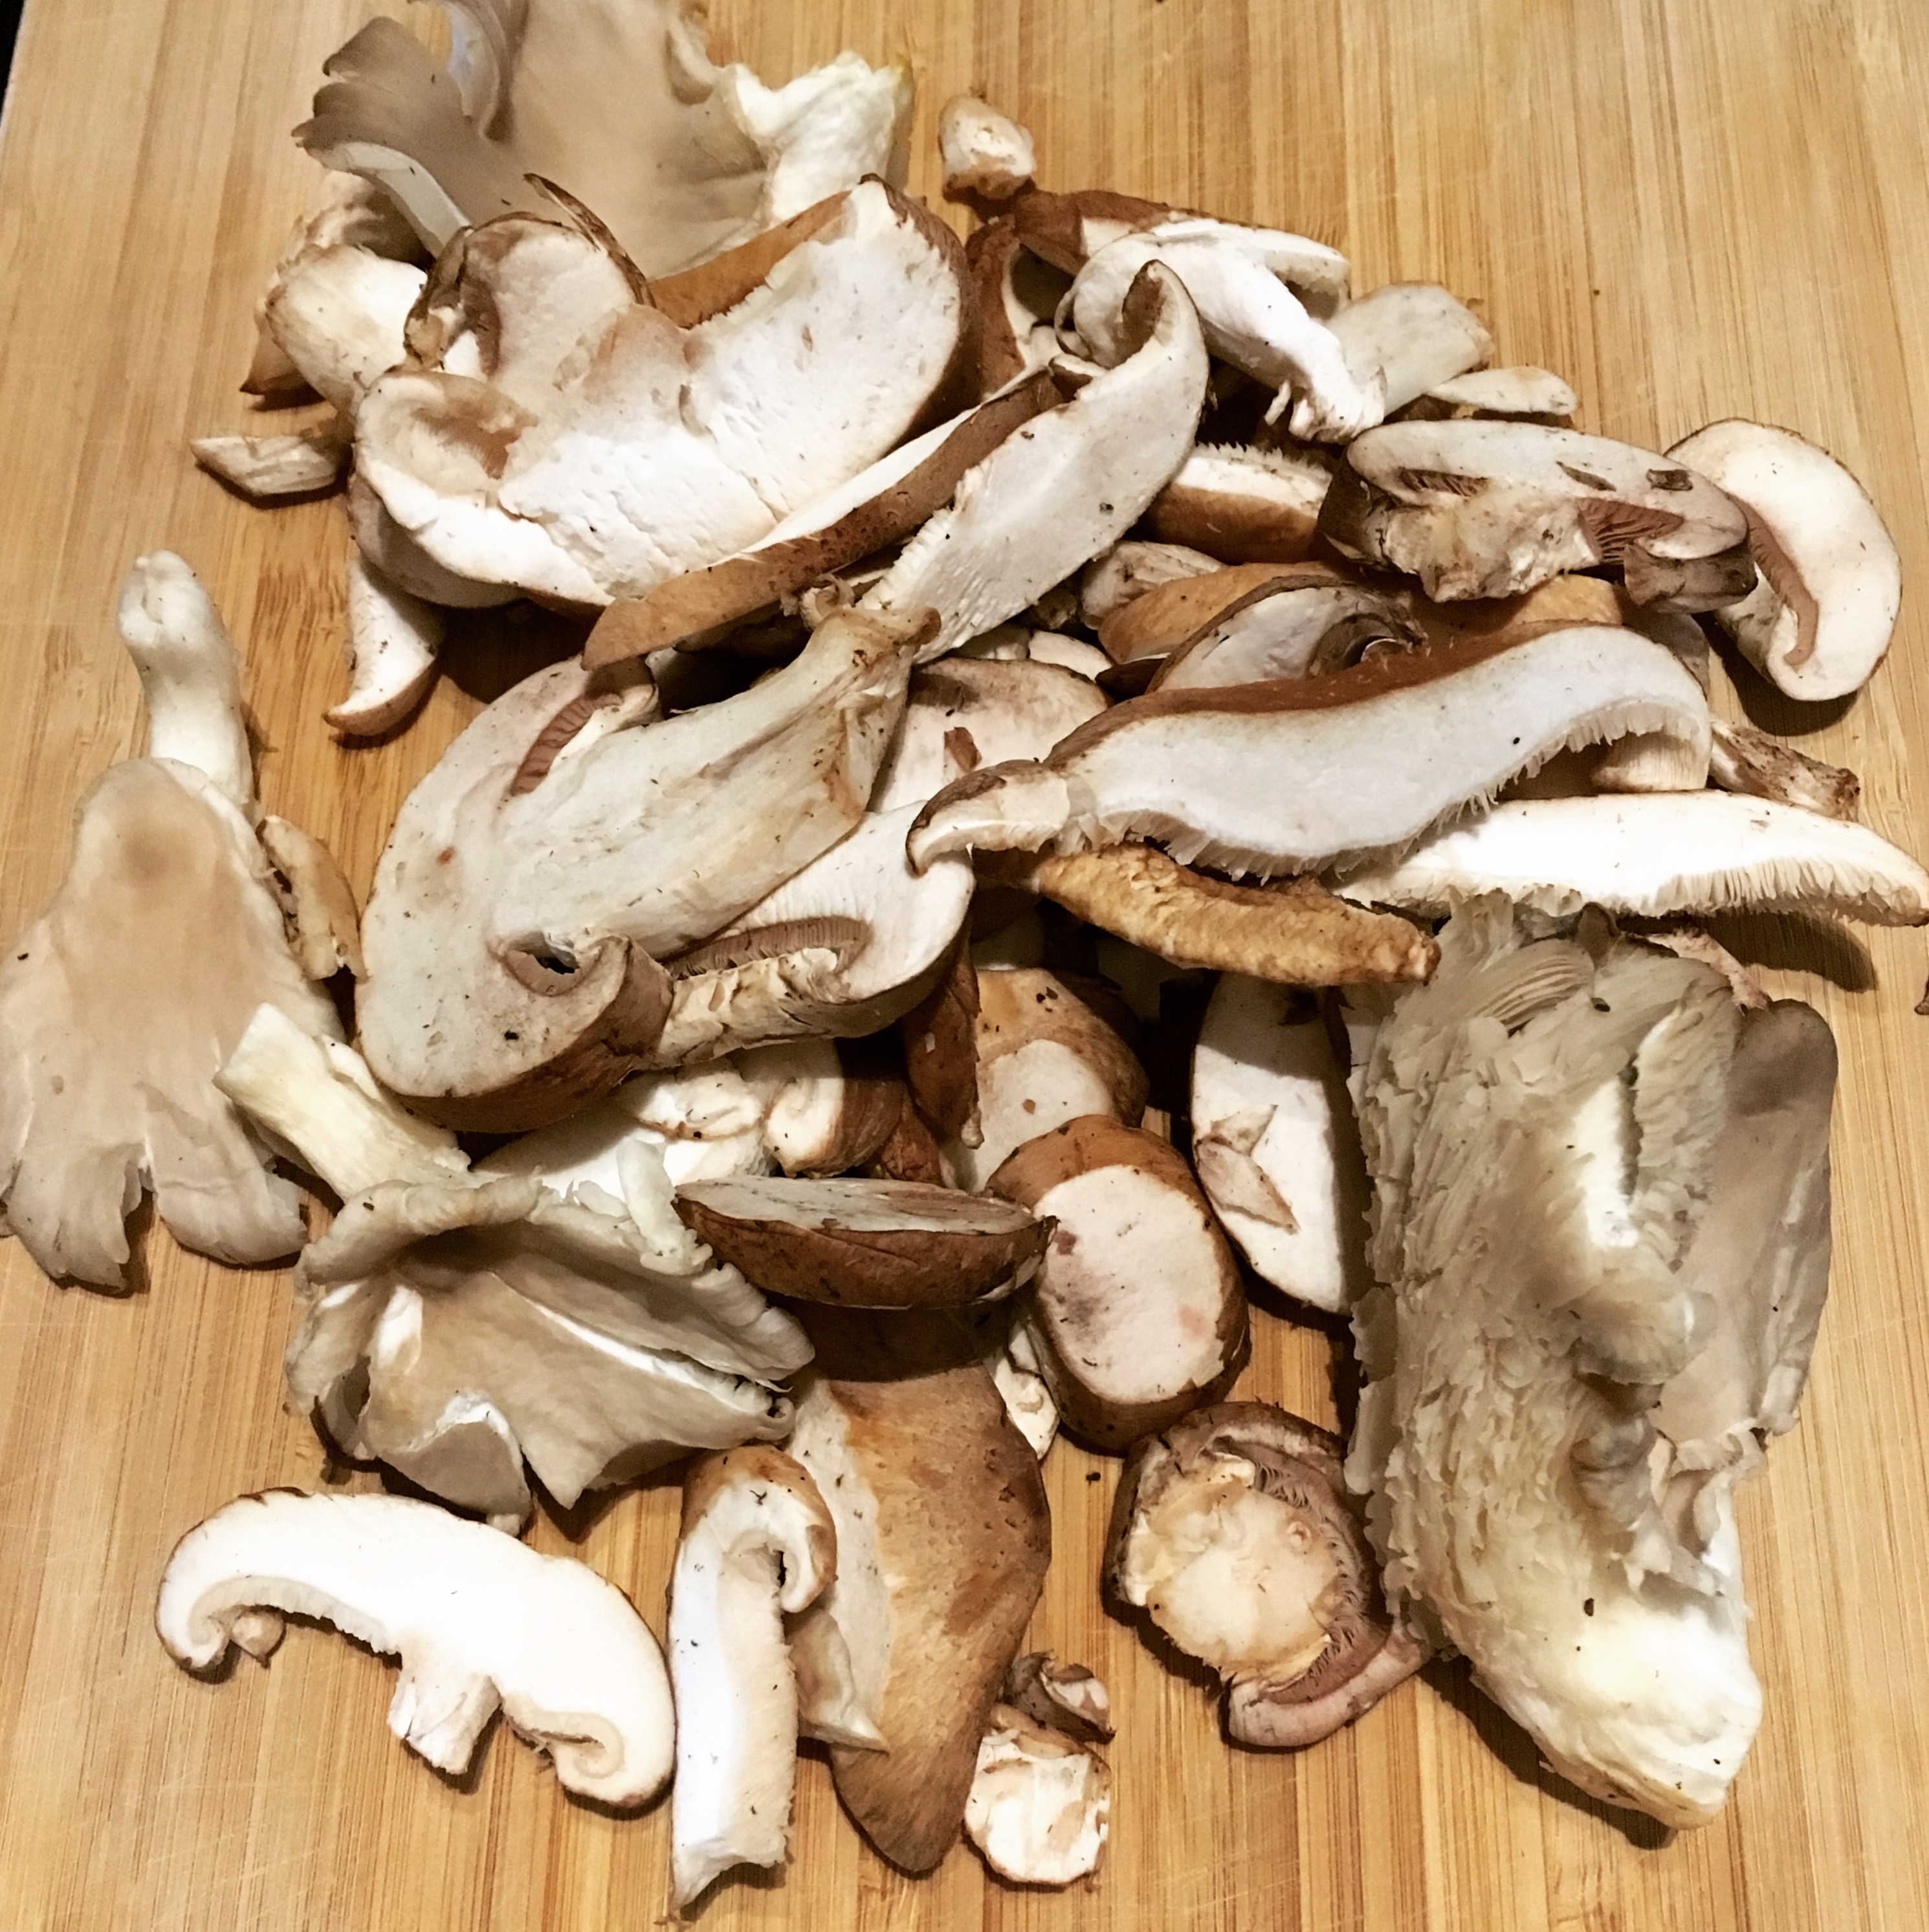
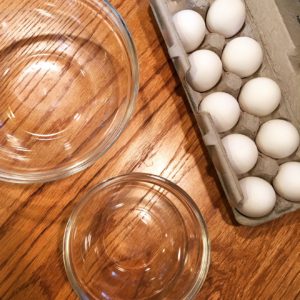
To start, I preheated my oven to 450 degrees and assembled my ingredients and bowls. I separate the old-fashioned way (hands only), so I just had a couple of bowls to divide the whites and yolks into.

Eggs, Cheese, Breakfast

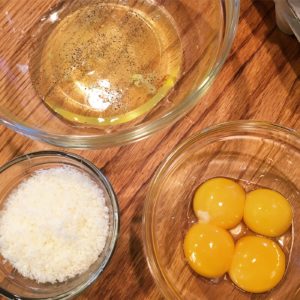
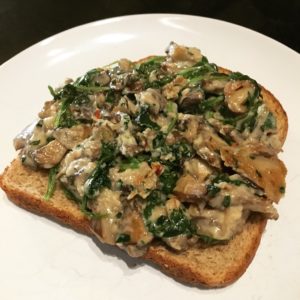
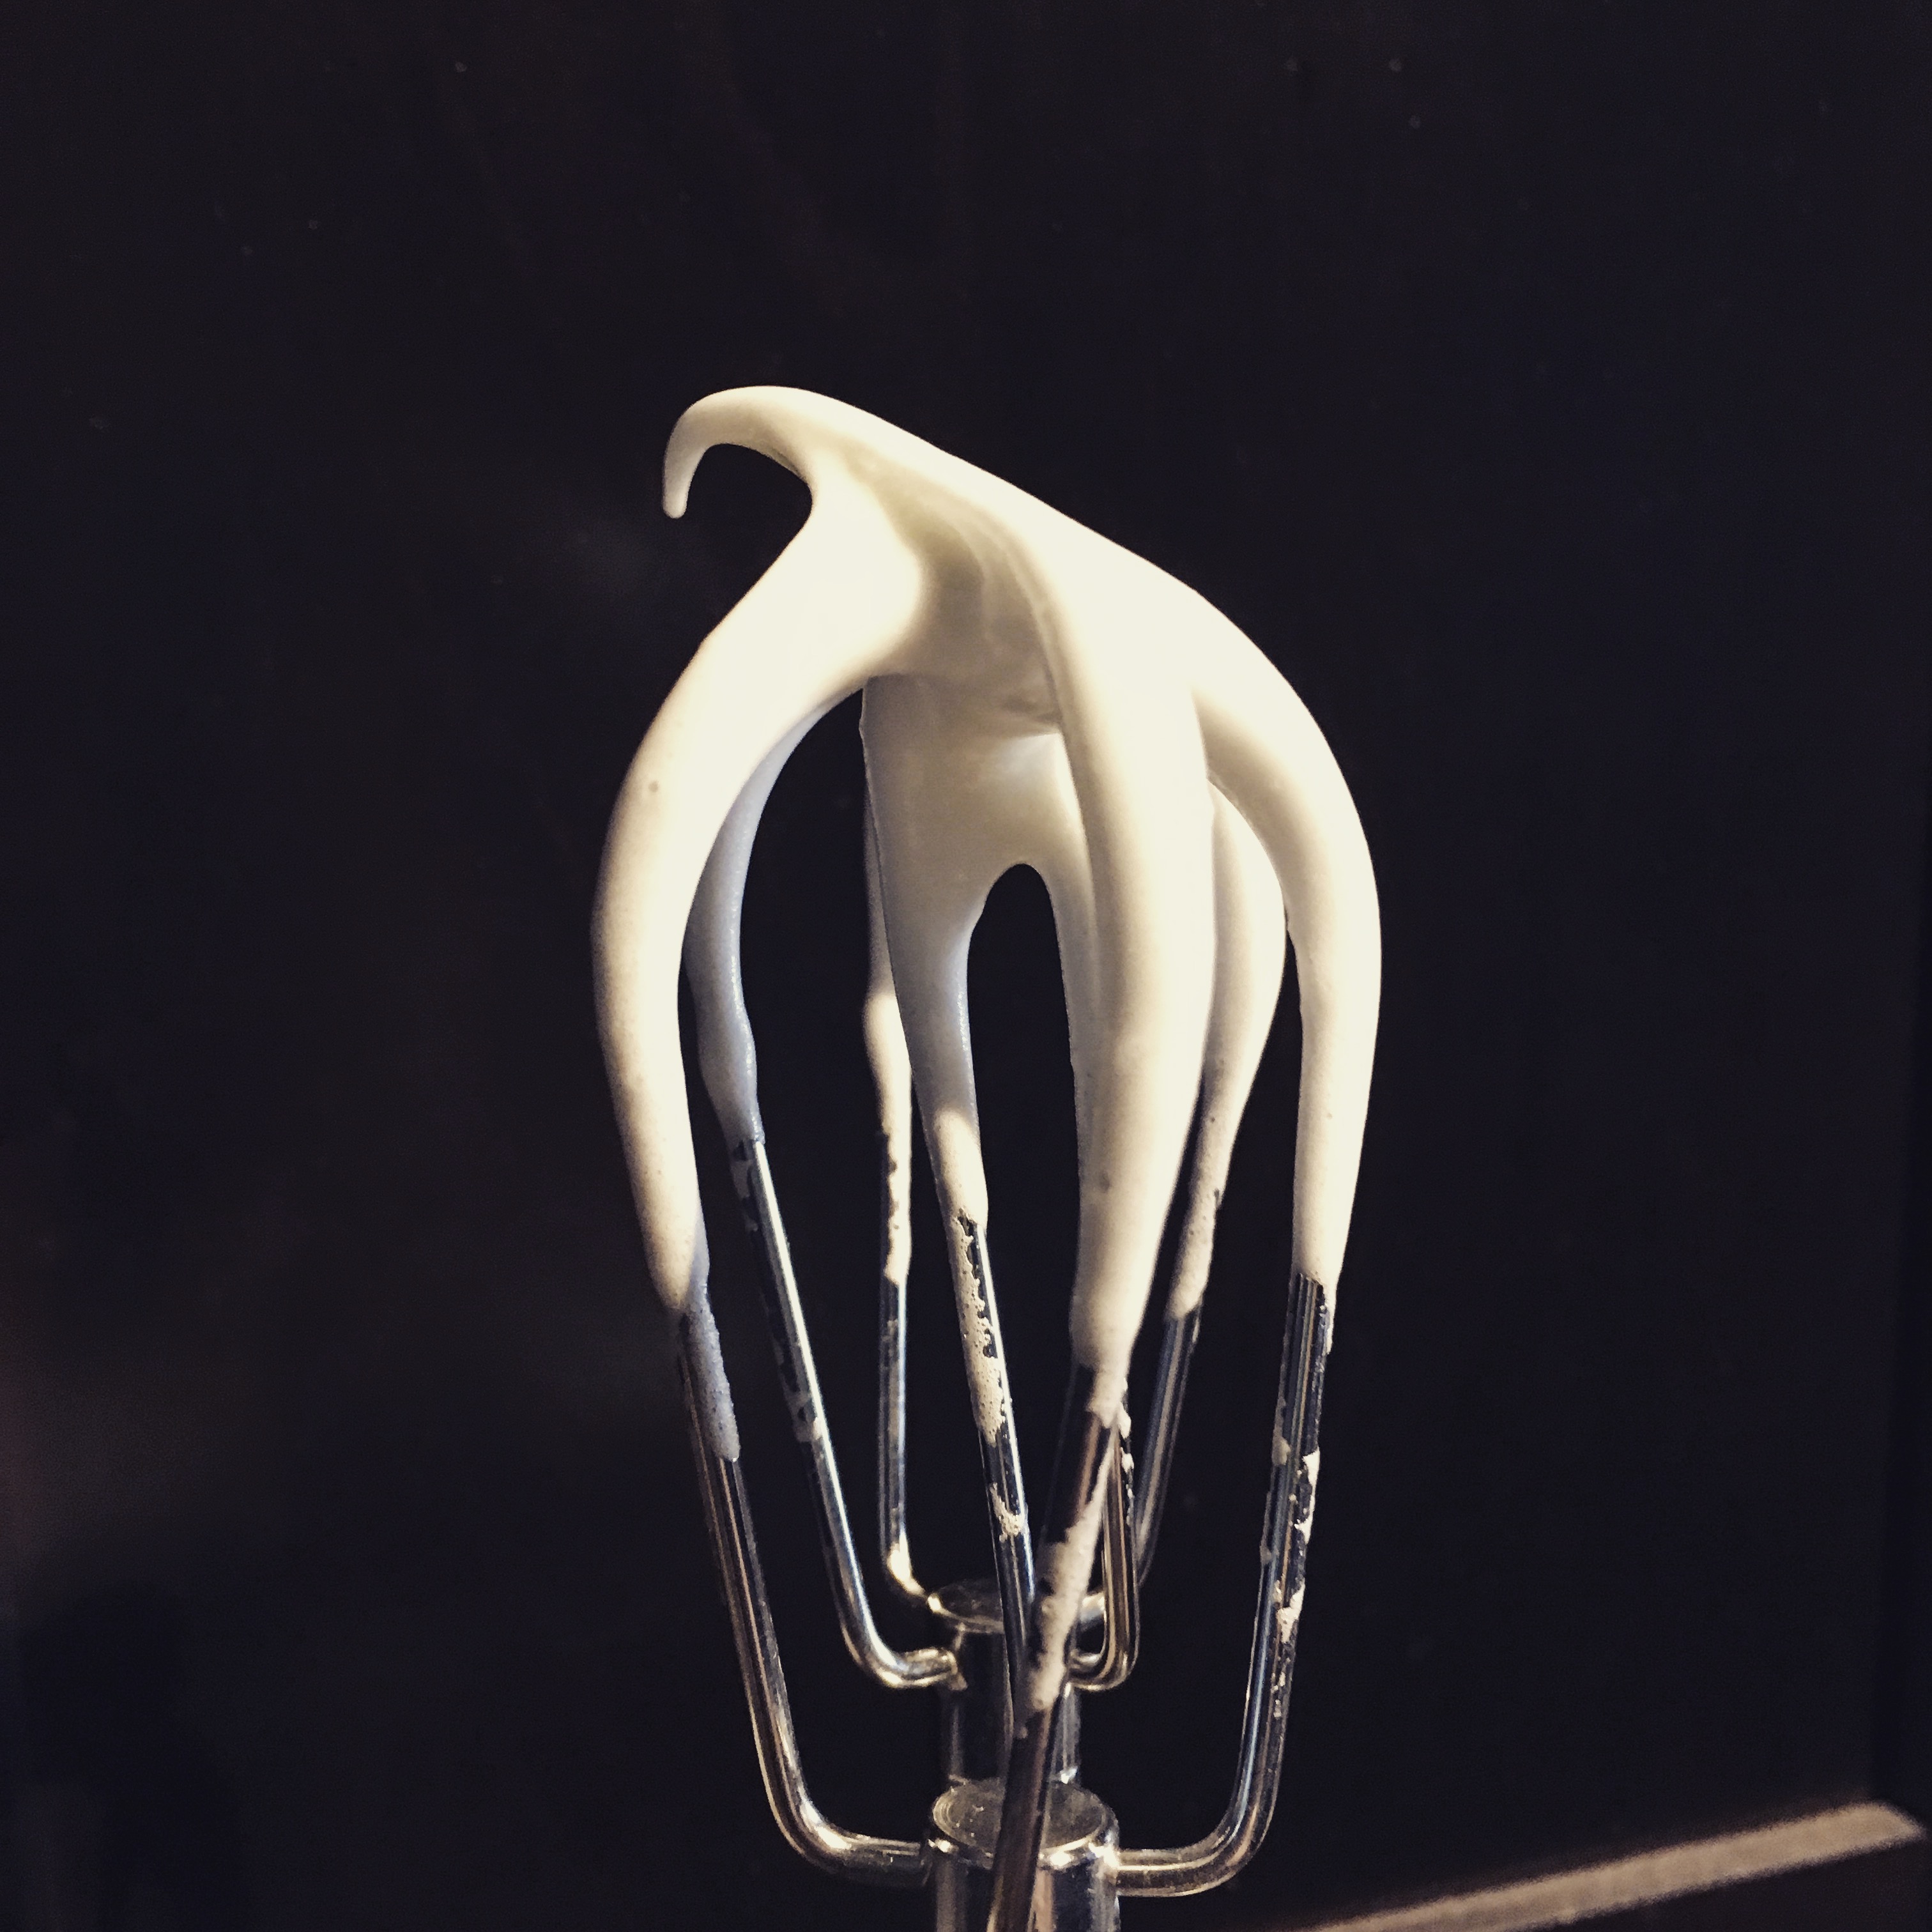
With the whites separated, I seasoned them with salt and pepper and used a hand mixer to whip them into stiff peaks. I carefully folded in the Parmesan cheese. On the baking sheet, I made 4 separate mounds of the whipped whites and indented them so my yolks would have somewhere to lie later.

Egg Whites, Cloud Eggs, Baking

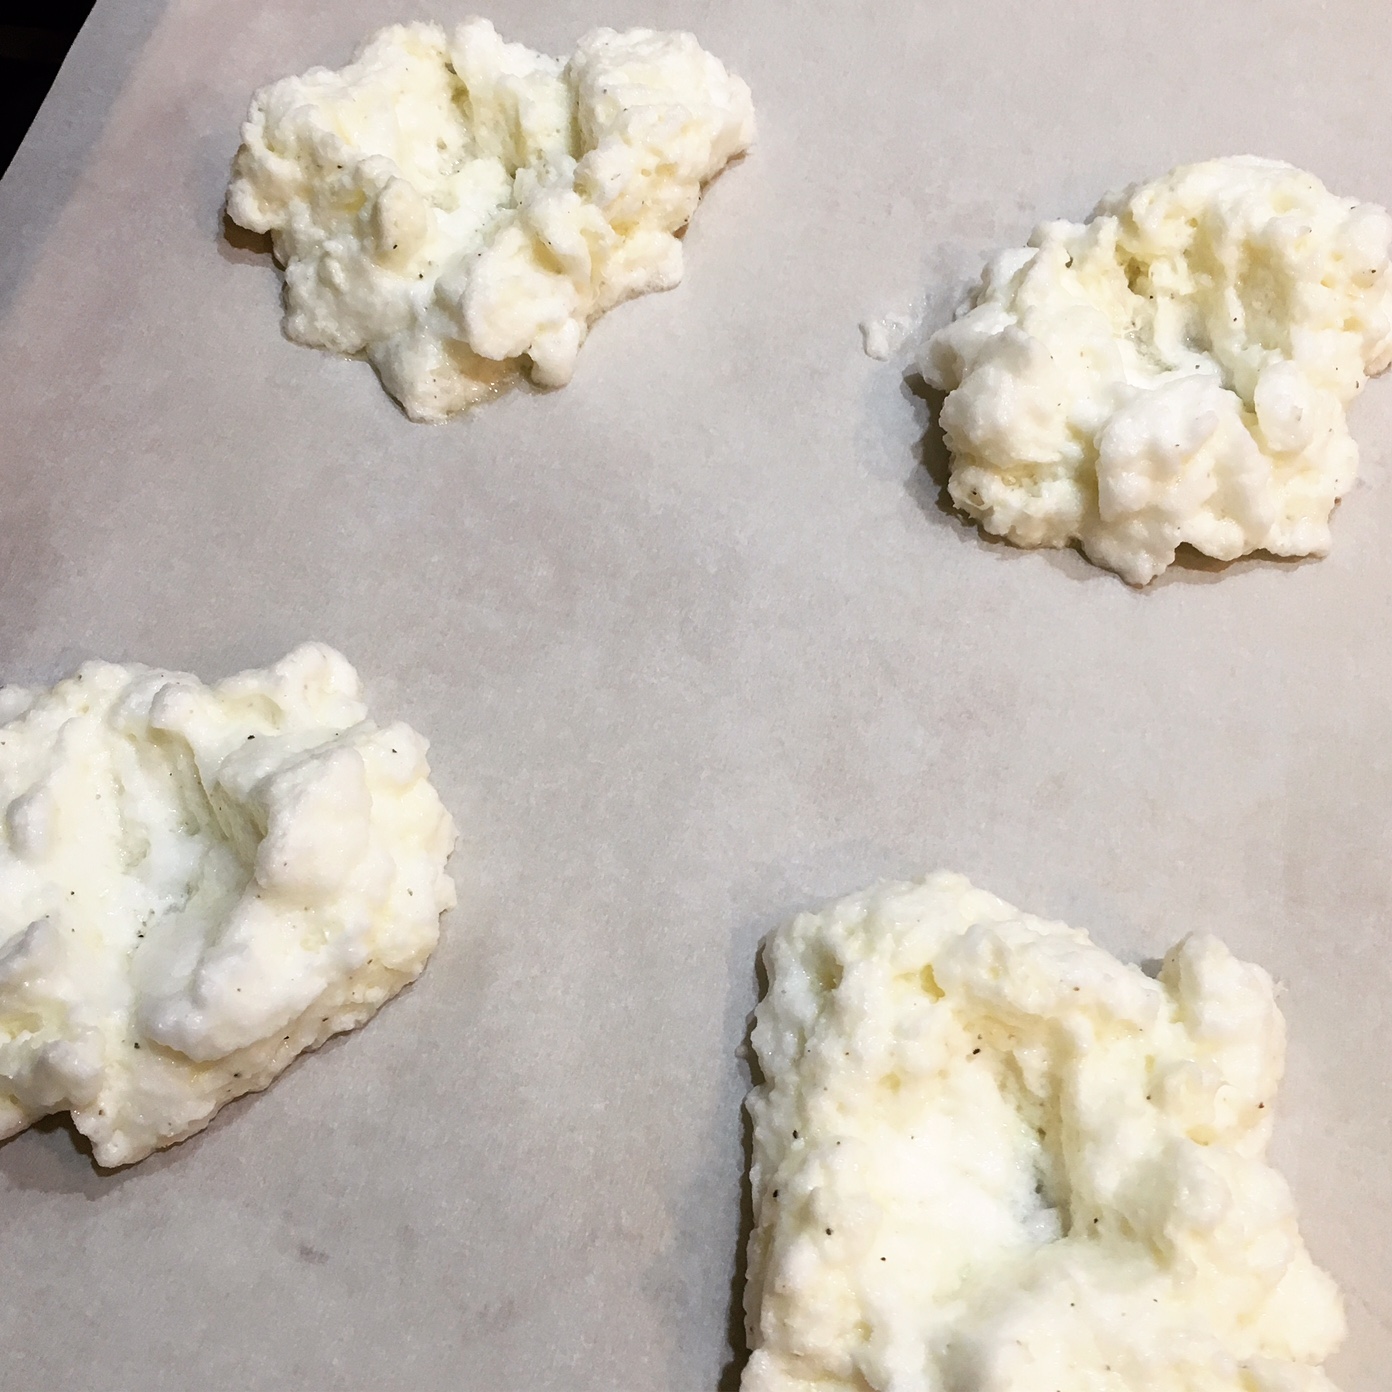
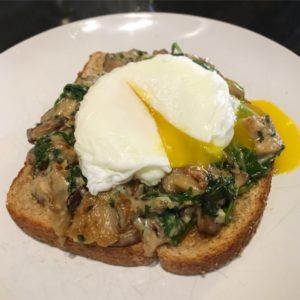
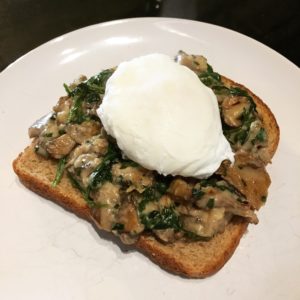
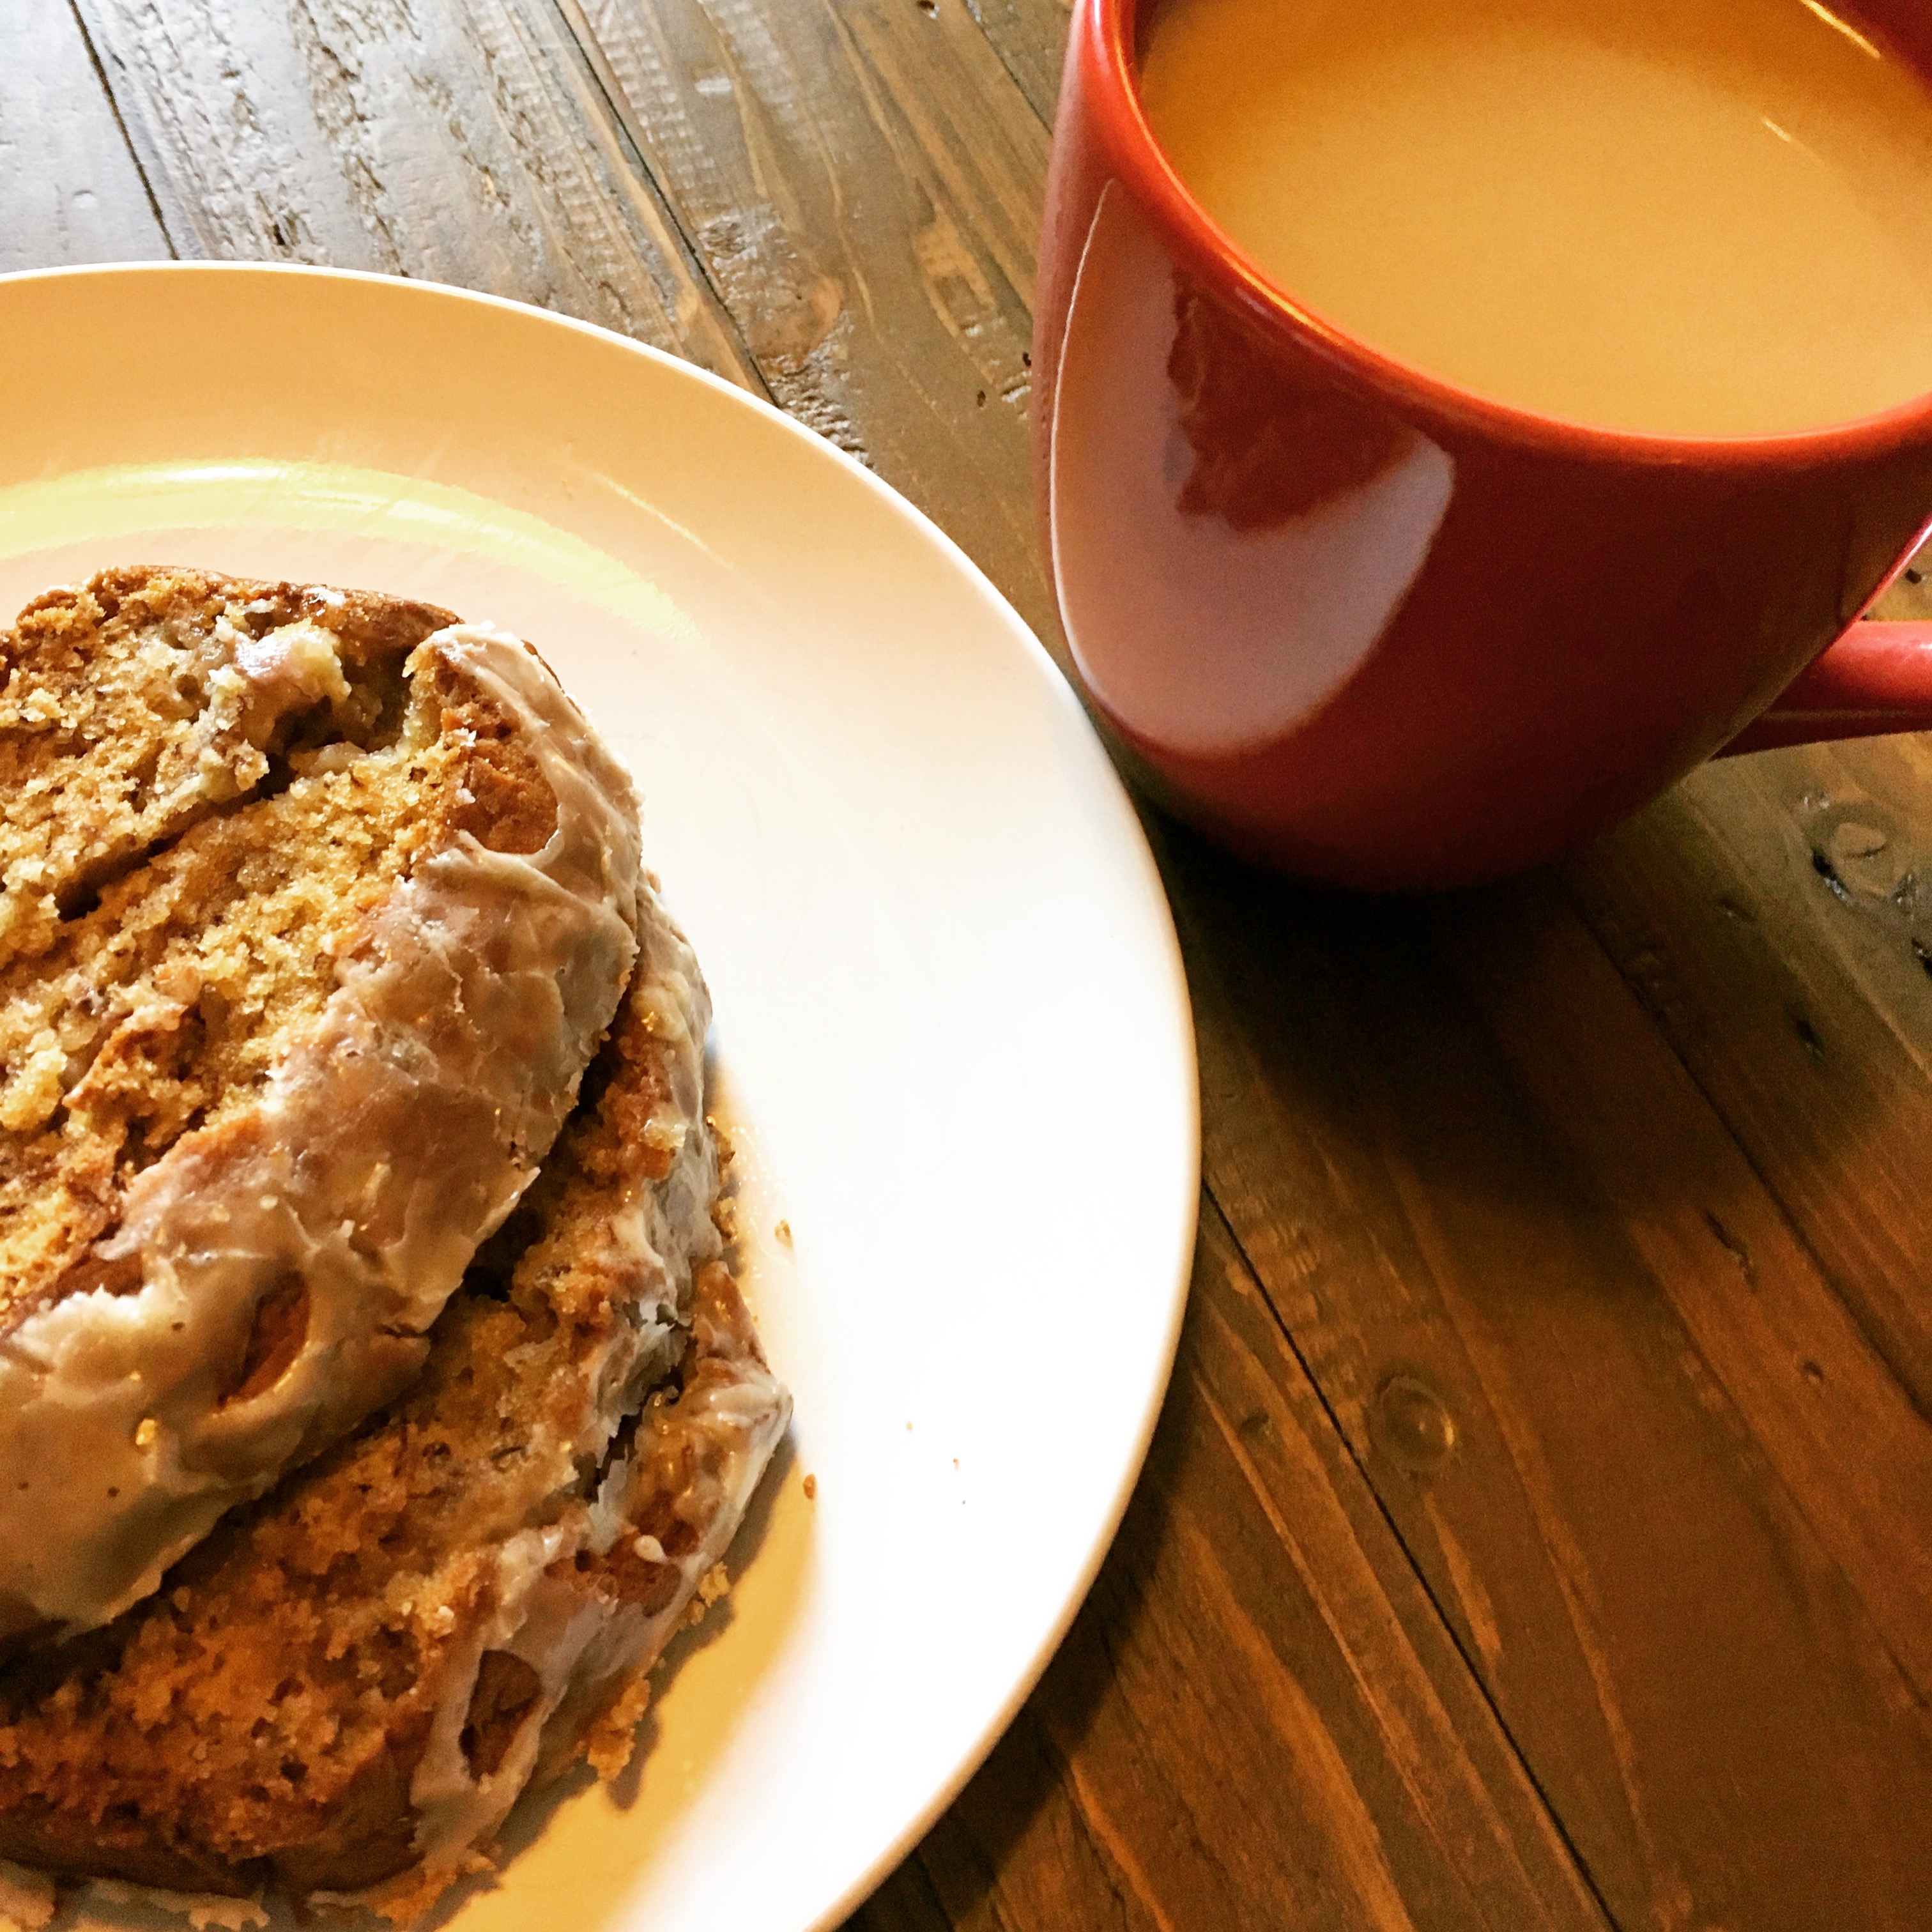
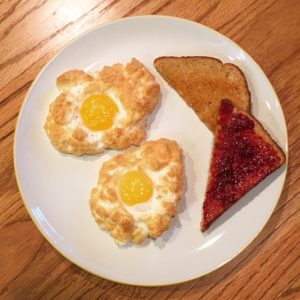
After they baked for 3 minutes, I took the sheet out of the oven and added one egg yolk to each egg white cloud. It went back into the oven for 3 more minutes, until the yolks were set. I served with toast, perfect to mop up the runny yolks.

Eggs, Breakfast, Brunch, Cloud Eggs
Eggs, Breakfast, Brunch, Cloud Eggs, Toast, Jam, Jelly

Cloud Eggs

  • Servings: 2
  • Time: 20 minutes
  • Print

Ingredients

  • 4 large eggs
  • salt and freshly ground black pepper
  • ½ cup freshly grated Parmesan
  • 3 TBS finely chopped fresh chives, for garnish (optional)

Directions

  1. Preheat oven to 450 degrees F and line a large baking sheet with parchment paper. Spray lightly with baking spray.
  2. Separate egg whites and egg yolks, placing the egg whites in a large bowl and each yolk in its own small bowl.
  3. Season the egg whites with salt and pepper. Using a whisk or a hand mixer, beat the egg whites until stiff peaks form. Gently fold in Parmesan.
  4. On the prepared baking sheet, create 4 mounds of egg whites and indent the centers of each to look like nests. Bake until slightly golden, about 3 minutes.
  5. Carefully add an egg yolk to the center of each egg white cloud. Season yolk with salt and pepper. Bake until the yolks are just set, about 3 minutes more. Garnish with chives, if using, and serve immediately.

Adapted from: Delish

The original recipe doesn’t call for spray the parchment paper, but I found that my finished eggs were a bit difficult to get off after baking. Additionally, the original recipe has you add all egg yolks to one bowl - obviously this creates less dish cleaning afterward, but it’s much trickier to get them out later without breaking them. (I broke two, despite being extremely careful.) The call is ultimately yours, but be careful!


PLUS: If you haven't entered for your chance to win a free book yet, there's still time! Enter my 1 Year Anniversary Giveaway through Friday, 8/11. More details in Sunday's post.

This post contains affiliate links. Full disclosure here.

Filed Under: book review, recipe Tagged With: baking, breakfast, brunch, easy prep, fiction, long read

The Sisters Chase + Powdered Donuts

July 15, 2017 by Megan 2 Comments

I’m a sucker for stories about sisters. I love the relationship between Elizabeth and Jane in Pride and Prejudice. Little Women is, of course, sister-centric and wonderful. I’ve never read the book, but whenever I watch In Her Shoes, I cry. So, it will come as no surprise that for my June BOTM I chose The Sisters Chase by Sarah Healy. I probably would’ve chosen it on the name alone, but it had the added benefit of coming highly recommended in my online book group as well.

Mary and Hannah Chase grow up in a small beach motel owned by their mother, Diane. When a car accident leaves the sisters on their own, eighteen-year-old Mary becomes Hannah’s guardian and takes it upon herself to do anything in her power to protect her. While Mary is at ease living a life in flux as they travel the country, Hannah aches for a real home where she can attend school and make friends. All Mary wants is for Hannah to be happy, but giving in may mean exposing a long-kept secret and risking an unbearable loss.

As an older sister, I definitely related to Mary and her willingness to do anything for her little sister, even if it seemed to be to her own detriment. Healy’s pacing and familiarity with the characters - they felt so real - resulted in a well-crafted story that wasn’t at all what I predicted. When I finished, it had me wanting to go back for a re-read.

Instead, I made some powdered donuts, like those the sisters’ mother piled high on a plate each morning for the motel’s guests. I wanted to bake them, since it’s less messy and somewhat healthier, so it gave me the perfect opportunity to use the donut pans I’ve had since two Christmases ago (thanks to my new sister-in-law, Kelly!).

The last time I made donuts was in middle school home ec class, and I remember being freaked out by splattering oil and the cleanup being such a process. This was MUCH easier. So much so that I may start making donuts more often.

First, I mixed the dry ingredients together - flour, sugar, baking powder and salt. In a separate bowl, a combined the egg, milk, vanilla extract and melted butter. I added these to the dry ingredients and mixed together.

Then, using a spoon, I added the batter into my greased donut pans, filling them about halfway.

I popped them into a 425-degree F oven and let them bake for 12 minutes. I let them cool in the pan for about 10 minutes.

Then, I dropped them into a paper grocery bag two at a time with some powdered sugar and shook and shook until they were well coated. Honestly, this happened really quickly (a few shakes at most). It was the most fun part of donut-making by far.

Everyone at work loved them, and I can’t wait to try new and different flavors. I always love when a book leads me a recipe I can use over and over again 🙂 Hope you enjoy!

Baked Powdered Sugar Donuts

  • Servings: 10
  • Time: 25 minutes
  • Print

Ingredients

  • 1¼ cups cake flour (see notes)
  • ¾ cup granulated sugar
  • 1¼ tsp baking powder
  • ¼ tsp salt
  • 1 large egg
  • ¼ cup milk
  • 1 tsp vanilla extract
  • 3 Tbsp unsalted butter, melted
  • 3 Tbsp heavy cream
  • 1 cup powdered sugar, for coating baked doughnuts

Directions

  1. Preheat oven to 425°F. Lightly grease doughnut pan; set aside.
  2. In a medium bowl, add all of the dry ingredients (cake flour, granulated sugar, baking powder and salt). Stir until well mixed.
  3. In a separate bowl, whisk together the egg, milk, vanilla extract, melted butter and heavy cream.
  4. Add the liquid ingredients to the dry ingredients; stir until just mixed.
  5. Spoon or pipe the batter into the greased doughnut pan. (Tip: Fill each doughnut circle about half full of batter.)
  6. Bake at 425°F for 12-14 minutes, or until doughnuts begin to turn golden brown on the edges.
  7. Let doughnuts cool in the pan.
  8. Place powdered sugar in paper bag. Once doughnuts have cooled, shake doughnuts (one at a time) in the bag with the powdered sugar until well coated. Tap off any excess powdered sugar. Repeat with remaining doughnuts. Serve immediately. (Note: If you plan on serving these doughnuts later, store them uncoated in an airtight container. Shake them in powdered sugar just before serving.)

From: Spiced Blog

If you don’t have cake flour, which I didn’t, and don’t want to buy some just for this recipe, it’s easy to make your own with all-purpose flour. For each cup of flour you need, take 1 cup of all-purpose flour, remove 2 TBSP and replace with 2 TBSP of cornstarch. Mix well to ensure it’s combined. I used 1½ cups flour with 3 TBSP for this recipe (and discarded the remaining ¼ cup).


This post contains affiliate links. Full disclosure here.

Filed Under: book review, recipe Tagged With: baking, book of the month, breakfast, contemporary, fiction, quick read

Housekeeping + Poached Eggs on Mushroom Arugula Toast

March 16, 2017 by Megan Leave a Comment

Marilynne Robinson is perhaps best known for her Gilead series, of which the first novel was published to much acclaim about 25 years after the book I’m here to share today, Housekeeping. This novel is understated, following sisters Ruth and Lucille, as they are left in the quiet, flood-prone town of Fingerbone to live in their grandmother’s house.

41u8MwmPhkL._SY344_BO1,204,203,200_

After their grandmother dies, the house is passed on to two great aunts who move in to take care of Ruth and Lucille, though they seem to doubt their abilities to do so. Late one evening, the girls’ Aunt Sylvie appears, seemingly unaware of her mother’s passing. She is greeted with surprise and a quick meal of poached eggs.  

Eventually, Sylvie becomes the girls’ caretaker, though she isn’t much for mothering, cooking or housekeeping, instead piling up cans and newspapers in the living room, preferring to eat her food cold and allowing the girls to skip school. Her transient ways leave her restless in the house. In response, Lucille seeks out a more normal childhood; Ruth can’t help but be drawn in, with implications that last their whole lives.

Shortly after Sylvie takes up permanent residence, a flood seeps into Fingerbone, covering the town with water and dampening everything, including her spirits. So, I thought some local mushrooms, which require a damp environment to grow well, would pair nicely with the poached eggs Sylvie ate upon her arrival. This weekend’s brunch was Poached Eggs on Mushroom Arugula Toast.

First, I roughly chopped my mushrooms (so nicely picked up by Scott at Eastern Market on Saturday morning) and my flat leaf parsley.

IMG_2673

I set a high-sided skillet mostly filled with water onto the stove to begin coming to a boil for the poached eggs. In another medium skillet, I heated through a tablespoon or so of olive oil and added the mushrooms. After a few minutes, when they were lightly browned and softened, I added the minced garlic and a pinch of red pepper flakes.

About a minute later, I added the goat cheese and milk and stirred until combined. I seasoned with salt and black pepper before adding the butter. At this point, I turned off the heat because my poaching water was ready to go. I also slipped my bread into the toaster.

I poured approximately 2 tablespoons of vinegar into my softly boiling water (vinegar will vary based on the amount of water, but for about 3 inches of water in a 10” pan, 2 tablespoons worked perfectly). I started with 2 eggs and cracked each into its own small bowl, lowering them one at a time into the water so that a bit of the water could seep in and help to start setting the egg white. I slowly poured the egg into the boiling water and used a wooden spoon to “collect” the egg whites around the yolk. I repeated with the second egg and set a time for 3 minutes.

I reignited the heat under the mushrooms and added the parsley and arugula so it could begin to wilt while the eggs finished poaching. I placed the finished toast on a plate, topped with the mushroom mixture and, once the eggs were done (fish them carefully out of the water with a slotted spoon), I added them to the top of the toasts.

Poached Eggs on Mushroom Arugula Toast

  • Servings: 2
  • Time: 20 minutes
  • Print


Slightly Adapted From: Shutterbean (whose pictures are much nicer than mine)

Ingredients

  • 2 slices hearty bread, toasted
  • a glug olive oil
  • 6 oz. mixed mushrooms, roughly chopped
  • 2 cloves garlic, minced
  • 2 tablespoons milk
  • 2 oz. goat cheese
  • a pad of butter
  • kosher salt & fresh ground pepper
  • a pinch red pepper flakes
  • ⅓ cup chopped Italian parsley
  • a handful of arugula
  • 4 eggs, poached in two batches

Directions

  1. Begin by heating a deep-sided skillet or wide pot filled with about 2-3 inches of water over medium-high heat. This should be brought to a soft boil while you cook the mushroom topping.
  2. Meanwhile, heat a medium skillet over medium-high heat with a glug of olive oil. Add in mushrooms and cook until softened and lightly browned, about 3-4 minutes. Stir in the garlic and red pepper flakes and cook for another minute.
  3. Add in the milk, and goat cheese, stirring until well combined. Season with salt and pepper. Stir in butter. Turn off the heat while you make the poached eggs.
  4. Add about 2 tablespoons of vinegar to the softly boiling water. (If it boils to aggressively it will cause the whites of the eggs to fall apart.)
  5. Put each egg in a small bowl (a measuring cup works well too). Carefully tip the bowl into the pot so that a bit of the hot water helps to start setting the egg and then pour the egg slowly into the pot. Using a wooden spoon or similarly blunt cooking utensil, gently push the egg whites over/around the yolk. Repeat with the second egg. Allow eggs to cook for approximately 3 minutes.
  6. While the eggs cook, put your toast in the toaster.
  7. Turn the heat back on under the mushrooms and add the parsley and arugula. When arugula has wilted, take mushrooms off the heat and transfer them to the top of the toasts. Place a poached egg (or two) on the top of each mound of mushrooms. Season with salt & pepper and serve immediately.

This post contains affiliate links. Full disclosure here.

Filed Under: book review, recipe Tagged With: book club, breakfast, brunch, fiction, vegetarian

Welcome to Braggsville + Belgian Waffles

March 11, 2017 by Megan 1 Comment

A story about a small town in Georgia starts at UC Berkeley with a group of four unlikely friends. In an alternate history class, the “4 Little Indians” hatch a plan that has D’Aron bringing them all back to his hometown for a reenactment of the Civil War. Their demonstration is expected to raise eyebrows and challenge the local mindset, but it ends up changing more than just opinions.

9780062302120_custom-02b2307e51fe69252971540140d28888bdcc2d5b-s400-c85.jpg

Welcome to Braggsville by T. Geronimo Johnson was chosen as the inaugural book for my office’s new Diversity Council Book Club. It certainly spawned some interesting conversation around race, class and unconscious bias and challenged the thinking of everyone in the room.

While I struggled with the writing style, which made it hard to tell who was speaking, if anyone was speaking at all and sometimes what the heck was actually going on, I realized (after some discussion with the group) that that might have been the point. Throughout the book, there is some confusion as to what events actually unfold and how, but one scene that is a very clear turning point in the story happens at a waffle house, while the foursome eats breakfast.

After finding a waffle recipe to accompany this novel, I borrowed a waffle maker from a generous coworker and set to work. With quite a few steps (and dishes), this recipe certainly isn’t as easy as some of the ones out there, but it was definitely delicious. If you have the time on a weekend morning, I suggest giving it a try.

With my oven at 200 degrees F, I combined the dry ingredients - flour, cornstarch, baking powder, baking soda and salt. With that set aside, I also combined most of the wet ingredients - buttermilk, milk (I used 2%), vegetable oil, vanilla extract and egg yolks.

In yet another bowl, I used a hand mixer to whip up my egg whites. Once they formed soft peaks, I added 3 tablespoons of sugar and continued whipping to form stiff, glossy peaks.

IMG_2621.JPG

At this point, I turned on my waffle maker to preheat. (It didn’t take very long to get up to temperature.)

While whisking, I poured the wet ingredients into a well in the middle of the dry ingredients and mixed until they were just combined. Finally, I folded in the egg white mixture. With the batter all ready to go, I began making the waffles.

I had to use about 1 cup of the mixture per waffle, but be sure to follow the directions on your waffle maker. Since I could only make one at a time, I followed the suggestion of Jaclyn at Cooking Classy and used the warm oven to keep them from getting cold while I finished up.

Though there are plenty of ways to “fancy up” the waffles, we went the classic route and topped them with a bit of butter and some maple syrup. I hope you enjoy as much as we did!

IMG_2622

Buttermilk Belgian Waffles

  • Servings: about 6
  • Time: 30 minutes
  • Print


From: Cooking Classy

Ingredients

  • 1½ cups all-purpose flour
  • ½ cup cornstarch
  • 1 tsp baking powder
  • ½ tsp baking soda
  • ½ tsp salt
  • 1 ½ cups buttermilk
  • ½ cup milk
  • 6 Tbsp vegetable oil or canola oil
  • ½ tsp vanilla extract
  • 2 large eggs, whites and yolks separated
  • 3 TBS granulated sugar

Directions

  1. Preheat oven to 200 degrees F. Preheat a Belgian waffle iron (if you don't have a Belgian waffle maker a regular waffle maker would work fine). In a mixing bowl whisk together flour, cornstarch, baking powder, baking soda and salt for 20 seconds, make a well in center of mixture and set aside.
  2. In a separate mixing bowl whisk together buttermilk, milk, vegetable oil, vanilla extract and egg yolks until combined.
  3. In a separate bowl, using an electric hand mixer set on high speed, whip egg whites (make sure there isn't a drop of yolk or they'll never fluff up) until soft peaks form. Add sugar and whip until stiff glossy peaks form.
  4. While whisking, pour buttermilk mixture into well in flour mixture and mix just until combined (batter should be slightly lumpy). Fold in egg white mixture.
  5. Cook batter in waffle iron according to manufacturer’s directions. Once each waffle is done, transfer to warm oven and allow to rest until crisp. Serve warm with butter and maple syrup.

Variations: Serve with sweetened whipped cream, fresh berries and raspberry/blueberry or strawberry syrup. For churro waffles, brush top of waffle with melted butter (be sure to get in each square) then pour a generous amount of cinnamon sugar into a 9-inch pie dish and dunk butter coated side in cinnamon sugar mixture.

This post contains affiliate links. Full disclosure here.

Filed Under: book review, recipe Tagged With: breakfast, brunch, contemporary, fiction, tough topics

Today Will Be Different + Breakfast Casserole

January 5, 2017 by Megan 2 Comments

Based on the title alone, Maria Semple’s Today Will Be Different seemed like a novel with an uplifting outlook. At the same time, I was also reading The Happiness Project, a nonfiction book with a similar self-improvement theme that one of my book clubs had chosen for January to kick off the New Year. Goodbye, 2016! Hello, 2017! Let’s start fresh.

28449270

I had loved Maria Semple’s last novel Where’d You Go Bernadette? It was laugh-out-loud funny with a surprising format, and I still recommend it to people constantly. Naturally, I was looking forward to her follow-up. As the title suggests, Today Will Be Different takes a peek at a day in the life of our main character Eleanor. She wakes up with the intention to be a better person than yesterday.

On a day that’s anything but ordinary, Eleanor certainly does her best to follow through with her resolutions. As the day unfolds, she is greeted with several surprises, including an adventure down memory lane. It definitely had some chuckle-worthy moments and relatable insights, but even for a novel about just one day, it felt rushed, incomplete, and in the end, a bit too contrived.

Still, it wasn’t a bad read - certainly enjoyable, and I took it as a bit of an inspiration to do a little better every day than the day before.

Best to start with breakfast, I think. I found an easy recipe for a breakfast casserole that’s greatest appeal was that most of the work could be done the night before. It ended up being a perfect dish to make between Christmas and New Year’s, when everything feels a little lazier and there are heaps of leftovers - especially, in our case, of spiral sliced ham. All I really had to buy was the frozen hash browns.

My parents came over for brunch late one morning, so the night before I did all of the prep, knowing tomorrow would be better. Easy satisfying breakfast is always a great way to start the day!

I chopped up what we had left of the Christmas ham, which ended up being just shy of 2 cups, but was still plenty for the recipe.

img_2407

I poured the shredded frozen hash browns into the bottom of a greased 9x13 casserole dish and whipped up a dozen eggs.

Next, I added the cheese (a little more cheddar and a little less pepper jack, since my mom isn’t a huge fan of spiciness), the chopped ham, seasoning salt and whole milk (which I used instead of half-and-half because we had it on hand). I stirred it all together and then poured it on top of the potatoes. My prep was complete, so I covered the dish in foil and set it in the fridge, ready to relax for the rest of the night.

img_2410

The next morning, about an hour and half before my parents arrived, I preheated the oven to 350 degrees and then placed the foil-covered casserole into the hot oven. Towards the last 20 minutes, it started bubbling over, so I placed a cookie sheet underneath the dish - I suggest doing this as a precaution when you first put it in the oven.

After the first 90 minutes, I removed the foil and baked it for an additional 5 minutes uncovered. The casserole looked finished, but the top was a little wet because the moisture had nowhere to go underneath the foil. This last 5 minutes helped the cheese become a little more golden and got rid of all the excess moisture, without overcooking the casserole. It was still fluffy and delightful for brunch.

img_2411

I made my parents and Scott wait while I took some photographs (sorry, guys!), but luckily this recipe had a 10-minute anticipation time built right in.

img_2412

img_2413

Everyone loved it, and I look forward to making this for special occasions and everyday weekends alike in the coming year.

The Best Breakfast Casserole

  • Servings: 8-12
  • Time: 1 hour and 40 minutes, including 90 minutes of bake time
  • Print


From: Alyssa, The Recipe Critic

Ingredients

  • 24 oz frozen shredded potatoes
  • 12 eggs
  • 2 cup half and half [or whole milk]
  • 1 tsp seasoning salt
  • 1½ cups cheddar cheese, grated
  • 1½ cups pepper jack cheese, grated
  • 2 cups chopped ham (or your preferred meat, sausage would also be great)

Directions

  1. Grease a 9x13 inch pan. Add the frozen and shredded potatoes to the bottom of the pan. Sprinkle with salt and pepper.
  2. In a large bowl, whisk the eggs together. Then add half and half, seasoning salt, cheeses and chopped ham or meat.
  3. Pour over the top of the frozen potatoes. Cover with foil and refrigerate for 2 hours or overnight.
  4. Bake covered in foil at 350 degrees for 90 minutes. Let rest for 10 minutes before serving.

This post contains affiliate links. Full disclosure here.

Filed Under: book review, recipe Tagged With: book club, breakfast, contemporary, easy prep, fiction, humor, make ahead, quick read

The Couple Next Door + Coffee-Glazed Banana Bread

October 15, 2016 by Megan Leave a Comment

From serious memoir to childhood favorite to suspenseful thriller - my last three books have been a little sporadic. The Couple Next Door is certainly more adult than The Secret Garden, but secrets still abound. After a shocking ending to a dinner party with (not surprisingly) the couple next door, Marco and Anne’s seemingly perfect life begins to unravel.

51qI2RzRlzL._SY344_BO1,204,203,200_.jpg

Shari Lapena’s The Couple Next Door was fast-paced, with new revelations at nearly every turn of the page. With a cast of characters that included an inappropriately flirtatious neighbor, a stay-at-home mom with a questionable past, and a power-hungry stepfather, no one’s motives were clear but everyone was suspect.

As the plot twisted here and turned there, food didn’t play much of a role. Despite starting with a dinner party, nothing much was mentioned aside from coffee. Uncertainty breeds sleeplessness, and the best cure for that is caffeine. In one instance, Lapena points out that the two main characters were “both living mostly on coffee and despair.”

In an effort to impart some comfort on a decidedly uncomforting storyline, I opted to make banana bread - with a coffee glaze. Comfort meets caffeine, thanks to this recipe from A Latte Food.

Like most quick breads, this one is pretty easy to get together. The really hard part is waiting for the baking (and cooling!) before you can finally eat it.

I had already-brewed coffee ready to go, but if you don’t, I suggest starting that process before you make the bread. I began by mashing up the bananas, which is always fun to do first thing in the morning. (Make sure your bananas are ripe. See them pre-mashed below; and mashed, with Beta looking on, wondering why she can’t have some of her favorite fruit too.)

I creamed the softened butter together with the sugars, adding the eggs and vanilla extract once the mixture was light and fluffy. To the wet ingredients, I slowly incorporated the flour, salt and baking soda. Once all was well-combined, I added the mashed bananas, stirring until just mixed.

Once in the prepared loaf pan, I let it bake in the oven for about an hour. With a few minutes to spare before the bread came out of the oven, I began the glaze so I could pour it over the loaf before it cooled completely. I whisked together the powdered sugar, brewed coffee and vanilla extract to form a light coffee-colored glaze.

I drizzled it over the still-cooling banana bread, with a plate underneath to catch any sugar-y drips.

img_1497img_1499

For those of you who don’t know me, I have a confession to make: I don’t like coffee. (Rory Gilmore would be horrified, I know.) I do, however, love banana bread. I thought the glaze tasted exactly like coffee, but Scott - who loves coffee - thought it tasted more like sugar. When I brought it to work, consensus all around was that it tasted good. If you actually like coffee, and prefer a more coffee-flavored glaze, I would suggest adding the espresso powder.

Or just enjoy it with a cup of coffee.

img_1498

Coffee-Glazed Banana Bread

  • Servings: 1 loaf
  • Time: 1 hour, 20 minutes
  • Print

Very slightly adapted from: A Latte Food

Ingredients

    Bread

  • ½ cup butter, softened
  • ½ cup sugar
  • ⅓ cup brown sugar
  • 2 eggs
  • 2 cups all-purpose flour
  • 1 tsp baking soda
  • ¼ tsp salt
  • 3 to 4 medium or large bananas
  • 1½ tsp vanilla extract
  • Coffee Glaze

  • 2 TBS strong coffee, brewed
  • 1 cup powdered sugar
  • ½ tsp vanilla extract
  • ¼ tsp espresso powder (optional)

Directions

    Bread

  1. Preheat the oven to 350. Grease a 9x5 loaf pan.
  2. In a small bowl, mash bananas. Set aside.
  3. In a large bowl, cream butter sugar, and brown sugar together until light and fluffy.
  4. Add in the eggs, one at a time, beating well after each addition. Add in vanilla extract, and mix.
  5. Sift together the flour, baking soda, and salt in a separate bowl. Slowly incorporate the dry ingredients into the wet ingredients, and stir until just combined.
  6. Add in mashed bananas, and mix until combined. Pour into prepared loaf pan.
  7. Bake for about 60 minutes, or until a cake tester comes out clean with just a few moist crumbs stuck to it.
  8. Allow to cool for 10 minutes. Move to a wire cooling rack.
  9. Glaze

  10. While bread is cooling, mix together powdered sugar, vanilla extract, espresso powder (if using), and 2 TBS brewed coffee. If the glaze is thicker than your desired preference, add in additional brewed coffee. [I used 2 TBS of coffee and no espresso powder and it was a perfect thickness; according to many, however, the flavor was not enough like coffee. Additional liquid may be required if adding the powder, but taste as you go to ensure a flavor you like.]
  11. Pour the glaze evenly over the loaf. Allow the glaze to harden completely before cutting into slices.

Filed Under: book review, recipe Tagged With: baking, breakfast, fiction, snack, suspense

  • « Go to Previous Page
  • Go to page 1
  • Go to page 2
  • Go to page 3
  • Go to page 4
  • Go to page 5
  • Go to Next Page »

Primary Sidebar

About

The Hungry Bookworm brings together literature and food. Megan has an insatiable appetite for both.

As C.S. Lewis said, “Eating and reading are two pleasures that combine admirably.” Enjoy!

  • Bloglovin
  • Facebook
  • Instagram
  • Pinterest

Subscribe

Don't miss out on bookish content, exclusive giveaways, and of course, book club-friendly recipes. Get notified of new posts via email.

Join 2879 subscribers.

Search for Ingredients, Recipes, or Books

Recent Posts

  • Subscriber Box Review: Literati Book Club - Roxane Gay's Audacious Book Club
  • Arsenic and Adobo + Ensaymada
  • Review of The Kindred Spirits Supper Club
  • Kids Edition: Sometimes I Like to Curl Up in a Ball + "Dirt" Pudding Cups
  • The Midnight Library + Broccoli and Ricotta Toast

Goodreads

Tags

5 ingredients or less appetizer baking book club book list book of the month books about food bread breakfast brunch chicken contemporary cookies cultural dessert dinner dinner party dystopia easy prep favorites fiction fruit historical fiction holiday ice cream linkup lunch meat memoir mini review nonfiction pasta quick read reading challenge science fiction seafood show us your books side dish snack soup TBR list thriller top ten tuesday vegetarian veggies

Archives

Other Great Book Blogs

Literary Quicksand
Never Enough Novels
Death by Tsundoku
Professional Reader 25 Book Reviews
Privacy & Cookies: This site uses cookies. By continuing to use this website, you agree to their use.
To find out more, including how to control cookies, see here: Cookie Policy

Footer Widget Header

Megan’s Instagram

Copyright © 2025 · Hungry Bookworm