• Skip to primary navigation
  • Skip to main content
  • Skip to primary sidebar
  • Home
  • Reviews
    • Book Index
    • Fiction
    • Non-Fiction
    • Top Ten Tuesdays
The Hungry Bookworm

The Hungry Bookworm

reading + eating

  • Recipes
    • Drinks
    • Snacks, Sides & Apps
    • Main Dishes
    • Desserts
    • 5 Ingredients or Less
  • About
    • Meet Megan
    • How I Rate
    • Review Policy
    • Contact

book of the month

Beasts of Extraordinary Circumstance + Sponge Cake with Forest Berries

November 7, 2017 by Megan 5 Comments

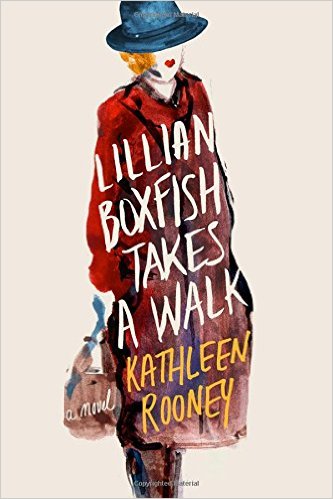
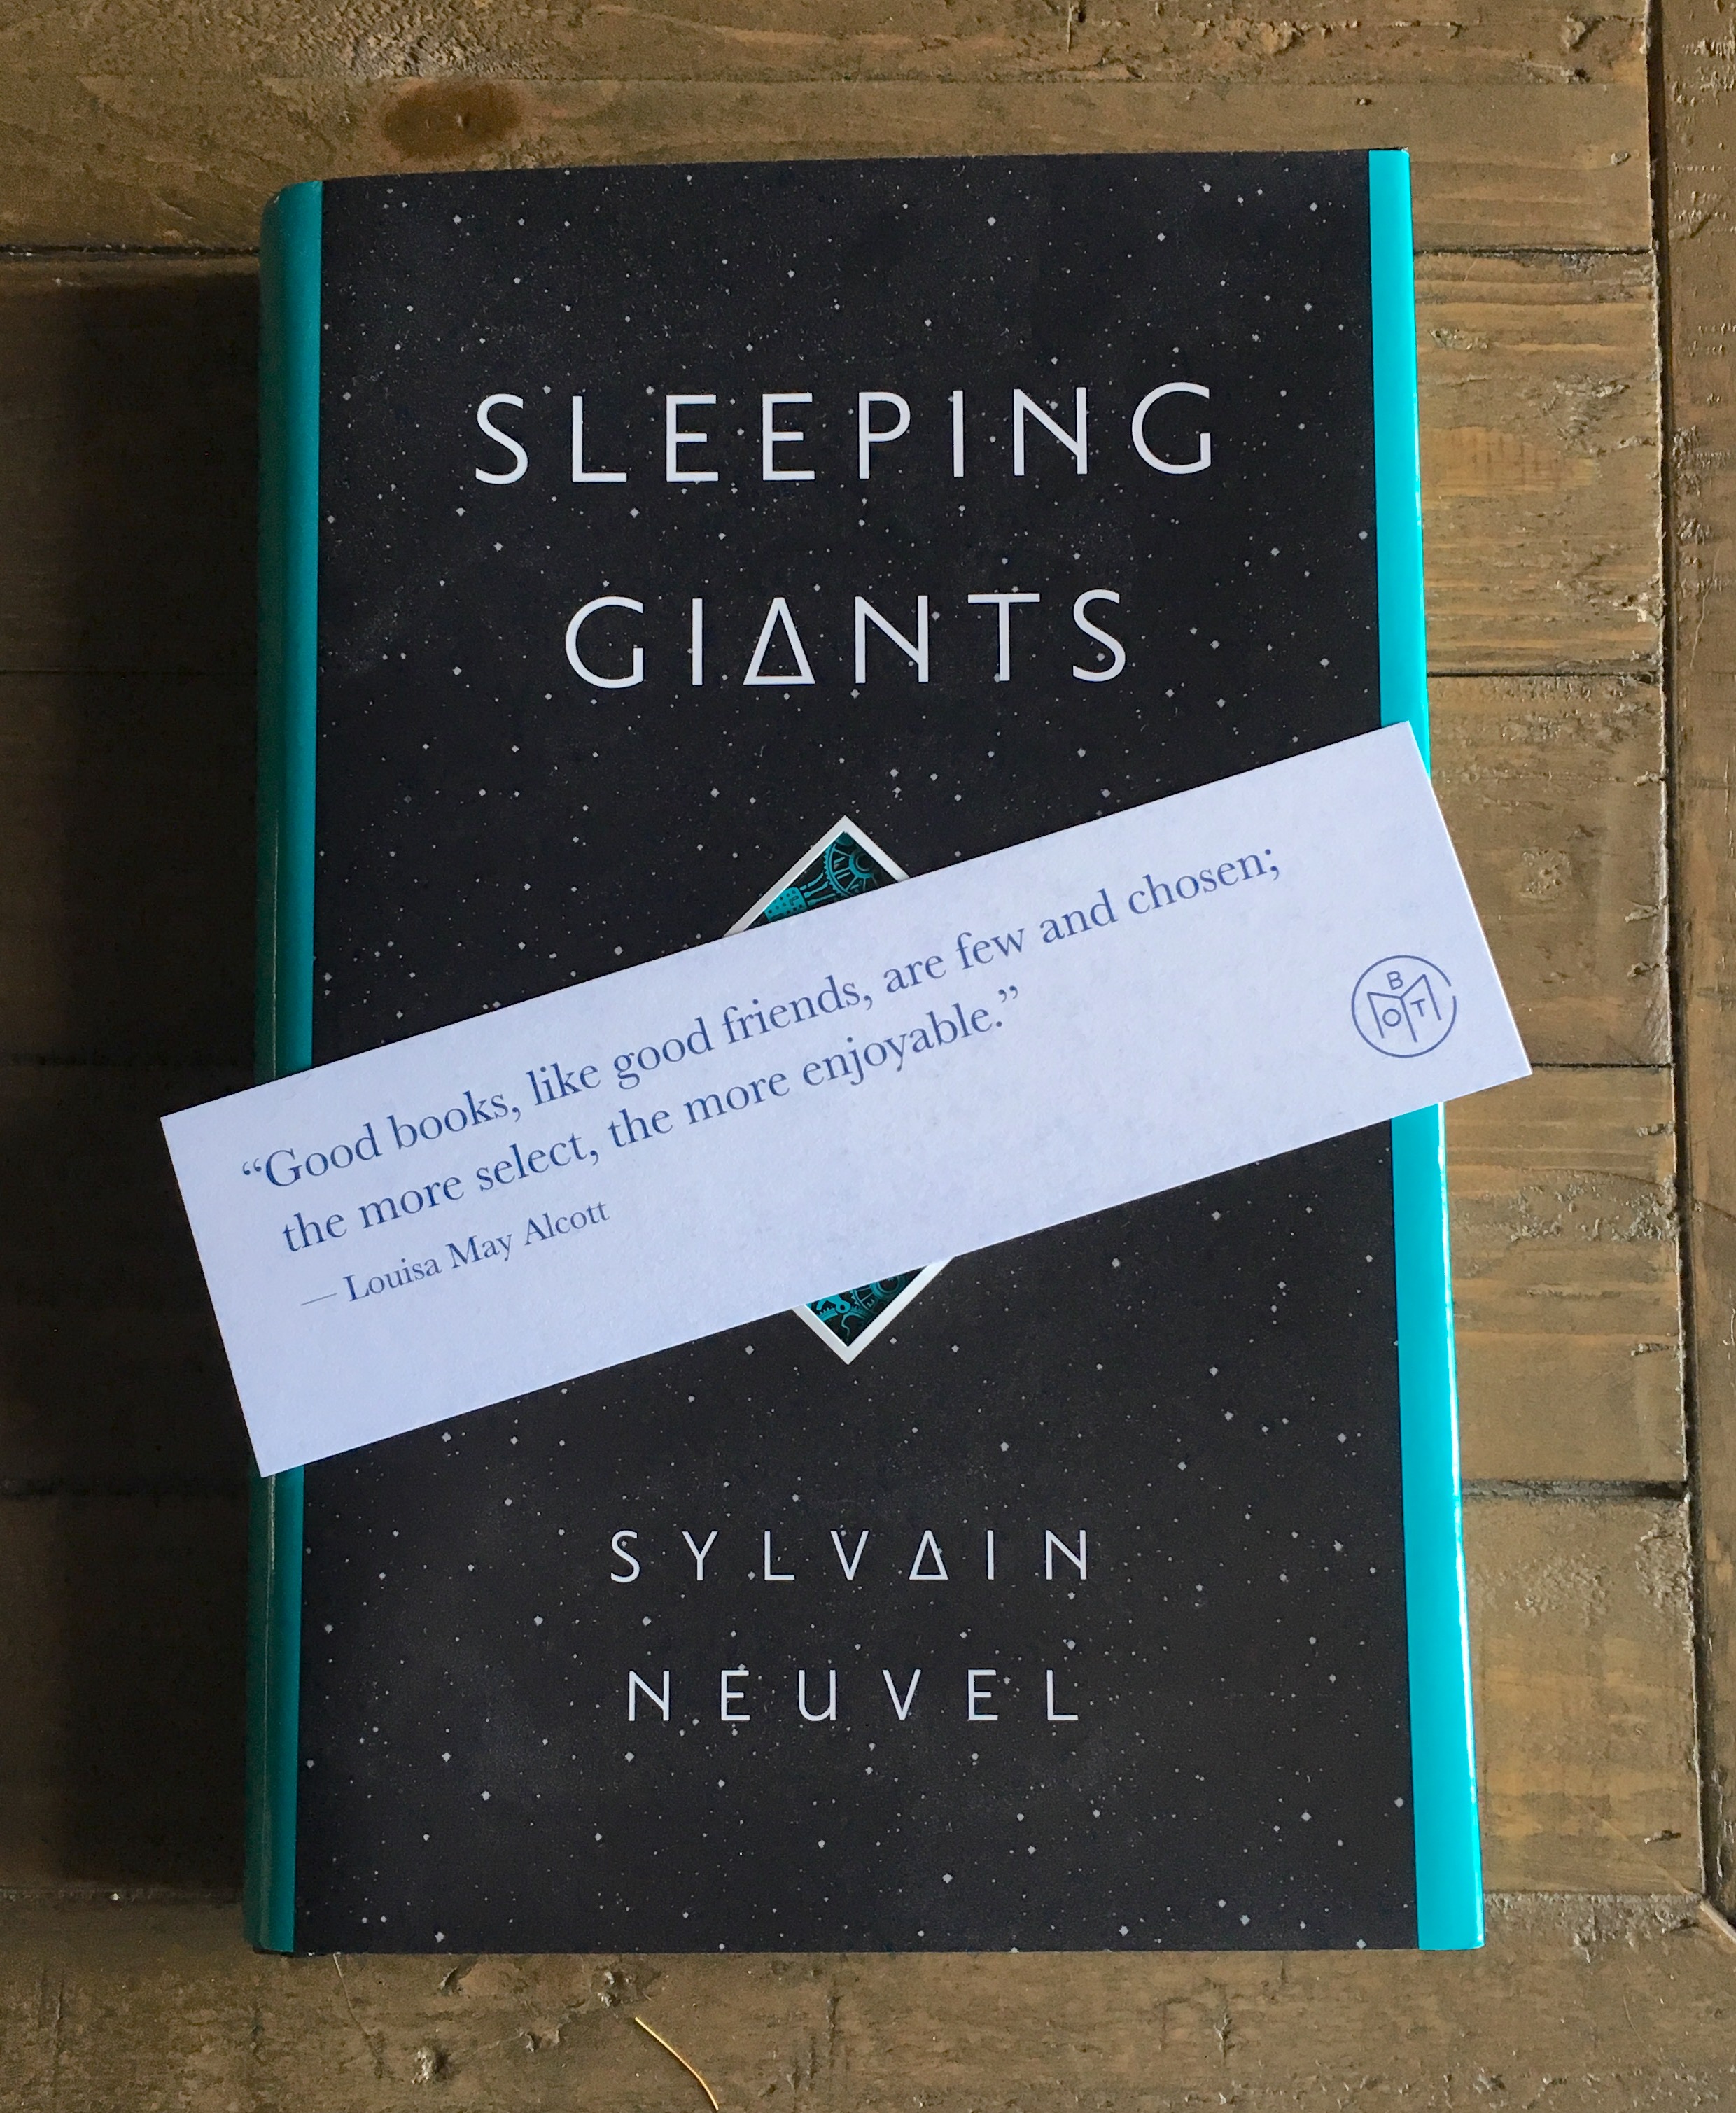
One of my favorite things about Book of the Month (among the many) is the opportunity members sometimes get to read a book before it’s released to the rest of the world. Ruth Emmie Lang’s wonderfully unexpected novel Beasts of Extraordinary Circumstance, which will be released next week on November 14th, was one of the October selections, and honestly, I was planning to share this post with you then, but I enjoyed this book so immensely, I couldn’t wait.

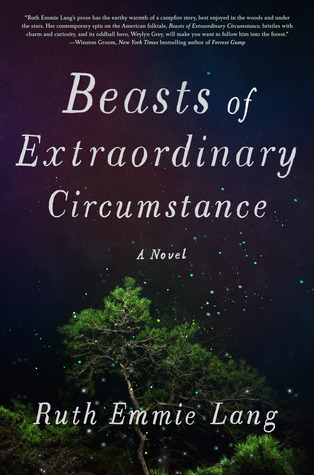
Lang’s imaginative novel follows Weylen Grey, a young orphan who was raised by wolves, as he grows up and travels the country looking for his true home. Each section of the story (set in a new year and different location) is told by those around Weylen - young Mary who befriends him in the woods while making deliveries for her father; a teacher who is taken aback by the student refusing to sit in a desk; an inexperienced mayor whose town is faced with an impending hurricane.

Judge Steph Ortiz, who chose this book for BOTM, described Beasts as “so comfortable and uplifting” and said it was “exactly the book [she] needed right now, and it made [her] so happy [she] wanted to howl at the moon.” After finishing the phenomenal The Rules of Magic, I was ready to be swept away again. A book that made me extraordinarily happy was exactly what I was looking for, and this one didn’t disappoint!

Unlike many of the other books I recommend, which while amazing are often full of tough topics, this novel left me with a wonderfully cozy feeling, and seriously, if you haven’t stopped and pre-ordered it yet, I’d suggest you do so now. It’s an excellent debut; I can’t wait to see what else Lang cooks up in the future.

Speaking of cooking (you had to know that was coming, right?), I decided to whip up a whimsical dessert to go along with this fairy tale novel. On one of her visits to the forest to see Weylen, Mary brings with her a freshly baked sponge cake, which they eat with hand-picked berries. I found a slightly fancy-sounding but down-to-earth-looking sponge cake recipe from Vikalinka and knew it would be a perfect fit.     

The only tweak I made to her recipe was to add some additional berries to the compote (and in decorating). In fact, I started by making the berry compote, adding the raspberries and blackberries to a small saucepan with a touch of water and some sugar. After about 15 minutes, I smushed the berries up a bit because there didn’t seem to be much thickening occurring. I let it continue cooking for another 10 minutes or so before following the rest of the directions. I used my food processor to blend the mixture until smooth, pushed it through a fine sieve and set it aside.

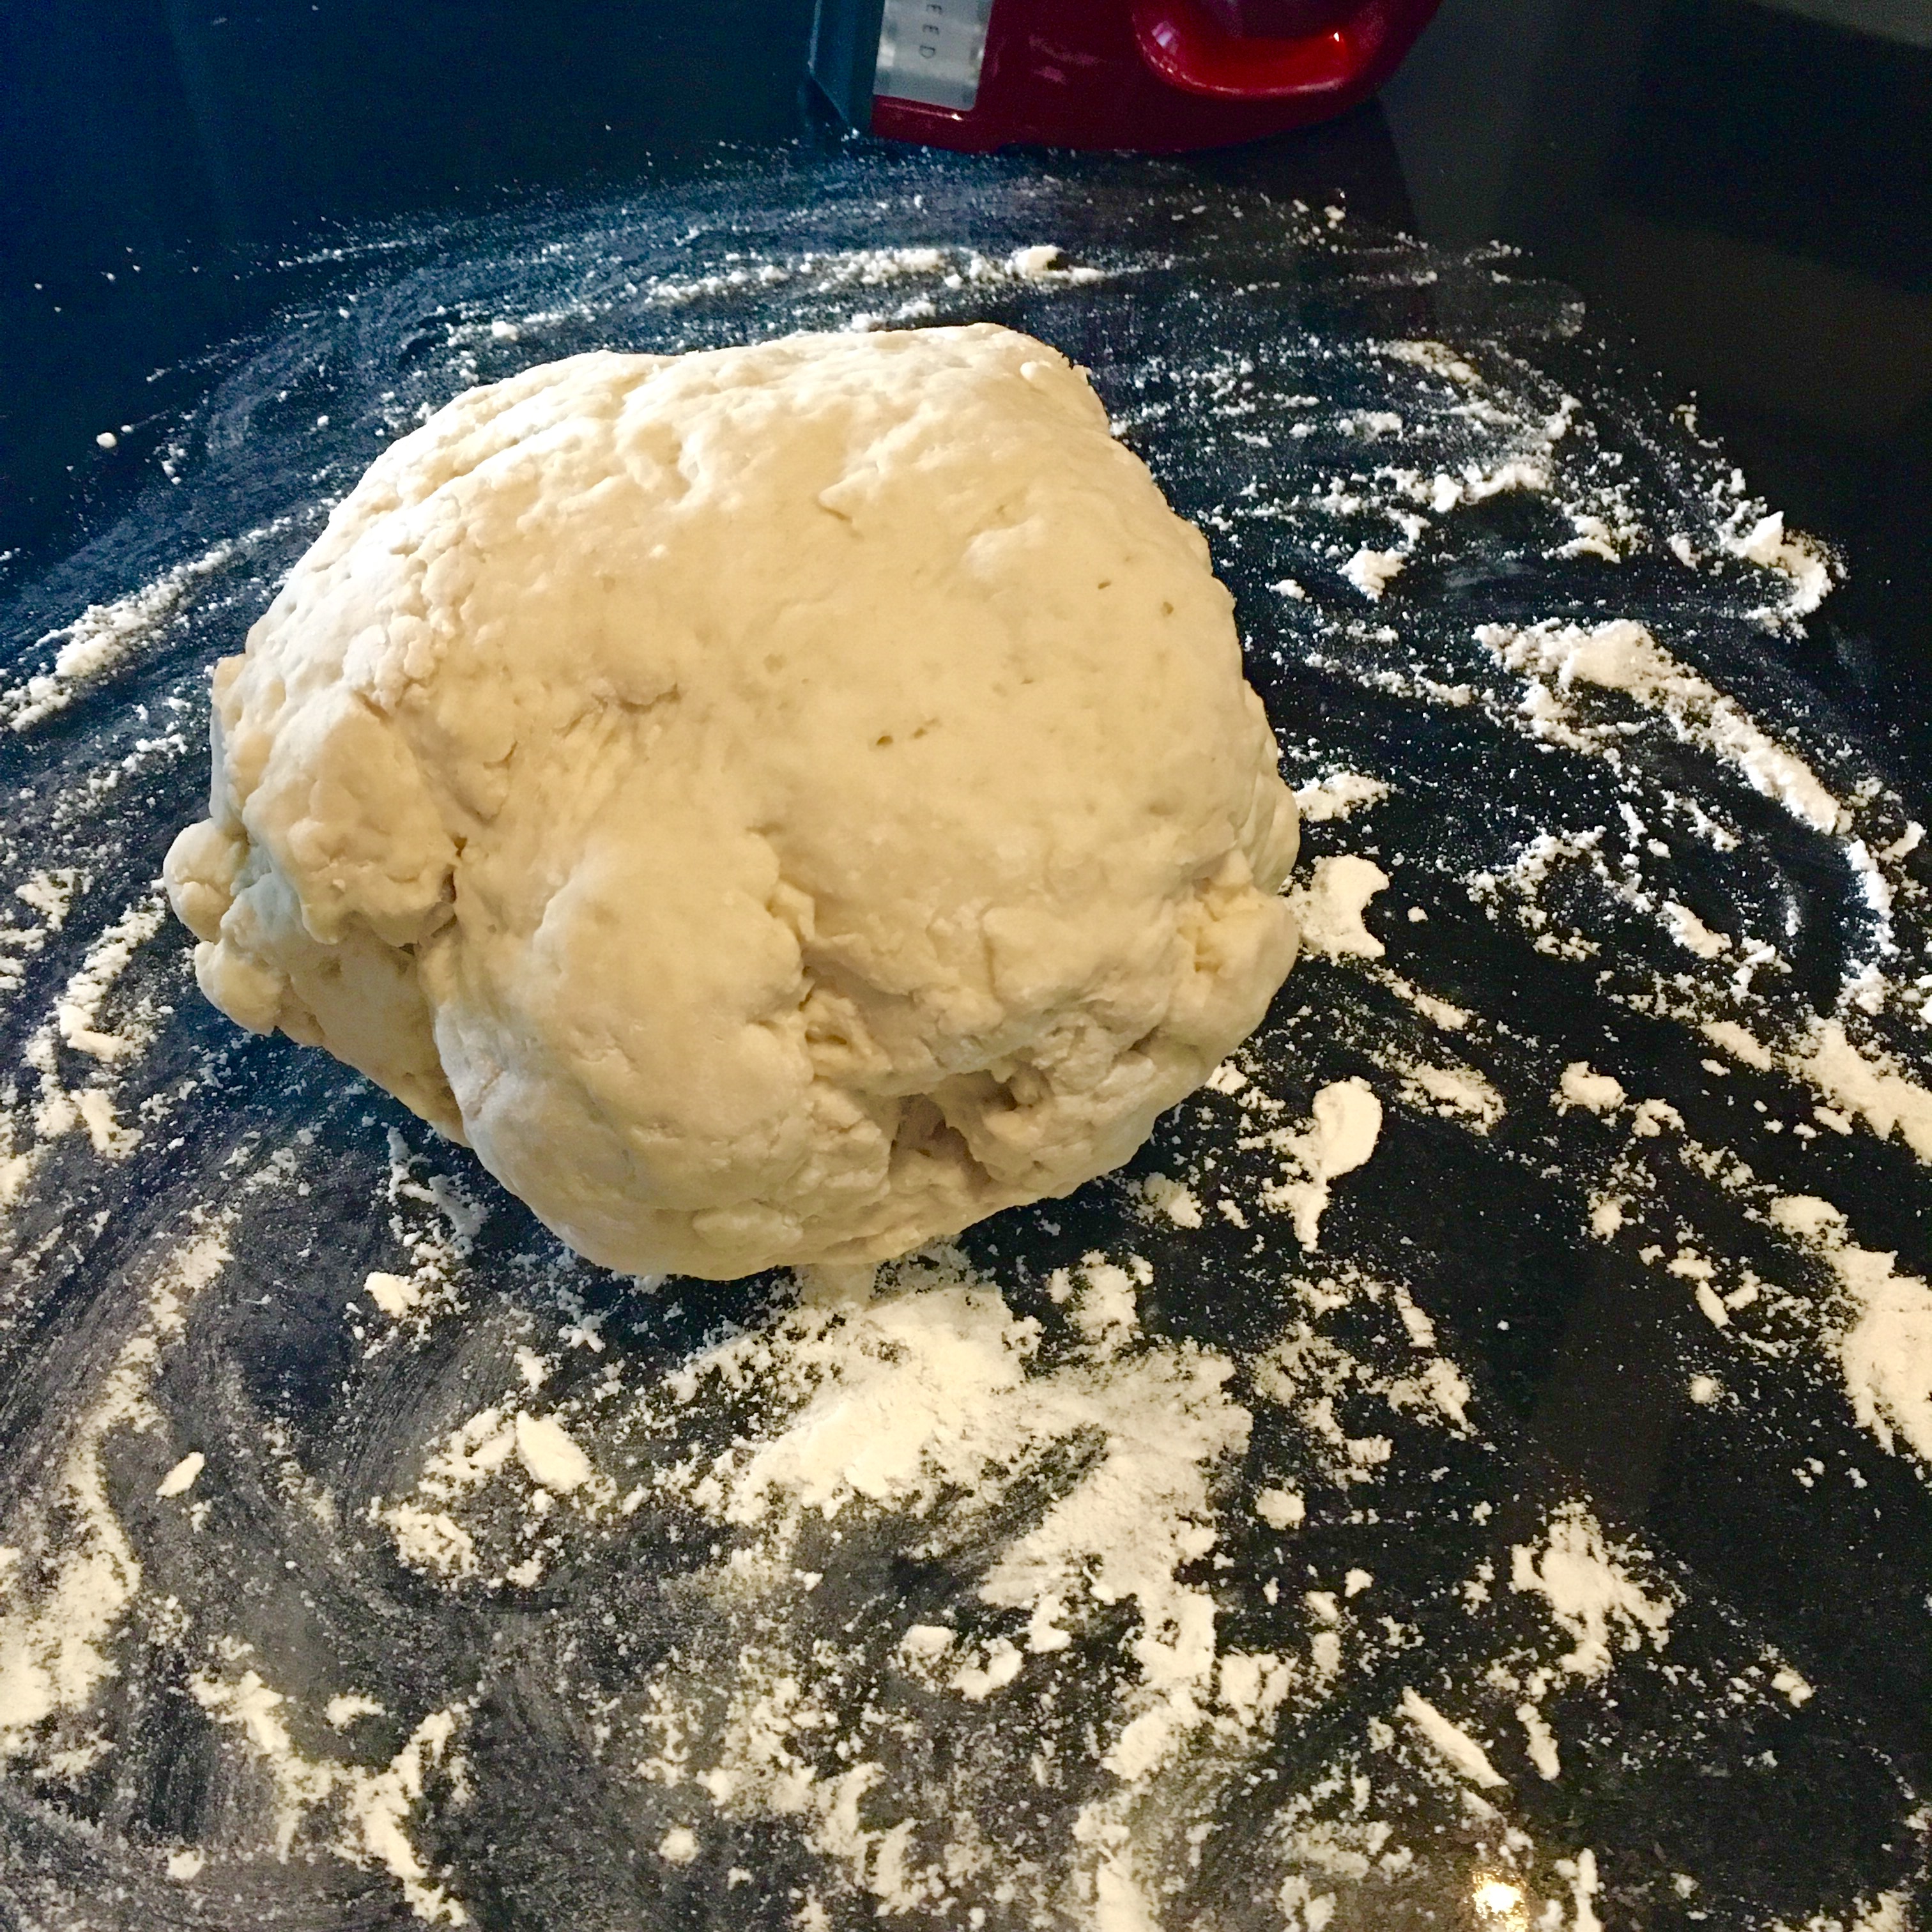
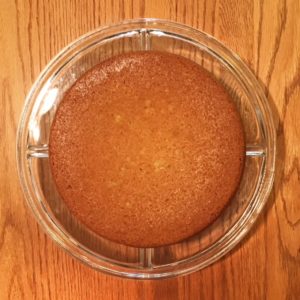
To make the cake, I started by preheating my oven to 350 degrees F and greasing my cake pans. (I didn’t line them with parchment paper, like the original recipe directs, but I didn’t have any issues getting the cakes out of my pans once they were cooled.)

In a large bowl, I mixed the butter and sugar until light and fluffy, adding the eggs one at a time and mixing for about a minute each. Finally, I added the vanilla and lemon zest.

In a separate bowl, I combined my dry ingredients, sifting together the flour, baking powder, baking soda and salt. I added the dry ingredients to the wet ingredients, mixing well. The end result was a very thick batter (according to Vikalinka, it should be the consistency of buttercream frosting).

I scooped approximately half into each cake pan and then used my kitchen scale to ensure they were even (about 2 pounds each, including the pan). It wasn’t specified in the original recipe, but I had some minor concerns they wouldn’t spread out due to thickness, so I used a scraper to spread the batter as evenly as I could in each pan. Then, the cakes went into the oven for about 30 minutes.

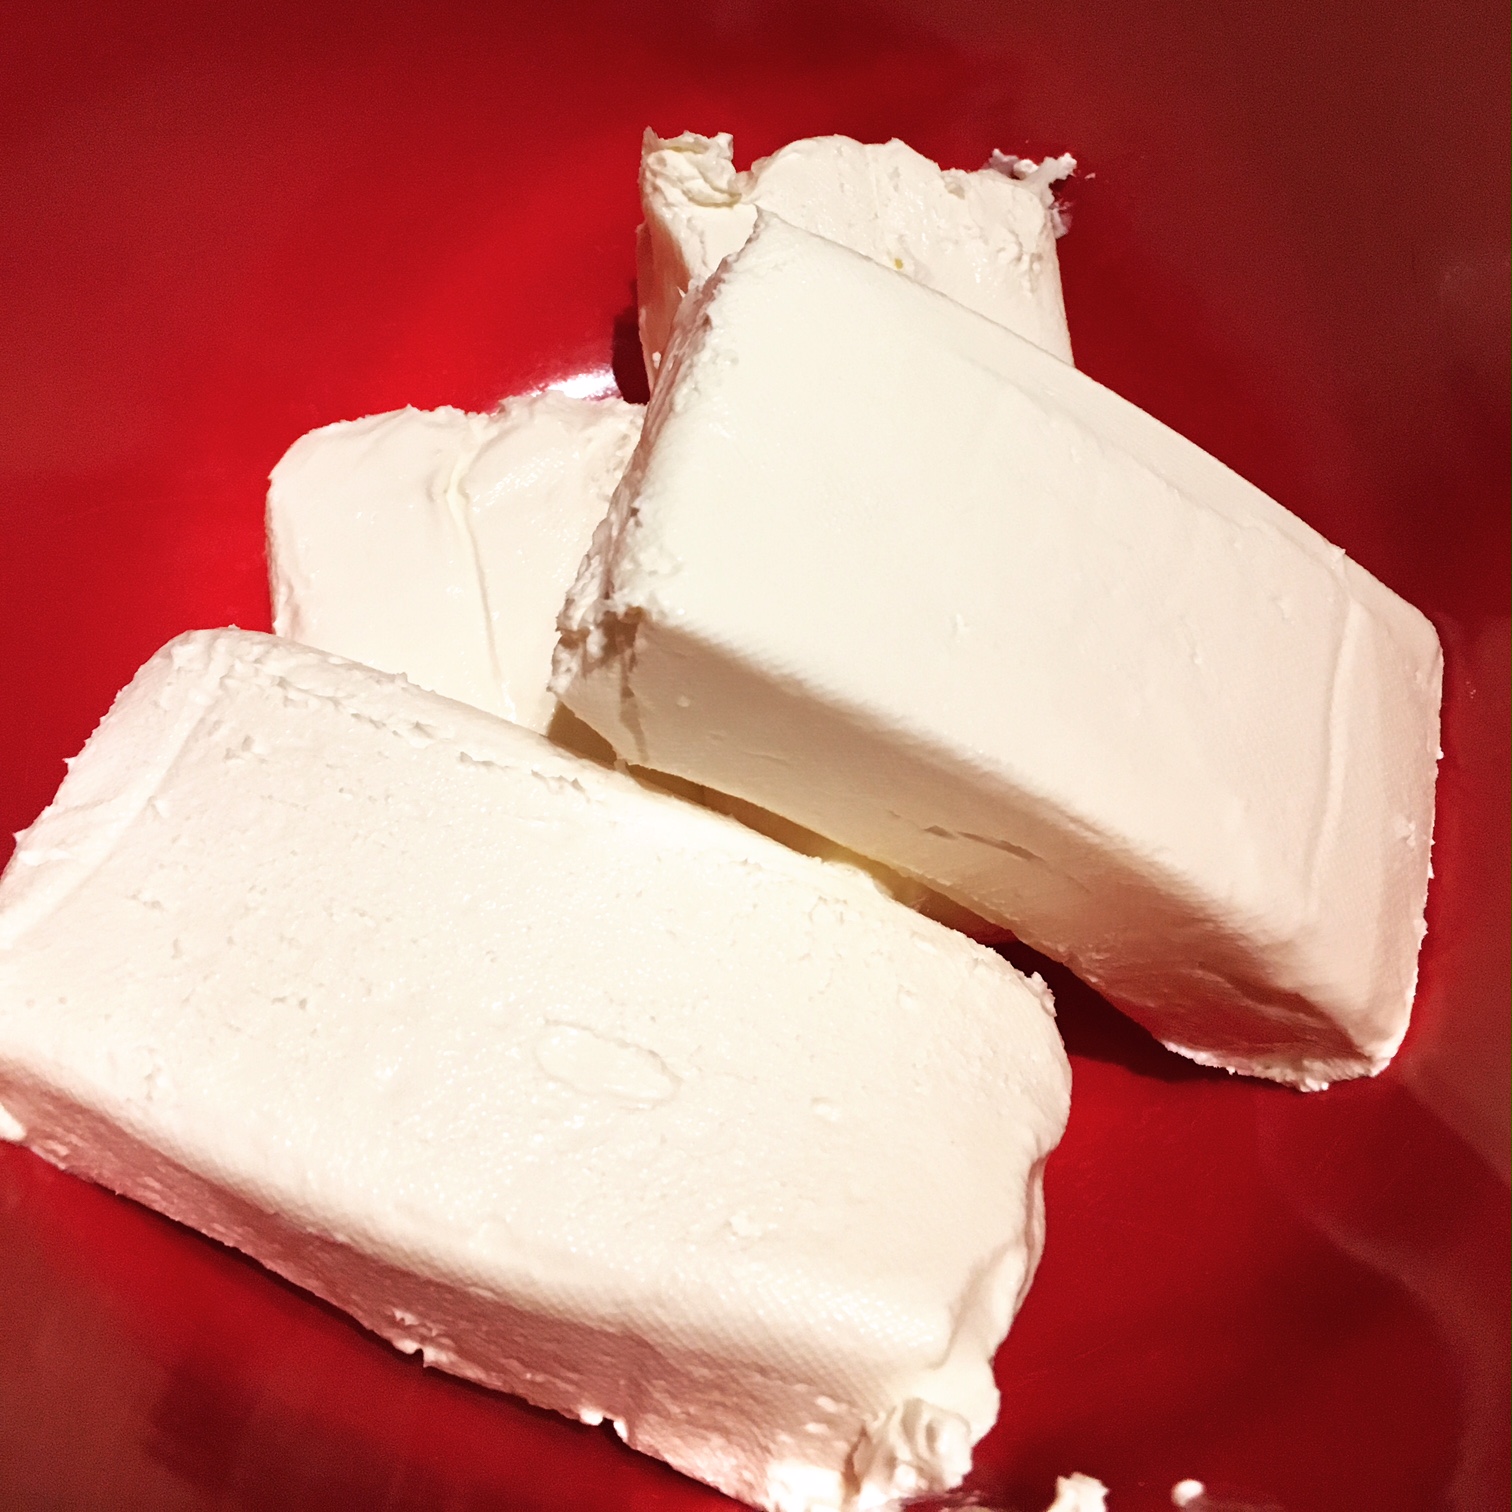
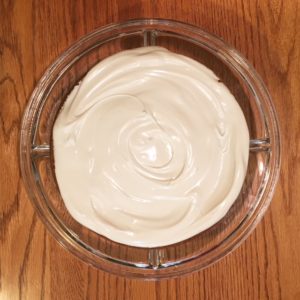
Meanwhile, I made the mascarpone cream. I used a hand mixer to whip the chilled mascarpone with the powdered sugar and vanilla extract for about 2 minutes. To that mixture, I added the whipping cream and whipped for a few more minutes until it was stiff. I covered the bowl and put it in the fridge to stay cool while the cake finished baking and cooled.

Once the cakes were out of the oven, I allowed them to cool on a baking rack for 20 minutes, before turning them out so they could cool completely. I was a bit nervous about assembly (since I’m not usually the best cake decorator), but this cake features a very unfussy decor and is perfect for an imprecise decorator such as myself.

To start, I placed one of the cooled cakes on a cake stand. I covered that with a thick layer of the mascarpone cream (I ended up having a little bit left… it seemed like a lot when I was decorating).

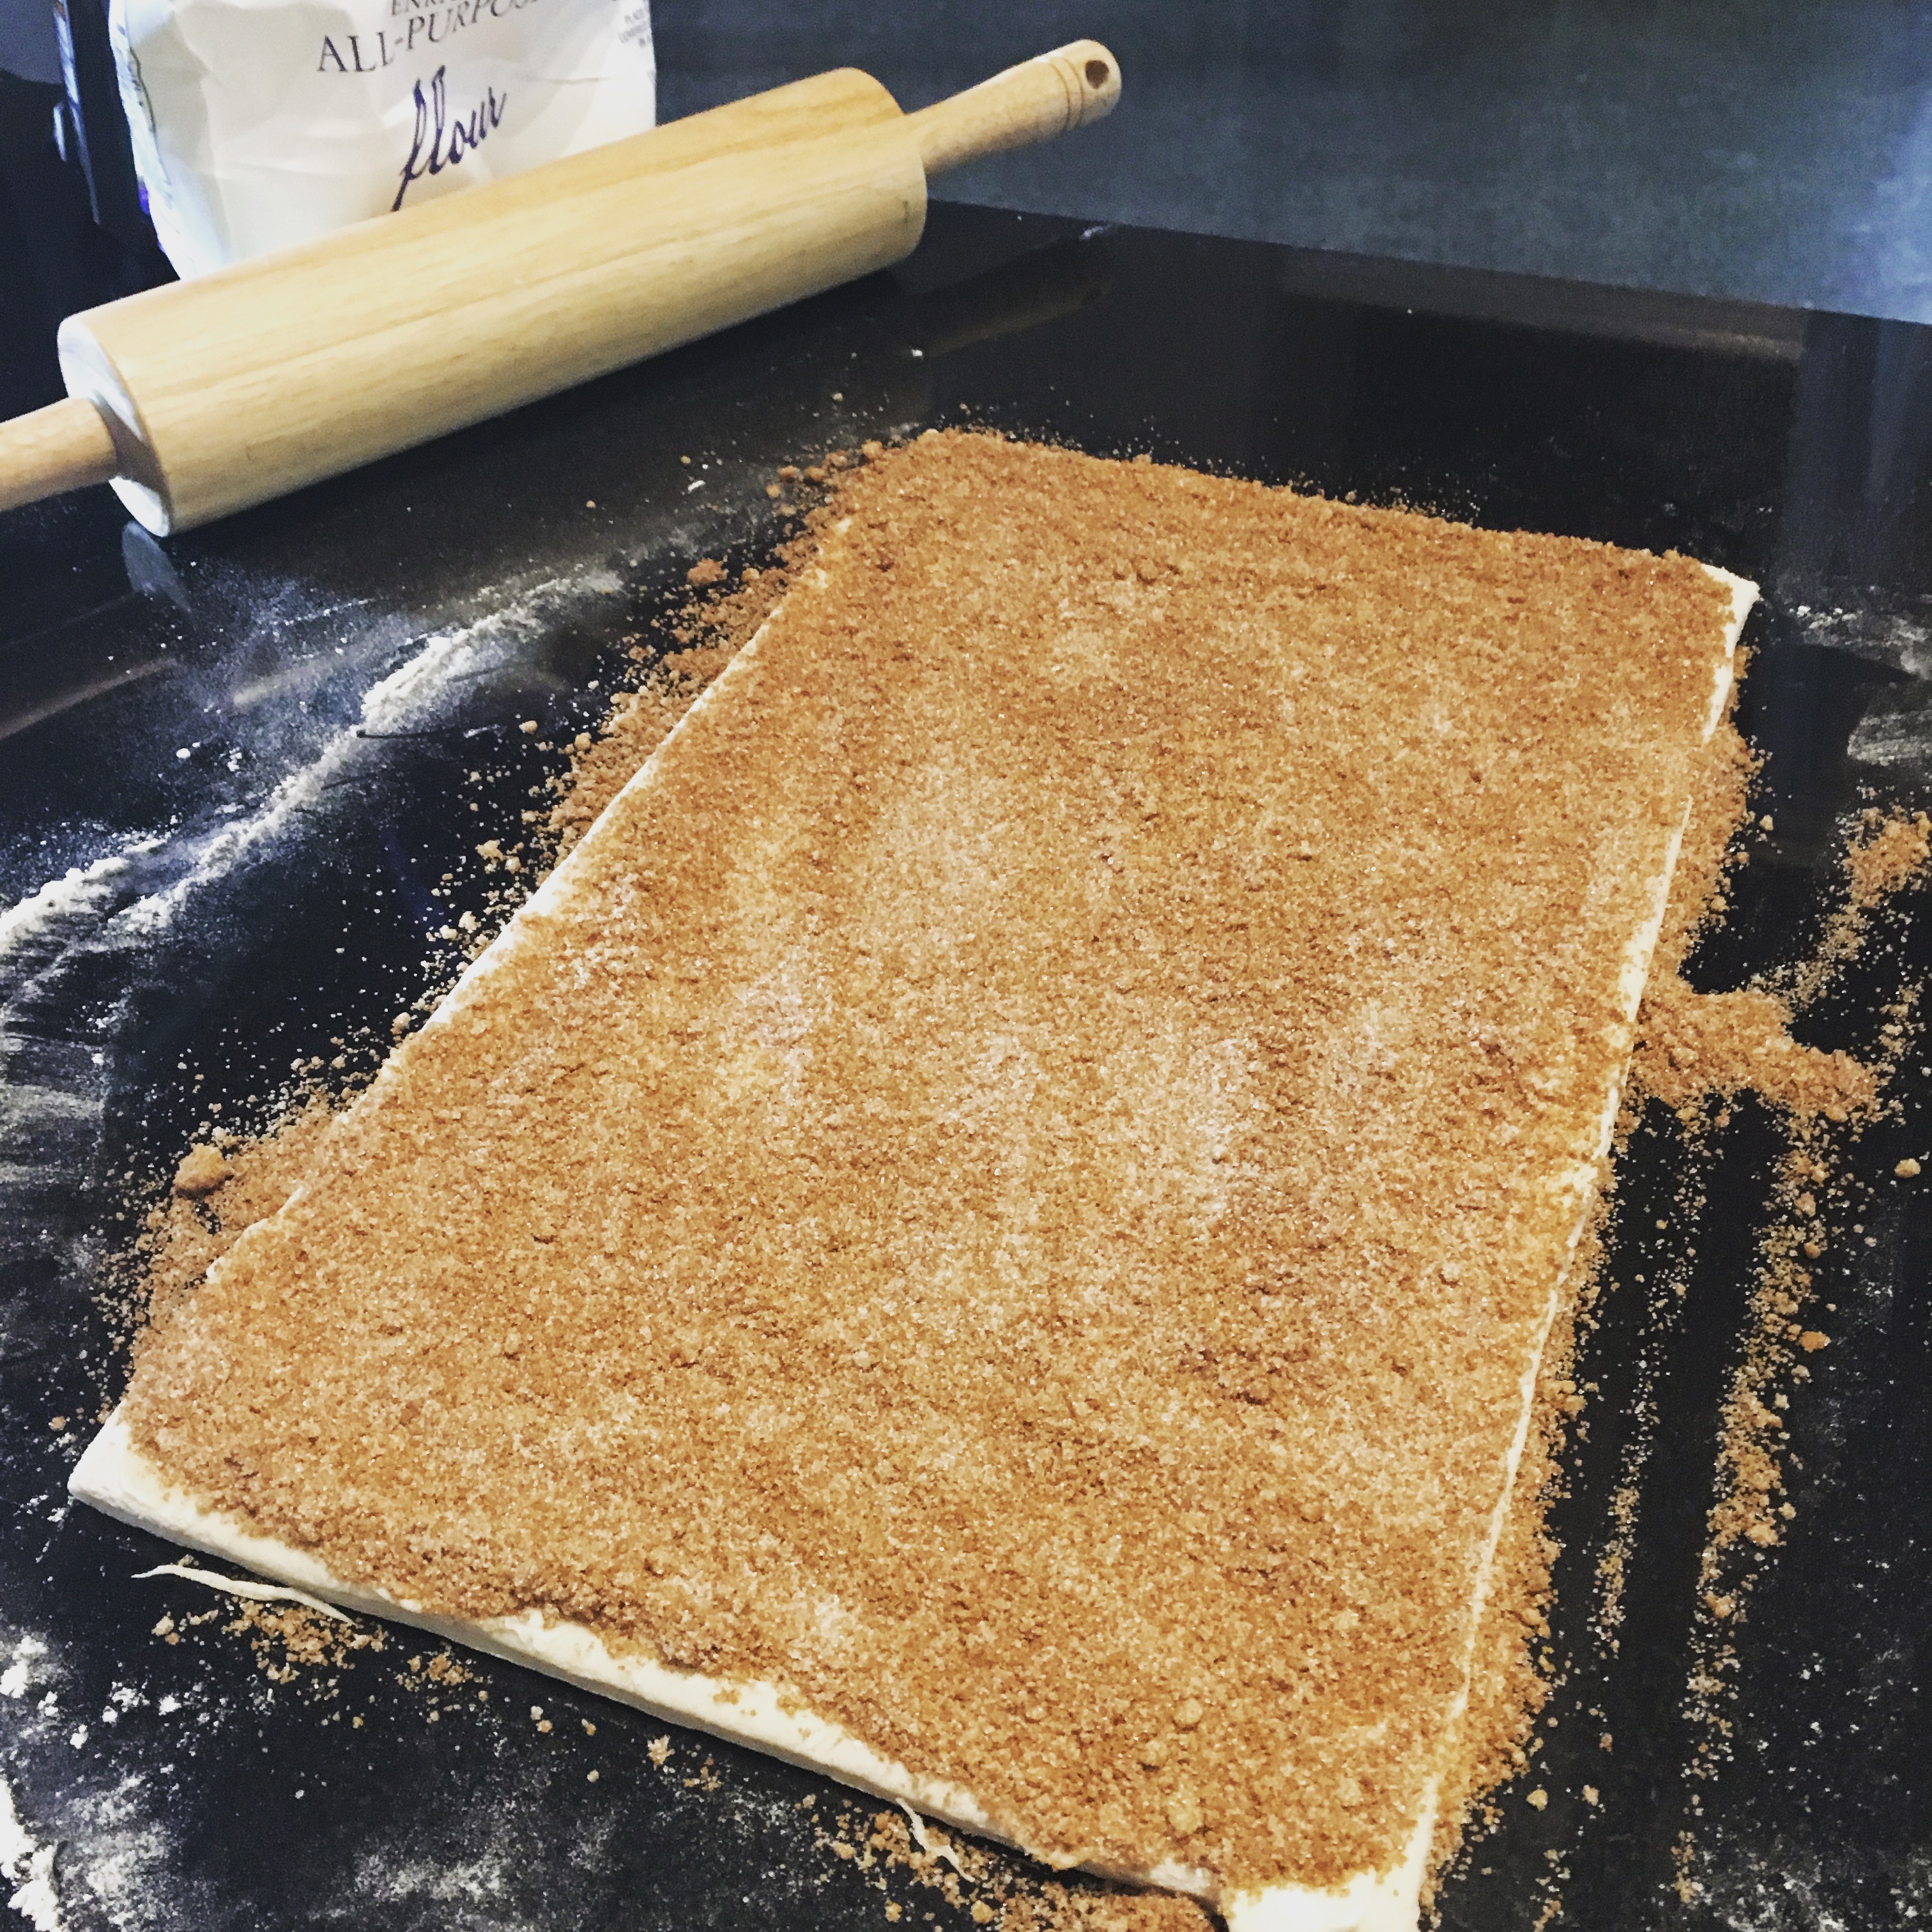
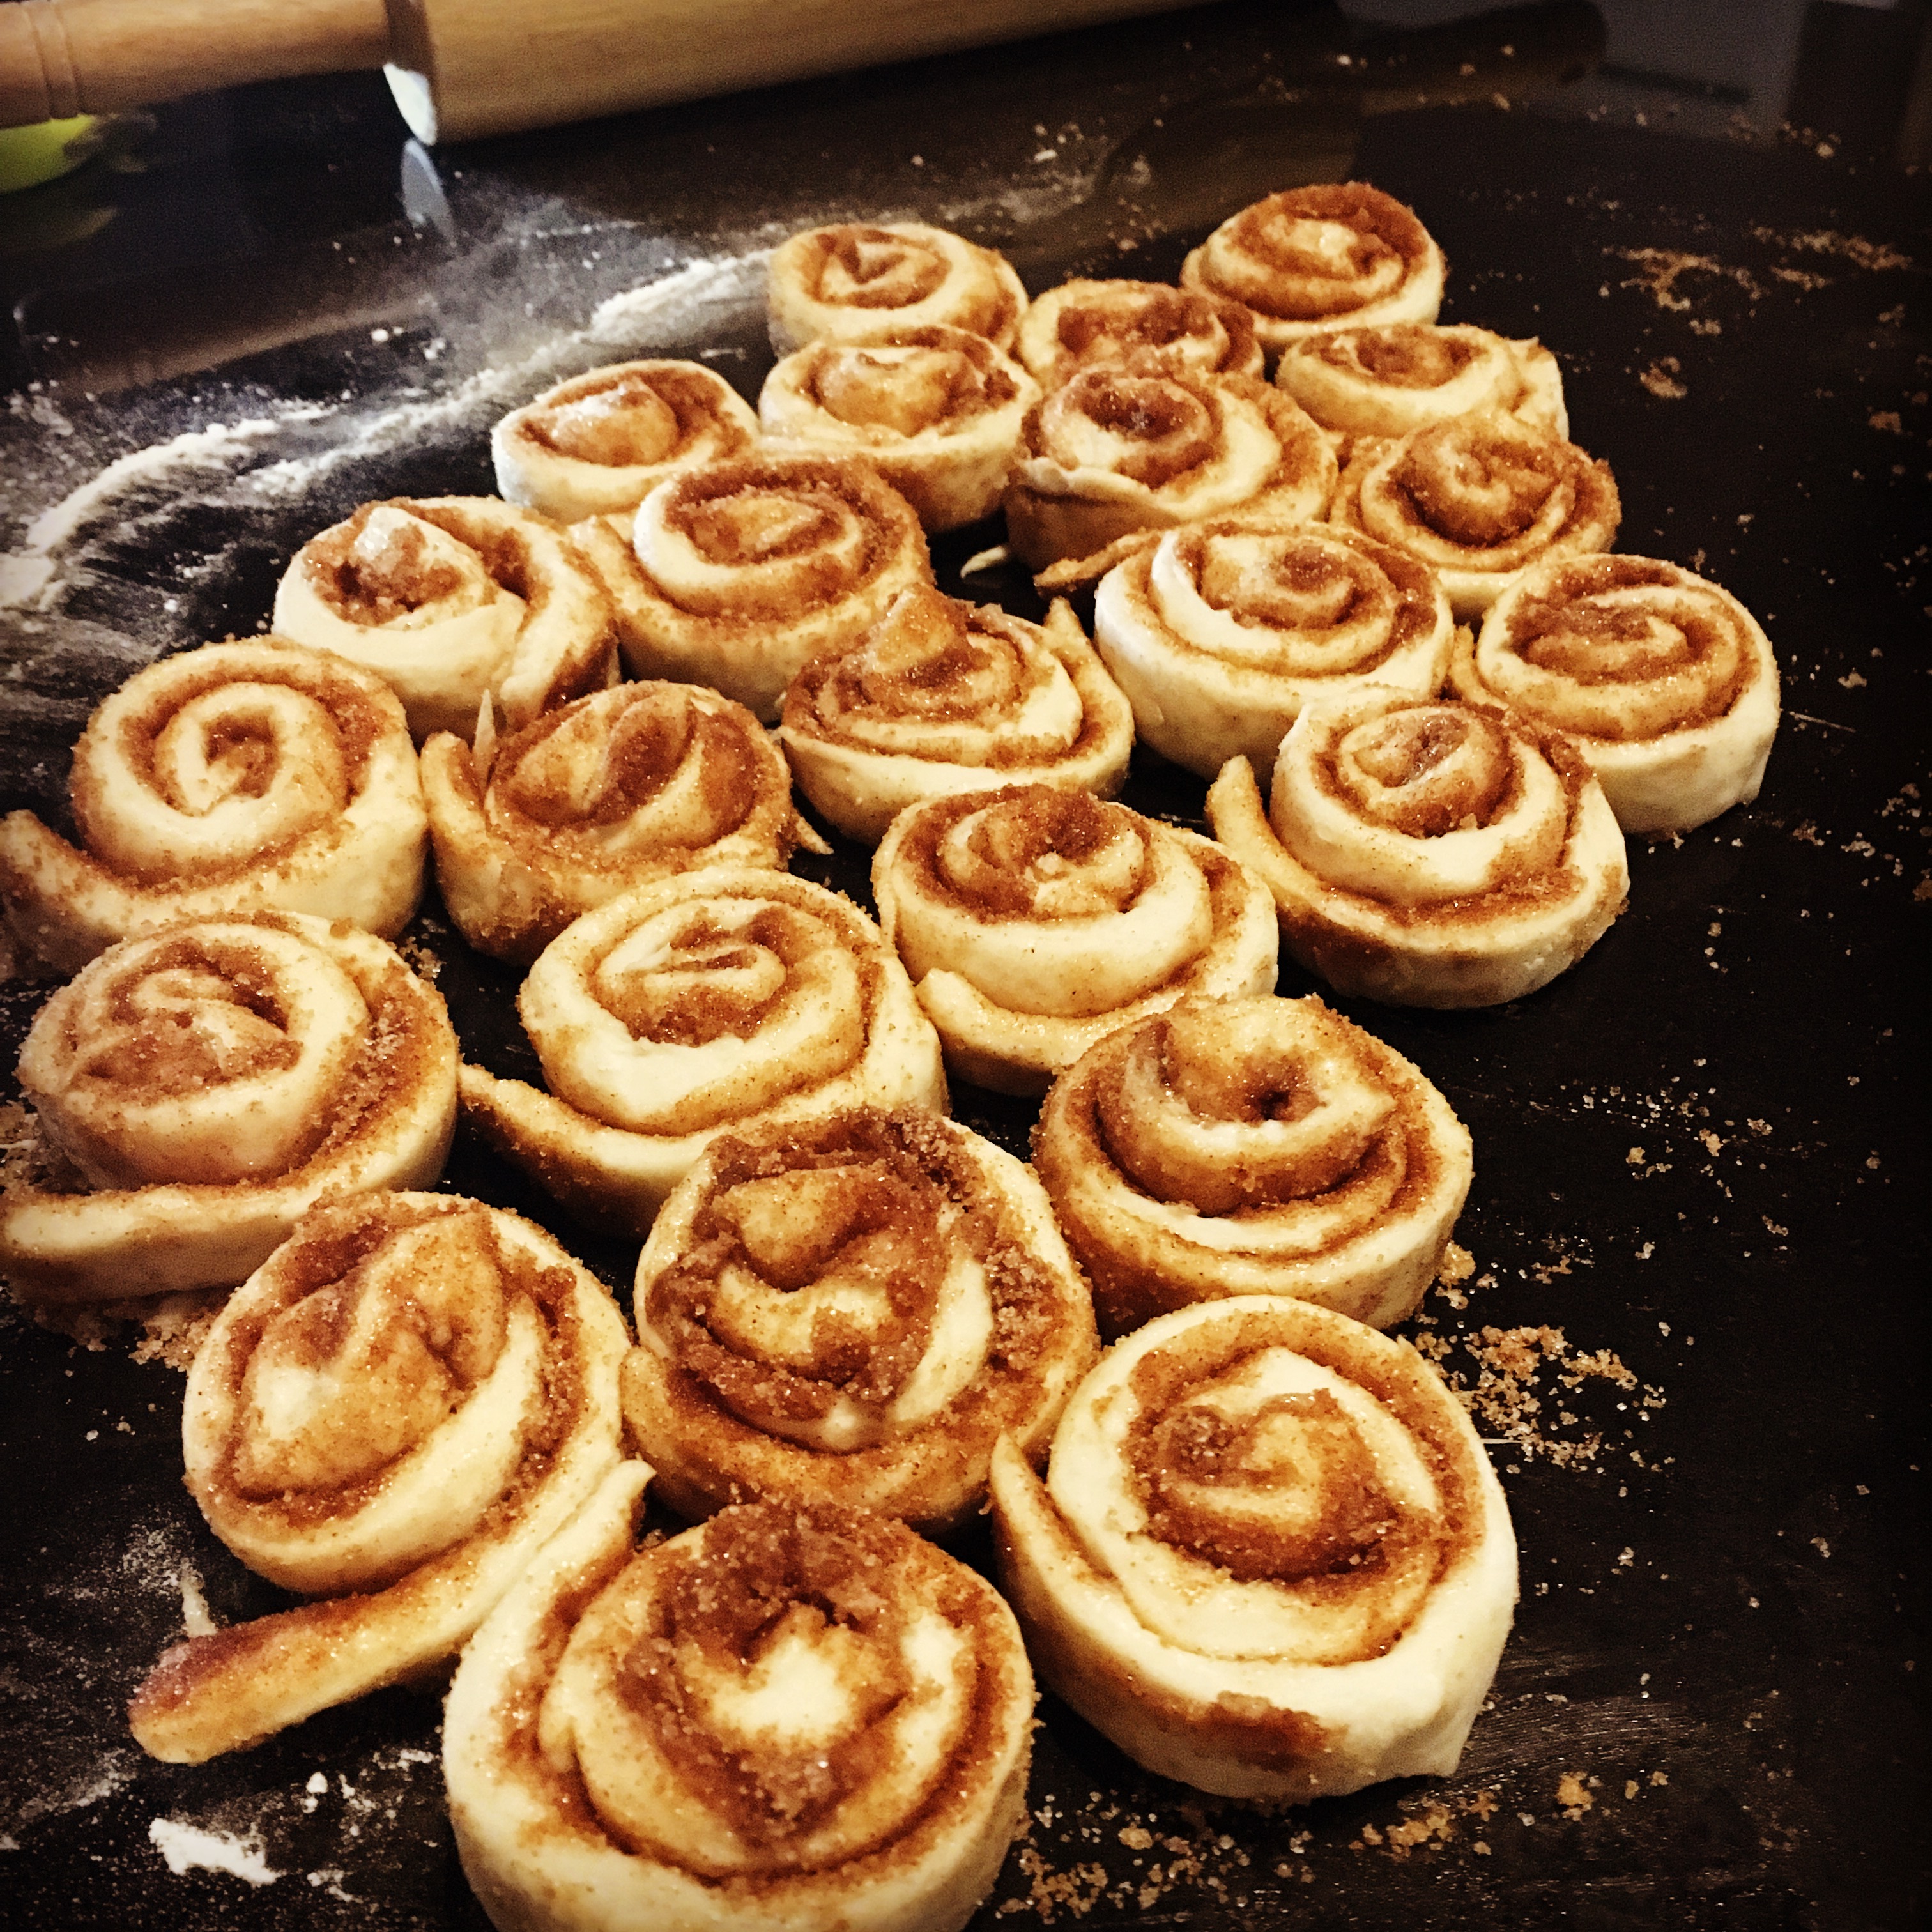
On top of the layer of cream, I poured the berry compote and spread it a bit with a cake spreader. (Mine ended up being somewhat thinner than it appeared in the original recipe, but it still tasted delicious, and made for a lovely garnish on the plate afterward.) Atop the filling, I added the second cake and began the decorating process. I used some of the leftover cream on about half of the cake, used leftover berries to make a design and dusted the whole thing with a bit of powdered sugar.

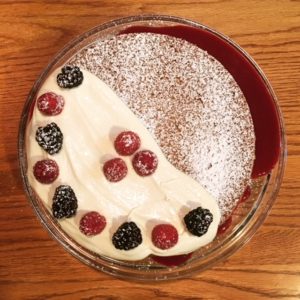
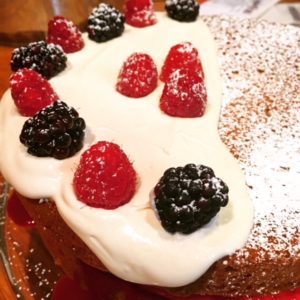
The finished cake may not have been as gorgeous as I had hoped, but it still looked impressive (in my opinion). More importantly, it tasted amazing. This is definitely a cake I’d like to try again.

Sponge Cake with Forest Berry Compote

  • Servings: 8
  • Time: 1 hour 15 minutes
  • Print

Ingredients

  • 1⅕ cup blackberries and raspberries
  • ⅕ cup sugar
  • 2 tbs water
  • 1 cup butter, softened and unsalted
  • 1⅓ cup granulated sugar
  • 4 eggs, large
  • 2 tsp vanilla bean paste or extract, divided
  • 1¾ cup flour
  • 2½ tsp baking powder
  • ½ tsp baking soda
  • ½ tsp salt
  • zest of 1 lemon
  • 1 cup mascarpone, chilled
  • ¼ cup powdered sugar
  • ¾ cup whipping cream

To make the forest berry compote

  1. In a small saucepan combine berries, sugar and water. Smash berries and cook over low heat for 15 minutes until the syrup coats a spoon.
  2. Remove from the heat and process in a food processor or a blender until smooth.
  3. Push through a fine sieve to get rid of the seeds and set aside.

To make the cake

  1. Preheat the oven to 350 degrees F, grease two 8" round cake pans and line with parchment paper, set aside.
  2. In the bowl of a stand mixer cream softened butter with sugar until light and fluffy.
  3. Start adding eggs one by one, whipping until well combined after each addition for about a minute.
  4. Add 1 tsp vanilla bean paste/extract and lemon zest.
  5. Combine sifted flour, baking soda and powder and salt in a separate bowl.
  6. Add dry ingredients to the wet ingredients, mix well, stopping the mixer and scraping sides and the bottom of the bowl.
  7. Divide the batter between two pans. Weigh them to get exactly the same cake in size.
  8. Bake in the oven for 30-35 minutes or until cake tester comes out clean.
  9. Remove from the oven and set on a wire rack to cool for 20 minutes, then remove from the pan and cool completely.

To make the mascarpone cream

  1. Whip chilled mascarpone with powdered sugar and 1 tsp vanilla bean paste/extract for 1-2 minutes until well combined.
  2. Then add whipping cream and whip for 2 more minutes until stiff.
  3. Cover and refrigerate until ready to use.

Assembling the cake

  1. Spread mascarpone cream on the bottom layer of the cake.
  2. Pour the berry compote on top and gently spread with a offset spatula.
  3. Top with another cake layer and dust with some powdered sugar for the traditional look. Optional: top a portion with leftover mascarpone cream and/or berries.

Slightly adapted from: Vikalinka

This post contains affiliate links. Full disclosure here.

Filed Under: book review, recipe Tagged With: baking, book of the month, fiction, fruit, magical realism

The Heart's Invisible Furies + Custard Slice

October 5, 2017 by Megan 4 Comments

Generally, I do enjoy most of what I read. Sometimes I don’t, but luckily, sometimes the opposite is true and I love a book so much that I can’t shut up about it. John Boyne’s The Heart’s Invisible Furies is one such book. Readers, my second 5-star book of the year is here, and I couldn’t be more excited to share it with you!

I first heard about this book on my new favorite podcast, All the Books. (Thank you, Liberty Hardy! You’re always full of excellent recommendations.) So, when I saw it in my August BOTM selections, I knew I had to select it. When it showed up in the mail, I was surprised at its heft - it’s nearly 600 pages - and set it aside for nearly enough, thinking I didn’t have time to get into a difficult, long book. I waited a couple of weeks, but when I finally picked it up, I was captivated in just the first few pages and by the end of the first chapter, I was hooked.

The novel follows Cyril Avery beginning when he is still an unborn child in his mother’s womb in a small town in 1940s Ireland. When she is cast out by a cruel priest, she finds herself in Dublin, where she must make it on her own. Her circumstances almost require her to put Cyril up for adoption, and he is taken by a hunchbacked Redemptionist nun to the home of Maude and Charles Avery, an eccentric couple who aren’t exactly cut out for parenthood. From there, Cyril’s life takes both heartwarming and heart-wrenching turns, bringing us to modern day Ireland in truly spectacular and unforgettable fashion.

This book may be 592 pages, but I couldn’t put it down. I finished it in a weekend and have been talking about it ever since. Furies is filled with complex and varied characters, all memorable in their own way. As entertaining as this novel was - it absolutely had it’s laugh out loud moments - I should probably mention that, like my last 5-star favorite, it tackles some sensitive topics and was hard to read in parts. But to me, that is the beauty of Boyne’s novel; he expertly captured all the nuances of humanity, from the mundanely everyday to unexpected tragedy in a captivating way.

Finding a recipe to pair with such a sweeping saga wasn’t as hard as I expected it to be. Several key scenes throughout take place in a parliamentary tea shop where “cream slice” seems to be a popular menu item. After doing some research, I found it’s also known as custard slice. I was able to find a recipe from RTE, or the Raidió Teilifís Éireann in Ireland, which is a real television station where Cyril finds himself working at one point in the novel.

The recipe has quite a lot of steps, but the ingredients list is small and it’s not really that complicated, so don’t let the long recipe below fool you. It’s totally doable.

To start, I set out my frozen puff pastry sheets to thaw while I made my pastry cream. I poured the milk into a saucepan, added a vanilla pod split down the middle and let it come to a boil. In the meantime, I combined the sugar, egg yolks and cornstarch with a mixer, beating for a few minutes until it became pale and light.

Once the milk began boiling, I removed it from the heat and slowly added it to the egg mixture, whisking all the while. I added it back to the saucepan, bringing it up to a slow boil over low heat, stirring continuously. After several minutes, it thickened, so I removed it from the heat and added it to a wide bowl to cool more quickly. I covered it with cling wrap and placed it in the fridge.  

Once the puff pastry dough was thawed (able to be unfolded), I used a sharp knife to cut it down to an 8x8 square. (I don’t think this is entirely necessary, if you have a 9x9 pan, which I found I did after the fact. I’ve explained further in the recipe notes below.) Then, on two parchment-lined baking sheets, I baked them for about 10 minutes each, until they were lightly golden.

After they cooled, I placed one pastry in the bottom of my pan, which was lined with foil. Per the directions, I made sure to leave extra foil hanging out of the pan so the completed custard slice could be removed more easily later; this is definitely a big help. Then, I smoothed the cooled pastry cream over the bottom layer of puff pastry and placed the prettier looking pastry sheet on top. The assembled dessert went back into the fridge to set while I made the topping.

I combined powdered sugar with a small amount of cold water to create a drizzle-able icing. I also melted some dark chocolate (you could also use milk chocolate if you prefer) in a small bowl in the microwave, until it was thin enough to drizzle with a spoon.

First, I drizzled the icing diagonally across the top of the pastry. Then, turning the pastry 90 degrees, I drizzled the melted chocolate to create a criss-cross pattern with the icing.

I covered the completed custard slice and put it back in the fridge to set until we were ready to give it a try. Later that evening, I cut it into 8 rectangular slices and served as our dessert. We found it to be sort of messy to eat, and I would recommend using a fork and a knife, but it certainly was tasty. If you decide to give it a go, I hope you enjoy!

Have you read John Boyne’s novel yet? What did you think?

Vanilla Custard Slice

  • Servings: 8
  • Time: 45 minutes
  • Print

Ingredients

  • 2 sheets frozen puff pastry
  • 13 fl oz whole milk
  • 1 vanilla pod, split down the middle or 1 tsp vanilla extract
  • 6 Tablespoons (3 ounces) granulated sugar
  • 3 egg yolks
  • 3 Tablespoons cornstarch
  • pinch of salt
  • 2 Tablespoons, or 1 ounce, or unsalted butter, cut into small cubes
  • ¼ cup powdered sugar
  • ¼ cup melting chocolate or chocolate chips

Directions

  1. Make the crème pâtissière to begin: Pour the milk into a saucepan and add the split vanilla pod, if using. (If using the vanilla extract, add it in with the butter at the end.) Bring the milk mixture to the boil, then remove from the heat.
  2. Whisk the sugar, egg yolks and cornstarch together in a large bowl for about 2–3 minutes using a hand-held electric mixer until pale and light.
  3. Pour the hot milk onto the egg mixture, whisking continuously, and then return the mixture to the saucepan. Cook the mixture over a low heat, stirring continuously, until the mixture becomes thick. It should just come to a boil. If it boils unevenly or too quickly, it may become lumpy, in which case use a whisk to mix until smooth again.
  4. Remove the custard from the heat and pour into a bowl (push the mixture through a sieve if there are any lumps). Add the pinch of salt and the butter (and vanilla extract if using) and stir until melted and thoroughly combined.
  5. Leave to cool, cover with cling wrap and chill before using.
  6. Preheat the oven to 425 degrees F. Line two baking trays with parchment paper.
  7. If using frozen puff pastry sheets, these should already be approximately 9x9. If you have a 9x9 pan available, you can use as-is. If you only have (or prefer to use) an 8x8 pan, cut the puff pastry sheets so they will fit the smaller pan. Cut approximately 1 inch off two of the sides, forming an 8x8 square.
  8. Place each pastry sheet onto the lined baking trays, prick each piece a few times with a fork and chill for 10-15 minutes. Then, bake the pastry sheets for 10-15 minutes or until golden brown and crisp. Set aside to cool.
  9. While the pastry bakes, line your baking pan with foil, allowing plenty of extra foil at the sides to allow you to lift out the assembled slices. If you don't have a square tin, it's not the end of the world, just use the foil to make a base and sides.
  10. Place one pastry sheet in the bottom of the lined tin (reserve the prettiest piece for the top). Spread the crème pâtissière evenly onto the pastry in the baking tray before placing the other piece of pastry on top. Refrigerate while making the icing.
  11. For the icing, sift the icing sugar into a bowl. Stir in 3-4 teaspoons cold water – just enough to give you a thick, drizzling consistency – and set aside.
  12. Place the chocolate in a bowl sitting over a saucepan with a few centimetres of water. Bring the water up to the boil, then take off the heat and allow the chocolate to melt slowly. (Another option would be to heat in the microwave at defrost or 30% power in 30 minute increments, stirring until it becomes melted enough to drizzle. If using melting chocolate, follow directions on the bag.)
  13. Take the custard slice from the fridge to decorate. First, using a spoon, drizzle the icing diagonally across the pastry. Turn the pan 90-degrees and, using a different spoon, drizzle the chocolate across the pastry forming lines that criss-cross the icing lines. Repeat with icing and chocolate as desired/until you run out.
  14. Place the slice back into the fridge to set. Later, cut the finished custard slice into 8 pieces. Using the foil, carefully lift the portioned vanilla slices out of the tray and serve.

Adapted from: Rachel Allen, via RTE

Notes: This recipe was adapted for the US from a recipe created in Ireland. Measurements were converted when necessary to accommodate American cooks.


This post contains affiliate links. Full disclosure here.

Filed Under: book review, recipe Tagged With: baking, book of the month, contemporary, dessert, drama, historical fiction, tough topics

Goodbye, Vitamin + The Most Dangerous Chocolate Cake in the World

September 5, 2017 by Megan 2 Comments

I finally got around to reading my July Book of the Month selection, a debut novel by Rachel Khong titled Goodbye, Vitamin, and it was such a quick read that it felt like I barely had it open before I was finished. It is both funny and touching, following a year in the life of 30-year-old Ruth as she quits her job and moves back home to spend time with her father who was recently diagnosed with Alzheimer’s.

Khong’s writing style is unassuming, and the results are comical and endearing. Ruth’s struggle isn’t one that I personally relate to, but it felt truthful and hopeful at the same time. When she arrives home just after Christmas, Ruth unhappily discovers that her mom has become afraid of cooking at home, convinced that her husband’s memory loss was caused by not only the packaged ingredients but the pots and pans themselves. After taking some time to get her bearings (and get over the heartbreak of her recently called-off engagement), Ruth throws herself into caretaking and doing whatever she can to help improve her father’s memory.

At one point, Ruth attempts to make a jellyfish-centric meal to help stave off further dementia, and while it’s not a success, it doesn’t stop her culinary adventures. In an email forward, she stumbles across THE MOST DANGEROUS CHOCOLATE CAKE IN THE WORLD, so-named because “from the moment you decide to make it until you sit down to eat is above 5 minutes!” Armed with a mug and a microwave, she makes it one day and sends a picture of the results to her forward-happy friend. I knew I wanted to make it too.

I can’t be sure, but I may have found the exact recipe Khong references in the novel. Both the one in Goodbye, Vitamin and the one I found online from the lovely Ree Drummond require 3 Tablespoons of chocolate chips, and I knew I was on the right track. Though I suppose it’s entirely possible all mug cakes have the same requirement, I was still pretty excited about it.

I actually brought all of the ingredients (and mugs) over to my sister’s house last weekend to try it out. We were belatedly celebrating her birthday together, and I thought chocolate cake was the perfect addition to our already fun-filled Sister Day.

I used a separate bowl to combine all the ingredients before scraping them into each mug, but the recipe calls for them to go straight into the mug, so do whatever you think works best. I wanted to make sure everything was well-combined (no lumps), but on the other hand, I had slightly more cleanup.

First, I mixed my dry ingredients - 3 Tablespoons each of all-purpose flour and sugar, 2 Tablespoons of cocoa powder, ¼ teaspoon of baking powder and a pinch of salt - using a mini whisk. Then, I added the wet ingredients - 3 Tablespoons each of milk and vegetable oil followed by a splash of vanilla. I made sure those were well-combined before adding 3 Tablespoons of chocolate chips.

I poured the mixture into one of the waiting mugs and put it in the microwave for 90 seconds. As Ruth remarked in the novel, “they look[ed] like beautiful souffles fresh out of the microwave.” I made 3 all together, one for each of us (my brother-in-law included), and after snapping some pictures while they cooled for a few minutes, we dug in.

They were delicious, and yes, absolutely dangerous. We finished them in a hurry!

I’m not normally a huge chocolate cake fan, but this wasn’t too decadent nor too much. It would go great with a scoop of ice cream, and it’s super easy to make for just the 2 of us - no tempting leftovers! Also, if you’re craving some chocolate in the summer, there’s no need to heat up the whole house with the oven.

The Most Dangerous Chocolate Cake in the World

  • Servings: 1
  • Time: 5 minutes
  • Print

Ingredients

  • 3 Tablespoons all-purpose flour
  • 3 Tablespoons sugar
  • 2 Tablespoons cocoa powder
  • ¼ teaspoon baking powder
  • Pinch of salt
  • 3 Tablespoons milk
  • 3 Tablespoons vegetable oil
  • Splash of vanilla extract
  • 3 Tablespoons chocolate chips

Directions

  1. Put the flour, sugar, cocoa powder, baking powder and salt in a 12-ounce microwave-safe ceramic mug. Blend thoroughly with a fork or small whisk. Add the milk, vegetable oil and vanilla and blend until smooth. Stir in the chocolate chips.
  2. Microwave on high for 90 seconds. Do not overcook or the cake will be dry. Let cool for 2 to 3 minutes before eating.

From: Ree Drummond, The Pioneer Woman

If you like your cake a little less rich, feel free to reduce the chocolate chips to 2 Tablespoons instead.


This post contains affiliate links. Full disclosure here.

Filed Under: book review, recipe Tagged With: book of the month, contemporary, dessert, fiction, quick read

The Sisters Chase + Powdered Donuts

July 15, 2017 by Megan 2 Comments

I’m a sucker for stories about sisters. I love the relationship between Elizabeth and Jane in Pride and Prejudice. Little Women is, of course, sister-centric and wonderful. I’ve never read the book, but whenever I watch In Her Shoes, I cry. So, it will come as no surprise that for my June BOTM I chose The Sisters Chase by Sarah Healy. I probably would’ve chosen it on the name alone, but it had the added benefit of coming highly recommended in my online book group as well.

Mary and Hannah Chase grow up in a small beach motel owned by their mother, Diane. When a car accident leaves the sisters on their own, eighteen-year-old Mary becomes Hannah’s guardian and takes it upon herself to do anything in her power to protect her. While Mary is at ease living a life in flux as they travel the country, Hannah aches for a real home where she can attend school and make friends. All Mary wants is for Hannah to be happy, but giving in may mean exposing a long-kept secret and risking an unbearable loss.

As an older sister, I definitely related to Mary and her willingness to do anything for her little sister, even if it seemed to be to her own detriment. Healy’s pacing and familiarity with the characters - they felt so real - resulted in a well-crafted story that wasn’t at all what I predicted. When I finished, it had me wanting to go back for a re-read.

Instead, I made some powdered donuts, like those the sisters’ mother piled high on a plate each morning for the motel’s guests. I wanted to bake them, since it’s less messy and somewhat healthier, so it gave me the perfect opportunity to use the donut pans I’ve had since two Christmases ago (thanks to my new sister-in-law, Kelly!).

The last time I made donuts was in middle school home ec class, and I remember being freaked out by splattering oil and the cleanup being such a process. This was MUCH easier. So much so that I may start making donuts more often.

First, I mixed the dry ingredients together - flour, sugar, baking powder and salt. In a separate bowl, a combined the egg, milk, vanilla extract and melted butter. I added these to the dry ingredients and mixed together.

Then, using a spoon, I added the batter into my greased donut pans, filling them about halfway.

I popped them into a 425-degree F oven and let them bake for 12 minutes. I let them cool in the pan for about 10 minutes.

Then, I dropped them into a paper grocery bag two at a time with some powdered sugar and shook and shook until they were well coated. Honestly, this happened really quickly (a few shakes at most). It was the most fun part of donut-making by far.

Everyone at work loved them, and I can’t wait to try new and different flavors. I always love when a book leads me a recipe I can use over and over again 🙂 Hope you enjoy!

Baked Powdered Sugar Donuts

  • Servings: 10
  • Time: 25 minutes
  • Print

Ingredients

  • 1¼ cups cake flour (see notes)
  • ¾ cup granulated sugar
  • 1¼ tsp baking powder
  • ¼ tsp salt
  • 1 large egg
  • ¼ cup milk
  • 1 tsp vanilla extract
  • 3 Tbsp unsalted butter, melted
  • 3 Tbsp heavy cream
  • 1 cup powdered sugar, for coating baked doughnuts

Directions

  1. Preheat oven to 425°F. Lightly grease doughnut pan; set aside.
  2. In a medium bowl, add all of the dry ingredients (cake flour, granulated sugar, baking powder and salt). Stir until well mixed.
  3. In a separate bowl, whisk together the egg, milk, vanilla extract, melted butter and heavy cream.
  4. Add the liquid ingredients to the dry ingredients; stir until just mixed.
  5. Spoon or pipe the batter into the greased doughnut pan. (Tip: Fill each doughnut circle about half full of batter.)
  6. Bake at 425°F for 12-14 minutes, or until doughnuts begin to turn golden brown on the edges.
  7. Let doughnuts cool in the pan.
  8. Place powdered sugar in paper bag. Once doughnuts have cooled, shake doughnuts (one at a time) in the bag with the powdered sugar until well coated. Tap off any excess powdered sugar. Repeat with remaining doughnuts. Serve immediately. (Note: If you plan on serving these doughnuts later, store them uncoated in an airtight container. Shake them in powdered sugar just before serving.)

From: Spiced Blog

If you don’t have cake flour, which I didn’t, and don’t want to buy some just for this recipe, it’s easy to make your own with all-purpose flour. For each cup of flour you need, take 1 cup of all-purpose flour, remove 2 TBSP and replace with 2 TBSP of cornstarch. Mix well to ensure it’s combined. I used 1½ cups flour with 3 TBSP for this recipe (and discarded the remaining ¼ cup).


This post contains affiliate links. Full disclosure here.

Filed Under: book review, recipe Tagged With: baking, book of the month, breakfast, contemporary, fiction, quick read

Lillian Boxfish Takes a Walk + Oreo Cheesecake

January 26, 2017 by Megan 1 Comment

When my Book of the Month email came a few weeks ago with the January selections, Lillian Boxfish Takes a Walk immediately caught my eye because the description said it was “the perfect book to start a new year of reading and of living.” When I read further and saw that the novel was about the highest paid woman in advertising, my choice was clear. (For those of you who don’t know me personally, I work in advertising too.) I made my selection and anxiously awaited my BOTM delivery.

51vzovzchyl-_sx331_bo1204203200_

Kathleen Rooney takes us back to New Year’s Eve in 1984. Her novel centers around the formidable yet friendly 85-year-old Lillian Boxfish (based on the real-life copywriter Margaret Fishback who became the highest paid female in advertising in the 1930s) as she takes a walk around New York City before ringing in the new year.

An avid walker, Lillian had planned to celebrate the holiday the “same as always,” with a visit to her neighborhood Italian restaurant for veal rollatini and green noodles and then “early to bed with a book.” Her plans are spoiled, however, by her uncharacteristic and absent-minded consumption of half a package of Oreo cookies.

After only a glass of Chianti at Grimaldi’s, Lillian decides to take a walk to the legendary Delmonico’s steakhouse downtown to not only work up an appetite but to correct a mistake from many years ago. On her walk, she reminisces about her career in writing - both advertisements and poetry, her relationships and her decades of experiences in Manhattan. She has to confront some of the grittier aspects of the city but remains undeterred throughout her ambling journey.

In honor of the city Lillian so wholeheartedly loves and the package of Oreos she detests, I decided to pair this charming novel with an Oreo cheesecake. This recipe from Southern Bite claims to be the Easiest Oreo Cheesecake, which I think would suit Lillian just fine, and I have to say, it was quite less complicated than other cheesecakes I’ve made in the past.

First, I made sure my cream cheese was softened by leaving it at room temperature for a while. I find it goes a little faster if unpackaged, so I put all four blocks into my bowl and left on the countertop to soften.

img_2493

I preheated my oven to 350 degrees F, greased my springform pan, and began crushing Oreos to make my crust.

img_2494

I combined the now-softened cream cheese, vanilla and sugar with my mixer, before adding the eggs. Then I added some slightly less crushed Oreos (about a dozen) to the batter, folding them in with a rubber spatula. I poured the mixture into my pan, tapped it lightly and topped with the remaining chunks of Oreos (about six). Here is what it looked like before baking:

img_2495

And after 50 minutes and plenty of cooling time, it looked like this:

This cheesecake is meant to be easy, not perfect, as Stacey explains. Yes, it’s a little brown on the edges and, yes, you may find a few cracks on top, but it was far less fussy than other cheesecakes, and honestly, it tasted just as delicious. No need to stress, just enjoy! And if you feel like you need to work it off afterwards, just take a walk like Lillian. 🙂

Easiest Oreo Cheesecake

  • Servings: 8-12 slices
  • Time: 1 hour
  • Print


From: Southern Bite

Ingredients

  • 1 (14.3-ounce) package Oreos, divided
  • 3 tablespoons butter, melted
  • 4 (8-ounce) packages cream cheese, softened
  • 1¼ cup sugar
  • 2 teaspoons vanilla extract
  • 4 eggs
  • whipped cream and chocolate sauce for topping, optional

Directions

  1. Preheat the oven to 350°F. Lightly spray a 9-inch springform pan with nonstick cooking spray.
  2. Place half of the Oreos (about 18) in a gallon size zip-top bag. Crush the cookies using a rolling pin. Pour the crushed Oreos into a small bowl and mix with the melted butter. Pour the mixture evenly into the bottom of the springform pan and press firmly to create a crust.
  3. In the bowl of a stand mixer (or in a bowl using a hand mixer), combine the softened cream cheese, sugar and vanilla until well-combined. Add the eggs and mix well. Roughly break up the remaining cookies and add them to the mixture, reserving some to sprinkle on top. Gently fold the cookies in and pour the batter onto the crust. Lightly tap the pan on the counter to get out any air bubbles. Sprinkle with the remaining Oreos.
  4. Bake for 40 to 50 minutes, or until the center in almost completely set. Cool and then refrigerate overnight to allow the cheesecake to firm up before serving (or at least 3 hours for those impatient folks). Drizzle with chocolate suace and add a dollop of whipped cream, if desired.

This post contains affiliate links. Full disclosure here.

Filed Under: book review, recipe Tagged With: book of the month, dessert, fiction, humor

Sleeping Giants + Mini Cinnamon Rolls

August 15, 2016 by Megan 3 Comments

Sleeping Giants was the first book I received as part of Book of the Month. I joined the club towards the end of June, primarily because I like books but also because I love getting mail and they were doing a summer promotion, which meant discounted books plus sunglasses plus a must-have tote bag. (Score!)

Anyway, I picked Sleeping Giants by Sylvain Neuvel, which was selected as an option for July by Liberty Hardy of Book Riot. It was supposed to be The Martian (which I loved) meets World War Z, and Liberty’s description touted “action, science, adventure, romance, and intrigue,” so naturally I was excited to receive my copy.

FullSizeRender

It was as page-turning as promised. Jumping from interview to interview, Neuvel weaves together a story of very dedicated (if not flawed) characters as they uncover and retrieve giant robot body parts across the globe. Together, the top secret team must decipher an unknown language and superior technology to determine how it works.

With every breakthrough, a new obstacle arises and questions remain. What is the robot’s purpose? Who left it here (and when)? Why are we finding it now? What should be done with it?

Neuvel’s interview style leaves very little room for much description beyond the immediate action of the story, and so food is barely mentioned in Sleeping Giants. In one instance, however, it makes an appearance; surprisingly, cinnamon rolls show up in a pivotal scene, with the potential to change one of the character’s outcomes.

While BOTM opted for cocktails when looking for a perfect food pairing - and to be fair, alcohol plays a more prominent role throughout the story - I went with the cinnamon rolls. Le Creme de la Crumb’s Mini Cinnamon Rolls may not seem like an obvious choice, but I disagree. Eating mini versions of regular food always has a way of making me feel just the littlest bit like a giant. (And now you can too!)

The best part about this recipe is that it's easy and quick, especially for cinnamon rolls. (Most take at least twice as long in my experience.)

To get started, I let the yeast do it's thing while I assembled the rest of my ingredients. After it was bubbling (a little over 5 minutes), I began incorporating the flour and salt, wishing I had a standing mixer but thankful at least for my new (and improved) hand mixer. Those dough hooks worked their magic and I ended up with a lovely little ball of dough.

dough

It hung out for about 10 more minutes, while I greased my muffin pans and whisked up the cinnamon mixture. Once I rolled it out, there was more than enough dough, which I dutifully cut into a 9 x 15 rectangle and covered in butter and cinnamon-sugar goodness.

cinnamon roll topping

Then came some rolling and cutting (and a little re-rolling) until I formed these 24 little beauties.

unbaked cinnamon rolls

They baked. I whipped up the frosting. When the oven timer went off, I pulled a few out of the pans right away and drizzled on the frosting. I was hungry, and these looked delicious!

iced cinnamon rolls

Mini Cinnamon Rolls
Print Recipe

Mini Cinnamon Rolls

Total Time1 hour hr
Course: Breakfast
Cuisine: American
Servings: 24 mini rolls

Ingredients

Dough

  • 1⅓ cups warm water
  • 1 TBS active dry yeast
  • 2 TBS honey
  • 3½ cups flour
  • 1 tsp salt

Filling

  • 4 TBS butter completely softened
  • ⅓ cup sugar
  • ⅓ cup brown sugar
  • 1 TBS cinnamon

Frosting

  • 2 TBS butter softened
  • 2 ounces cream cheese softened
  • 1 tsp vanilla extract
  • 3 cups powdered sugar
  • milk

Instructions

  • Preheat oven to 375 and lightly grease a muffin pan. Add water, yeast, and honey to the bowl of a stand mixer fitting with a dough hook and stir to combine. Allow to rest for 5 minutes (mixture will rise and foam).
  • Add flour and salt to bowl. Turn the mixer on low and allow to mix until ingredients come together, then increase mixing speed to medium-low for 5 minutes. Remove dough from bowl and allow to rise for 10 minutes on a lightly floured surface.
  • While dough is rising, prepare the filling by whisking together sugars in a bowl.
  • Use a floured rolling pin to roll dough into a 9x15 inch rectangle. Use a pizza cutter to trim off the sides if it isn't perfectly rectangular. Spread softened butter over the surface of the dough. Sprinkle cinnamon-sugar mixture over the butter.
  • Tightly roll one 15-inch side (the long side) of the dough toward the other 15-inch side to create a long log. Pinch the seam so it closes off the log. Use a very sharp knife or a pizza cutter to cut the ends off and then to cut the log into 24 equal parts. Place each cinnamon roll in the greased muffin tins. Bake 15-20 minutes until golden brown.
  • While cinnamon rolls are baking, prepare the frosting. Cream together butter and cream cheese. Mix in the vanilla. Gradually add powdered sugar and mix until combined. Add milk 1 tablespoon at a time [I ended up using 6 tablespoons] until frosting reaches a spreadable consistency. When cinnamon rolls are finished baking, drizzle or spread frosting over rolls and serve.

Notes

From: Creme de la Crumb [Annotations from me]
This recipe made a considerable amount of frosting - at least double the amount you need to cover the cinnamon rolls. I would recommend cutting this portion of the recipe in half, or planning something else delicious to use it for!

___________

Sleeping Giants is the first novel in a series called Themis Files, and even though Neuvel does a good job of wrapping it up so you don’t have to read further if you don’t want to, his unexpected prologue left me wanting more. (The follow-up won’t release until 2017.)

This post contains affiliate links. Full disclosure here.

Filed Under: book review, recipe Tagged With: baking, book of the month, breakfast, brunch, fiction, science fiction

  • « Go to Previous Page
  • Go to page 1
  • Go to page 2

Primary Sidebar

About

The Hungry Bookworm brings together literature and food. Megan has an insatiable appetite for both.

As C.S. Lewis said, “Eating and reading are two pleasures that combine admirably.” Enjoy!

  • Bloglovin
  • Facebook
  • Instagram
  • Pinterest

Subscribe

Don't miss out on bookish content, exclusive giveaways, and of course, book club-friendly recipes. Get notified of new posts via email.

Join 2879 subscribers.

Search for Ingredients, Recipes, or Books

Recent Posts

  • Subscriber Box Review: Literati Book Club - Roxane Gay's Audacious Book Club
  • Arsenic and Adobo + Ensaymada
  • Review of The Kindred Spirits Supper Club
  • Kids Edition: Sometimes I Like to Curl Up in a Ball + "Dirt" Pudding Cups
  • The Midnight Library + Broccoli and Ricotta Toast

Goodreads

Tags

5 ingredients or less appetizer baking book club book list book of the month books about food bread breakfast brunch chicken contemporary cookies cultural dessert dinner dinner party dystopia easy prep favorites fiction fruit historical fiction holiday ice cream linkup lunch meat memoir mini review nonfiction pasta quick read reading challenge science fiction seafood show us your books side dish snack soup TBR list thriller top ten tuesday vegetarian veggies

Archives

Other Great Book Blogs

Literary Quicksand
Never Enough Novels
Death by Tsundoku
Professional Reader 25 Book Reviews
Privacy & Cookies: This site uses cookies. By continuing to use this website, you agree to their use.
To find out more, including how to control cookies, see here: Cookie Policy

Footer Widget Header

Megan’s Instagram

Copyright © 2025 · Hungry Bookworm