• Skip to primary navigation
  • Skip to main content
  • Skip to primary sidebar
  • Home
  • Reviews
    • Book Index
    • Fiction
    • Non-Fiction
    • Top Ten Tuesdays
The Hungry Bookworm

The Hungry Bookworm

reading + eating

  • Recipes
    • Drinks
    • Snacks, Sides & Apps
    • Main Dishes
    • Desserts
    • 5 Ingredients or Less
  • About
    • Meet Megan
    • How I Rate
    • Review Policy
    • Contact

fiction

The Royal We + Tea Sandwiches

June 24, 2017 by Megan 2 Comments

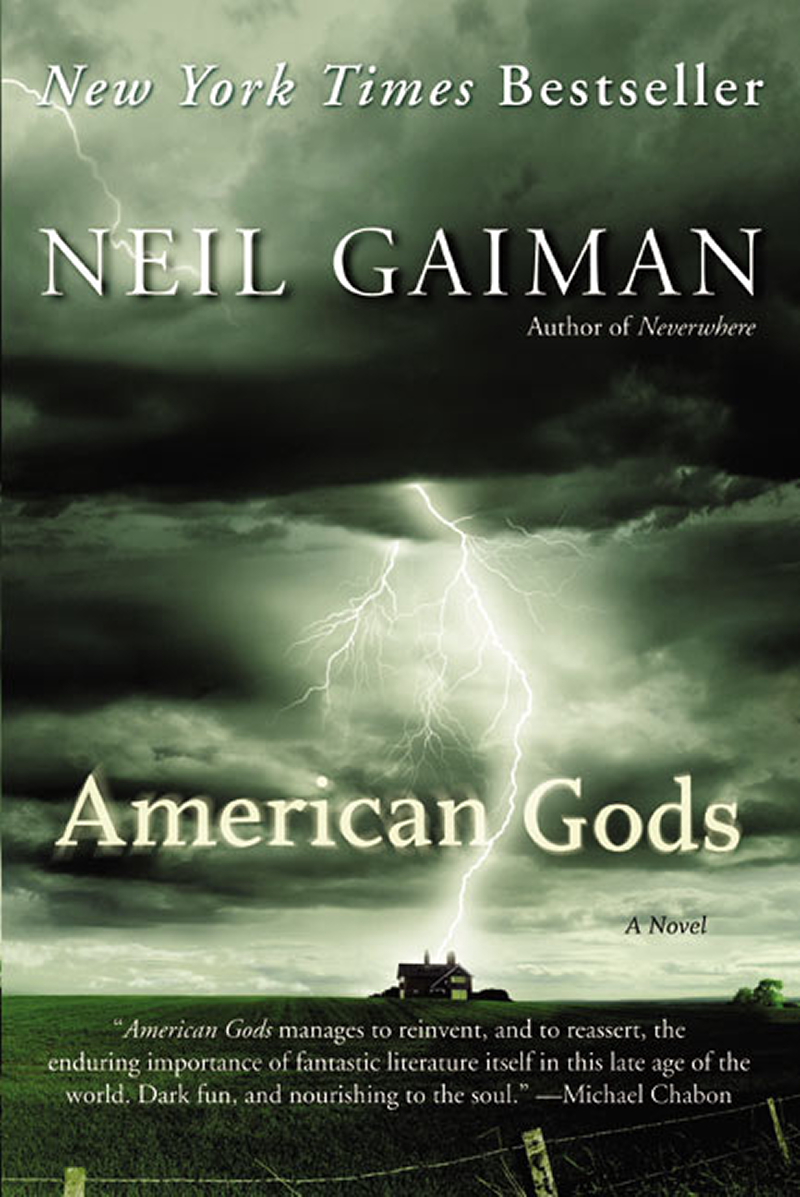
Happy Summer, everyone! It’s been awhile since I’ve read a rom-com-type book, and I forgot what a breath of fresh air they can be. I was unable to resist the cover of The Royal We, which is clearly depicting a couple so like William and Kate that it’s surprising that it’s not them, and the novel ended up being an excellent way to kick off what promises to be a busy summer of reading.

This is totally fan fiction about everyone’s favorite British royal couple, with the major exception being that Rebecca Porter isn’t British at all - she’s American. She also has a twin sister who keeps things much more interesting than Pippa ever did. I wasn’t expecting an American girlfriend - expecting William and Kate as I was - but it was a nice surprise. Sort of like The Prince & Me, it gives American girls hope that they too can have a prince one day. There’s no denying it, I probably liked this book so much because the hope of a royal meeting was part of the my decision to study abroad in London too. 😛 No such luck, but lots of fun adventures, nonetheless! It brought back memories…

Overall, the book was a tad drawn out, maybe a little bit longer than it needed to be, but the struggles Bex and Nick went through during their long courtship seemed pretty realistic. The story was really dramatic and entertaining, an (almost) endless will-they-or-won’t-they propelling it forward. I’m not sure I’d read a sequel (princess movies sequels are never that good…), but I certainly enjoyed this one.

When choosing a recipe for this book, it was a hard decision between Pimm’s Cup, which was not only a favorite of Nick and crew but also my favorite British drink while abroad, and tea sandwiches, which of course were ever-present throughout the story. Because England. In the end, I had to go with the tea sandwiches because while cocktails are a pretty big part of American life, high tea is something that comes along less often, and I love high tea.

I decided to make three different kinds - the classic cucumber, an egg salad with watercress (one of my favorite sandwiches while in London), and the tasty combo of ham, brie and apple.

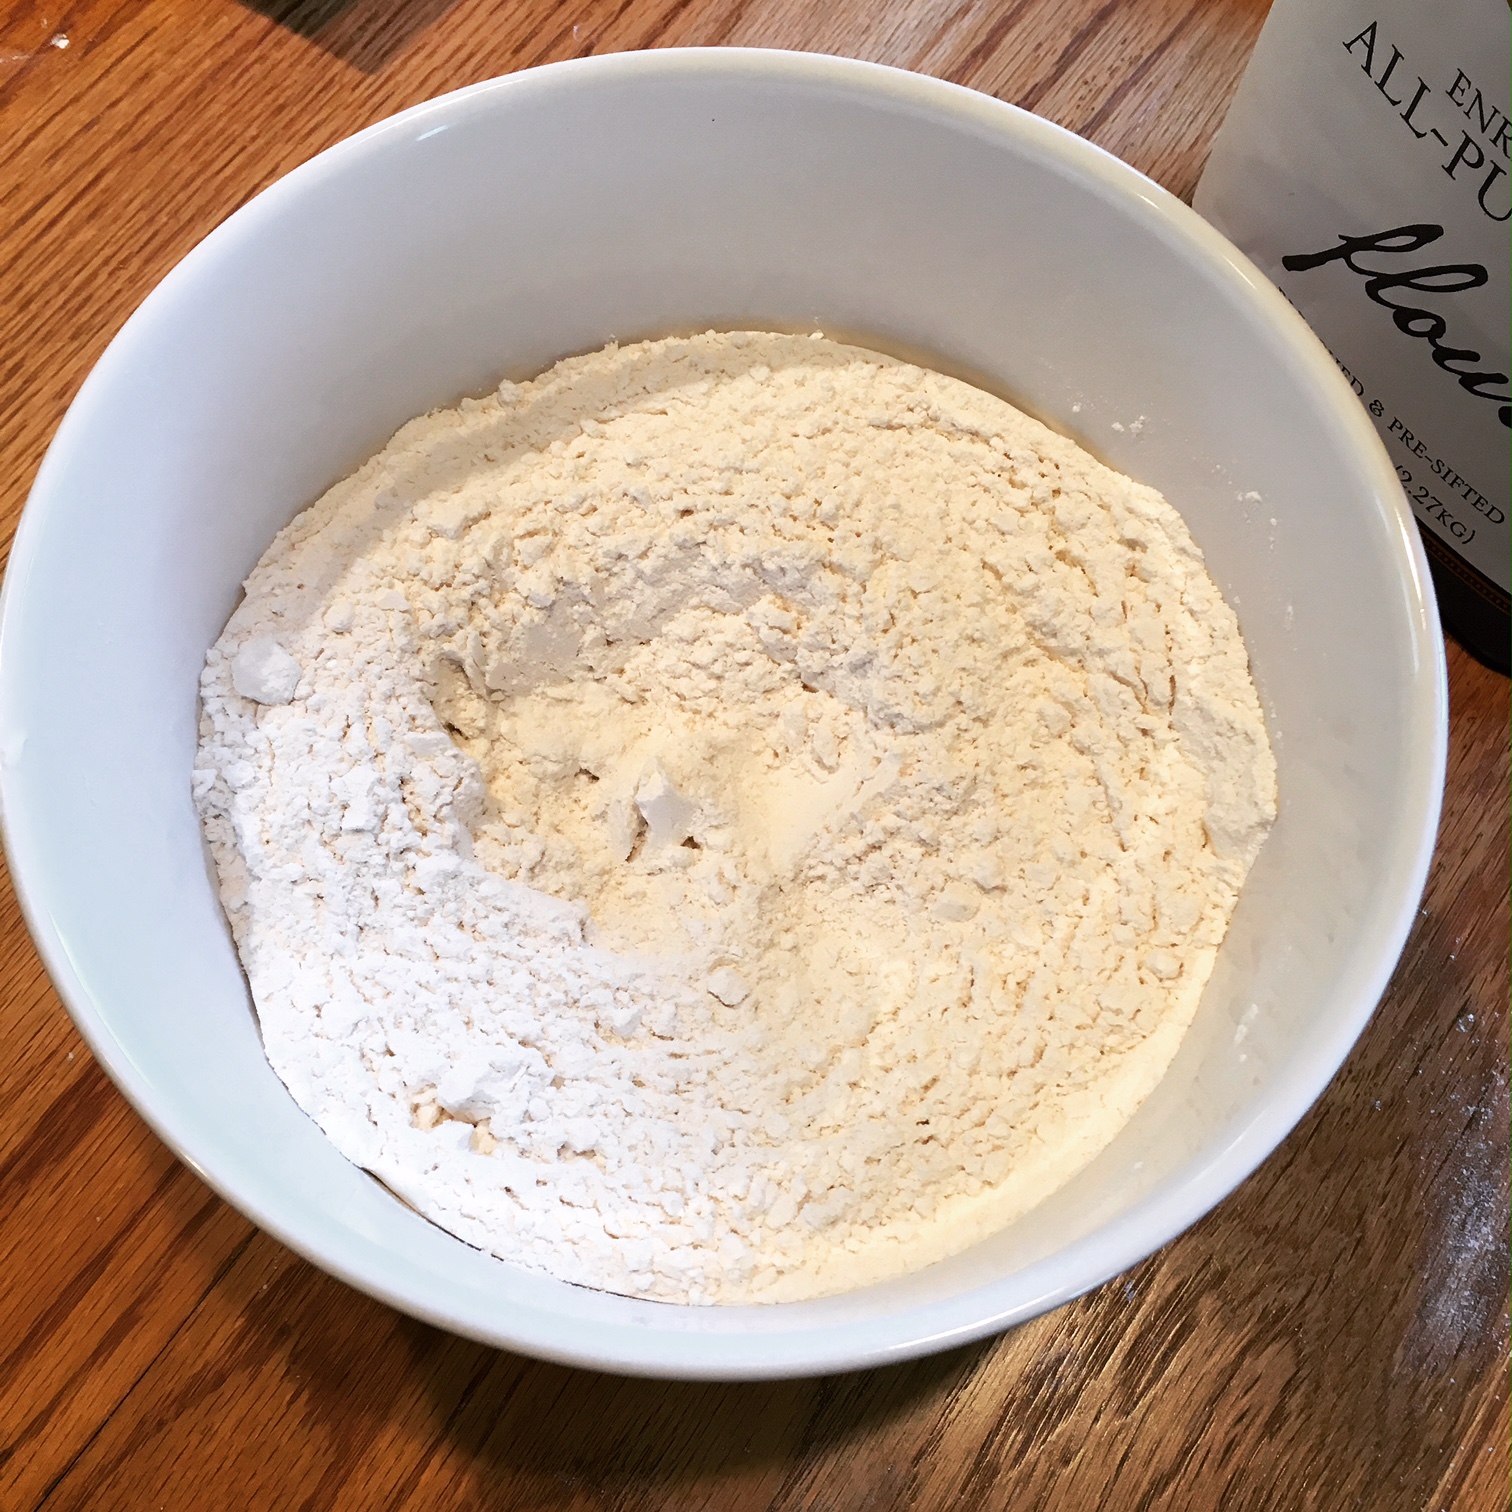
I started by prepping the eggs, and while they were hard-boiling, I whipped up the cream cheese mixture for the cucumber sandwiches. The majority of tea sandwich-making is the actual assembly and, of course, the removing of the bread crusts.

To make the cream cheese mixture, I combined 1 package of cream cheese and ⅓ cup of mayonnaise in my food processor until smooth. To that, I added garlic salt and fresh dill. I don’t think you should be shy with the dill - I used around a tablespoon, while the original recipe called for 1 teaspoon.  

When eggs were finished boiling, I let them cool in an ice bath, peeled them, and used my egg slicer tool to chop them into small pieces. I combined the egg with mayonnaise, white wine vinegar, dijon mustard and Lawry’s seasoned salt.

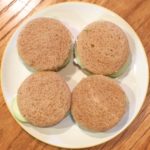
With the two main spreads done, I began prepping the rest of my sandwich ingredients. I sliced the cucumbers into thin slices, I rinsed the watercress and removed the leaves from the stems, and I sliced the green apple and brie for the last sandwich. Last but not least, I removed the crusts from my bread. For the cucumber sandwiches, I made the bread into rounds using a large cutter (no need to remove the crusts first if you’re doing this).

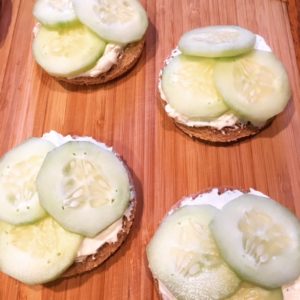
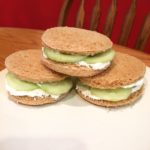
When it was time for the assembly, I set out the bottoms on a large cutting board and got to work. First, I spread the cream cheese mixture on the rounds and topped them with sliced cucumber.

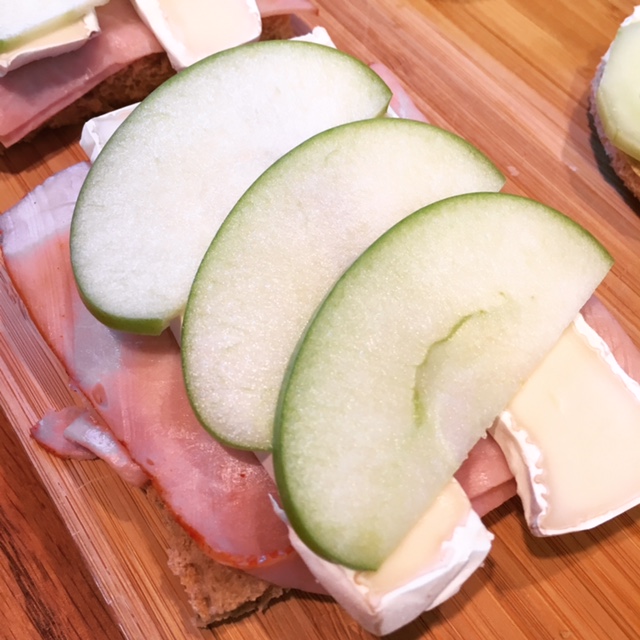
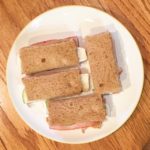
Next, I spread a thin layer of dijon and butter on half of the remaining squares, topping it with ham, sliced brie, and thinly sliced apple halves.

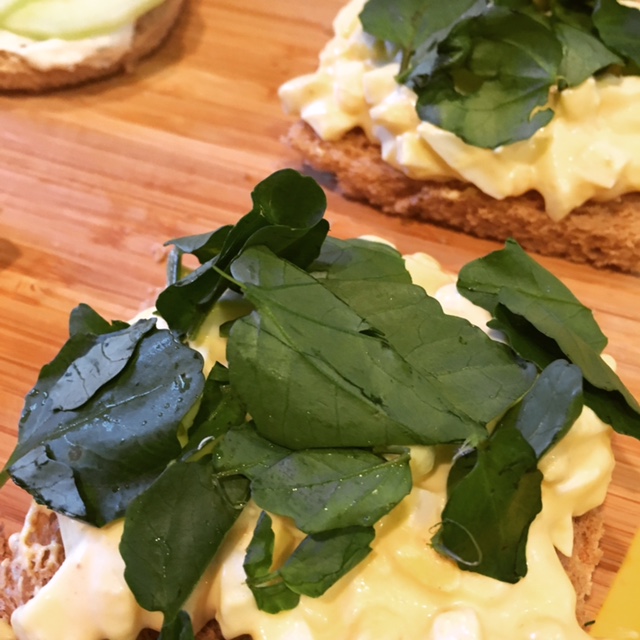
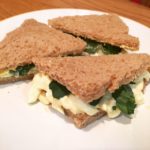
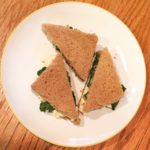
Finally, I carefully put the egg salad atop the rest of the bread and placed some watercress on top.

Then, each sandwich got a lid and we were ready to go!

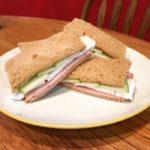
It’s really too bad I didn’t read this for book club. An afternoon tea theme would’ve been perfect for the meeting. Instead, Scott and I got to enjoy them ourselves, which wasn’t bad either.  

Cucumber Tea Sandwiches

  • Servings: 20 rounds
  • Time: 15 minutes
  • Print

Ingredients

  • 1 (8-ounce) package cream cheese, softened
  • ⅓ cup mayonnaise
  • 1 medium cucumber, peeled and sliced thinly
  • ¼ teaspoon garlic salt
  • 1 Tablespoon chopped fresh dill, or to taste
  • 40 slices of thin sandwich bread

Directions

  1. Process cream cheese and mayonnaise in a blender or food processor until smooth, stopping once to scrape down sides.
  2. Combine cream cheese mixture, garlic salt, and dill.
  3. If creating rounds, use a 2- to 3-inch round cutter to cut bread, discarding the edges. Or, if you prefer triangles or squares (which makes 80 sandwiches), cut the crusts from the bread and discard and cut into quarters.
  4. Spread cream cheese mixture evenly onto half of the bread slices. Place 3-4 cucumber slices per round on top of the mixture. Lightly coat the top slice of bread, just enough to keep the bread in place over the cucumbers and place on top.
  5. Serve immediately, or you may store cucumber sandwiches in an airtight container for up to 1 hour before serving.

Adapted from: Southern Living, by way of MyRecipes.com

You may use whichever type of bread you prefer. Traditional tea sandwiches are usually made with white bread. I used wheat bread, and the original recipe calls for one slice of each per sandwich.


Egg Salad Tea Sandwiches with Watercress

  • Servings: 12 halves
  • Time: 15 minutes
  • Print

Ingredients

  • 6 eggs, hard-boiled and peeled
  • ⅛ teaspoon Lawry’s seasoned salt, or salt and pepper to taste
  • ⅓ cup mayonnaise
  • 2 teaspoons white wine vinegar
  • 2 teaspoons dijon mustard
  • 12 slices of thin sandwich bread
  • Small bunch watercress

Directions

  1. Roughly chop your hard-boiled eggs, or use an egg slicer if you have one. First, slice the egg horizontally, carefully flip the egg to the vertical position and slice again. (If you don’t have your own preferred method for hard-boiling eggs, please see notes below.)
  2. In a large bowl, combine the eggs, mayonnaise, vinegar, mustard and seasoned salt. Gently fold together.
  3. To construct the sandwich, remove the crusts from the bread and cut in halves, forming triangles (or your preferred shape).
  4. On half of the bread, add the egg salad and top with watercress leaves. Add a slice on top of each to complete the sandwich.

Adapted from: Serious Eats

To make hard-boiled eggs: Bring a pot of water to a boil, make sure there is enough water to completely cover the eggs. Once boiling rapidly, carefully add each egg using tongs. The eggs should be still cold from the fridge. Allow to boil for 12 minutes. Remove from the boiling water and allow to cool in an ice bath for 5 minutes, or until cool to the touch. Peel.

A note on sandwich size: I specifically used a loaf of “sandwich bread” from my grocery store, which were smaller and more square than a usual loaf of bread. These formed small halves, as you can see from my photos. If your bread is larger, or you want smaller sandwiches, feel free to cut into quarters.


Ham, Brie and Apple Tea Sandwich

  • Servings: 12 halves
  • Time: 10 minutes
  • Print

Ingredients

  • ½ lb deli ham of your choice (I used Virginia Ham)
  • 6 large slices of brie
  • 1 large Granny Smith apple, thinly sliced
  • dijon mustard
  • softened butter
  • 12 slices of thin sandwich bread

Directions

  1. Remove the crust from the bread.
  2. To assemble the sandwiches, spread half of the slices lightly with softened butter and dijon mustard. Place 1-2 pieces of ham on top of each, followed by 2 slices brie side-by-side lengthwise, and finally place 3-4 slices of apple on top. Finish with an additional piece of bread.
  3. Cut each sandwich into halves lengthwise to form rectangles.

Inspired by: The Food Network

A note on sandwich size: I specifically used a loaf of “sandwich bread” from my grocery store, which were smaller and more square than a usual loaf of bread. These formed small halves, as you can see from my photos. If your bread is larger, or you want smaller sandwiches, feel free to cut into quarters.


Filed Under: book review, recipe Tagged With: book club, fiction, lunch, party, sandwich

All Grown Up + Grown-Up Ramen

June 6, 2017 by Megan 1 Comment

There was a time before my blog, and before I became obsessed with Goodreads, that I kept track of what I read with a Google spreadsheet. It was pretty simple - title, author, notes, date finished and a Y/N column for whether or not I’d recommend it. That spreadsheet is my only memory of the last time I read a Jami Attenberg novel and my succinct reaction was “the ending was predictable; I cared about exactly zero of the characters.” Four years later, with her novel All Grown Up, I found myself having deja vu.

9780544824249_custom-378e8da65f06b2846e6b6c01b27adf75e2edb10f-s400-c85

Andrea is a thirty-nine-year-old single woman without children. She wanted to be an artist, but instead finds herself in an unfulfilling career so she can pay the rent. In New York City, that’s not remarkably unusual. What is remarkably unusual about Andrea is that she refuses to grow up, and the people around her think that’s perfectly alright.  

I didn’t find it predictable, though perhaps I should have - a 40-year-old woman who still acts like someone fresh out of college can’t be expected to grow up at that late stage - but I didn’t care about any of the characters. In the end, I found Andrea’s life and the novel on the whole quite sad, but on the plus side, Attenberg’s writing was lovely and made the less than 200 pages easy to get through.

In a transformation like the one I hoped Andrea would have, I turned a college classic into something a bit more put-together, a posh NYC favorite - Grown-up Ramen Noodles. I found a recipe from Fork Knife Swoon to go off of and set to work.  

To start, I began cooking a chicken breast seasoned with salt and pepper in a skillet with olive oil. Once the rounded side was browned - about 7 minutes - I flipped it over and cooked the other side for another 5 minutes or so. I transferred it to a small foil-lined baking sheet and placed it in my preheated 375-degree oven to finish cooking.

IMG_3231

While the chicken was cooking, I began my broth and set the water for my eggs to boil. In a medium saucepan, I heated some toasted sesame oil before adding minced garlic and ginger. I allowed those to cook for a few minutes until fragrant. Then, I added the soy sauce and rice cooking wine, stirring to combine. After another minute, I added the chicken broth, covered the pan and brought it all to a boil.

Once boiling, I turned down the heat and allowed it to simmer for 5 minutes. I added the dried mushrooms and let the broth continue to simmer. Meanwhile, I removed the chicken from the oven and set it aside. I also added the two eggs to the separate pan of boiling water and set a timer for 7 minutes.

I used this time to prep my scallions and seaweed, and once the chicken had rested, I cut it into slices.

IMG_3232

After 10 minutes, I removed the mushrooms and placed them in the waiting bowls. (If I had sliced them, I would’ve done so here. If I was making this again, I would slice the mushrooms into more bite-size pieces, as noted in the recipe below.) I also placed the eggs into an ice bath so they could cool before peeling.

I added the dried ramen noodles into the prepared ramen broth, discarding the flavoring packets that come with the noodles. (College memories!) You could cook the noodles in plain boiling water instead, but I have always preferred to make them in the broth/flavoring to impart some of that flavor on the noodles.

IMG_3233

Once the noodles are ready, carefully place them in each bowl and top with the broth. Carefully peel each egg, slice in half and place in the bowls on top of the noodles and mushrooms. Add the sliced chicken, scallions and seaweed. Serve and enjoy!

IMG_3234

Grown-Up Chicken Ramen

  • Servings: 2
  • Time: 1 hour
  • Print

Ingredients

  • 1 large boneless, skinless chicken breast
  • kosher salt and freshly-ground black pepper, to season
  • 1 TBS unsalted butter, or olive oil
  • 2 tsp sesame oil
  • 2 tsp fresh ginger, minced
  • 3 tsp fresh garlic, minced
  • 3 TBS low-sodium soy sauce
  • 2 TBS rice cooking wine
  • 4 cups chicken stock or broth
  • ½ - 1 oz dried shitake mushrooms
  • 1-2 tsp sea salt, to taste
  • 2 large eggs
  • 1/2 cup scallions, sliced
  • 2 (3 oz) packs dried ramen noodles
  • optional: roasted seaweed snacks, in ribbons, for serving

Directions

  1. Cook the chicken: Preheat the oven to 375 degrees F. Season the chicken generously with salt and pepper. Melt the butter (or heat olive oil) in an oven-safe skillet over medium heat. Add the chicken breast, round side down, and cook until golden brown and it releases easily from the pan, about 5-7 minutes. Flip the chicken over and cook for another 4-5 minutes, until golden.
  2. Transfer the skillet to the oven and roast for 15-20 minutes, until the chicken is cooked through. (If you don’t have an oven-safe skillet, you may transfer the chicken to a small baking sheet lined with foil.) Remove from the oven, transfer the chicken to a plate and cover with foil until ready to serve.

  3. Make the ramen broth: Heat the sesame oil in a large pot over medium heat, until shimmering. Add the garlic and ginger, and cook for a few minutes until softened. Add the soy sauce and rice wine, and stir to combine. Cook for another minute. Add the stock, cover, and bring to boil. Remove the lid, and let simmer uncovered for 5 minutes, then add the dried mushrooms. Simmer gently for another 10 minutes, and season with salt, to taste.
  4. Otherwise, take the mushrooms out of the broth using tongs, and carefully, slice them into thick bite-size slices on a cutting board. (For particularly large mushrooms, you may cut them in half before slicing.) Place in bowls for serving.

  5. Make the soft-boiled eggs: Fill a pot with enough water to cover the eggs, and bring to a boil. Gently lower the eggs (still cold from the fridge) into the boiling water, and let simmer for 7 minutes (for a slightly-runny yoke) or 8 minutes (for a soft, but set-up yoke).
  6. Meanwhile, fill a large bowl with ice water. When the timer finishes, transfer the eggs to the ice bath to stop the cooking process. Wait at least 5 minutes, or until cool enough to handle, then carefully peel away the shell and slice in half, lengthwise. Set aside until ready to serve.

  7. Assemble the ramen bowls: Meanwhile, chop the scallions and slice the seaweed snacks into ribbons (if using). Slice the chicken into thin pieces. Set aside. When the eggs are in the ice bath, add the ramen noodles to the broth. Cook for approximately 3 minutes, until soft, then divide the noodles into two large bowls, next to the mushrooms. Add the ramen broth, dividing evenly. Top each bowl with half of the sliced chicken breast, a soft boiled egg each, fresh scallions and the seaweed. Serve immediately.

Adapted from: Fork Knife Swoon

To save some time, or if you’re making this on a warm day like I was, substitute pre-made rotisserie chicken.


This post contains affiliate links. Full disclosure here. 

Filed Under: book review, recipe Tagged With: book club, chicken, contemporary, dinner, fiction, lunch, quick read, soup

Truly Madly Deeply + Grilled Shrimp and Corn

May 25, 2017 by Megan 2 Comments

“It all began at a barbecue.” And so Liane Moriarty’s latest novel begins. It seemed innocent enough, but with a title like Truly Madly Guilty, I knew it wouldn’t stay that way for long. I have been a fan of Moriarty’s ever since I read her best-seller Big Little Lies in 2015. With the HBO series adaptation recently wrapping up, I was excited for more when my hold finally came through at the library.

9781250069818_p0_v3_s1200x630

For those of you who have seen or read Big Little Lies, the setup is similar. It becomes quickly apparent that something bad has happened, but it’s less clear who it happened to and what exactly it is. Over the course of a slow, every-other-chapter build, the consequences of a normal, spur-of-the-moment backyard barbeque become all too real.

I would consider some of Moriarty’s other novels to be quick-paced beach reads, despite her ability to sneak tough, sometimes dark subjects into an otherwise light, reality TV-style wrapper. Though the title Truly Madly Guilty definitely screams “get out your sunnies!” I didn’t get the same vibe this time.

The plot moved too slowly for me, and it’s real strength was in its character building. The relationships were messy and complicated in a way that felt authentic because it wasn’t over-the-top. By the end of the novel, I definitely appreciated its subtlety though it wasn’t what I expected going in.

But, since it all started with a barbecue, I used that as my recipe inspiration. And, since it took place in Australia, I couldn’t resist making (get your Aussie accent ready!) shrimp on the barbie. I was also mostly just excited to have an excuse to use our new grill on the deck.

I found a simple recipe for Lemon Garlic Shrimp Kabobs from one of my faves Damn Delicious, and even though she bakes hers in the oven, I was easily able to adapt it to a grill. Alongside Grilled “Crack Corn,” this could easily impress at your next outdoor get-together! The best part about both of these recipes is that they don’t require a lot prep and they grill up in under 15 minutes.

To start, I shucked my corn and speared my shrimp and lemons onto the skewers. (I used metal, but if you’re using bamboo or wooden skewers, make sure you soak them first.) I chose to do a lemon slice on each end and 4-5 shrimp in the middle, but you can mix it up however you think it works best.

Then, Scott put the corn on the grill, since it took slightly longer than the shrimp, while I made the sauce for the corn and the shrimp.

To make sauce for the corn, I simply combined already melted butter with brown sugar, cayenne pepper, salt and black pepper. I whisked it up really well and brought it outside to the grill. Scott began basting the corn and put the shrimp on.

Back in the kitchen, I made the sauce/glaze for the shrimp skewers. In a small saucepan, I melted some butter. To that, I added lemon juice, minced garlic and dried basil, oregano and thyme. I also seasoned it with salt and pepper - I used a generous pinch and a turn or two of freshly ground black pepper. After a couple of minutes, it was fragrant and ready.

We allowed the corn to cook while the shrimp finished up, even though it was basically finished - a little extra color never hurt anyone. Be sure your shrimp is fully cooked through, but be careful not to overcook it as it can be tough and chewy. The shrimp should be a nice pink color.

Both recipes were really delicious and really easy. Perfect for entertaining a small group, or a relaxing summer evening outside. I hope everyone has a safe, sunny Memorial Day weekend! See you next week!

IMG_3107

Lemon Garlic Shrimp Kabobs

  • Servings: 6
  • Time: 20 minutes
  • Print

Ingredients

  • 1½ pounds medium shrimp, peeled and deveined
  • 2-4 lemons, thinly sliced and halved
  • kosher salt and freshly ground black pepper, to taste
  • ¼ cup unsalted butter, melted
  • ¼ cup freshly squeezed lemon juice
  • 4 cloves garlic, minced
  • ½ tsp dried oregano
  • ½ tsp dried thyme
  • ½ tsp dried basil
  • 2 TBS chopped fresh parsley leaves

Directions

  1. Thread shrimp and lemon halves onto skewers. In a medium saucepan, over medium high heat, melt butter. Stir in lemon juice, garlic, oregano, thyme and basil until fragrant, about 2 minutes; season with salt and pepper, to taste. (If you have a side burner on your grill, you can do this while the shrimp cooks.)
  2. Preheat grill to medium-high heat. Oil grates and add shrimp.
  3. Grill each side for about 3-4 minutes on each side, until cooked through.
  4. Serve shrimp skewers immediately, brushed with butter mixture and garnished with parsley, if desired.


From: Damn Delicious

Crack Corn

  • Servings: 6
  • Time: 15 minutes
  • Print

Ingredients

  • 6 ears corn, husked
  • 3 TBS brown sugar
  • 1 tsp cayenne pepper
  • salt
  • freshly ground black pepper
  • ¼ cup melted butter
  • lime wedges, for squeezing

Directions

  1. Heat grill to high. Oil grates and add corn. Grill for 5 minutes, turning occasionally.
  2. Meanwhile, in a small bowl, add brown sugar, cayenne pepper, salt, pepper and melted butter. Whisk together until combined.
  3. Baste corn, while grilling, until totally slathered in crack sauce. Grill until charred and tender, approximately 5 minutes more.
  4. Squeeze with lime and serve.

From: Delish.com

Filed Under: book review, of interest, recipe Tagged With: contemporary, drama, fiction, grilling, seafood, spicy, television series, veggies

The Unbearable Lightness of Being + Raspberry Mousse

May 18, 2017 by Megan 3 Comments

They say bad things come in threes, and maybe I’m being a bit dramatic, but I’m really hoping this latest read is the end of my little streak of three books in a row I didn’t like. One of my book clubs recently met to discuss Milan Kundera’s best-known work The Unbearable Lightness of Being, which I’m sorry to say I suggested. At least I only had myself to blame.

9717

To simplify it, Kundera’s novel is about two couples (in a loose sense of the word) in Prague in the sixties and seventies. Tomas is a surgeon who leaves his wife for a young woman named Tereza, even though he continues to sleep around. He literally cannot help himself. One of the women he sleeps with is Sabina, whom the story also follows, documenting her bohemian life and her sort-of relationship with a professor named Franz. My favorite character in the whole book was Tomas and Tereza’s dog Karenin, who was named after the male character in Anna Karenina, even though she’s a girl.

I suppose the simple description of the book makes it sound more juicy and interesting than it is. Don’t be fooled. To keep you away from the main plot points, Kundera tosses in several chapters on kitsch, his thoughts on politics, and his philosophies on life. He makes for an interesting narrator, repeatedly pointing out that his characters aren’t real, which as a reader really pulls you out of the story (if the random bits of philosophy and politics didn’t do that already).

People seem to love this book - it has over 4 stars on Goodreads and is considered by many to be a classic - but for me, and most of my book club, it was truly unbearable. On the “lighter” side of things, however, it led to some delicious raspberry mousse.

The novel didn’t have many mentions of food, so I decided to play off the theme of lightness and create what is traditionally a light, airy dessert. I found a recipe from Fearless Dining for Easy Fresh Raspberry Mousse that seemed to easy to make and looked delicious. (If you look at her page, she has many, many mousse varieties to try out.)

First, I began boiling my half cup of water in tiny saucepan. Meanwhile, in a slightly larger saucepan, I added 2 teaspoons of gelatin (about 1 envelope, but measure just in case) to the quarter cup of cold water and allowed that to sit.

I washed my raspberries, extracted my vanilla seeds and combined the rest of the ingredients while the gelatin/water combination was becoming more jelly-like and the water boiled. Once that was all ready, I combined everything into my larger saucepan (with the gelatin mixture) and brought it all to a boil for 5 minutes.

I transferred the mixture to my food processor and blended everything together, though I would recommend a blender if you have one. It will likely breakdown the raspberry seeds better than my food processor did.

Allow that mixture to cool for 10 minutes (or longer). I let mine sit for about 15 minutes while I made the whipped cream. To do so, add the 2 cups of heavy / whipping cream to a large bowl and use a hand mixer, mixing until stiff peaks form.

IMG_3043

Once the raspberry mixture is cooled enough, gently fold that into the whipped cream a little bit at a time. (Despite what the original recipe said, I tried folding the cream into the raspberry mixture, since typically technique says you should add the whipped cream into the denser/wetter mixture to avoid losing air. However, because the raspberry mixture was so soup-y, it mostly remained at the bottom and proved hard to combine.)

Once the cream and the raspberry mixture were well-combined - the entire mixture was a light pink - I placed the bowl in the fridge to set/cool. After almost 2 hours, it was mostly set, but I think could’ve stood to hang out in there a little longer. The consistency was perfect they next day when we finished it up. Two hours was perfectly fine, but if you have the time, I would recommend allowing it to remain in the fridge a bit longer.

We served it in my grandmother’s crystal cut dessert dishes, which I hadn’t used before, and garnished with the remainder of the fresh raspberries.

IMG_3044

IMG_3045

Unbelievably Light Raspberry Mousse

  • Servings: 4-6
  • Time: 30 minutes, plus cooling/setting time
  • Print

Ingredients

  • ¼ cup cold water
  • ½ cup boiling water
  • 2 teaspoons gelatin
  • 1 Tablespoon lemon juice
  • ¼ cup granulated sugar
  • 1 cup fresh raspberries (a 6oz package should be plenty, including garnish)
  • 2 cups heavy cream
  • seeds of 1 vanilla bean (or 3 teaspoons vanilla extract)

Directions

  1. In a small saucepan, add cold water.
  2. Mix in gelatin and allow to sit for 5 minutes.
  3. Stir in boiling water, vanilla bean, sugar, lemon juice, and raspberries.
  4. Bring to boil on medium heat then turn down to low and boil for 5 minutes.
  5. Pour mixture into a blender or food processor and blend until smooth. (This reduces the raspberry seeds.)
  6. Allow this mixture to cool for at least 10 minutes.
  7. Meanwhile, in a large bowl, add whipping cream and beat with an electric mixer until stiff peaks form.
  8. Gently fold the raspberry mixture into the cream until well-combined.
  9. Allow the finished mousse to cool in the refrigerator for a minimum of 1 hour.
  10. Serve garnished with fresh strawberries, if desired.

From: Fearless Dining

A blender may provide better results than a food processor as far as reducing seeds. I would recommend allowing to cool for 2-4 hours if you have the time - ours was also delicious when we finished it the next day.

Number of servings will depend on size. This recipe yields 4 generous helpings.


Filed Under: book review, recipe Tagged With: classic, dessert, fiction, fruit

The Round House + Indian Fry Bread

May 11, 2017 by Megan 2 Comments

On an Indian reservation in 1988, a woman is attacked but the details are immediately unclear as Geraldine is reluctant to discuss what happened. Both her husband and thirteen-year-old son Joe give her space to recover while still determined to do what they can to bring her justice. Joe strikes out on his own investigation, bringing him and his friends to a sacred meeting place on the reservation, The Round House.

The-Round-House-by-Louise-Erdrich.jpg

Louise Erdrich’s novel has been highly praised and is award-winning, but I didn’t like it very much. I thought using the son’s perspective to tell the story was an interesting choice, creating more suspense surrounding the attack. Overall, though, while the central plot was gripping, there was so much extra going on in the story that I found it distracting and was ultimately pulled away from Geraldine and her family’s plight.

Often on adventures around the reservation, Joe and his friends were fed Indian fry bread - occasionally with jam or honey, occasionally in the form of tacos. In looking up the history of fry bread, I found that it also comes with a story of pain and suffering. (You can read more here.) It seemed like the perfect food to accompany this novel.

Allrecipes had a recipe for fry bread that many commenters hailed as authentic and the most like their grandmothers’. I also poked around and found one from The Pioneer Woman that had a few more ingredients and included details on making Indian tacos. I sort of combined the two when making my bread.

First, I combined my flour, salt and baking powder.

IMG_2924

Then, I slowly added my warm water, stirring it with a spoon until it was all added, and then kneading it with my hands. Once the mixture was well combined, I covered the bowl with a dish towel to let it rest for about 45 minutes.

I then separated the dough and rolled it into smaller balls, forming about 12 (which will depend on how large you decide to make your fry bread).

IMG_2925

In my cast iron skillet, I heated a little over an inch of shortening until hot. While it came up to temperature, I flattened each ball into a large disk and created a little hole in the middle of each to keep it from forming too much of a “dome” while frying.

I fried each piece of bread for about a minute on each side, until each side was a nice golden brown.

IMG_2926

When done, we ate them warm with some jam (and tried some honey too). I didn’t make Indian tacos this time but will definitely have to try them out in the future. Check out the finished product, plus a look at my new red kitchen - so happy it's finally a reality!

IMG_2927

IMG_2928

Indian Fry Bread

  • Servings: 8-12
  • Time: 1 hour, 15 minutes (including 45 minutes inactive time)
  • Print

Ingredients

  • 4 cups all-purpose flour
  • ½ teaspoon salt
  • 1 tablespoon baking powder
  • 1½ cups warm water (110 degrees F/45 degrees C)
  • 4 cups shortening for frying (1-2 inches in the skillet)

Directions

  1. Combine flour, salt, and baking powder. Stir in 1½ cups lukewarm water. Knead until soft but not sticky.
  2. Cover bowl with a dish towel and allow to rest for 35-45 minutes.
  3. Shape dough into balls of about plum-size and then flatten into patties between 4-7 inches in diameter (depending on how large you want them). Make a small hole in the center of each patty.
  4. Fry one (or two) at a time in 1-2 inches of hot shortening, until the bread turns golden brown - about a minute. Flip and fry for another 45 seconds to a minute.
  5. Allow to dry on a paper towel. Serve warm with jam or honey, or use as a base for Indian tacos.

Adapted from: Allrecipes.com and The Pioneer Woman

Filed Under: book review, recipe Tagged With: book club, bread, cultural, fiction

American Gods + Beef Pasties

May 4, 2017 by Megan 4 Comments

I read American Gods hoping to create some personal excitement for the new series on Starz (which premiered on April 30), but I finished it feeling less than enthused. I’ve had a bit of a mixed reaction to Neil Gaiman - ultimately thinking that my first selection The Ocean at the End of the Lane was just okay, but enjoying both Coraline and Neverwhere.

American-Gods-Cover-05292015.jpg

Gaiman’s novel is interesting enough at the outset. It follows Shadow as he is released from prison after serving three years. On his way home, he meets a mysterious man called Wednesday, an old god, actually. Wednesday enlists Shadow to help him recruit other old gods, traveling back and forth across the United States attempting to convince them to join the fight against the new gods.

Shadow’s story, when we were following it, kept my attention. It was the detours Gaiman took at the end of each chapter that I found distracting, as the story peeked in at the goings-on of various other gods we usually hadn’t met yet (and sometimes never saw again). The plot took a lot of twists and turns, and had I been fully invested, I would’ve been at the edge of my seat so I can see why people really enjoy it.

When he wasn’t with Wednesday, Shadow took refuge in a small town called Lakeside, Wisconsin. It was there that I found my recipe for American Gods - Mabel’s famous pasties. Pasties are baked pastries filled with meat and vegetables, said to have originated in Cornwall, England. They are also quite popular in the Upper Peninsula of Michigan, and while I have had them in England, I’ve never had them close to home - until now.

Scott’s mom had actually made them before and shared her recipe with me. (Thank you!) I made my own dough, which she said would be easy with a food processor - and it was.

My food processor didn’t seem to be able to handle such a large amount of ingredients, however, so I ended up splitting the dough into two batches. I also needed slightly more liquid to get it to come together, so use your best judgment, but make sure not to overdo the liquid because you don’t want the dough to become sticky.  

I formed the dough into two smaller disks and stored them in the refrigerator in plastic wrap to chill. I allowed mine to chill overnight but a couple of hours should be sufficient.

While the dough chilled (or in my case, before I took it out to roll it), I prepared the vegetables for the filling. First, I diced the carrots, doing my best to keep them relatively small so they would soften well while baking.

Having never even eaten rutabaga (to my knowledge), I certainly had never made it, so I was a little unsure how to tackle it at first. Ultimately, I just hacked off a chunk of it, peeled off the skin and then cut the piece into smaller pieces that would fit in my food processor spout. I used my grating attachment to grate it quickly.

Then, I peeled and diced my potatoes, trying to keep their size in line with the size of my carrots. About 2 medium potatoes yielded the 1½ cups I needed. After so much prepped I decided to just use minced dried onion out of my cupboard. Fresh onion might impart a bit more moisture into the meat, but it turned out well with the dried version, so use whatever works best for you.

I combined all of my filling ingredients - about a pound of ground beef, the carrots, potatoes, rutabaga and minced onion. I also added salt and some freshly ground black pepper. Lastly, I melted the butter and poured that over the filling, making sure to mix it in well.

IMG_2869

As I took my dough out to roll and shape, I turned on my oven to 350 degrees F to preheat. I rolled out the dough and used 8” saucers as a guide for my circles, yielding 4 large pastry circles. I filled half of each circle with as much filling as I could, making sure it could still be closed and sealed.  

IMG_2870

Note: I had a bit of filling leftover as well as a bit of pastry, so I probably could’ve made each one a bit bigger.

Finally, I cut 3 slits into each pasty and brushed them with an egg wash before putting them in the oven on baking sheets lined with parchment paper. After about an hour, they came out a lovely golden brown.

IMG_2868

Thinking it seemed similar to meatloaf (and after some online research), I decided to eat mine with some ketchup - which seems to be a popular choice - as well as a little spicy brown mustard. Scott enjoyed his with sour cream (another online hit). Serve with whatever condiments you enjoy, but make sure you allow them to cool before digging in! 

Beef Pasties

  • Servings: 4
  • Time: 1 hour, 20 minutes (not including inactive time for the dough to chill)
  • Print

Ingredients

    For the Dough:
  • 1 cup Crisco or lard
  • 3½ cups flour
  • ½ tsp baking powder
  • ½ tsp salt
  • 1 egg (beaten)
  • ½ TBS vinegar
  • ½ cup ice water
  • For the Filling:

  • 1 pound ground beef
  • 1 cup grated (or finely diced) rutabaga
  • 1 ½ cup diced potatoes
  • 1 or 2 carrots, diced
  • 1 small onion, diced or 1 TBS dried minced onion
  • salt and pepper
  • 1/4 stick butter or margarine, melted
  • egg wash: 1 egg and 1 TBS water

Directions

  1. To make the dough, put the dry ingredients - shortening/lard, flour, salt and baking powder - into the food processor. With it on low, drizzle in the liquid ingredients - 1 beaten egg, 1 tablespoon of white vinegar and ½ cup of ice water.
  2. Once dough is well combined, form into a disk (or two smaller disks) in plastic wrap and allow to chill for a few hours, or overnight. When ready to create the pasties, roll out the dough and cut into circles with a small saucer (8” or 10” diameter).
  3. Combine the filling ingredients, adding the melted butter last.
  4. Add filling to one half of each pastry circle. Fold over and crimp the edges.
  5. Brush with an egg wash and make 2-3 slits or use a fork on the top to allow the steam escape while baking.
  6. Bake on parchment paper-lined baking sheets at 375 degrees F for 15 minutes before turning down to 325 degrees F for 45 minutes, OR just bake for 1 hour at 350 degrees F.


From: The Kitchen of Scott’s Mom, Karen

You could also make more smaller pasties, by cutting smaller circles of dough and using less filling. This may affect baking time. Mine were quite giant, but worked well as a main course (or full meal)!


Filed Under: book review, of interest, recipe Tagged With: baking, fantasy, fiction, meat, television series

  • « Go to Previous Page
  • Go to page 1
  • Interim pages omitted …
  • Go to page 22
  • Go to page 23
  • Go to page 24
  • Go to page 25
  • Go to page 26
  • Interim pages omitted …
  • Go to page 30
  • Go to Next Page »

Primary Sidebar

About

The Hungry Bookworm brings together literature and food. Megan has an insatiable appetite for both.

As C.S. Lewis said, “Eating and reading are two pleasures that combine admirably.” Enjoy!

  • Bloglovin
  • Facebook
  • Instagram
  • Pinterest

Subscribe

Don't miss out on bookish content, exclusive giveaways, and of course, book club-friendly recipes. Get notified of new posts via email.

Join 2879 subscribers.

Search for Ingredients, Recipes, or Books

Recent Posts

  • Subscriber Box Review: Literati Book Club - Roxane Gay's Audacious Book Club
  • Arsenic and Adobo + Ensaymada
  • Review of The Kindred Spirits Supper Club
  • Kids Edition: Sometimes I Like to Curl Up in a Ball + "Dirt" Pudding Cups
  • The Midnight Library + Broccoli and Ricotta Toast

Goodreads

Tags

5 ingredients or less appetizer baking book club book list book of the month books about food bread breakfast brunch chicken contemporary cookies cultural dessert dinner dinner party dystopia easy prep favorites fiction fruit historical fiction holiday ice cream linkup lunch meat memoir mini review nonfiction pasta quick read reading challenge science fiction seafood show us your books side dish snack soup TBR list thriller top ten tuesday vegetarian veggies

Archives

Other Great Book Blogs

Literary Quicksand
Never Enough Novels
Death by Tsundoku
Professional Reader 25 Book Reviews
Privacy & Cookies: This site uses cookies. By continuing to use this website, you agree to their use.
To find out more, including how to control cookies, see here: Cookie Policy

Footer Widget Header

Megan’s Instagram

Copyright © 2025 · Hungry Bookworm