• Skip to primary navigation
  • Skip to main content
  • Skip to primary sidebar
  • Home
  • Reviews
    • Book Index
    • Fiction
    • Non-Fiction
    • Top Ten Tuesdays
The Hungry Bookworm

The Hungry Bookworm

reading + eating

  • Recipes
    • Drinks
    • Snacks, Sides & Apps
    • Main Dishes
    • Desserts
    • 5 Ingredients or Less
  • About
    • Meet Megan
    • How I Rate
    • Review Policy
    • Contact

quick read

All Grown Up + Grown-Up Ramen

June 6, 2017 by Megan 1 Comment

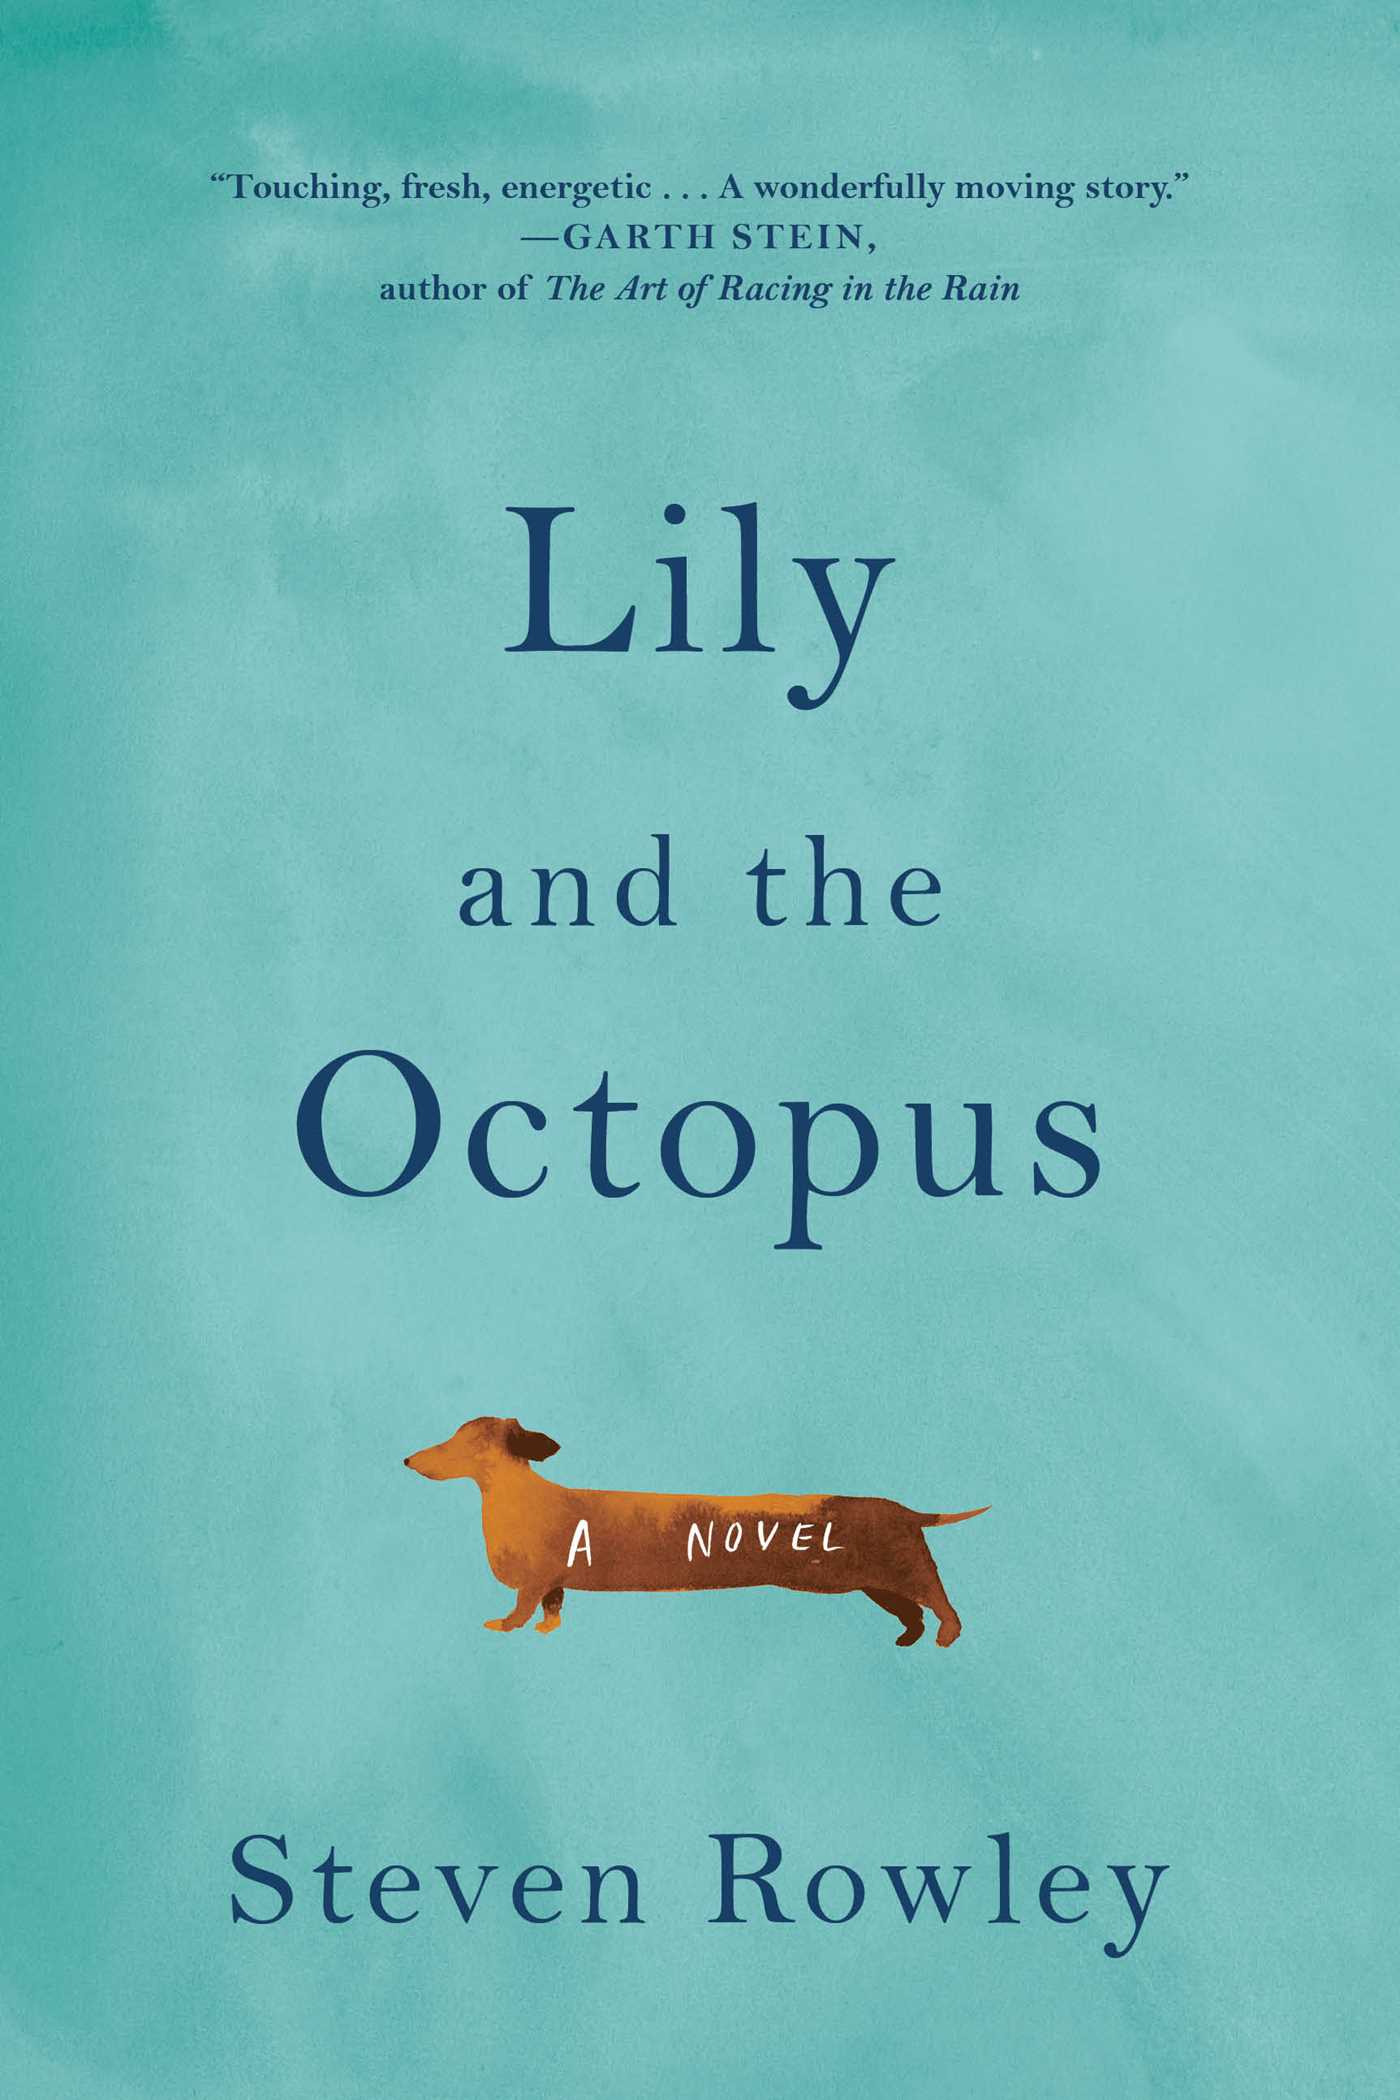
There was a time before my blog, and before I became obsessed with Goodreads, that I kept track of what I read with a Google spreadsheet. It was pretty simple - title, author, notes, date finished and a Y/N column for whether or not I’d recommend it. That spreadsheet is my only memory of the last time I read a Jami Attenberg novel and my succinct reaction was “the ending was predictable; I cared about exactly zero of the characters.” Four years later, with her novel All Grown Up, I found myself having deja vu.

9780544824249_custom-378e8da65f06b2846e6b6c01b27adf75e2edb10f-s400-c85

Andrea is a thirty-nine-year-old single woman without children. She wanted to be an artist, but instead finds herself in an unfulfilling career so she can pay the rent. In New York City, that’s not remarkably unusual. What is remarkably unusual about Andrea is that she refuses to grow up, and the people around her think that’s perfectly alright.  

I didn’t find it predictable, though perhaps I should have - a 40-year-old woman who still acts like someone fresh out of college can’t be expected to grow up at that late stage - but I didn’t care about any of the characters. In the end, I found Andrea’s life and the novel on the whole quite sad, but on the plus side, Attenberg’s writing was lovely and made the less than 200 pages easy to get through.

In a transformation like the one I hoped Andrea would have, I turned a college classic into something a bit more put-together, a posh NYC favorite - Grown-up Ramen Noodles. I found a recipe from Fork Knife Swoon to go off of and set to work.  

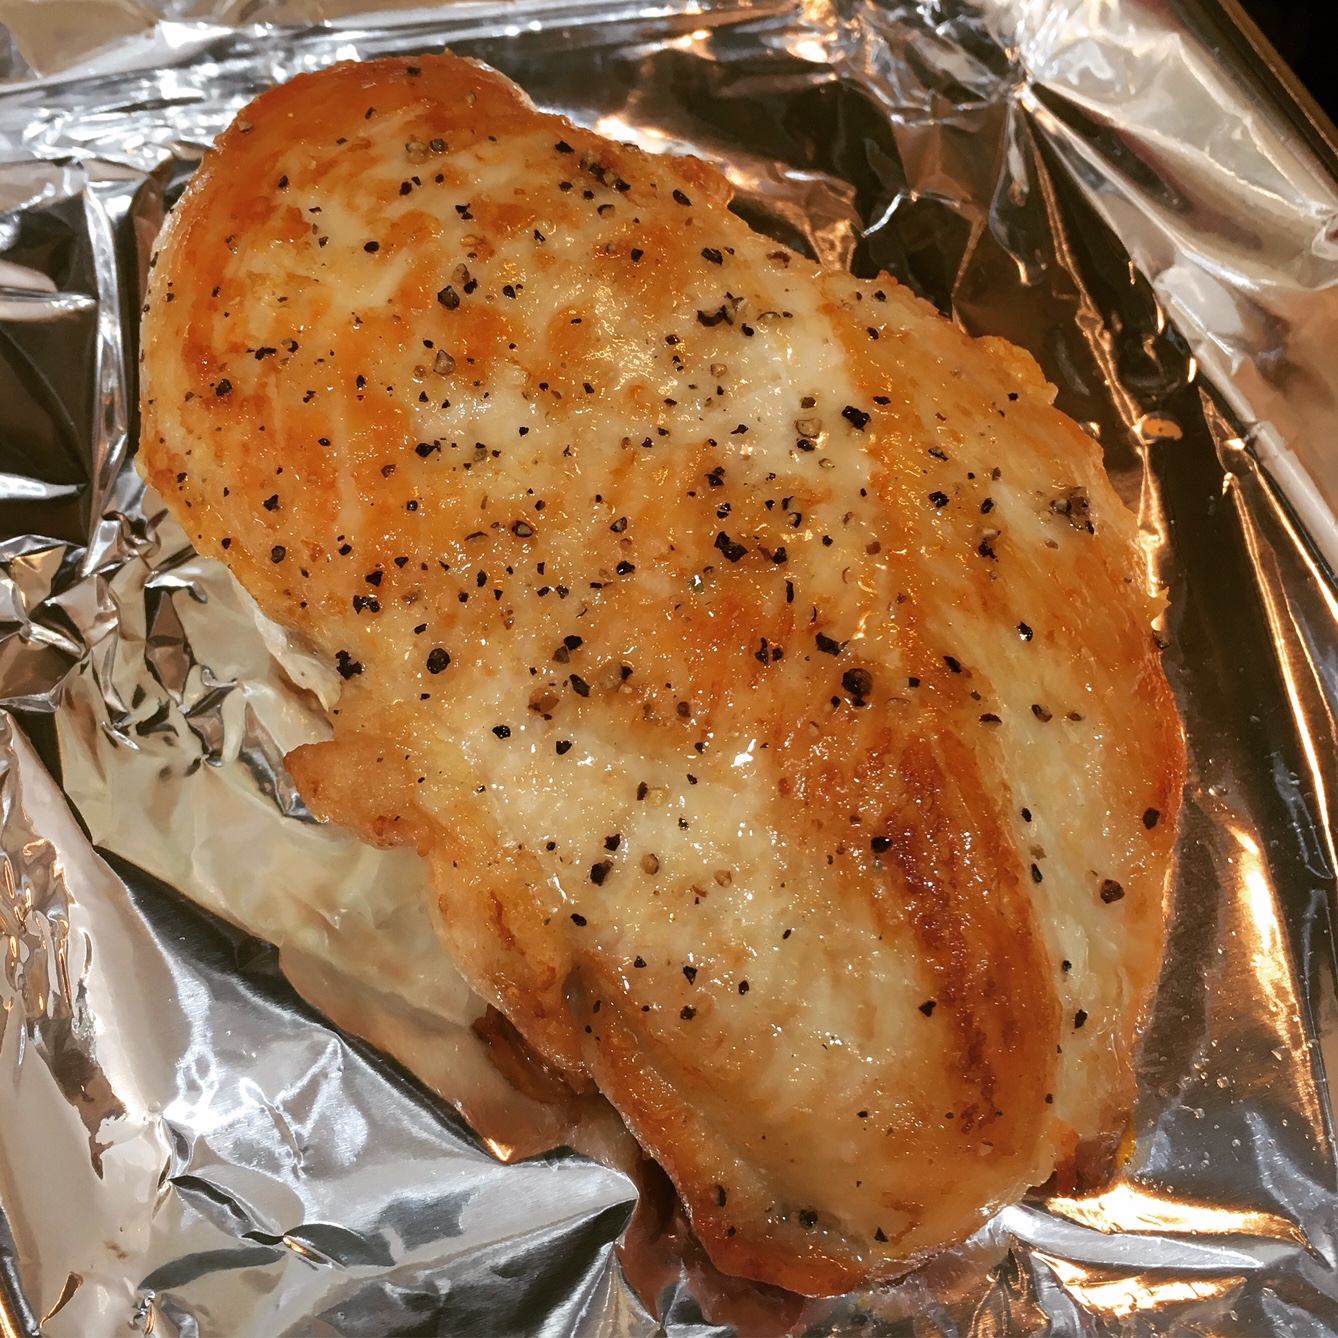
To start, I began cooking a chicken breast seasoned with salt and pepper in a skillet with olive oil. Once the rounded side was browned - about 7 minutes - I flipped it over and cooked the other side for another 5 minutes or so. I transferred it to a small foil-lined baking sheet and placed it in my preheated 375-degree oven to finish cooking.

IMG_3231

While the chicken was cooking, I began my broth and set the water for my eggs to boil. In a medium saucepan, I heated some toasted sesame oil before adding minced garlic and ginger. I allowed those to cook for a few minutes until fragrant. Then, I added the soy sauce and rice cooking wine, stirring to combine. After another minute, I added the chicken broth, covered the pan and brought it all to a boil.

Once boiling, I turned down the heat and allowed it to simmer for 5 minutes. I added the dried mushrooms and let the broth continue to simmer. Meanwhile, I removed the chicken from the oven and set it aside. I also added the two eggs to the separate pan of boiling water and set a timer for 7 minutes.

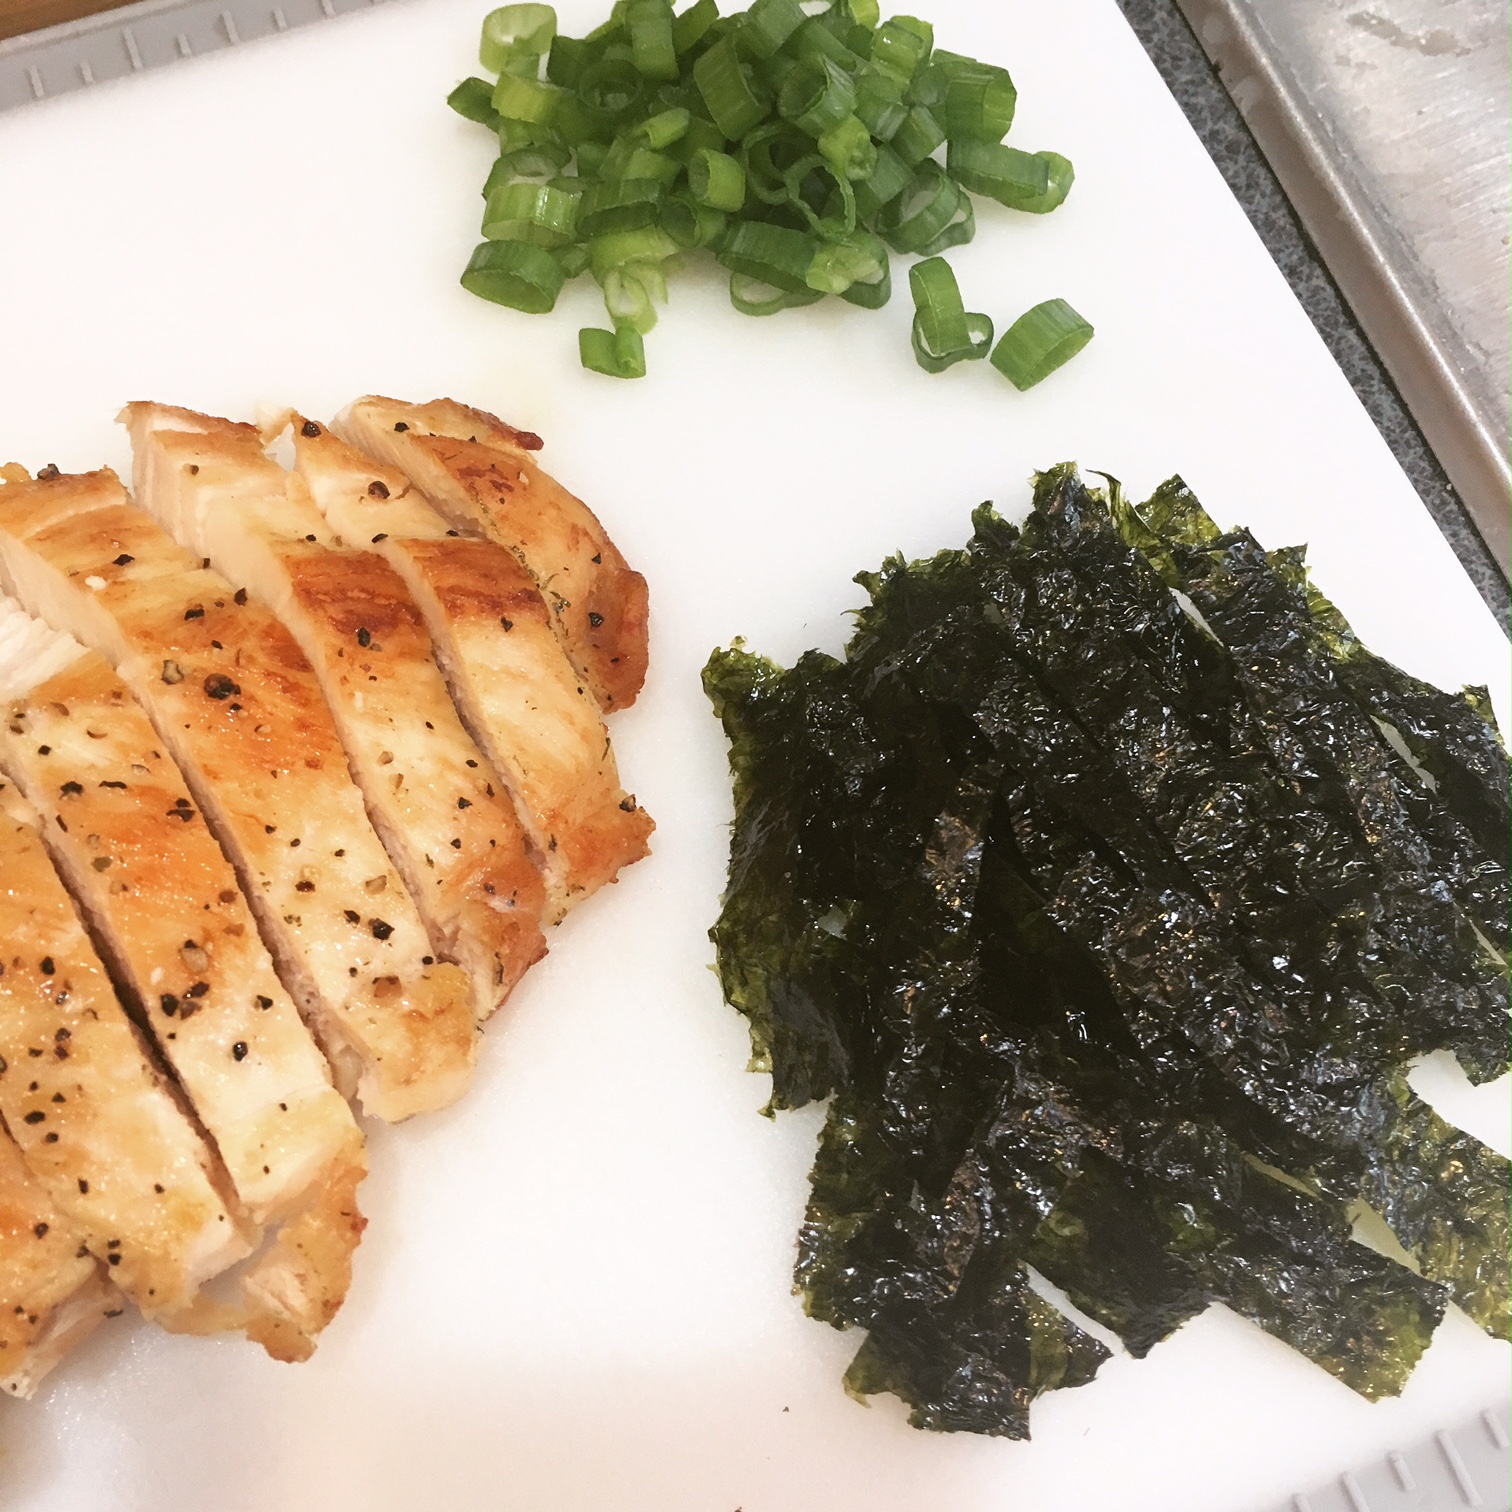
I used this time to prep my scallions and seaweed, and once the chicken had rested, I cut it into slices.

IMG_3232

After 10 minutes, I removed the mushrooms and placed them in the waiting bowls. (If I had sliced them, I would’ve done so here. If I was making this again, I would slice the mushrooms into more bite-size pieces, as noted in the recipe below.) I also placed the eggs into an ice bath so they could cool before peeling.

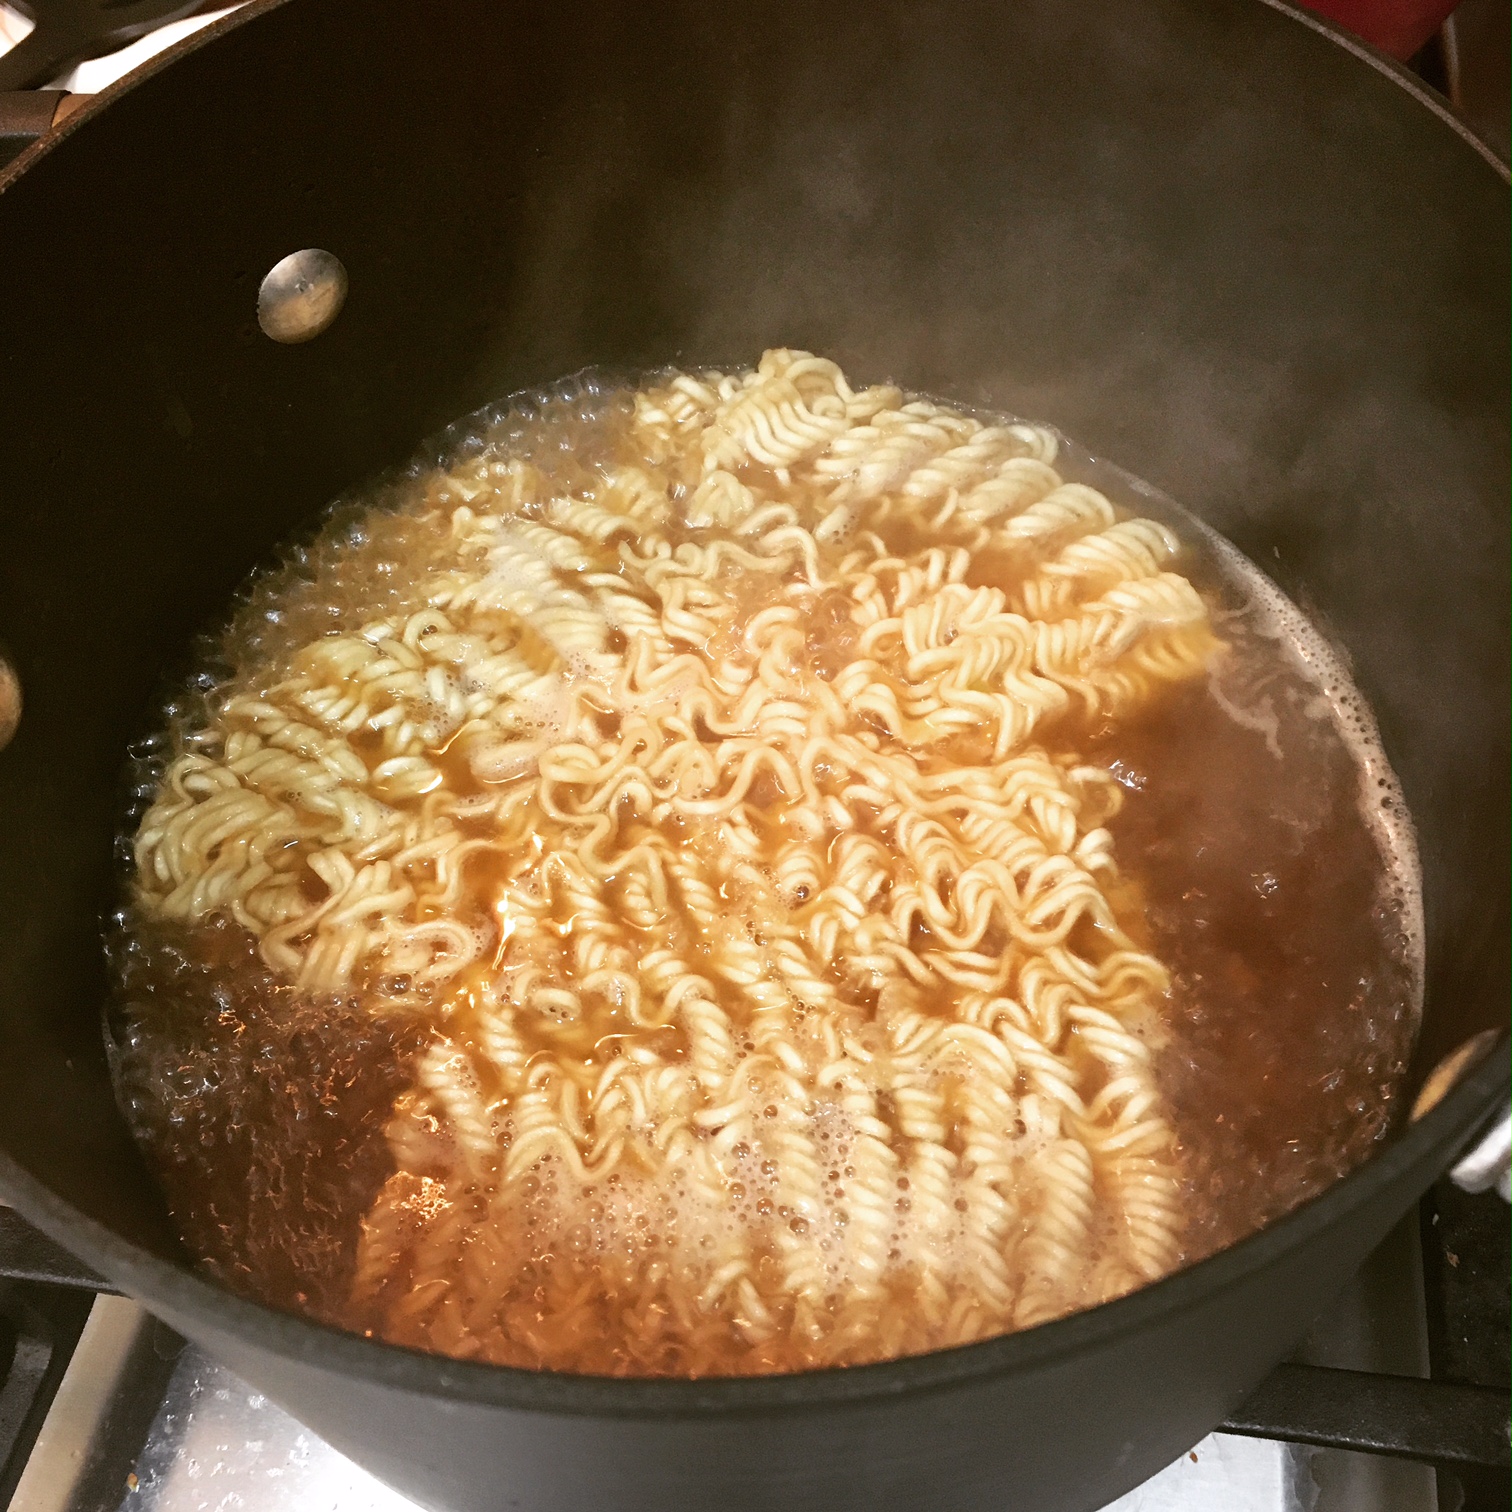
I added the dried ramen noodles into the prepared ramen broth, discarding the flavoring packets that come with the noodles. (College memories!) You could cook the noodles in plain boiling water instead, but I have always preferred to make them in the broth/flavoring to impart some of that flavor on the noodles.

IMG_3233

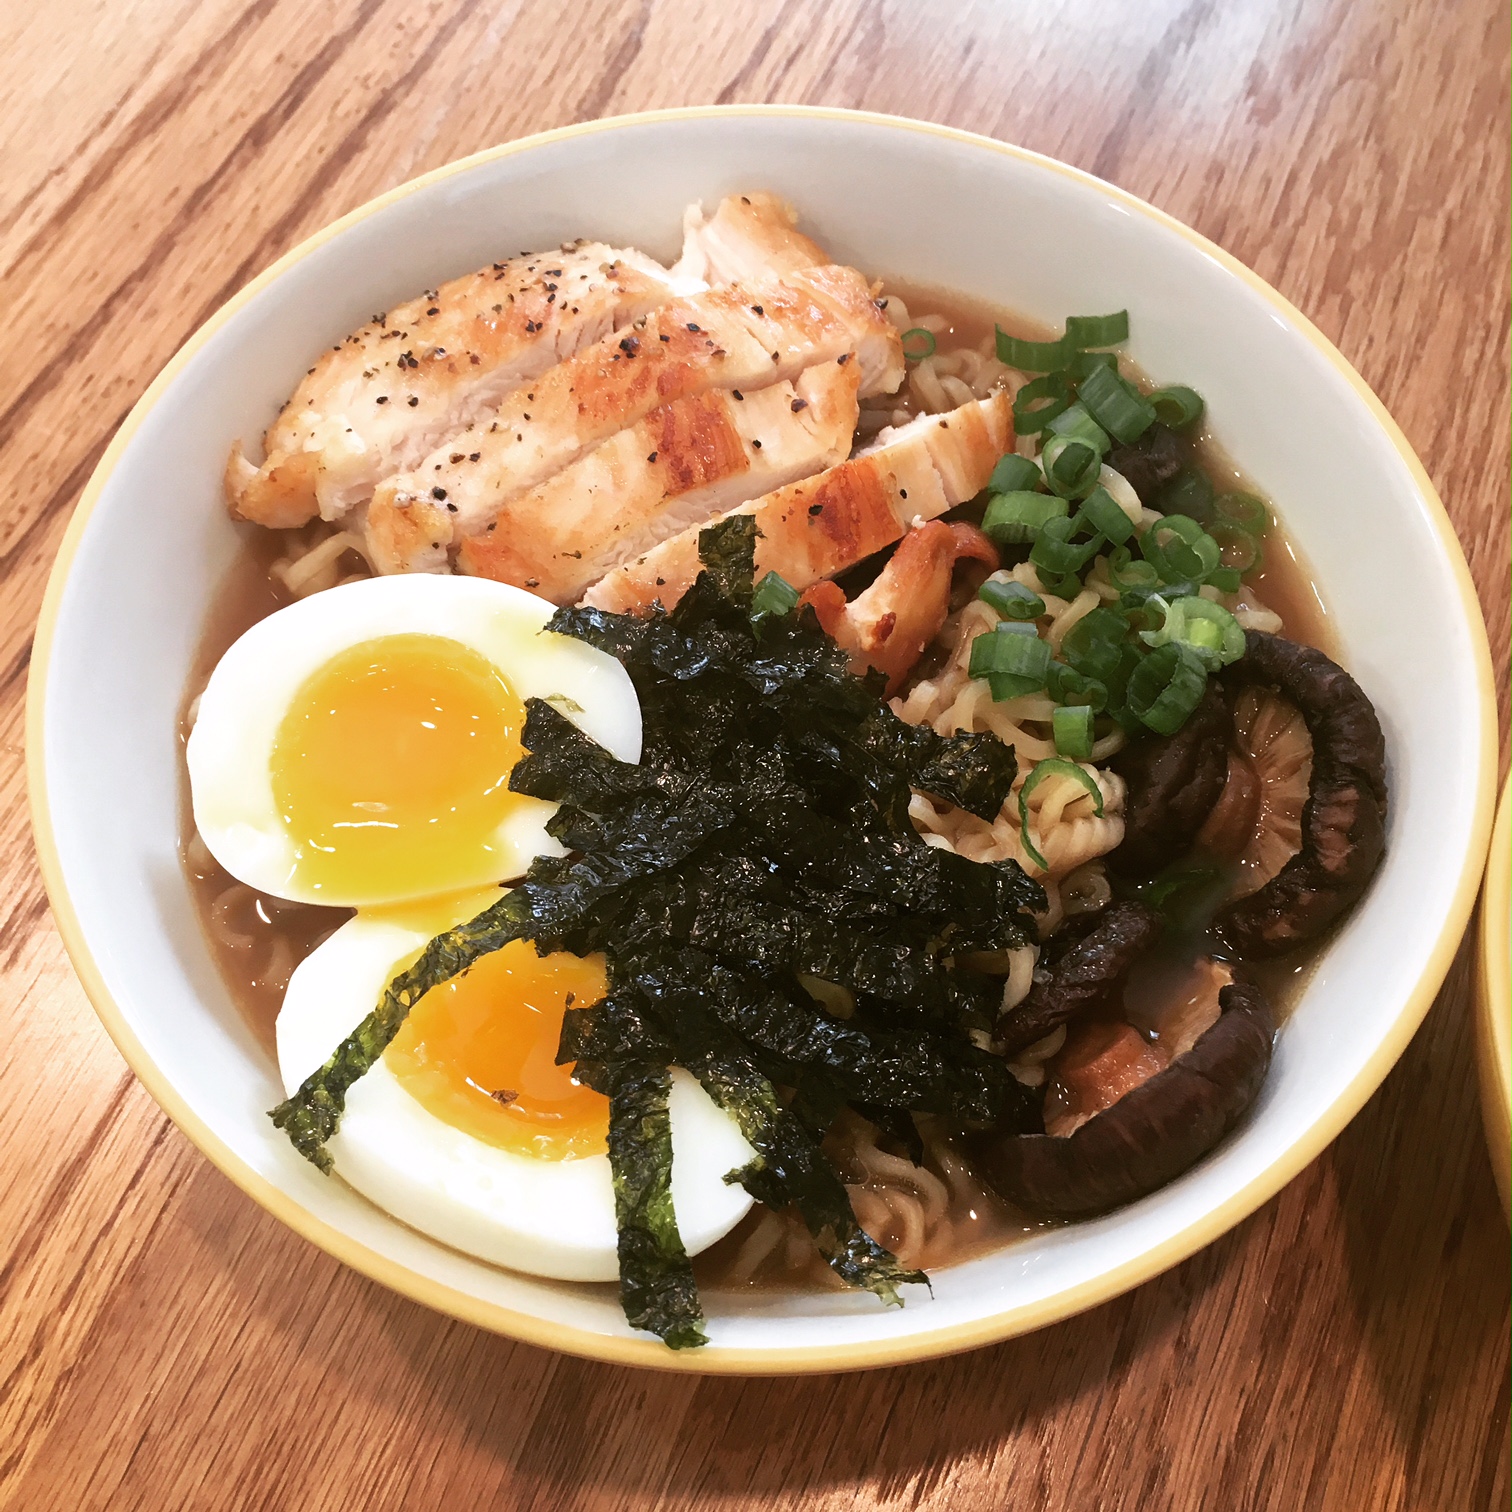
Once the noodles are ready, carefully place them in each bowl and top with the broth. Carefully peel each egg, slice in half and place in the bowls on top of the noodles and mushrooms. Add the sliced chicken, scallions and seaweed. Serve and enjoy!

IMG_3234

Grown-Up Chicken Ramen

  • Servings: 2
  • Time: 1 hour
  • Print

Ingredients

  • 1 large boneless, skinless chicken breast
  • kosher salt and freshly-ground black pepper, to season
  • 1 TBS unsalted butter, or olive oil
  • 2 tsp sesame oil
  • 2 tsp fresh ginger, minced
  • 3 tsp fresh garlic, minced
  • 3 TBS low-sodium soy sauce
  • 2 TBS rice cooking wine
  • 4 cups chicken stock or broth
  • ½ - 1 oz dried shitake mushrooms
  • 1-2 tsp sea salt, to taste
  • 2 large eggs
  • 1/2 cup scallions, sliced
  • 2 (3 oz) packs dried ramen noodles
  • optional: roasted seaweed snacks, in ribbons, for serving

Directions

  1. Cook the chicken: Preheat the oven to 375 degrees F. Season the chicken generously with salt and pepper. Melt the butter (or heat olive oil) in an oven-safe skillet over medium heat. Add the chicken breast, round side down, and cook until golden brown and it releases easily from the pan, about 5-7 minutes. Flip the chicken over and cook for another 4-5 minutes, until golden.
  2. Transfer the skillet to the oven and roast for 15-20 minutes, until the chicken is cooked through. (If you don’t have an oven-safe skillet, you may transfer the chicken to a small baking sheet lined with foil.) Remove from the oven, transfer the chicken to a plate and cover with foil until ready to serve.

  3. Make the ramen broth: Heat the sesame oil in a large pot over medium heat, until shimmering. Add the garlic and ginger, and cook for a few minutes until softened. Add the soy sauce and rice wine, and stir to combine. Cook for another minute. Add the stock, cover, and bring to boil. Remove the lid, and let simmer uncovered for 5 minutes, then add the dried mushrooms. Simmer gently for another 10 minutes, and season with salt, to taste.
  4. Otherwise, take the mushrooms out of the broth using tongs, and carefully, slice them into thick bite-size slices on a cutting board. (For particularly large mushrooms, you may cut them in half before slicing.) Place in bowls for serving.

  5. Make the soft-boiled eggs: Fill a pot with enough water to cover the eggs, and bring to a boil. Gently lower the eggs (still cold from the fridge) into the boiling water, and let simmer for 7 minutes (for a slightly-runny yoke) or 8 minutes (for a soft, but set-up yoke).
  6. Meanwhile, fill a large bowl with ice water. When the timer finishes, transfer the eggs to the ice bath to stop the cooking process. Wait at least 5 minutes, or until cool enough to handle, then carefully peel away the shell and slice in half, lengthwise. Set aside until ready to serve.

  7. Assemble the ramen bowls: Meanwhile, chop the scallions and slice the seaweed snacks into ribbons (if using). Slice the chicken into thin pieces. Set aside. When the eggs are in the ice bath, add the ramen noodles to the broth. Cook for approximately 3 minutes, until soft, then divide the noodles into two large bowls, next to the mushrooms. Add the ramen broth, dividing evenly. Top each bowl with half of the sliced chicken breast, a soft boiled egg each, fresh scallions and the seaweed. Serve immediately.

Adapted from: Fork Knife Swoon

To save some time, or if you’re making this on a warm day like I was, substitute pre-made rotisserie chicken.


This post contains affiliate links. Full disclosure here. 

Filed Under: book review, recipe Tagged With: book club, chicken, contemporary, dinner, fiction, lunch, quick read, soup

Lots of Candles, Plenty of Cake + Funfetti Cake

June 1, 2017 by Megan 5 Comments

I added Anna Quindlen’s memoir Lots of Candles, Plenty of Cake to my to-read list almost four years ago. I don’t remember my reasoning for wanting to read it back then, but I know that I decided to finally rescue it from my too-long list - which currently sits at 436 books - because I wanted to make a cake.

Quindlen_Lots-of-Candles-Plenty-of-Cake.jpg

I knew nothing of Quindlen when I began reading, and over the course of her “memoir,” I can’t say I know that much more about her. Really it seemed more like a carryover from her columns in the New York Times as she described them - a collection of her thoughts on life and aging, coupled with bits of advice.

Perhaps I wasn’t exactly the target market for this book - I am roughly half her age, really just at the beginning of my career, not yet married and currently without children. I’m still figuring a lot of things out, and while in some ways she is too, we are figuring out very different things about life. I was able to glean a few interesting insights from her writing, but ultimately, I think this book is one I’d like to try again a couple of decades down the road.

The cake I envisioned when I chose this book was a towering cake ablaze with an unsafe amount of candles. So, I began my recipe search by buying four dozen tall, skinny, colorful candles to cover my imaginary cake. (Thank you, Amazon!) After all, candles do come first in the title - lots of them - and the plenty of cake comes second.

With the candles secured, I sought out a recipe for funfetti cake and found a great one from Sugar Spun Run. The homemade, triple-layer cake suited my needs perfectly. Now, I just had to execute…

I started the night before by setting out my frozen sticks of butter to soften overnight. Between the frosting and the cake, there was so much butter (over a pound and a half!). In the morning, I preheated my oven, separated my eggs and floured the pans to get started.

Then, I added the butter for the cake (1 stick, plus 1 tablespoon) to the stand mixer and beat until creamy. In went the sugar and oil, beaten until well-combined and creamy. I used a scraper on the sides of the bowl and added in the vanilla extract.

In a separate bowl, I whisked together the flour, baking powder and salt. Then, as instructed, I alternated between adding the flour and the milk to the butter-sugar mixture in the mixer, beating on medium speed until combined.

IMG_3094

I whipped the egg whites into stiff peaks and measured out a half cup of sprinkles to add to the cake batter.

IMG_3095

I gently folded them into the batter until both the egg whites and sprinkles were well-incorporated and the funfetti batter was complete.

IMG_3097

I only had 2 cake pans, so I put my best estimate of one-third of the batter into each of my cake pans, saving the last third to bake after the first two layers were finished. I baked them together for about 35 minutes, using a toothpick to test each one before allowing them to cool. After 15 minutes, I removed each cake layer from the pan so they could finish cooling on a rack. Then, I baked my last layer.

IMG_3098

After all of the cake layers were out of the oven and cooling, I set to work on my frosting. First, allll of the butter - 6 softened sticks - went into the stand mixer. (I increased the recipe by 50%, according to the recommendation, so I wouldn’t run out. I ended up having more than enough - please read my notes in the recipe.)

IMG_3099

Once the butter was creamy, I added salt and beat for about 20 more seconds. I did my best to add the powdered sugar gradually without making a mess, but I wasn’t quite successful. My lovely red mixer looked like it had been in a snowball fight by the time I was done! I let it incorporate approximately 1 cup at a time and then added in the vanilla extract.

My cake layers weren’t 100% even because I had had to estimate, so I started with the thickest layer at the bottom. I frosted the top of that, placed the next layer and frosted that, before placing the last layer and frosting the top and sides of the entire cake. As suggested, I put the cake with the crumb coat into the freezer for about 15 minutes before finishing the frosting with a final thicker layer.

IMG_3100

The last step to decorating the cake - but certainly not the least! - was adding the sprinkles. I watched quite a few tutorials on the best way to add the sprinkles without making a mess. My frosted cake was on a cardboard cake round, so I set that on a cooling rack nested into a baking sheet with sides. I cupped my dominant hand (in my case, my left) and filled it with sprinkles, carefully tipping them onto the side of the cake. Most of the extras fell into the baking sheet as expected!

I continued to rotate and sprinkle until the entire bottom third of the cake was covered in sprinkles. Lastly, I carefully covered the outside of the top of the cake with a thick line of sprinkles to match the bottom. It was easier than I expected it to be! And, as someone who is usually terrified of cake-decorating, I found that sprinkles not only do sprinkles look super festive, they cover a lot of errors. 🙂

IMG_3101

Last but not least, it was time for the candles. I didn’t end up using all of the four dozen candles I bought, but I covered the cake pretty well. The candles looked impressive. I have honestly never been more proud of a cake I’ve made - especially from scratch. Hope you enjoy it as much as Scott, my sister and brother-in-law, and my co-workers did! (I know I didn’t have to twist any arms, but thanks to all for taste-testing.)

Triple-Layer Funfetti Cake

  • Servings: 14
  • Time: 1 hour, 30 minutes
  • Print

Cake Ingredients

  • 9 TBS butter, softened
  • 3 cups sugar
  • 1 cup canola oil (vegetable oil would also work)
  • 4 tsp vanilla extract
  • 4 cups + 2 TBS all-purpose flour
  • 4½ tsp baking powder
  • 1½ tsp salt
  • 1½ cup milk
  • 9 egg whites (room temperature preferred)
  • ½ cup sprinkles

Buttercream Frosting Ingredients

  • 1 lb unsalted butter, softened to room temperature
  • ¼ tsp salt
  • 6 cups powdered sugar
  • 6 TBS heavy cream
  • 2 tsp vanilla extract

Cake Directions

  1. Preheat oven to 350F and prepare 3 8-inch round cake pans by generously greasing and flouring. Be sure to shake out excess flour.
  2. In stand mixer, beat butter on medium-low speed until creamy.
  3. Add sugar and oil and beat until all ingredients are well-combined and creamy.
  4. Scrape down the sides and bottom of the bowl and then stir in your vanilla.
  5. In separate bowl, whisk together your flour, baking powder, and salt.
  6. Measure out your milk. Then, with mixer on medium speed, gradually alternate between adding the flour mixture and the milk, starting and ending with the flour mixture. Stir until each one is almost completely combined before adding the next. Pause occasionally to scrape down sides and bottom of bowl.
  7. In separate bowl, combine your egg whites and, with a hand-mixer on high-speed, beat until stiff peaks form.
  8. Using a spatula, gently fold your egg whites and sprinkles into your batter. Take care to scrape the sides and bottom of the bowl so that ingredients are well-combined, and take care not to over-mix.
  9. Evenly divide cake batter into prepared pans.
  10. Bake on 350F for 35-40 minutes, or until a toothpick inserted in the center of each cake layer comes out clean or with few crumbs (should not be wet). For best results, rotate your cake pans halfway through baking to ensure even baking. Cakes will be a light golden brown when done.
  11. Remove cakes from oven and allow to cool in pans for 15 minutes. Run a butter knife around the inside rim of each pan and invert each onto a cooling rack. Allow to cool completely before frosting.

Frosting Directions

  1. In stand mixer, beat butter on medium-speed until creamy.
  2. Add salt and beat again for about 20 seconds.
  3. Gradually, about 1 cup at a time, add powdered sugar, waiting until each cup is completely mixed before adding the next cup.
  4. Then, 2 tablespoons at a time, add the heavy cream on medium-high speed, waiting until each addition is well-combined before adding the next 2 tablespoons.
  5. Add vanilla extract and stir on medium-high for 30 seconds.
  6. Transfer one layer of your cooled cake to serving platter. Use frosting to ice the top. Add the next layer, ice the top of that. Add your third layer on top and ice the top, and then do a thin "crumb coating" around the entire cake.
  7. Transfer to freezer for 10-15 minutes, then remove and apply a clean, thick coat of frosting around the entire cake.

From: Sugar Spun Run

Original recipe based on this technique from I Am Baker to frost cakes. She recommended increasing the above frosting recipe by 50% to ensure full coverage, but I had a TON leftover. I don’t like overly frosted cakes, but mine was still well-frosted according to taste testers (a good amount), so it’s up to you and your preferences.

This cake may also be made in 3 9" pans, just decrease the baking time. Start checking the cakes for doneness at 25 minutes.


P.S. It will apparently take me only 8 years (a shockingly short amount of time!) to finish my TBR list...assuming I don’t add any more books. If you’d like to calculate your own TBR time, check out Read It Forward’s calculator. Let me know in the comments how many years of reading you have ahead of you!

Screen Shot 2017-05-26 at 12.40.27 PM


This post contains affiliate links. Full disclosure here. 

Filed Under: book review, recipe Tagged With: baking, celebration, dessert, memoir, quick read

Today Will Be Different + Breakfast Casserole

January 5, 2017 by Megan 2 Comments

Based on the title alone, Maria Semple’s Today Will Be Different seemed like a novel with an uplifting outlook. At the same time, I was also reading The Happiness Project, a nonfiction book with a similar self-improvement theme that one of my book clubs had chosen for January to kick off the New Year. Goodbye, 2016! Hello, 2017! Let’s start fresh.

28449270

I had loved Maria Semple’s last novel Where’d You Go Bernadette? It was laugh-out-loud funny with a surprising format, and I still recommend it to people constantly. Naturally, I was looking forward to her follow-up. As the title suggests, Today Will Be Different takes a peek at a day in the life of our main character Eleanor. She wakes up with the intention to be a better person than yesterday.

On a day that’s anything but ordinary, Eleanor certainly does her best to follow through with her resolutions. As the day unfolds, she is greeted with several surprises, including an adventure down memory lane. It definitely had some chuckle-worthy moments and relatable insights, but even for a novel about just one day, it felt rushed, incomplete, and in the end, a bit too contrived.

Still, it wasn’t a bad read - certainly enjoyable, and I took it as a bit of an inspiration to do a little better every day than the day before.

Best to start with breakfast, I think. I found an easy recipe for a breakfast casserole that’s greatest appeal was that most of the work could be done the night before. It ended up being a perfect dish to make between Christmas and New Year’s, when everything feels a little lazier and there are heaps of leftovers - especially, in our case, of spiral sliced ham. All I really had to buy was the frozen hash browns.

My parents came over for brunch late one morning, so the night before I did all of the prep, knowing tomorrow would be better. Easy satisfying breakfast is always a great way to start the day!

I chopped up what we had left of the Christmas ham, which ended up being just shy of 2 cups, but was still plenty for the recipe.

img_2407

I poured the shredded frozen hash browns into the bottom of a greased 9x13 casserole dish and whipped up a dozen eggs.

Next, I added the cheese (a little more cheddar and a little less pepper jack, since my mom isn’t a huge fan of spiciness), the chopped ham, seasoning salt and whole milk (which I used instead of half-and-half because we had it on hand). I stirred it all together and then poured it on top of the potatoes. My prep was complete, so I covered the dish in foil and set it in the fridge, ready to relax for the rest of the night.

img_2410

The next morning, about an hour and half before my parents arrived, I preheated the oven to 350 degrees and then placed the foil-covered casserole into the hot oven. Towards the last 20 minutes, it started bubbling over, so I placed a cookie sheet underneath the dish - I suggest doing this as a precaution when you first put it in the oven.

After the first 90 minutes, I removed the foil and baked it for an additional 5 minutes uncovered. The casserole looked finished, but the top was a little wet because the moisture had nowhere to go underneath the foil. This last 5 minutes helped the cheese become a little more golden and got rid of all the excess moisture, without overcooking the casserole. It was still fluffy and delightful for brunch.

img_2411

I made my parents and Scott wait while I took some photographs (sorry, guys!), but luckily this recipe had a 10-minute anticipation time built right in.

img_2412

img_2413

Everyone loved it, and I look forward to making this for special occasions and everyday weekends alike in the coming year.

The Best Breakfast Casserole

  • Servings: 8-12
  • Time: 1 hour and 40 minutes, including 90 minutes of bake time
  • Print


From: Alyssa, The Recipe Critic

Ingredients

  • 24 oz frozen shredded potatoes
  • 12 eggs
  • 2 cup half and half [or whole milk]
  • 1 tsp seasoning salt
  • 1½ cups cheddar cheese, grated
  • 1½ cups pepper jack cheese, grated
  • 2 cups chopped ham (or your preferred meat, sausage would also be great)

Directions

  1. Grease a 9x13 inch pan. Add the frozen and shredded potatoes to the bottom of the pan. Sprinkle with salt and pepper.
  2. In a large bowl, whisk the eggs together. Then add half and half, seasoning salt, cheeses and chopped ham or meat.
  3. Pour over the top of the frozen potatoes. Cover with foil and refrigerate for 2 hours or overnight.
  4. Bake covered in foil at 350 degrees for 90 minutes. Let rest for 10 minutes before serving.

This post contains affiliate links. Full disclosure here.

Filed Under: book review, recipe Tagged With: book club, breakfast, contemporary, easy prep, fiction, humor, make ahead, quick read

Talking As Fast As I Can + Luke's Cheeseburgers

December 8, 2016 by Megan 4 Comments

Two months ago, I pre-ordered Lauren Graham’s collection of personal essays. Last week, it arrived! I couldn’t wait to dive in and, once I started reading, I tackled it within a few hours. She covered everything from her time on Parenthood (another enjoyable TV favorite) to her experience writing her novel Someday, Someday, Maybe and, of course, what it was like to be a part of Gilmore Girls the first time around and how lucky she felt to get to do it all again in the recent revival.

IMG_2136.JPG

Reading Talking As Fast As I Can: From Gilmore Girls to Gilmore Girls and Everything in Between is what I imagine talking with Lauren Graham to be like - funny, genuine and a little all over the place. As such, she didn’t spend too much time on any one thing and, in a few cases, I was left wanting more.

I thought it was interesting to learn that, as an actor who doesn’t particularly like watching her work, she hadn’t actually seen much of the original Gilmore Girls series. One of my favorite parts of the book was her chapter on the show as she watched it on Netflix. Another natural favorite was her chapter on the revival - don’t worry, she gives fair warning about the spoilers. After devouring the new episodes and being left with mixed feelings about it (more on that in my next post), it was above all nice to see the heart that went into making it, on Lauren’s part as well as everyone else involved.

Deanna and I chose to pair Lauren’s book with a Gilmore Girls classic, a dish that Lorelai herself ate many many times on the show - the Luke’s Cheeseburger. If you’re visiting Stars Hollow (I wish!), a stop at Luke’s for breakfast or lunch is an absolute must and, based on the quantity these ladies ate, I’d say they’re highly recommended.

If you have a man friend who can help you out by throwing on a flannel shirt, a backwards hat, and a bit of a sarcastic no-nonsense attitude, you can try to get there. Even without the Luke imitation, these burgers were quite delicious.

To start, Deanna seasoned the beef and formed the patties, while I prepped our chosen toppings of lettuce, tomato and red onion.

img_2286

If you like your buns toasty, as I do, start by heating a griddle or large skillet and lightly buttering both sides of the sesame buns. Once the griddle is hot, place them butter side down and rotate them as needed to get a nice even golden brown on them.

While the buns are toasting (they can sometimes take longer than the burgers), get another skillet going over medium-high heat. Place the burgers in the preheated pan and, making sure to leave space between them, let cook through for about 3 minutes. Flip the burgers and cook for an additional 2-4 minutes. (Be sure to cook it to your desired doneness, which can be done with a meat thermometer.) If you’re adding cheese, do so now and cover loosely to help it melt.

Place the sesame buns on the plate and arrange the garnish as desired, before adding the burger to the bottom of the bun. Top with condiments if you like. Lorelai would request that you serve with french fries.

img_2287

If you’re feeling fancy, you can eat them with pinkies up, like I made Deanna do.

img_2295

We hope you enjoy! And, remember, no cell phones.

img_2296
Luke's Cheeseburger
Print Recipe

Luke’s Cheeseburgers

Prep Time5 minutes mins
Cook Time10 minutes mins
Total Time15 minutes mins
Course: Main Course
Cuisine: American
Servings: 4 1/2 pound burgers

Ingredients

  • Sesame seed buns
  • Butter
  • 1 lb lean beef ground
  • 1 tsp kosher salt
  • 1 tsp black pepper
  • Cheddar cheese slices
  • Red onion sliced thinly
  • Tomato sliced
  • Lettuce leaves
  • Pickle chips

Instructions

  • Prepare garnishes as desired. Recommend 1 lettuce leaf in halves, 2 thin tomato slices, 3-4 rings of red onion, and 3 pickle chips per burger.
  • To make the hamburger patties, divide the ground beef as desired into 2 or 4 portions. Roll each into a ball then flatten between palms. Season each flattened patty with salt and pepper.
  • Heat a large griddle or skillet over medium heat. Lightly butter each half of each bun and place butter-side down on the griddle. Cook until each bun is lightly browned. Place on plates and arrange with garnish.
  • Heat a large skillet over medium-high heat for 1 minute. Place the hamburger patties onto the skillet, leaving space between them. After 3 minutes, flip the patties. Cook for an additional 2 minutes (or longer, depending on your desired doneness.) If desired, add cheese to each patty. Cover if able to help the cheese melt for approximately 2 minutes. Remove from heat.
  • Place each patty on a bun and serve.

Notes

Adapted from: Eat Like a Gilmore by Kristi Carlson
Additional optional garnishes, as recommended in the original recipe, are grilled onions or sauteed mushrooms.

_______________

This post contains affiliate links. This does not increase the price you pay, but I may receive a small commission for any products you choose to buy. Purchases made through affiliate links help to cover my blogging costs. Thank you for helping to support The Hungry Bookworm! Full disclosure here.

Filed Under: book review, of interest, recipe Tagged With: dinner, essays, gilmore girls, humor, lunch, meat, nonfiction, quick read

Lily and the Octopus + Dog Treats

December 1, 2016 by Megan Leave a Comment

I hope you all had a Happy (and food-filled) Thanksgiving! I’m pretty sure it marked my first Thanksgiving ever without turkey and all of the fixings, which I definitely missed more than I expected. As it was, Scott and I were spending our last day in Cambodia (and shortly before that, Thailand).

Obviously the trip was amazing - worth missing one Thanksgiving for - and thanks to the long plane rides, an overnight train trip and a few days on the beach, I had plenty of time for reading! I finished nearly five books, including what I thought would be a light and whimsical read about a man and his dog: Lily and the Octopus.

lily-and-the-octopus-9781501126222_hr

Perhaps I should’ve paid more attention to the description of Lily as an “aging companion.” Not exactly what I bargained for - particularly when this trip was separating us from our own dog for two weeks, or what basically felt like forever. Sad book + missing my dog = Yes, I cried on the plane.

It’s not a spoiler to say that Lily dies. It’s very obvious from the beginning that the octopus is coming for her. The octopus, in fact, is a tumor that has Lily’s friend and owner Ted in denial before he is able to get down to the business of defeating it. This cleverly-written story is a journey of acceptance more than anything else. Every dog owner will relate (I especially loved the chapter of Lily’s nicknames, many of which Beta shares), but everyone will be touched.

To go with this book, and to make up our extended absence to Beta, I whipped up some homemade dog treats shortly after we got back home. Since the cupboard was bare, I found an easy recipe with only three ingredients - oats, peanut butter and (previously frozen ripe) bananas.

img_2120

First, I preheated the oven to 350 degrees while I processed the oats into a powder. I did not grind them up as finely as she did in the original recipe, resulting in a less smooth final treat. (Beta didn’t seem to mind.)

I mashed up the banana, mixed it in with the peanut butter and then added in the oat powder. I rolled it out onto the powdered counter top and used my bone-shaped cookie cutter to make the treats. Feel free to use any shapes you have handy.

img_2122

I ended up with 22 total treats and, with the little bit of “dough” that was left, I stuffed an empty Kong for a snack later.

img_2125

Bake for about 15 minutes, or until the edges start to brown. Mine ended up a little soft, but they end up being less crumbly and messy that way. And, of course, I had to let Beta taste-test right away!

img_2128

img_2130

Homemade Peanut Butter Banana Dog Treats

  • Servings: makes approx. 24 treats
  • Time: 20 minutes
  • Print


From: Munchkins and the Military Blog

Ingredients

  • 1½ cups uncooked old-fashioned oats
  • 1 large banana
  • ½ cup peanut butter

Directions

  1. Preheat your oven to 350 degrees.
  2. Using a food processor or blender, grind your oats until they're powder.
  3. In a bowl, beat together the banana and peanut butter until smooth. A few small chunks of banana here and there is ok. The dough should stick together, but shouldn't be sticky.
  4. Reserve about a tablespoon of ground oatmeal and pour the rest into the banana peanut butter mixture and mix until combined.
  5. Dust your surface with the reserved ground oatmeal and roll your dough to about a 1/4 inch thickness.
  6. Cut into desired shapes and place on a parchment paper lined cookie sheet.
  7. Bake treats for approximately 15 minutes, or until the edges start to brown.
  8. Cool completely before storing in an airtight container for up to a week.

This post contains affiliate links. Full disclosure here.

Filed Under: book review, recipe Tagged With: animals, contemporary, dog treats, fiction, quick read, tear jerker

Harry Potter and the Cursed Child + Exploding Truffles

October 30, 2016 by Megan 1 Comment

As though magically conjured, the library book I placed a hold on back in July finally became available last weekend - just in time for Halloween! I wasted no time starting (and finishing) the long-awaited Harry Potter and the Cursed Child, better known to some as “Harry Potter #8.” As with all the others, I read it as quickly as I could, though thankfully this was much shorter than Deathly Hallows.

harry_potter_and_the_cursed_child_special_rehearsal_edition_book_cover

For a moment, it was nice to be back in Harry Potter’s world. But I quickly realized it wasn’t the world I know and love. Yes, there was Harry and Ron and Hermione. There was Hogwarts and Professor McGonagall. There was even Draco Malfoy. What was missing was the actual intricacies of the world that J.K. Rowling created, the details that immersed me from the very first chapter of the very first book.

True, this is the script of a play rather than a book. I’m sure a lot of the magic comes across in the costumes, in the acting and on the stage. I can understand that and forgive that it’s just the nature of a play to have less description than a novel.

What makes me wish I hadn’t read it is that being an adult is relatively unmagical - even, oddly, in a magical world. Our famous trio is all grown up. They have jobs and children. They have bad eyesight. It was weird to read, and not just because their adulthood felt pretty much like it does in the muggle world. I think I would’ve been happily comfortable leaving Harry, Ron and Hermione right where we left them (before the final book’s epilogue) - in a magical world full of possibility.

Upon finishing, I decided that the only cure for how I was feeling was chocolate. Everyone knows it has mood-enhancing properties, even in the wizarding world. And, in true Halloween (and Weasley) fashion, I thought it would be fun to make something that was both a trick and a treat - Exploding Truffles.

Since this was my first attempt at making candy, I was a little nervous but mostly excited. Surprisingly, finding the Pop Rocks was the hardest part of the task; it turned out to be a very easy recipe to make. ( if you’re having as much trouble as I did finding Pop Rocks, even at the height of Halloween candy madness, I suggest a trip to Party City.) You can choose whichever flavor you like. I chose strawberry, which worked really well with the chocolate.

img_1598

I began by chopping my chocolate into smaller chunks, while my heavy cream simmered on the stove top.

img_1599

Once the cream is hot, pour over the chocolate pieces and whisk to melt it until together they form a well-combined and smooth mixture. Cover the bowl with plastic wrap and place in the fridge for 3 hours to firm up. (You could probably read the entirety Cursed Child while it’s chilling.)

After it’s chilled, scoop the ganache into small balls (about ¾ inches) and then roll them between your palms to round them out. This doesn’t really get as messy as it seems like it would.

Pour 4 of the Pop Rocks packets onto a plate or into a bowl, leaving one packet for decorating with later. Roll each truffle ball in the candy until it’s well-covered, setting each completed one on a baking sheet covered in aluminum. It’s best to work quickly so that the Pop Rocks are exposed to the air as little as possible (especially if it’s humid). Mine began crackling as soon as I took them out of the package!  

img_1600

img_1601

Once finished, plate the truffles in the freezer while you prepare the dipping chocolate (I chose dark chocolate). When that is melted and ready, lower each truffle into the bowl of chocolate using a fork and coat well. Be sure to remove any excess chocolate, which can be done by tapping the fork against the side of the bowl.

Place each truffle back on the foiled baking sheet. While the chocolate is still melted - it dries quickly, so I would do it immediately - sprinkle a few Pop Rocks from the last packet on top.

The original recipe suggests letting them sit in the refrigerator for 10-15 minutes to set, but I was impatient and they tasted great as soon as they were covered in chocolate!

img_1602

These delicious truffles would be an excellent addition to any Halloween party, Harry Potter-themed party, or Harry Potter-themed Halloween party. They are also fun to spring on unsuspecting coworkers in October, or just enjoy them on your average weeknight at home!

Print Recipe

Exploding Truffles

Prep Time45 minutes mins
Cook Time3 hours hrs 15 minutes mins
Inactive Time3 hours hrs 15 minutes mins
Total Time4 hours hrs
Course: Dessert
Servings: 24

Ingredients

  • 6 ounces bittersweet chocolate about 1 cup chopped
  • 4 ounces heavy cream
  • 5 .33-oz envelopes popping candy, like Pop Rocks [I recommend 6 to be on the safe side]
  • 12 ounces chocolate candy coating [I recommend dark chocolate]

Instructions

  • Chop the chocolate into small pieces and place it in a medium heat-safe bowl. Place the cream in a small saucepan over medium heat and bring it to a simmer.
  • Pour the hot cream over the chocolate and allow it to soften the chocolate for a minute. Use a whisk to blend the cream and chocolate together. Stir until you have a smooth, homogenous mixture. Press a piece of plastic wrap on top of the ganache and refrigerate it until it is firm enough to scoop, about 3 hours.
  • Scoop the ganache mixture into small balls, about 3/4" in diameter, and roll them into circles between your palms. If the ganache starts to melt and stick, use a little cocoa powder on your palms to prevent sticking.
  • Once they're rolled into balls, open 4 of the Pop Rocks envelopes and pour them into a small bowl. (Do not open them early, as the humidity in the air will start to make them sticky once the package is opened.) Roll a truffle ball in the Pop Rocks, then roll it briefly between your palms to embed the candy into the ganache. If the rocks don't stick, briefly roll the truffle between your palms to soften the chocolate, then roll it in Pop Rocks.
  • Set the coated truffles on a baking sheet covered with aluminum foil, and repeat with remaining truffles and Pop Rocks. At this point you want to dip the truffles as quickly as possible, to avoid exposing the Pop Rocks to air for an extended amount of time. However, the ganache might be a bit too soft for dipping, so I recommend putting the truffles in the freezer while preparing the dipping chocolate.
  • You don't want to freeze them, just chill them quickly for about 5-10 minutes. If you do not plan on dipping them immediately, do not put them in the freezer, just wrap them well with cling-wrap and refrigerate until you dip them.
  • While the truffles chill in the freezer, place the coating chocolate in a microwave-safe bowl and microwave until melted, stirring every 30 seconds to prevent overheating.
  • Once the coating chocolate is smooth and the truffles are firm enough to dip, it's time to dip the truffles. Use dipping tools or a fork to submerge a truffle in the chocolate. Remove it from the chocolate and tap the fork against the bowl several times to remove excess chocolate. Replace it on the foil-lined baking sheet, and, while the chocolate is still wet, sprinkle popping candy from the remaining envelope on top. Repeat with remaining truffles and chocolate.
  • Allow the chocolate to set in the refrigerator for 10-15 minutes. Store Exploding Truffles in an airtight container in the refrigerator, but for best taste and texture, serve at room temperature. Because the popping candy does absorb moisture, these are best eaten within 24 hours of making them, although they will still pop up to 3 days later.

Notes

From: The Spruce Eats

This post contains affiliate links. Full disclosure here.

Filed Under: book review, recipe Tagged With: candy, dessert, kid friendly, play, quick read, seasonal

  • « Go to Previous Page
  • Go to page 1
  • Interim pages omitted …
  • Go to page 6
  • Go to page 7
  • Go to page 8

Primary Sidebar

About

The Hungry Bookworm brings together literature and food. Megan has an insatiable appetite for both.

As C.S. Lewis said, “Eating and reading are two pleasures that combine admirably.” Enjoy!

  • Bloglovin
  • Facebook
  • Instagram
  • Pinterest

Subscribe

Don't miss out on bookish content, exclusive giveaways, and of course, book club-friendly recipes. Get notified of new posts via email.

Join 2879 subscribers.

Search for Ingredients, Recipes, or Books

Recent Posts

  • Subscriber Box Review: Literati Book Club - Roxane Gay's Audacious Book Club
  • Arsenic and Adobo + Ensaymada
  • Review of The Kindred Spirits Supper Club
  • Kids Edition: Sometimes I Like to Curl Up in a Ball + "Dirt" Pudding Cups
  • The Midnight Library + Broccoli and Ricotta Toast

Goodreads

Tags

5 ingredients or less appetizer baking book club book list book of the month books about food bread breakfast brunch chicken contemporary cookies cultural dessert dinner dinner party dystopia easy prep favorites fiction fruit historical fiction holiday ice cream linkup lunch meat memoir mini review nonfiction pasta quick read reading challenge science fiction seafood show us your books side dish snack soup TBR list thriller top ten tuesday vegetarian veggies

Archives

Other Great Book Blogs

Literary Quicksand
Never Enough Novels
Death by Tsundoku
Professional Reader 25 Book Reviews
Privacy & Cookies: This site uses cookies. By continuing to use this website, you agree to their use.
To find out more, including how to control cookies, see here: Cookie Policy

Footer Widget Header

Megan’s Instagram

Copyright © 2025 · Hungry Bookworm