• Skip to primary navigation
  • Skip to main content
  • Skip to primary sidebar
  • Home
  • Reviews
    • Book Index
    • Fiction
    • Non-Fiction
    • Top Ten Tuesdays
The Hungry Bookworm

The Hungry Bookworm

reading + eating

  • Recipes
    • Drinks
    • Snacks, Sides & Apps
    • Main Dishes
    • Desserts
    • 5 Ingredients or Less
  • About
    • Meet Megan
    • How I Rate
    • Review Policy
    • Contact

bread

Then We Came to the End + Bagels

July 24, 2018 by Megan 2 Comments

When I’m not reading, cooking or writing about it, I’m often at work. And, for those of you who don’t know, I work at an advertising agency. I’m an account person, which in a nutshell, means that most of my job is in service to our clients, doing whatever it is I need to do to make them happy. Like any job, there are a lot of things to like about advertising and there are a lot of things to dislike about it. Luckily, for me, the good far outweighs the bad.

Then We Came to the End by Joshua Ferris

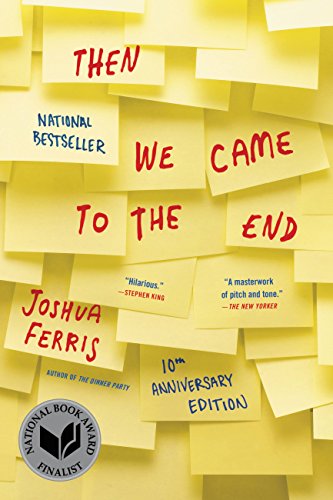
I recently picked up Joshua Ferris’ novel Then We Came to the End as part of the Book Challenge by Erin, for the category requiring you to read a book featuring a character who shares your profession. I don’t know why, but I expected to have a hard time finding a piece of fiction about advertising. I couldn’t have been more wrong; I found this one with a simple search. Obviously, the characters in Then We Came to the End work in an ad agency - in fact, almost all of them do.

[Read more...] about Then We Came to the End + Bagels

Filed Under: book review, recipe Tagged With: baking, bread, breakfast, contemporary, fiction, reading challenge

Standard Devation + Spaghetti Marinara and Garlic Bread

January 18, 2018 by Megan Leave a Comment

One day, Katherine Heiny’s novel Standard Deviation appeared in my library queue, ready to pick up. As I mentioned in January’s SUYB post, I can’t even remember how I heard about, but I must’ve added it to my library list right away so I wouldn’t forget about it. However it stumbled into my life, I’m glad it did; it wasn’t a life-changing novel by any means, but it was entertaining and enjoyable all the same - a bit like an indie rom-com.

Standard Deviation is about Graham, who lives in an apartment in New York City with his second wife Audra and their young son. While Graham seems to prefer to observe, his wife Audra talks constantly and makes friends wherever she goes, leading to a barrage of house guests who always seem to be underfoot.

A lesser storyteller could’ve easily painted Graham as an exasperated husband sick of his wife’s antics and Audra as a selfish busybody, and though they occasionally exhibit those qualities, on the whole they’re much more than that, and quite likeable. One of the more endearing (and amusing) storylines within the novel revolves around their son Matthew and his love of origami. Though it’s never explicitly said (that I can recall), it appears he has Asperger's, and their dedication to his passion is an excellent example of selfless parenting.

Like me, Graham loves good food and cooking at home, both for his family and their frequent guests. Also like me, he finds cooking less enjoyable when he’s forced to plan a meal around picky eaters. Unfortunately for Graham, he often found himself in such a situation, and it was in one of those moments that I drew my inspiration for today’s recipe:

Spaghetti marinara with garlic bread was his all-purpose crowd-pleasing picky-eater dinner. Spaghetti marinara was like taking a girl on a first date, actually: nothing fancy, no surprises, best foot forward.

I personally prefer meat sauce on my spaghetti, but desperate times call for desperate measures. I took the recipe my family usually uses for spaghetti sauce and omitted the meat to make a marinara sauce. This recipe is really easy, but it’s flavorful and thick so it sticks to spaghetti really well.

To start, I added about a half cup of chopped onion to olive oil already heated in a sauce pot and cooked them until they were translucent. To the onions, I added a large can of crushed tomatoes and small cans of tomato sauce and tomato paste. Then I added salt and pepper, dried basil, dried oregano, some sugar and Parmesan cheese and gave it all a good stir.

Once the ingredients are combined, bring it up to a boil and then reduce to a simmer. Like most tomato sauce, it can get messy real quick if it starts to bubble up and pop, so I like to keep a lid offset on top to let some of the air and steam escape but keep the sauce from getting all over the stovetop. You can let it simmer for as little as long as you like, stirring occasionally, but it's best after at least 20 minutes. Of course, it's even better the second day.

While the sauce simmered, I boiled the water for my spaghetti and started on the garlic bread. Because I was just making dinner for Scott and myself, I adjusted the recipe down and only used about a third of the Italian bread loaf. I partially melted some butter in a small bowl, added the garlic powder and dried parsley, and then melted the mixture the rest of the way. With a basting brush, I applied the butter-garlic mixture generously to each slice.

I baked the bread in the oven for about 10 minutes, covered each slice with shredded mozzarella and put the pan back in the oven for about 7 more minutes until it was melted. At this point, the spaghetti pasta was cooked al dente and the sauce was ready to go.

I need to perfect my spaghetti swirl for future fancy plating, but the taste more than makes up for the lack of finesse in that area. These crowd-pleasing recipes are as perfect for the discerning foodies in your life as they are the picky-eaters. It’s wonderful bonus that they’re easy too. Hope you enjoy!

Marinara Sauce

  • Servings: 6
  • Time: 30 minutes
  • Print

Ingredients

  • ½ cup chopped onion
  • 1 28-oz can crushed tomatoes
  • 1 8-oz can tomato sauce
  • 1 6-oz can tomato paste
  • ¼ teaspoon garlic powder
  • 1 teaspoon salt
  • ¼ teaspoon black pepper
  • ¾ teaspoon dried basil
  • ¾ teaspoon dried oregano
  • ¼ cup sugar
  • ¼ cup Parmesan cheese

Directions

  1. In a large sauce pot, preheat a bit of olive oil (about 1 Tablespoon) and add onion. Cook until translucent.
  2. Add crushed tomatoes, tomato sauce and tomato paste. Add remaining ingredients and stir.
  3. Bring to a boil then simmer. (Use a lid; it will splatter.)
  4. Serve over spaghetti or your favorite pasta.

Adapted from a family recipe

Recipe Notes: To make a meat sauce, simply add 1-lb ground beef or turkey, browning with the onion in step one.


Cheesy Garlic Bread

  • Servings: 6-8
  • Time: 25 minutes
  • Print

Ingredients

  • ½ cup butter
  • 1½ tablespoons garlic powder
  • 1 tablespoon dried parsley
  • 1 (1 pound) loaf Italian bread, cut into ½ -inch slices
  • 8 oz. shredded mozzarella cheese

Directions

  1. Preheat oven to 350 degrees F.
  2. In a small saucepan over medium heat (or the microwave), melt butter and mix with garlic powder and dried parsley.
  3. Place Italian bread on a medium baking sheet. Using a basting brush, brush generously with the butter mixture.
  4. Bake in the preheated oven approximately 10 minutes, until lightly toasted. Remove from heat. Sprinkle with mozzarella cheese and any remaining butter mixture. Return to oven approximately 5 minutes, or until cheese is melted and bread is lightly browned.

From: Noelle C on Allrecipes.com

This post contains affiliate links. Full disclosure here.

Filed Under: book review, recipe Tagged With: bread, contemporary, dinner, fiction, pasta, quick read

They Both Die at the End + French Toast

December 9, 2017 by Megan 2 Comments

Imagine a world where you knew exactly which day you would die but not how - on the morning of your death, you get a phone call with the warning and are instructed to make the most of it. That’s the premise behind Adam Silvera’s They Both Die at the End, a young adult dystopian novel. I devoured it in a single day.

On the morning of September 5, a representative from Death-Cast calls both Mateo and Rufus - two teenage boys - and informs them that their End Day is here. They each set off to live their best life on their last day on Earth, not knowing exactly how or when it will come to an end. Interestingly (and one of the things I loved most about Silvera’s concept), a whole economy has grown up around this knew End Day phenomenon, and it is through the app Last Friend, that Mateo and Rufus find each other.

Together, they set about tying up loose ends, experiencing new things and enjoying a last meal to fuel them through their adventures. Some may not appreciate knowing how it all ends before even picking up the novel, but don’t let that hold you back. The ending was not what I was expecting, and I found that the anticipation of the end-point kept the momentum going as I read. If you enjoyed the movie Stranger Than Fiction, which I very much did, that’s the closest approximation I can think of to knowing a plot point and not having it ruin the rest of the experience for you.

Of course, knowing a recipe would end up tagging along with my review, Rufus and Mateo’s most memorable meal on their End Day was important to me. At a hole-in-the-wall diner, they order what I can only hope was an amazing grilled chicken salad (which wouldn’t be my first choice, to be honest) and French toast with a side of French fries (now we’re getting somewhere…).

The French toast obviously stood out to me - yes, grilled chicken salad can be very delicious, but I would really rather not endure a last day without carbs. For those of you who followed my Thanksgiving Readathon, you’ll know I adored Molly Wizenberg’s A Homemade Life. Coincidentally, in it, she included a recipe for her father’s French toast, alongside a whole chapter describing its deliciousness. I knew this had to be the recipe I used here, because a last meal absolutely has to be the best. It did not disappoint, and I can only hope the boys’ French toast was just as amazing.

To start, I dug out my cast iron skillet and glugged in some canola oil, making sure to completely cover the bottom, per Molly’s instruction. Then, I cracked 3 eggs into a Pyrex pie dish, which I would ultimately use to coat the bread.

To the eggs, I added milk, sugar, vanilla, salt and nutmeg, whisking it all together. While the oil heated up, I added two slices of bread to the egg mixture, letting it soak for about 45 seconds or so on each side. (I unfortunately was unable to find a loaf of bread that wasn’t pre-sliced, so they weren’t cut diagonally, but I still think it worked well.)

Then, carefully, using tongs, I placed each slice into the hot oil. It bubbled as it should’ve, which was a good sign. I let it cook for between 1 and 2 minutes on each side.

When each pair of slices was finished, I placed them on a plate lined with paper towels. We had these for a quick dinner one night after work, but they were so easy, that I wouldn’t hesitate to make them on a sleepy weekend morning. I haven’t made a lot of French toast myself, but I have eaten it quite often at restaurants, and this was probably the best I’ve ever had. I can definitely see us adding it to the rotation, especially when we’re looking for a little simple indulgence.

To finish, I dusted the slices with some powdered sugar, which is something I love from years of ordering French toast at restaurants. I’m actually always disappointed when it appears on my table without a white dusting. Of course, we also covered them with syrup and dug right in.

Last Meal French Toast

  • Servings: 6-8 slices
  • Time: 20 minutes
  • Print

Ingredients

  • 3 large eggs
  • 1 cup whole milk
  • 1 tablespoon sugar
  • 1 teaspoon vanilla extract
  • ¼ teaspoon salt
  • pinch of freshly ground nutmeg
  • canola or other flavorless oil, for frying
  • 6 to 8 slices day-old bread, cut on the diagonal, about ¾ inch thick
  • pure maple syrup, for serving
  • powdered sugar, for serving (optional)

Directions

  1. Break the eggs into a wide, shallow bowl or an 8-inch square Pyrex dish. Whisk the eggs to break up the yolks. Add the milk, sugar, vanilla, salt and nutmeg and whisk to blend.
  2. Place a heavy large skillet - preferably cast iron - over medium-high heat, and pour in enough oil to completely cover the bottom of the skillet. Let the oil heat until you can feel the warmth radiating from it when you hold your hand close over the pan. To test the heat, dip the tip of a finger into the egg mixture - not the oil! - and flick a drop into the oil. If it sizzles, it’s ready.
  3. Meanwhile, when the oil is almost hot enough, put 2 to 3 slices of bread into the egg mixture, allowing them to rest for 30 seconds to 1 minute per side. They should feel heavy and thoroughly saturated, but they shouldn’t be falling apart.
  4. Carefully, using tongs, place the slices in the skillet. They should sizzle upon contact, and the oil should bubble busily around the edges. Watch carefully: with hot oil like this, the slices can burn more quickly than you would think. Cook until the underside of the each slice is golden brown, 1 to 2 minutes. Carefully flip and cook until the second side is golden, another 1 to 2 minutes. Remove to a plate lined with paper towel, and allow to sit for a minute or two before serving.
  5. Repeat with remaining bread. If, at any point, the bread starts to burn before it has a chance to brown nicely, turn the heat back a little. You want to keep it nice and hot, but not smoking.
  6. If desired, dust with powdered sugar. Serve with maple syrup.

Slightly adapted from: Molly Wizenberg’s A Homemade Life, featured on pages 39 - 40 as Burg’s French Toast

Recipe Notes: Bread should always be a day or two old. Make sure it has a soft, light crumb and isn’t too dense. When pouring in the oil, make sure it completely coats the bottom of the pan.


This post contains affiliate links. Full disclosure here.

Filed Under: book review, recipe Tagged With: bread, breakfast, dystopia, fiction, vegetarian, young adult

The Music Shop + French Onion Soup

December 2, 2017 by Megan Leave a Comment

If there are any music lovers out there, this book is for you. Rachel Joyce’s The Music Shop was similar in feel to The Storied Life of AJ Fikry, which I adored, except in place of a bookshop and bookworms you have a music shop and musicians (or at the very least, those who appreciate music). Though this book doesn’t hit shelves until January, I was lucky enough to get an early copy.


In a rundown neighborhood that smells of cheese and onion, in 1988, Frank is struggling to keep his music shop open. It is the age of the CD and though records are losing their appeal, Frank’s shop is something special. As a true connoisseur of music, he is able to recommend exactly the tracks his customers need, even if they didn’t know it was what they were looking for.

One day, a mysterious woman enters his shop, arousing the interest of the surrounding shop owners, who often congregate at Frank’s. He begins teaching her about music and everything begins to change. This novel has a wonderful, quirky set of characters and tells a heartwarming story. I only wish I was more into music, because I would have appreciated it that much more.

Though the book made the neighborhood’s pervasive smell of cheese and onion sound like a bad thing, I’ll admit it really just had me craving French onion soup. Full of caramelized onions and covered with melty cheese, nothing could be more delicious! I pulled out my trusty recipe from The Pioneer Woman, which I’ve been using for a few years now, and got to work creating my own cheesy, onion-y smells in the kitchen.

To start, I always slice my onions, since it takes a bit of time and I usually can’t finish slicing them all in the time it takes the butter to melt. I used 6 medium yellow onions, because that’s what I had on-hand, but if you’re buying them specifically for this recipe, you can substitute a few less large onions.

I melted a half stick of butter in my Dutch oven. (Ree uses a whole stick of butter, but over time I’ve adapted the recipe and use just half of that. Since we usually have leftovers, I’ve found that that much butter creates a pretty thick - and unappetizing - layer of solidified fat on top of the soup when it gets cold. It tastes just as good with half a stick, and is probably healthier too!)

To the melted butter, I added my sliced onions, which take up quite a lot of room in the Dutch oven - don’t worry! They’ll cook down considerably. I stir/toss the onions with a spoon to make sure they’re all pretty well coated in the butter and then I let them cook for about 20 minutes over medium-low heat while covered.

After they’ve cooked down a bit, it’s time to put them into a 400 degree oven, where they’ll cook for an hour minimum. I like to cook mine for closer to an hour and a half to really allow them to caramelize. My favorite thing about this recipe is that it’s perfect for lazy weekend days - it takes a while to make, but most of that time is hands-off. What you get in the end is a delicious, comforting soup.

Back on the stovetop, over medium heat, I used a wooden spoon to scrape off some of the brown bits, which are full of flavor. Carefully add a generous cup of dry white wine to the pot, all while scraping the flavor off the bottom and sides. (If you’re concerned about potential fire hazard, since alcohol is flammable, you can briefly turn off the heat, add the wine, and turn the heat back on. With such a large/deep pot, I don’t find that to be necessary.) I let that mixture cook down until the alcohol is mostly cooked off, about 5 minutes.

To the onions, I added the chicken and beef broths, minced garlic and a dash of Worcestershire sauce. I allowed the soup to simmer for between 30 and 45 minutes.

Meanwhile, with about 15 minutes left on the soup, I prepped the bread to use on top of the soup. I sliced about half of a baguette, making sure to keep them on the thicker side. (I like to freeze the other half of the baguette for the next time I make the soup, or for another recipe.) I put them under the broiler for a few minutes, until they began to brown and get crispy.

When the soup was finished, I ladled it into a bowl for each of us, set two pieces of bread on top and covered that generously with grated cheese. (I used a nutty Swiss from Trader Joe’s, since they were out of my usual shredded mix - see notes. If the mix is unavailable or you’re not near a TJs and budget is a factor, Swiss is a great substitute for Gruyere, which usually runs $10/lb or more.)

Since my bowls aren’t oven safe, I used my old trick of popping each bowl into the microwave for a minute or less - I suggest watching through the door - until the cheese is melted. You don’t get the nice browning that you get under the broiler, but the meltiness is really what I’m looking for in a French onion soup anyway. Hope you enjoy!

French Onion Soup

  • Servings: 6
  • Time: 2 hours, 20 minutes
  • Print

Ingredients

  • ½ stick butter
  • 4 large or 6 medium yellow onions, halved root to tip and thinly sliced
  • 1 cup (generous) dry white wine
  • 4 cups low sodium chicken broth
  • 4 cups beef broth
  • 4 cloves minced garlic
  • dash of Worcestershire sauce
  • Several thick slices of baguette
  • 5 ounces weight (to 7 Ounces) Gruyere cheese, grated

Directions

  1. Melt butter in a heavy soup pot or Dutch oven over medium-low heat. Add onions and cook, covered, for 20 minutes. Meanwhile, preheat oven to 400 degrees.
  2. Place pot into the oven with the lid slightly ajar to ensure the onions will brown. Allow onions to cook in the oven for 1 to 1 ½ hours, stirring at least once during the cooking process so onions won’t stick and burn.
  3. Remove pot from oven and place back on stovetop over medium heat. Stir, scraping off all the brown, flavorful bits. Turn off heat and pour in wine. Turn heat back to medium. (If you do this carefully, you don’t need to turn off the heat.) Cook wine for 5 minutes, allowing it to reduce. 4. Add broths, Worcestershire sauce and minced garlic and reduce heat to low. Simmer for 30 to 45 minutes.
  4. Butter one side of the bread slices and broil over low heat, allowing bread to brown and become crispy.
  5. When soup is ready, ladle into bowl or ramekin. Place crispy bread on top, and then sprinkle generously with grated cheese. Broil until cheese is melted and bubbly. (Alternatively, if you don’t have oven-safe bowls, you can place in microwave for 30 - 60 seconds, or until melted.)
  6. Serve immediately.

Adapted from: The Pioneer Woman

Notes: I prefer the Swiss/Gruyere shredded cheese mix from Trader Joe’s, if there is one near you. It’s more cost effective and saves you the trouble of grating. Additionally, you can substitute vegetable broth for the chicken broth if you prefer. If you only have stocks on-hand, I’ve also used them in place of the broth(s), and the result is much the same - just check the taste and adjust seasoning as needed.


This post contains affiliate links. Full disclosure here.

Filed Under: book review, recipe Tagged With: bread, comfort food, dinner, fiction, lunch, quick read, soup, veggies

Lilac Girls + Poppy Seed Cake

July 8, 2017 by Megan 1 Comment

No matter how many WWII novels I read or stories I hear, I’m still astonished at the atrocities that took place and how many people were able to overcome and survive such horrifying ordeals. Though I usually devour these books, which are often natural page-turners, I find them hard to get through mentally. Martha Hall Kelly’s Lilac Girls was no exception.

Inspired by the real Caroline Farriday and a group of Polish prisoners called “the Rabbits,” this novel tells the story of three women whose lives intersect at the Ravensbruck, the only Nazi concentration camp for women. In alternating chapters, we follow Kasia, a Polish teenager who becomes one of the Rabbits; Herta Oberhauser, a German doctor stationed at Ravensbruck; and Caroline, a New York City socialite, who does her best to assist in the war effort from abroad.

Though I’d be interested in finding out more about the real Caroline, I found her chapters to be the least compelling. Honestly, her storyline was the reason I couldn’t give this book a full 4 stars on Goodreads. (I would’ve given it 3.5 if Goodreads allowed it, but they don’t - one of my pet peeves.) Kasia’s and Herta’s chapters, on the other hand, had me turning the page constantly. I liked that Kelly told the story from such different points of view.

In one of the bright spots at Ravensbruck, Kasia and her sister receive a package from their father and unwrapped it to find not only chocolate and a sign of hope, but some poppy-seed cake as well. As she put it, “Polish cake would be good medicine.” I hadn’t heard of poppy seed cake before, but I knew it was the recipe to make this time around. I found one from Jenny Can Cook and set to work.

Upon starting the recipe, I realized I only had half as many poppy seeds as I needed. I’d bought one 2.6 oz bottle of poppy seeds at the grocery store, because the pickings were slim. If you find yourself in the same situation, you may want to pick up two containers, or if you’re trying this for the first time, you may want to make a smaller loaf instead, like I did. When I made it, I adjusted the recipe and made a half-sized loaf instead of the full recipe (I included the full recipe below).

First, I ground the poppy seeds 2 Tablespoons at a time, until they were moist and looked a lot like wet coffee grounds. I added boiling water to a small bowl and stirred in the poppy seeds until they were all moistened, letting them stand uncovered. Then, using the same grinder, I ground up my toasted almonds.

In a large bowl, I combined the flour, yeast, sugar and salt. To that I added, the warmed milk (slightly less than 120 degrees F since I was using active dry yeast), followed by the oil and the egg. Using an electric mixer, I beat it on high for about 2 minutes, and then added in the extra flour, beating it until it formed a mass. Mine was slightly sticky when I transferred it to the board, so I ended up adding about a Tablespoon more of flour (to my halved recipe). I should’ve taken a picture of my messy dough fingers, but it wouldn’t have been safe to grab my phone to do so. Dough everywhere!

I kneaded it and let it rest for 10 minutes while I combined the filling. To the poppy seeds, I added the ground almonds, lemon and orange zests, sugar and vanilla extract.

I rolled the dough out to about 5” x 6” (again with the halved recipe) and spread the filling on the top, almost to the edges.

Then, I carefully rolled it, placed it seam-side down, and tucked the ends under, placing it on a parchment-lined baking sheet. I covered it with a cloth and left it untouched in a warm place (aka my upstairs on an 80-degree July day) for about an hour and a half.

I opted to top it with an egg wash and poppy seeds before baking, thinking the glaze might make it too sweet. It also didn’t seem like Papa’s bread for his girls would’ve included a glaze, but I could be wrong. If you prefer a glaze, see the recipe notes.

I baked it for slightly less than the recipe called for due to size, but even with halving the recipe, I think it could’ve used maybe 5 minutes longer (or 30 minutes total) in the oven. It was hard to let it cool for a long time once it came out of the oven, but trust me, it’s much better when it’s fully cooled. I also personally like the outside thirds of the bread better than the middle third.

I hope you enjoy! Have you read the Lilac Girls? What did you think?

Poppy Seed Cake

  • Servings: 1 loaf
  • Time: 2 hours, 45 minutes
  • Print

Dough Ingredients

  • 1½ cups bread (or all purpose) flour
  • 1 packet (2 tsp/7 gms/1/4 oz) yeast - instant or active dry yeast
  • ¼ cup sugar
  • ½ teaspoon salt
  • ⅔ cup 1% milk heated to 120-130° F for instant yeast (or 110-120°F for active dry)
  • 2 Tablespoons oil
  • 1 egg
  • about ¾ cup extra flour

Filling Ingredients

  • 1 cup poppy seeds
  • ⅓ cup boiling water
  • ¼ cup ground toasted almonds (20 count)
  • ½ cup sugar
  • ½ teaspoon vanilla extract
  • zest of ½ a lemon and ½ an orange

Directions

  1. Grind poppy seeds (see note below). Place in a small bowl, stir in boiling water & let stand uncovered.
  2. Grind almonds and set aside.
  3. Place flour, yeast, sugar, and salt in large mixing bowl.
  4. Stir in milk followed by oil and egg.
  5. Beat on high for 2 minutes. Stir in extra flour until dough forms a mass.
  6. Place dough on floured board and knead 100 turns (about 2 minutes). Cover and let rest 10 minutes.
  7. Meantime, add ground almonds, sugar, vanilla and zests to poppy seeds.
  8. Roll dough into a 10 x 12 shape. Spread filling almost to edges, roll starting at 10-inch end and place on parchment-lined baking sheet, seam side down. Pinch and tuck ends under.
  9. Cover with a towel and rise in a warm spot for 1½ hours or until double in size.
  10. Before making, brush with egg wash and sprinkle with additional poppy seeds.
  11. Preheat oven to 350° F and bake for 35 minutes. Allow to cool fully before slicing and serving.

From: Jenny Can Cook

Instead of coating the top with poppy seeds, if you prefer a sweeter bread you can add a glaze. Allow baked cake to cool for 10 minutes and drizzle with glaze, made using 1 cup powdered sugar and about 2 Tablespoons milk, added slowly.

If using a spice grinder, grind seeds slowly, about 2 Tablespoons at a time, until they feel moist – about 10 seconds per each portion. Scoop out any that stick to the bottom of the grinder as you go. Once they are all ground, use the same grinder to grind the almonds.


This post contains affiliate links. Full disclosure here.

Filed Under: book review, recipe Tagged With: baking, bread, drama, historical fiction, tough topics

The Kitchen House + Cracklin' Bread

June 17, 2017 by Megan 4 Comments

As you may know from my latest life update, Scott and I recently moved into our first house. The following Monday, I ventured out to find the local library and become a member. I also found out about an upcoming semi-annual used book sale hosted by the Friends of the Library - it was just a few weeks away, and I was so excited I hadn’t missed it! I ended up buying 13 books that day and The Kitchen House was one of them.

the-kitchen-house.jpg

I’d read about half of the books I bought and took a gamble on the other half. Not sure of where to start, I posted the haul on my online book club’s page and was overwhelmed with suggestions to start with Kathleen Grissom’s novel; so I did. It’s not exactly the expected tale of Southern plantation life, and I loved it all the more for that.

After her parents die on the journey from Ireland to the States, newly-orphaned Lavinia is taken in by the master of a tobacco plantation and placed under the care of Belle, a slave in the kitchen house. Though she lives and works with them, the difference between Lavinia and her adopted family becomes more and more clear as she grows up. She is given opportunities that are intended to improve her life, including whisking her off the plantation and providing her with an education.  

Eventually, the bond Lavinia shares with her adopted family puts them all in a precarious situation and tough choices must be made. I found myself rooting for Lavinia, Belle and every one of their family members.

Early on, Belle makes cracklin’ bread, cornbread with “crunchy bits of pork fat” mixed in. Lavinia and Fanny ate the cracklin’ “with zeal” and, from that point on, all I could think about was making my own cracklin’ bread. I couldn’t get my hands on any cracklin’, nor was I exactly sure of how to go about finding the pork bits to make it, so I unfortunately had to substitute with bacon crumbles. Don’t worry, the recipe I found from Southern Living said it’s okay, but maybe it’s just trying to make northerners like me feel better.

It was very easy to make, and I started by rendering down my bacon. Once it cooled a bit, I chopped it into small crumbly bits. I preheated the oven to 425 and melted the butter in my skillet.

In a bowl, I used a whisk to mix the cornmeal, baking powder and salt (making my own self-rising cornmeal) with the flour.

IMG_3276

In a separate bowl, I mixed together the buttermilk and eggs before adding to the well in the middle of my dry ingredients. I added the crumbled bacon as well and stirred until just wet. I poured the whole mixture into the hot skillet.

IMG_3277

After baking for about 25 minutes, the cracklin’ bread was a beautiful golden brown.

IMG_3278

Grannie’s Cracklin’ Bread

  • Servings: 8-10
  • Time: 40 minutes
  • Print

Ingredients

  • ¼ cup butter or margarine
  • 2 cups self-rising cornmeal*
  • ½ cup all-purpose flour
  • 2½ cups buttermilk
  • 2 large eggs, lightly beaten
  • 1 cup cracklings**

Directions

  1. Place butter in a 9-inch cast-iron skillet (or other oven-safe skillet), and heat in a 425° oven for 4 minutes.
  2. Combine cornmeal and flour in a large bowl; make a well in center of mixture.
  3. Stir together buttermilk, eggs, and cracklings; add to dry ingredients, stirring just until moistened. Pour over melted butter in hot skillet.
  4. Bake at 425° for 25 to 30 minutes or until golden brown.

From: Southern Living, by way of MyRecipes.com

*If you don’t have self-rising cornmeal, you can make your own by adding 1 TBS of baking powder and 1 tsp of salt to 2 cups of regular cornmeal.

**1 cup cooked, crumbled bacon (12 to 15 slices) may be substituted for cracklings.


Here is the rest of my book haul. What should I dive into next?

IMG_3057.JPG

This post contains affiliate links. Full disclosure here.

Filed Under: book review, recipe Tagged With: bread, historical fiction, meat, side dish

  • « Go to Previous Page
  • Go to page 1
  • Go to page 2
  • Go to page 3
  • Go to Next Page »

Primary Sidebar

About

The Hungry Bookworm brings together literature and food. Megan has an insatiable appetite for both.

As C.S. Lewis said, “Eating and reading are two pleasures that combine admirably.” Enjoy!

  • Bloglovin
  • Facebook
  • Instagram
  • Pinterest

Subscribe

Don't miss out on bookish content, exclusive giveaways, and of course, book club-friendly recipes. Get notified of new posts via email.

Join 2879 subscribers.

Search for Ingredients, Recipes, or Books

Recent Posts

  • Subscriber Box Review: Literati Book Club - Roxane Gay's Audacious Book Club
  • Arsenic and Adobo + Ensaymada
  • Review of The Kindred Spirits Supper Club
  • Kids Edition: Sometimes I Like to Curl Up in a Ball + "Dirt" Pudding Cups
  • The Midnight Library + Broccoli and Ricotta Toast

Goodreads

Tags

5 ingredients or less appetizer baking book club book list book of the month books about food bread breakfast brunch chicken contemporary cookies cultural dessert dinner dinner party dystopia easy prep favorites fiction fruit historical fiction holiday ice cream linkup lunch meat memoir mini review nonfiction pasta quick read reading challenge science fiction seafood show us your books side dish snack soup TBR list thriller top ten tuesday vegetarian veggies

Archives

Other Great Book Blogs

Literary Quicksand
Never Enough Novels
Death by Tsundoku
Professional Reader 25 Book Reviews
Privacy & Cookies: This site uses cookies. By continuing to use this website, you agree to their use.
To find out more, including how to control cookies, see here: Cookie Policy

Footer Widget Header

Megan’s Instagram

Copyright © 2025 · Hungry Bookworm