• Skip to primary navigation
  • Skip to main content
  • Skip to primary sidebar
  • Home
  • Reviews
    • Book Index
    • Fiction
    • Non-Fiction
    • Top Ten Tuesdays
The Hungry Bookworm

The Hungry Bookworm

reading + eating

  • Recipes
    • Drinks
    • Snacks, Sides & Apps
    • Main Dishes
    • Desserts
    • 5 Ingredients or Less
  • About
    • Meet Megan
    • How I Rate
    • Review Policy
    • Contact

spicy

Homegoing + African Yam and Peanut Soup

July 19, 2018 by Megan 1 Comment

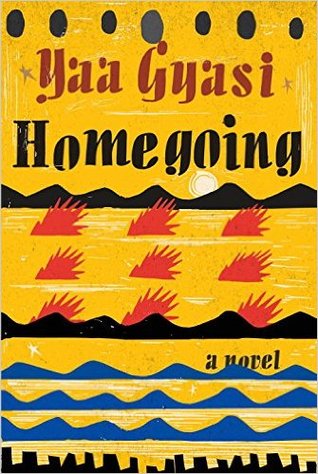
My book club recently selected Homegoing by Yaa Gyasi, a book that was selected in one of my other book clubs last year. It’s a book that’s gotten a lot of attention and praise since its release, and though it has an appealing premise, I’ve not felt compelled to read it -- until now. I didn’t read it last time, but I knew I couldn’t neglect it again. I dove right in and didn’t look back.

Homegoing by Yaa Gyasi

Gyasi’s sweeping novel is about two half-sisters separated at birth and their descendants. Effia and Esi are born in different villages in eighteenth century Ghana. They share the same mother but have different fathers and very different upbringings. Effia marries an Englishman and lives her life in a castle on the African country’s coast. Esi, however, is sold into slavery, passing through the castle’s dungeons on her way to America. Each chapter following their own focuses on an immediate descendent for generation after generation.

[Read more...] about Homegoing + African Yam and Peanut Soup

Filed Under: book review, recipe Tagged With: book club, cultural, fiction, historical fiction, soup, spicy, vegetarian

When Dimple Met Rishi + Chicken Tikka Masala Pizza

September 19, 2017 by Megan Leave a Comment

In many ways, Sandhya Menon’s When Dimple Met Rishi follows the same formula as many time-tested and beloved romantic comedies. And, honestly, that’s part of what made it so enjoyable. It is unabashedly a young adult love story, and a clever, funny one at that. Dimple is a future-minded high school graduate, hoping to enroll in a web development program and forget about her mother’s matchmaking for the summer. Rishi is also a future-minded recent graduate, though he’s focused more on meeting and wooing his fated wife before heading off to MIT.

Rishi is traditional where Dimple is modern. He learned Hindi before English, strives to be a good son, and is willing to put his dreams of being a comic book artist aside to do so. Dimple wants to code apps and can’t wait to take a break from her traditional Indian parents to make her own way in the world. Rishi is looking forward to meeting the girl his parents have chosen for him to marry, and Dimple has no idea such an arrangement has been made.

In fact, when they do meet, it doesn’t go exactly as Rishi had planned. He’s a bit overzealous, to say the least. It’s hardly a meet-cute, but it’s hilarious. Somehow, Rishi recovers and gets another chance to make an impression. During their first official “hangout” at a pizza shop, a relationship between Dimple and Rishi doesn’t seem meant to be, but as we all know, some people are born to defy expectations.

In true rom-com fashion, the novel is full of ups and downs and obstacles the young couple must overcome to end up happily ever after. That said, it’s well-done, enjoyable and not as expected as you may think. As a bonus, the entire novel is quite amusing - funnier than I expected. I often found myself laughing out loud (even while Scott slept next to me, oops). I wholeheartedly recommend this to anyone looking for something lighthearted and entertaining. It’s a lovely choice to wrap up the summer.

One other thing I found quite interesting was the fact that A Wrinkle in Time, which Dimple considers one of her favorite childhood stories, played such an integral role within the story. Funnily enough, I had just read A Wrinkle in Time before picking up this book. The constant mentions of Meg and her journey stood out to me a little bit more, and it was cool that I had so recently become familiar with the story myself. Since something like that had never happened to me before, I was excited to share the coincidence. Like Dimple and Rishi, it almost seemed fated that I read them in this order.

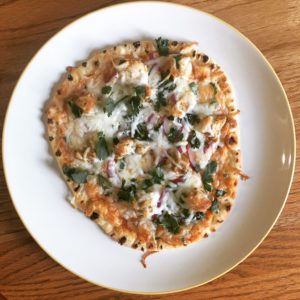
To accompany Dimple and Rishi’s story, I decided to make pizza with an Indian spin. I knew I wanted to use naan as a crust (something I’ve done in the past with leftover pieces) and wanted to bring in the flavor of chicken tikka masala. I found a recipe from Raya Malaysia to use as a base.

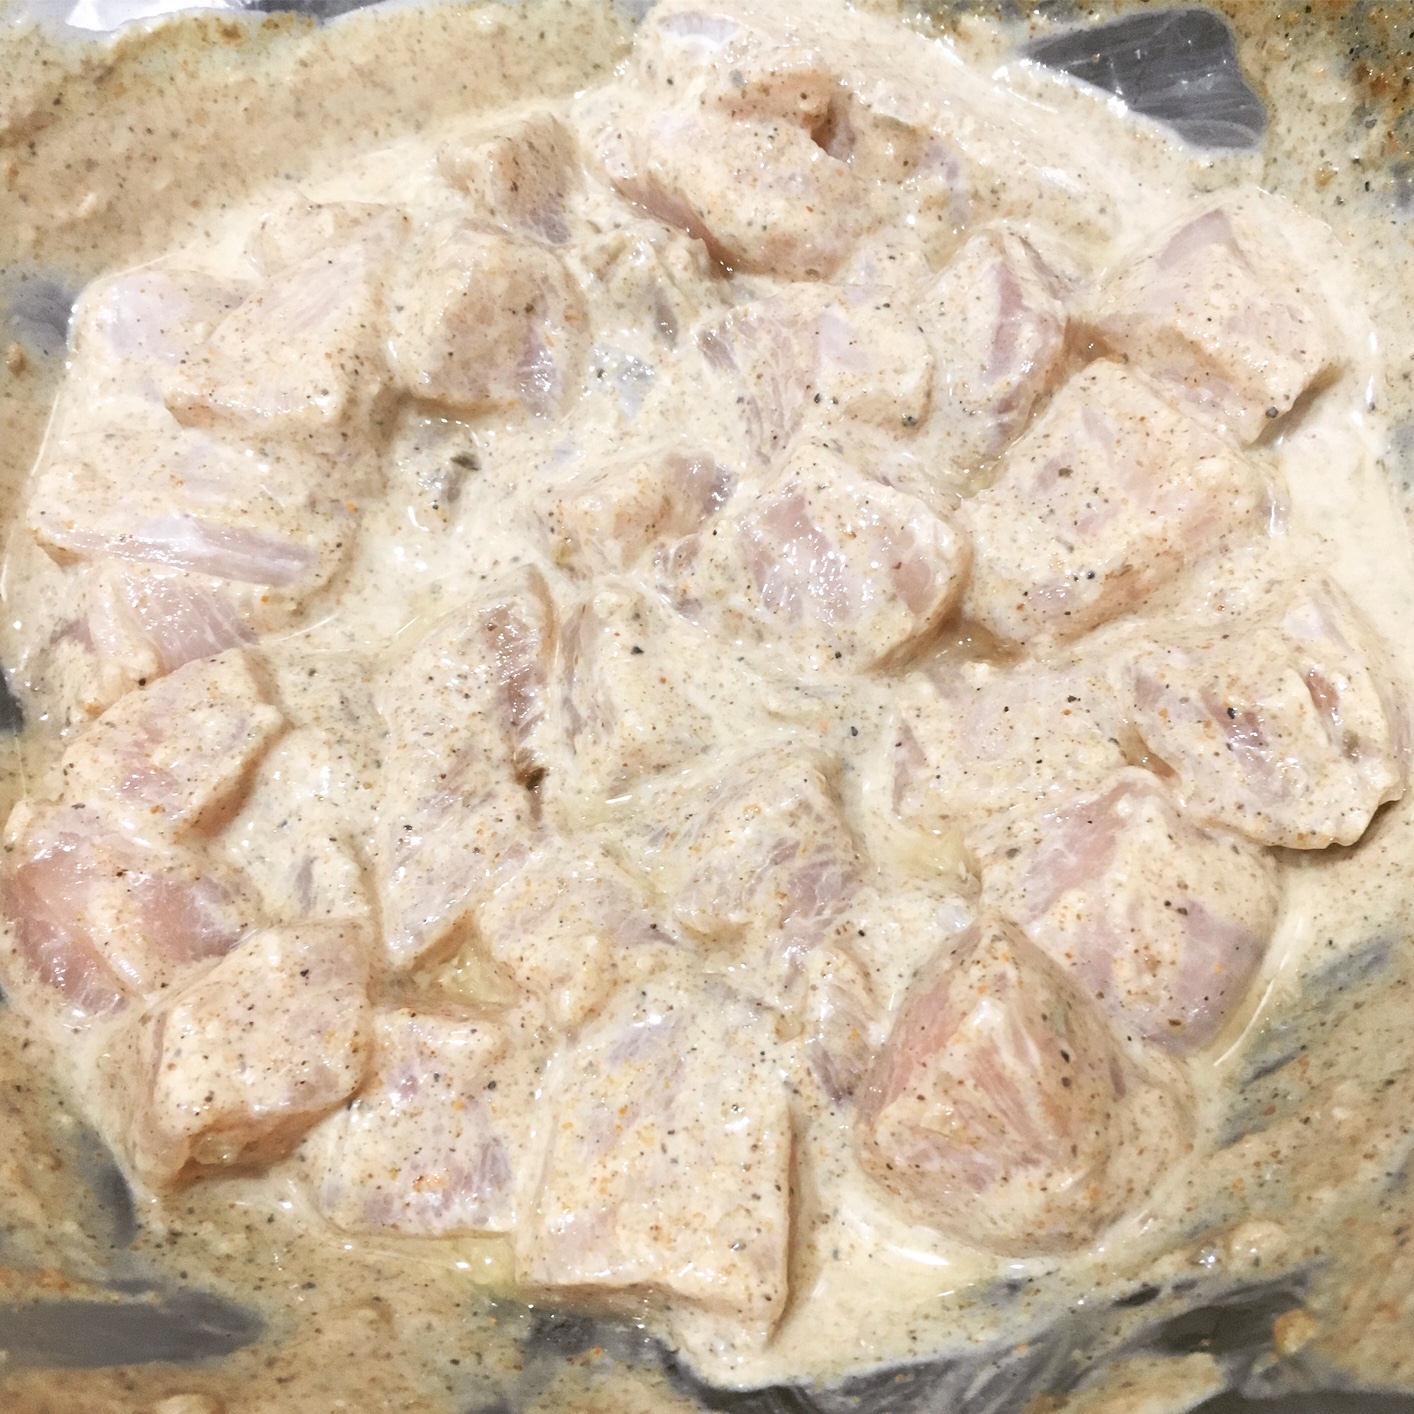
First, I created the marinade for the chicken, combining a half teaspoon each of ground cumin, cayenne pepper, garam masala and minced fresh ginger; a quarter teaspoon each of salt and black pepper; one Tablespoon of lemon juice; two Tablespoons of plain yogurt; and a pinch of cinnamon. Then, I tossed the chicken in the marinade until it was well-coated, covered the bowl with plastic wrap, and set it in the fridge for about an hour.

It’s a lot of ingredients, yes, but I had all of them at home already. Most of the spices are common, especially if you cook any type of ethnic food with regularity in your home. Hopefully you won't have to buy many to make this marinade, but then again if you do, you'll have everything handy to just make it more often. 🙂

To cook the chicken, I preheated the oven to 450 degrees F. I lined a baking pan with foil and arranged the chicken in a single layer. I allowed it to bake for 6-7 minutes.

While that baked, I made the pizza sauce. First, I mixed cumin, paprika and garam masala in a small bowl. In a separate bowl, I combined the tomato sauce, yogurt and heavy cream.

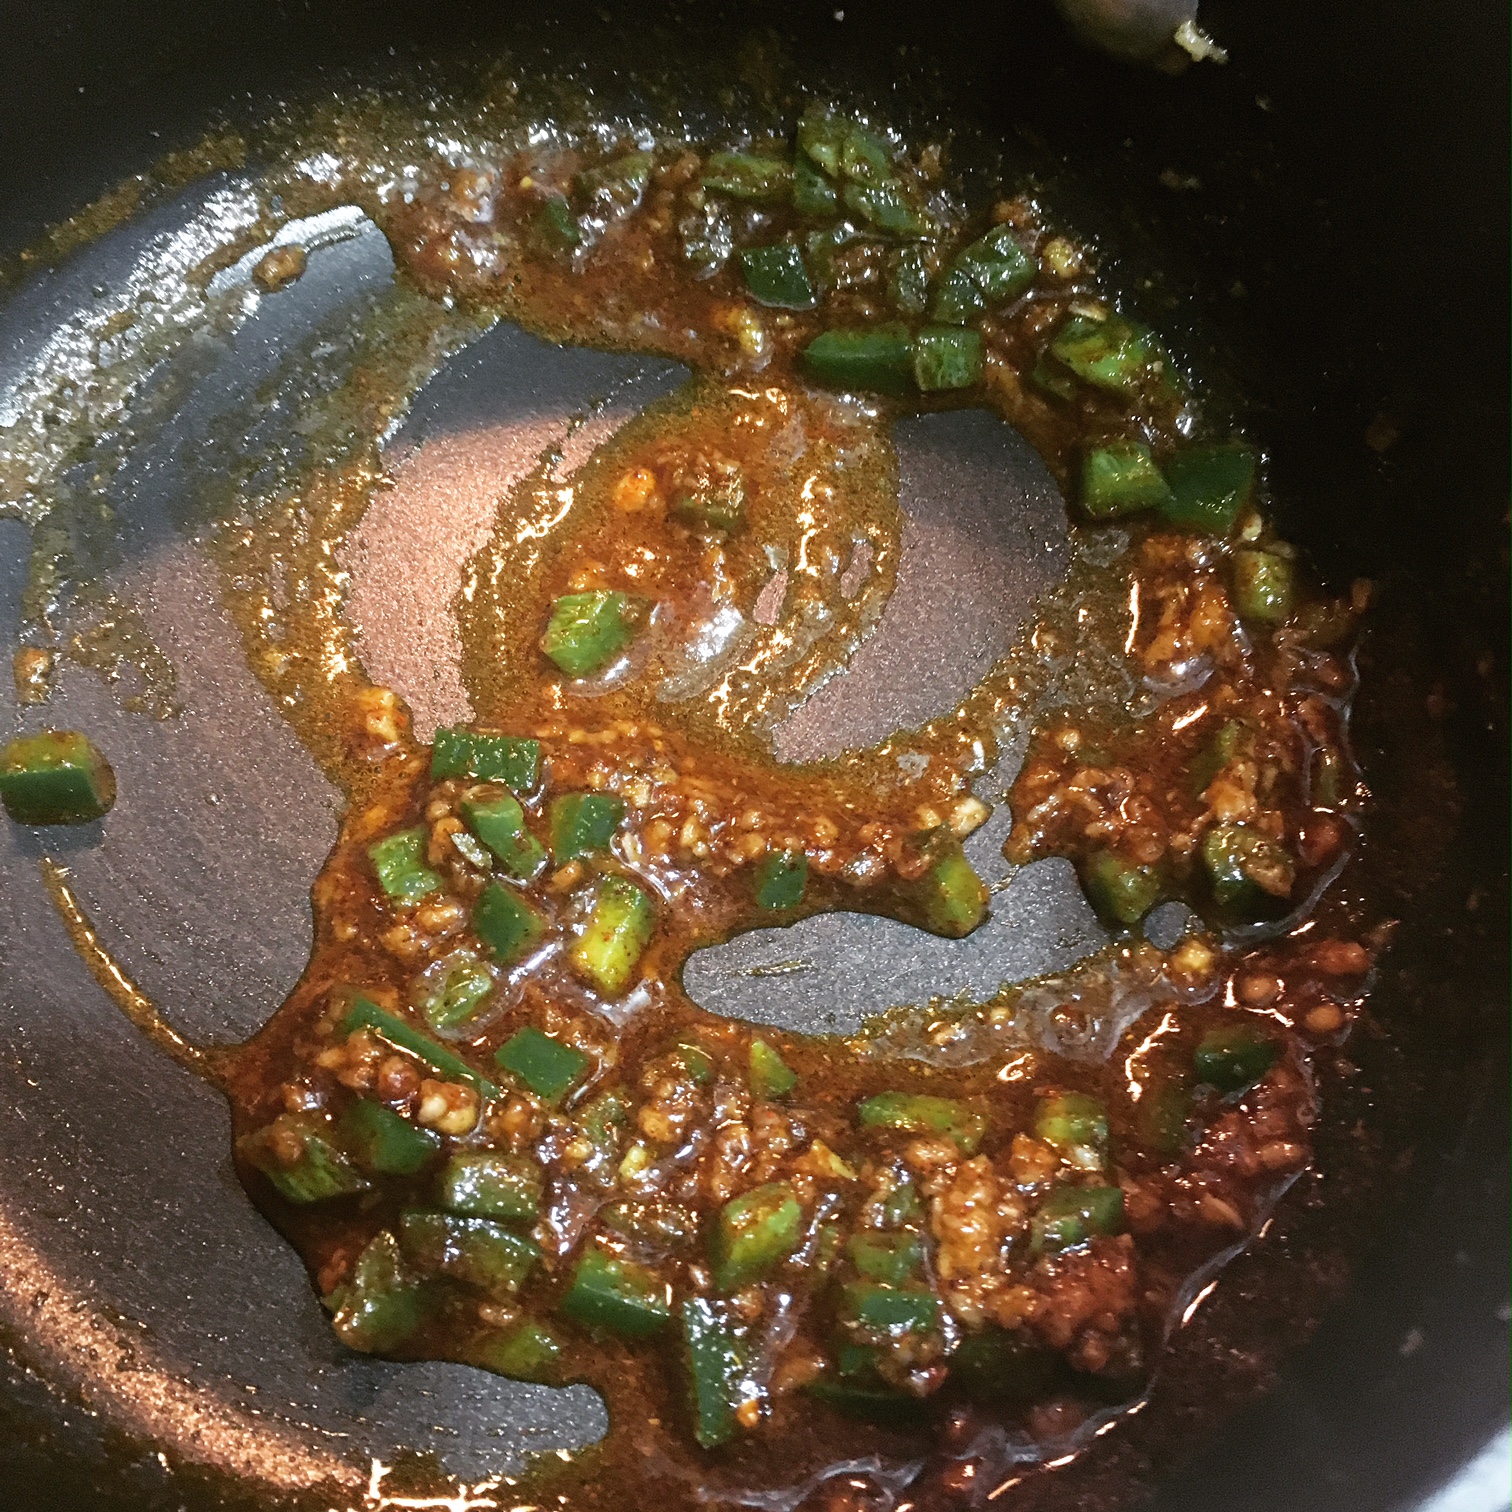
In a small saucepan, I melted/warmed the ghee and added minced garlic and finely diced jalapeños, sautéing for a few minutes, until aromatic. Then I added my spice mixture and continued to heat for 1-2 minutes, stirring often.

I removed as much of the jalapeño as I could, per the original directions (see my notes with the recipe), before adding the tomato sauce mixture. I added some salt and allowed it to thicken a bit, cooking for about 2 more minutes.

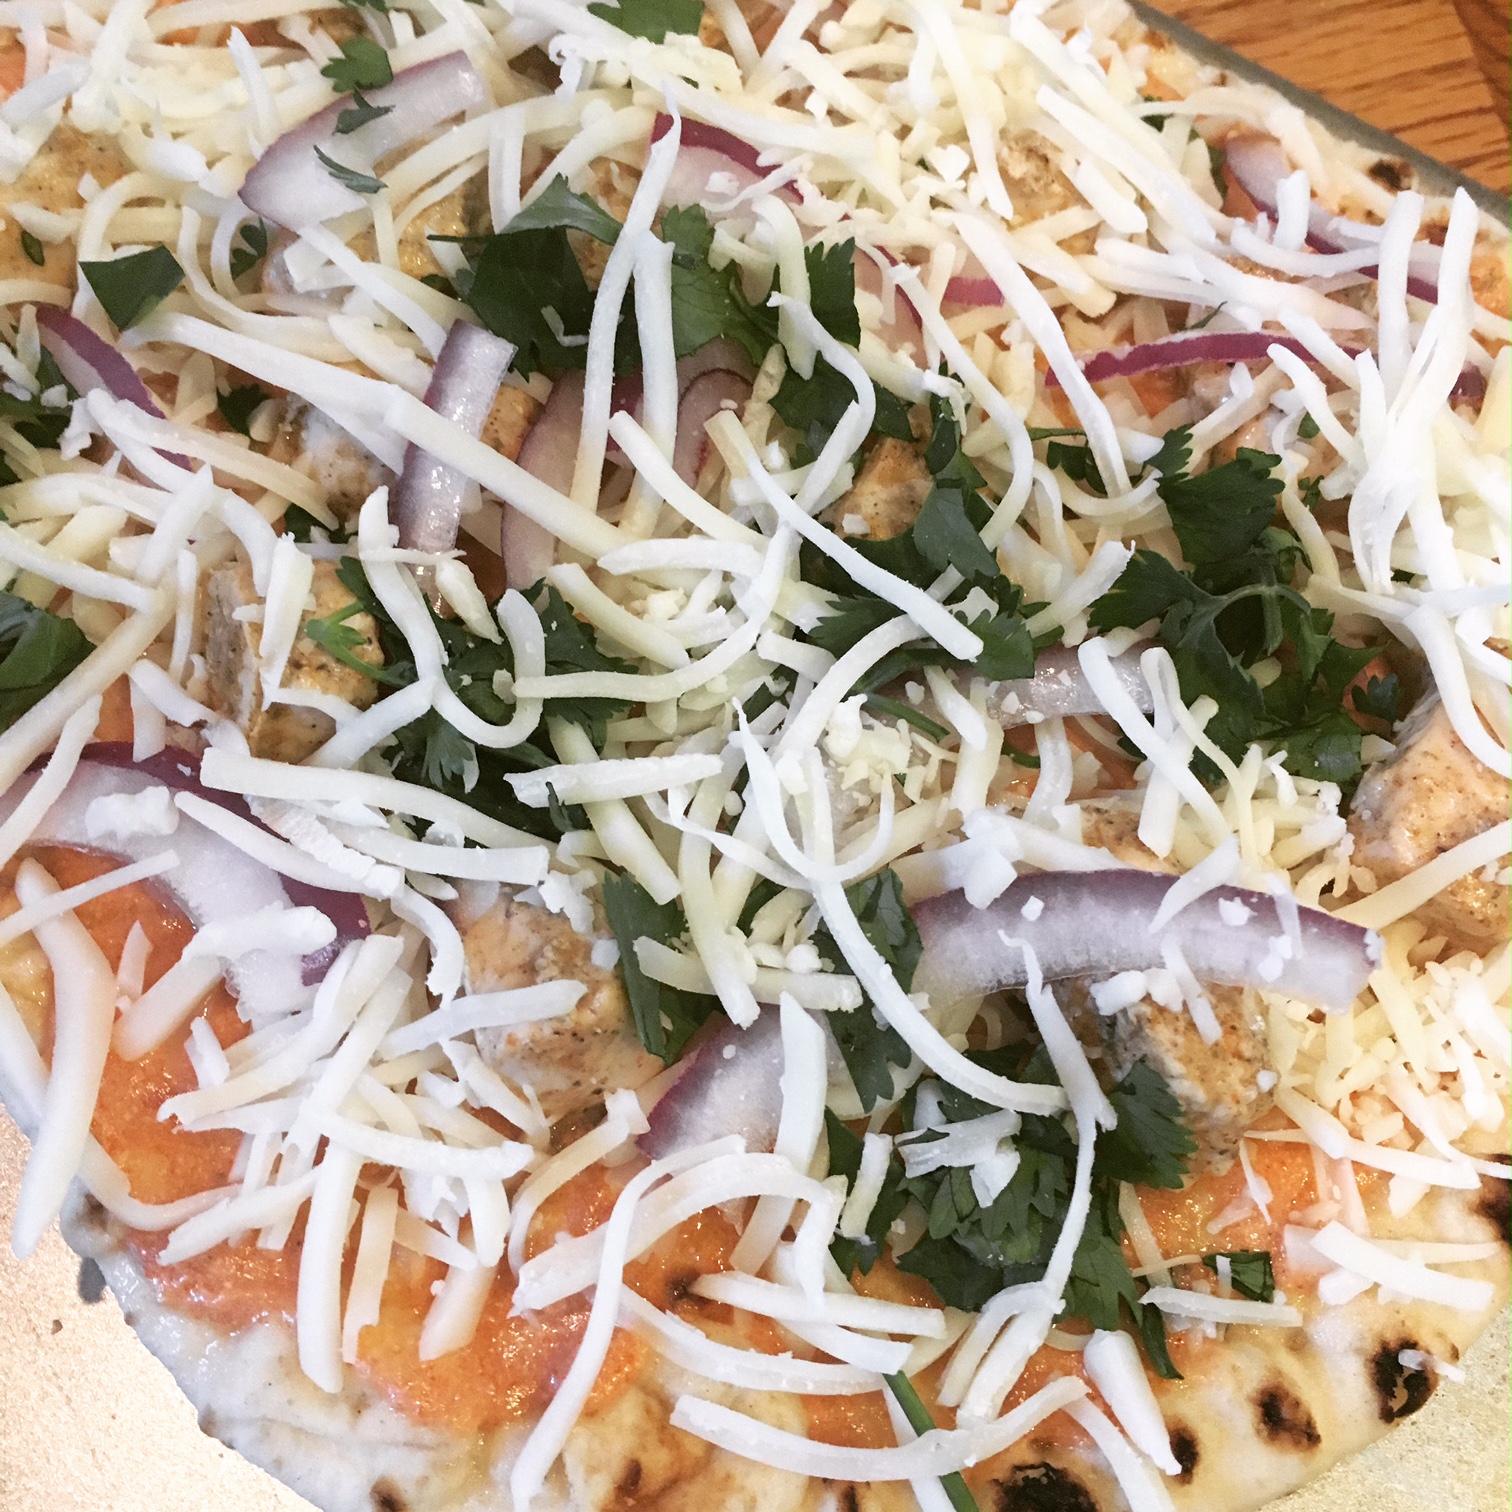
At this point the chicken was finished cooking in the oven, so I took it out and began assembling my pizzas. To start, I brushed each piece of naan lightly with olive oil. Then, using a spoon, I dolloped sauce into the center of each piece of naan, and with a circular motion outward, spread the sauce until each piece was completely covered.

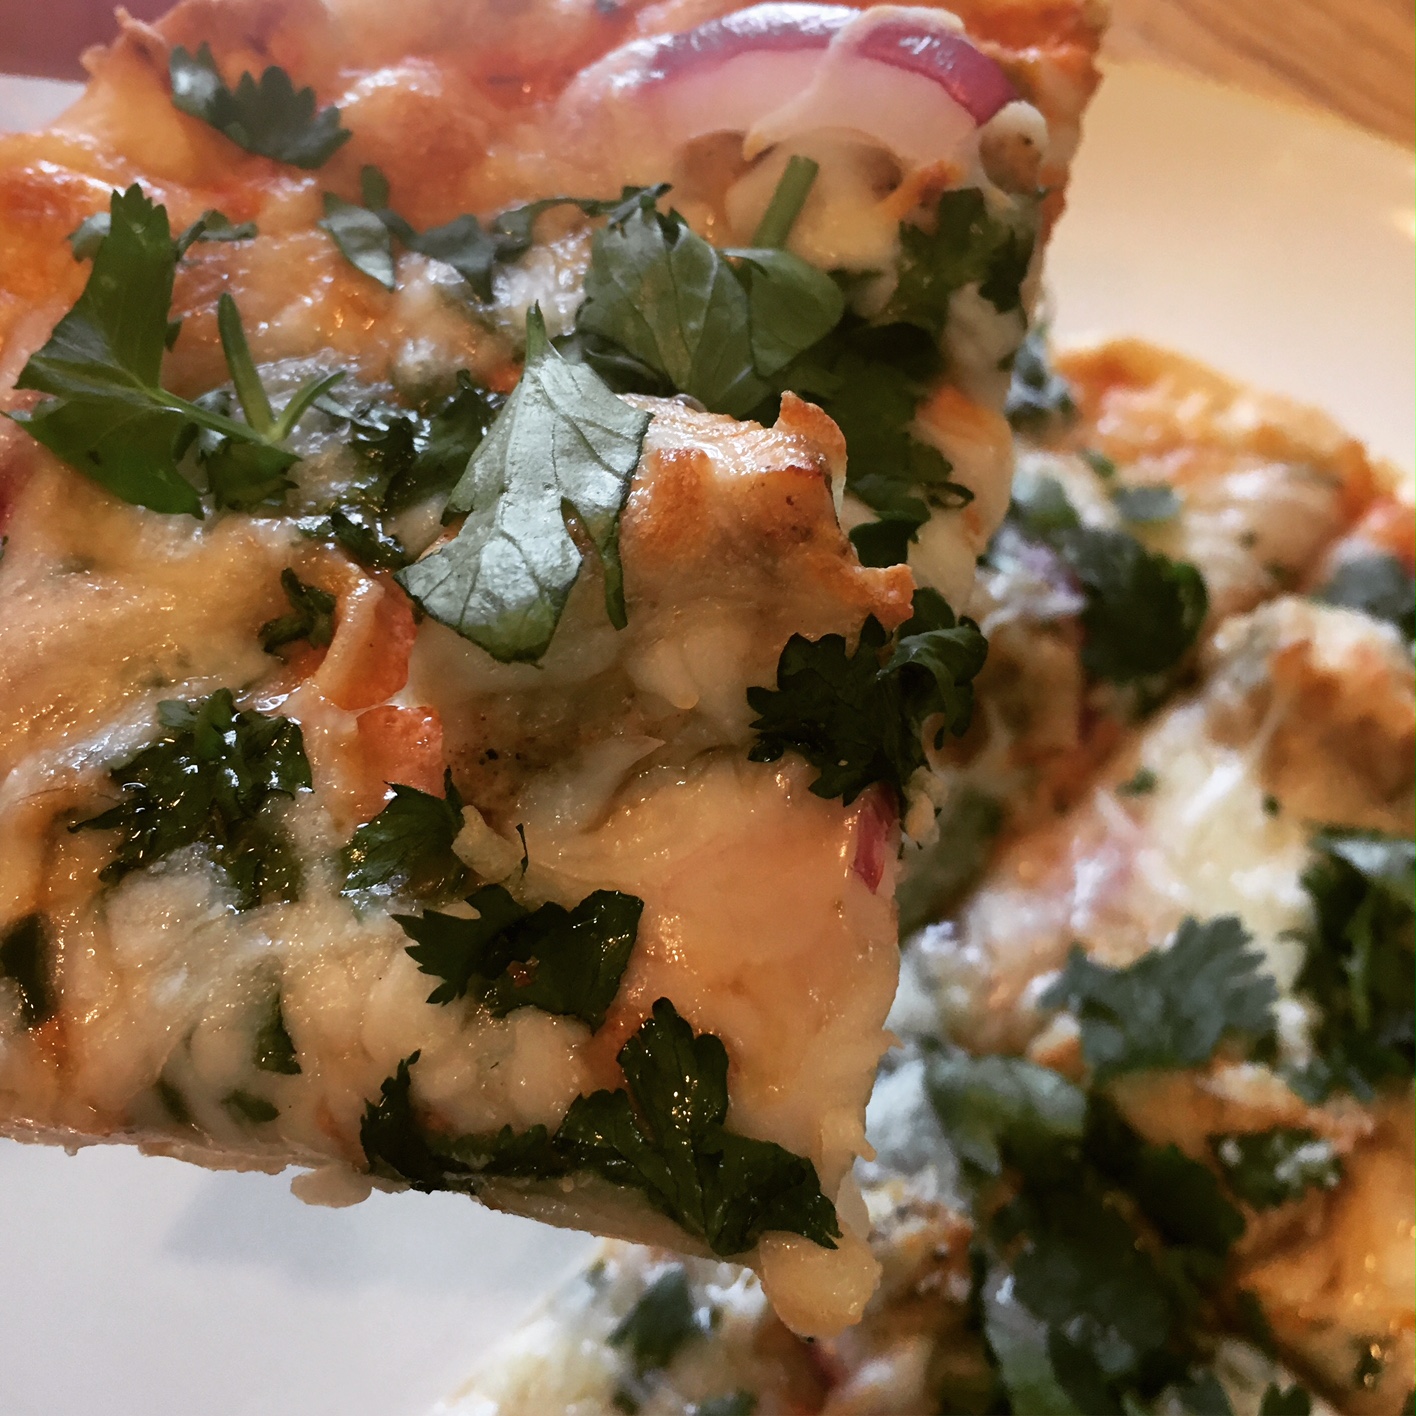
Then, I topped the sauce with a little less than half of the shredded cheese, before adding the chicken, thinly sliced red onion and cilantro. Finally, I added another layer of cheese, using the rest of it.

I baked the pizzas for about 10 minutes each. Since the chicken is already cooked, the pizzas are done when the cheese is melted and the naan is a bit more firm. For garnish, I added the remaining chopped cilantro to each pizza before serving.

These pizzas were absolutely delicious! If you’re a fan of Indian food and a fan of pizza, there’s no reason not to give this a try. It’s easy and so flavorful! This is definitely going down as one of my favorite recipes this year and it will absolutely be making some additional appearances in our kitchen. (I can’t wait!)

Chicken Tikka Masala Pizza

  • Servings: 3-4 personal pizzas
  • Time: 30 minutes
  • Print

Pizza Ingredients

  • 10 oz skinless and boneless (1 large) chicken breast, cut into 1/2-inch cubes and marinated
  • 3 or 4 pieces of naan (traditional or garlic; I used traditional)
  • olive oil for brushing
  • pizza sauce, recipe below
  • ¼ red onion, thinly sliced
  • 1 to 1 ½ cup shredded mozzarella cheese
  • handful of cilantro, chopped (plus some for garnish)

Chicken Marinade Ingredients

  • ½ teaspoon ground cumin
  • ½ teaspoon ground cayenne pepper
  • ½ teaspoon ground garam masala
  • ½ teaspoon minced fresh ginger
  • ¼ teaspoon salt
  • ¼ teaspoon ground black pepper
  • 1 Tablespoon lemon juice
  • 2 Tablespoons plain yogurt
  • pinch of cinnamon

Pizza Sauce Ingredients

  • 2 cloves garlic, minced
  • ½ jalapeño, deseeded and finely diced
  • 1 tablespoon ghee (or butter)
  • salt to taste
  • ½ teaspoon cumin
  • ½ teaspoon paprika
  • ½ teaspoon garam masala
  • 4 oz tomato sauce
  • 2 Tablespoons plain yogurt
  • 2 Tablespoons heavy cream

Directions

  1. In a bowl, cover the chicken with the prepared marinade and allow to marinate for at least an hour in the refrigerator.
  2. Preheat the oven to 450 degrees F and line a baking pan with foil and spread the marinated chicken in a single layer on the pan. Discard the remaining marinade. Bake for 6-7 minutes, turning halfway through if desired.
  3. While the chicken is cooking, begin to prepare the pizza sauce. Combine the cumin, paprika and garam masala in a small bowl. In a separate small bowl, combine the tomato sauce with 2 Tablespoons of yogurt and 2 Tablespoons of heavy cream.
  4. Heat a small saucepan and warm/melt the ghee (or butter). Sauté the garlic and jalapeño until aromatic. Pour in the combined spices from step 3 and sauté until fragrant over medium heat, stirring often, for about 1-2 minutes. Remove the jalapeño and discard. (If you prefer it spicier, you may leave in the jalapeño.)
  5. Add in the tomato sauce mixture and stir well to mix. Sprinkle salt to taste and continue to simmer until the sauce thickens, about 2 minutes. Turn off the heat.
  6. To prep the pizzas, lay the naan on foil-covered cookie sheets. Brush lightly with olive oil. Spread the pizza sauce onto the naan “crust,” covering evenly. Sprinkle with about half (erring on the side of less) of the mozzarella cheese. Arrange the chicken, red onions and chopped cilantro on pizza and cover with the remaining cheese.
  7. Reduce the temperature to 425 degrees F and bake the pizzas for 8-10 minutes. Remove the pizza from the oven and garnish with the remaining chopped cilantro.

Adapted from: Raya Malaysia

Notes: Pertaining to fishing the jalapeños out of the spice mixture, I don’t think this is entirely necessary - unless you’re extremely averse to spice. In that case, perhaps leave them out altogether, but if you do use them and want to remove them, it’s okay if you don’t get them all. This task can be somewhat annoying, based on my own experience. I removed about half before I decided we probably wouldn’t mind the jalapeños. Use your own judgment, based on your spice preference.

When I made my pizza sauce, I doubled amounts of tomato sauce, yogurt and cream within the pizza sauce because typically store bought cans of tomato sauce come in 8 oz and the recipe said it made up to 3 pizzas but I planned to make 4. I had quite a lot of sauce leftover after covering the pizzas to our liking, so I think as-is should be sufficient for 4 pizzas, but if you like your pizzas on the saucier side, this may be necessary.


This post contains affiliate links. Full disclosure here.

Filed Under: book review, recipe Tagged With: chicken, contemporary, dinner, fiction, quick read, spicy, young adult

Pachinko + Kimchi

August 26, 2017 by Megan Leave a Comment

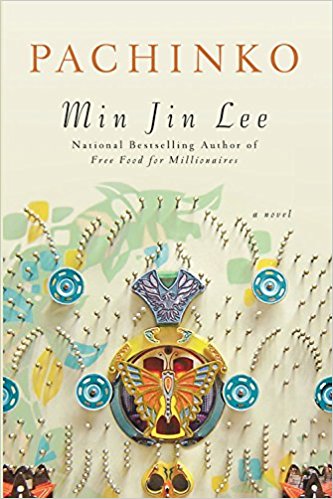
Pachinko, for those of you who don’t know (and I didn’t until I read Min Jin Lee’s novel of the same name), is a Japanese game of chance, a combination of pinball and a slot machine. Like the game it’s named for, Lee spins an epic tale that goes up and down, away and back again, all as the Korean family we follow move to Japan and either suffer or thrive there. The novel starts with the parents of our strong central female character Sunja and spans over seventy years and several generations.

I liked Pachinko, but despite being well-written, it wasn’t a particularly enjoyable read. Lee really put her characters through the ringer, and the suffering they experienced left me feeling very defeated. It was an interesting perspective on an immigration story - one we aren’t often exposed to here in the United States but one that didn’t leave me with much hope either.

It was a book we chose for our August book club, and I’ll admit I put it on the list because I already owned it (checking off that TBR!) and because I wanted to make and eat sushi. It turned out that while sushi did show up a couple of times in the novel, kimchi is what really made an impression. Sunja and her sister-in-law used their skills in the kitchen to make kimchi when times were tough, supporting their family the only way they could.

Kimchi, which is made of fermented vegetables - usually cabbage, requires about a minimum of a week to make. So, it was about two weeks ago that I set to work. I found a recipe that didn’t seem too intimidating and stopped by the trusty 168 Asian Mart (you may remember from my dumpling-making adventures) to gather all of the Korean-specific ingredients, such as salted shrimp and red pepper powder.

I chopped my cabbage into roughly 2-inch pieces, put them in a large bowl and sprinkled them with a generous amount of salt (half a cup), tossing the leaves to make sure they were well-coated. Then, I covered the cabbage with water - I ended up using about 15 cups - and covered the entire bowl with plastic wrap. I let it sit for about a day.

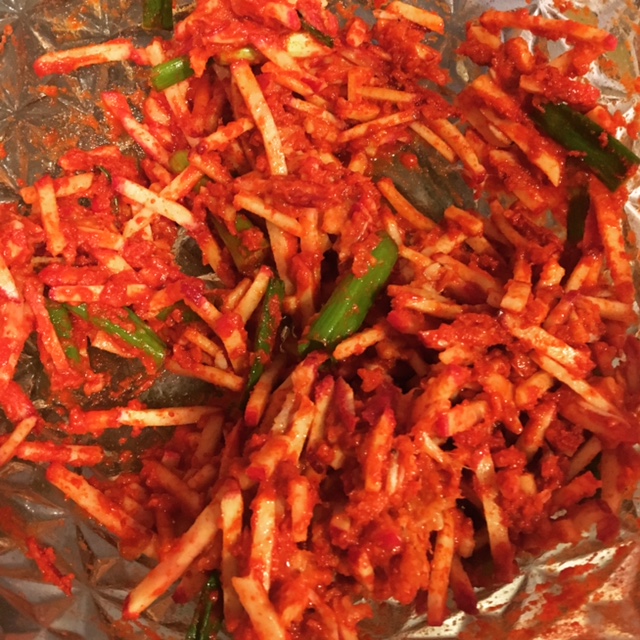
Then, I placed the cabbage in a colander, rinsed it and squeezed it out. While that sat, I combined all of the other ingredients in a large bowl - radish cut into matchsticks, scallions cut into 1-inch pieces, what seemed like a ton of Korean red pepper powder, fish sauce, minced ginger and garlic, Korean salted shrimp and a little bit of sugar.

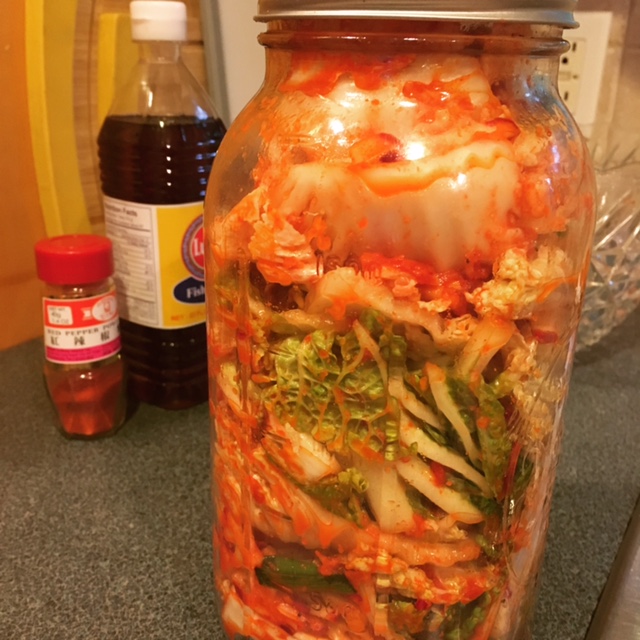
Once it was well-combined, I added the cabbage and tossed it until it was well-coated and pretty red too. Then, I stuffed everything into my large glass jar and sealed it. I snapped a quick picture before I left it in the dark, cool basement for another full day.

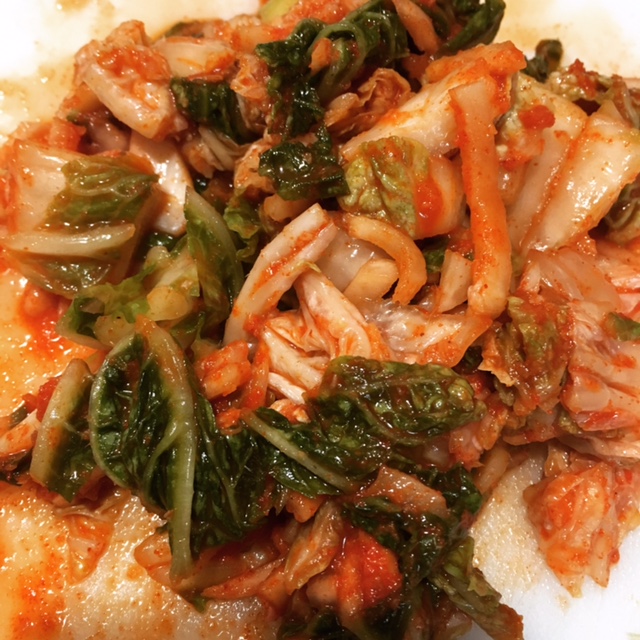
Then, I opened the lid and allowed the gases to escape - the product of our fermentation process was quite pungent. I’d recommend doing this with the windows open, or in a very well-ventilated room. After about a half an hour, I sealed it back up and placed it in the fridge. The jar hung out in the fridge for about 10 days, until yesterday, when I opened it up to attempt to make kimchi fried rice.

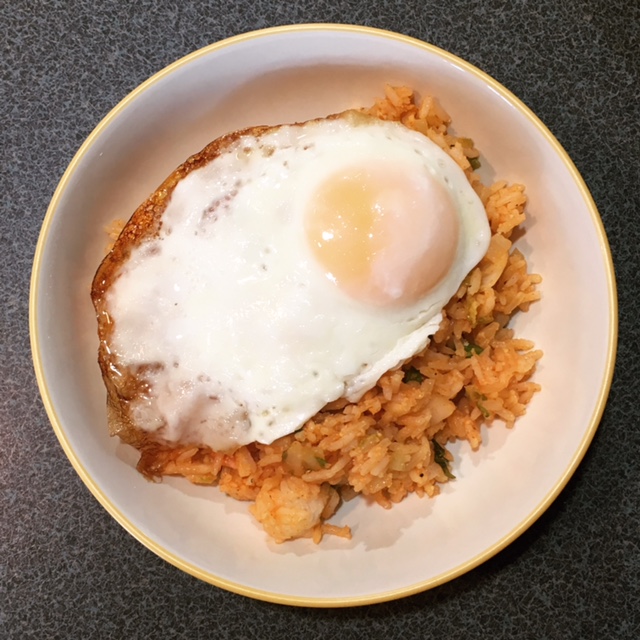
You can use kimchi for a lot of different things, but the one I thought I might enjoy the most was kimchi fried rice. (Disclaimer: I’m not a huge kimchi fan to begin with.) Luckily, I was already familiar with fried rice from my Boston Girl blog entry earlier this year.

I ended up tweaking the recipe I found a little bit, but I loved the idea of serving it with an egg on top, so I had Scott fry some up while I put the finishing touches on the rice. The whole meal turned out really well - the kimchi added a little bit of an extra kick to the fried rice, and I liked it much more than I expected to! Now, we just have to figure out how to use the rest of the kimchi 🙂 Any suggestions, fellow foodies?

Basic Napa Cabbage Kimchi

  • Servings: 1½ quarts
  • Time: 25 minutes, plus about 4 days inactive soaking/fermenting time (up to one week)
  • Print

Ingredients

  • 1 (2-pound) napa cabbage
  • ½ cup kosher salt
  • about 12 cups cold water, plus more as needed
  • 8 ounces daikon radish, peeled and cut into 2-inch matchsticks
  • 4 medium scallions, ends trimmed, cut into 1-inch pieces (use all parts)
  • ⅓ cup Korean red pepper powder
  • ¼ cup fish sauce
  • ¼ cup peeled and minced fresh ginger (from about a 2-ounce piece)
  • 1 Tablespoon minced garlic cloves (from 6 to 8 medium cloves)
  • 2 teaspoons Korean salted shrimp, minced
  • 1½ teaspoons granulated sugar

Directions

  1. Cut the cabbage in half lengthwise, then crosswise into 2-inch pieces, discarding the root end. Place in a large bowl, sprinkle with the salt, and toss with your hands until the cabbage is coated. Add enough cold water to just cover (about 12 cups), making sure the cabbage is submerged (it’s OK if a few leaves break the surface). Cover with plastic wrap or a baking sheet and let sit at room temperature at least 12 hours and up to 24 hours.
  2. Place a colander in the sink, drain the cabbage, and rinse with cold water. Gently squeeze out the excess liquid and transfer to a medium bowl; set aside.
  3. Place the remaining ingredients in a large bowl and stir to combine. Add the cabbage and toss with your hands until evenly combined and the cabbage is thoroughly coated with the mixture.
  4. Pack the mixture tightly into a clean 2-quart or 2-liter glass jar with a tight-fitting lid and seal the jar. Let sit in a cool, dark place for 24 hours (the mixture may bubble). Open the jar to let the gases escape, then reseal and refrigerate at least 48 hours before eating. (Kimchi is best after fermenting about 1 week). Refrigerate for up to 1 month.

From: Chowhound

I used the kimchi to make Kimchi Fried Rice (from Rasa Malaysia), though it can be served as a side or in a variety of dishes.


This post contains affiliate links. Full disclosure here.

Filed Under: book review, recipe Tagged With: contemporary, cultural, drama, fiction, long read, side dish, spicy, veggies

Truly Madly Deeply + Grilled Shrimp and Corn

May 25, 2017 by Megan 2 Comments

“It all began at a barbecue.” And so Liane Moriarty’s latest novel begins. It seemed innocent enough, but with a title like Truly Madly Guilty, I knew it wouldn’t stay that way for long. I have been a fan of Moriarty’s ever since I read her best-seller Big Little Lies in 2015. With the HBO series adaptation recently wrapping up, I was excited for more when my hold finally came through at the library.

9781250069818_p0_v3_s1200x630

For those of you who have seen or read Big Little Lies, the setup is similar. It becomes quickly apparent that something bad has happened, but it’s less clear who it happened to and what exactly it is. Over the course of a slow, every-other-chapter build, the consequences of a normal, spur-of-the-moment backyard barbeque become all too real.

I would consider some of Moriarty’s other novels to be quick-paced beach reads, despite her ability to sneak tough, sometimes dark subjects into an otherwise light, reality TV-style wrapper. Though the title Truly Madly Guilty definitely screams “get out your sunnies!” I didn’t get the same vibe this time.

The plot moved too slowly for me, and it’s real strength was in its character building. The relationships were messy and complicated in a way that felt authentic because it wasn’t over-the-top. By the end of the novel, I definitely appreciated its subtlety though it wasn’t what I expected going in.

But, since it all started with a barbecue, I used that as my recipe inspiration. And, since it took place in Australia, I couldn’t resist making (get your Aussie accent ready!) shrimp on the barbie. I was also mostly just excited to have an excuse to use our new grill on the deck.

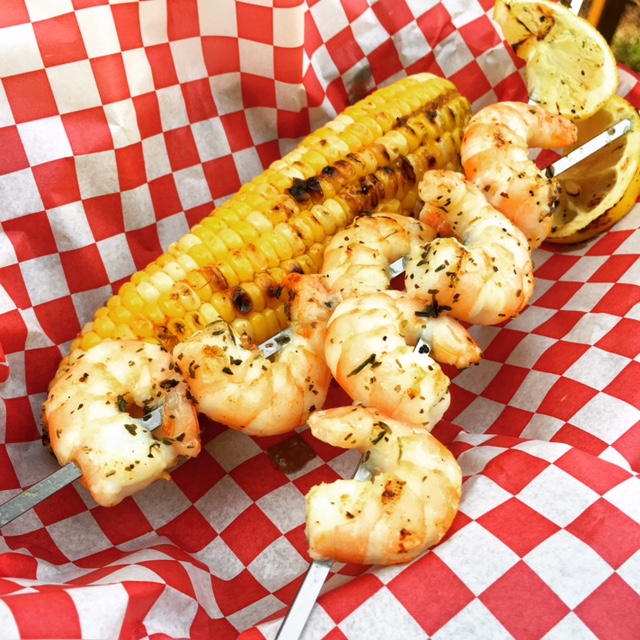
I found a simple recipe for Lemon Garlic Shrimp Kabobs from one of my faves Damn Delicious, and even though she bakes hers in the oven, I was easily able to adapt it to a grill. Alongside Grilled “Crack Corn,” this could easily impress at your next outdoor get-together! The best part about both of these recipes is that they don’t require a lot prep and they grill up in under 15 minutes.

To start, I shucked my corn and speared my shrimp and lemons onto the skewers. (I used metal, but if you’re using bamboo or wooden skewers, make sure you soak them first.) I chose to do a lemon slice on each end and 4-5 shrimp in the middle, but you can mix it up however you think it works best.

Then, Scott put the corn on the grill, since it took slightly longer than the shrimp, while I made the sauce for the corn and the shrimp.

To make sauce for the corn, I simply combined already melted butter with brown sugar, cayenne pepper, salt and black pepper. I whisked it up really well and brought it outside to the grill. Scott began basting the corn and put the shrimp on.

Back in the kitchen, I made the sauce/glaze for the shrimp skewers. In a small saucepan, I melted some butter. To that, I added lemon juice, minced garlic and dried basil, oregano and thyme. I also seasoned it with salt and pepper - I used a generous pinch and a turn or two of freshly ground black pepper. After a couple of minutes, it was fragrant and ready.

We allowed the corn to cook while the shrimp finished up, even though it was basically finished - a little extra color never hurt anyone. Be sure your shrimp is fully cooked through, but be careful not to overcook it as it can be tough and chewy. The shrimp should be a nice pink color.

Both recipes were really delicious and really easy. Perfect for entertaining a small group, or a relaxing summer evening outside. I hope everyone has a safe, sunny Memorial Day weekend! See you next week!

IMG_3107

Lemon Garlic Shrimp Kabobs

  • Servings: 6
  • Time: 20 minutes
  • Print

Ingredients

  • 1½ pounds medium shrimp, peeled and deveined
  • 2-4 lemons, thinly sliced and halved
  • kosher salt and freshly ground black pepper, to taste
  • ¼ cup unsalted butter, melted
  • ¼ cup freshly squeezed lemon juice
  • 4 cloves garlic, minced
  • ½ tsp dried oregano
  • ½ tsp dried thyme
  • ½ tsp dried basil
  • 2 TBS chopped fresh parsley leaves

Directions

  1. Thread shrimp and lemon halves onto skewers. In a medium saucepan, over medium high heat, melt butter. Stir in lemon juice, garlic, oregano, thyme and basil until fragrant, about 2 minutes; season with salt and pepper, to taste. (If you have a side burner on your grill, you can do this while the shrimp cooks.)
  2. Preheat grill to medium-high heat. Oil grates and add shrimp.
  3. Grill each side for about 3-4 minutes on each side, until cooked through.
  4. Serve shrimp skewers immediately, brushed with butter mixture and garnished with parsley, if desired.


From: Damn Delicious

Crack Corn

  • Servings: 6
  • Time: 15 minutes
  • Print

Ingredients

  • 6 ears corn, husked
  • 3 TBS brown sugar
  • 1 tsp cayenne pepper
  • salt
  • freshly ground black pepper
  • ¼ cup melted butter
  • lime wedges, for squeezing

Directions

  1. Heat grill to high. Oil grates and add corn. Grill for 5 minutes, turning occasionally.
  2. Meanwhile, in a small bowl, add brown sugar, cayenne pepper, salt, pepper and melted butter. Whisk together until combined.
  3. Baste corn, while grilling, until totally slathered in crack sauce. Grill until charred and tender, approximately 5 minutes more.
  4. Squeeze with lime and serve.

From: Delish.com

Filed Under: book review, of interest, recipe Tagged With: contemporary, drama, fiction, grilling, seafood, spicy, television series, veggies

The Underground Railroad + Carolina-Style Pulled Pork

February 2, 2017 by Megan Leave a Comment

One of my book clubs unanimously selected The Underground Railroad for our latest meeting, and I was really excited. I began reading with high expectations - Colson Whitehead’s novel was not only recommended by Oprah (a book club selection) and Obama, it had won the National Book Award for Fiction as well.

61ctwxzsuzl-_sx327_bo1204203200_

A piece of historical fiction, it re-imagines the Underground Railroad as an actual railroad that exists underground traveling from the south through various branches as it makes its way north. It was the idea that drew me in initially, even though on the surface it does seem like a real train would be a lot more difficult to run and much easier to find. In the end, the Underground Railroad wasn’t as much of a “character” in the story as I had expected; instead, our story revolved around Cora, a runaway slave from Georgia.

The structure jumps around quite a bit, and though I got used to it about a quarter of the way into the book, I found it difficult to follow in the beginning. Jumping back and forth also took away from my ability to connect with the characters, particularly Cora with whom we spent the most time. The lack of emotion combined with the mismatched historical events left me feeling a bit confused and mostly just glad it was over.

In a novel that mostly depicted the terror and hardship of American slavery, it still had some victories. And making it to the safety and splendor of Valentine Farm is a victory for Cora. There, on Saturday evenings, they all got together for a family-style meal - with “hogs [as] the first order of business” alongside “smoky collards, turnips, sweet potato pie, and the rest of the kitchen’s concoctions.”

Since the hogs made up the center of their meal, I decided to make Carolina-style pulled pork. Cora spends a great deal of time in both Carolinas, and her time there changes both her course of action and her outlook on the future.

Pulled pork needs to be cooked slowly over low heat so that it truly tenderizes. It can be made at low temperatures in the oven, in a smoker or in the slow cooker, which is how I chose to make mine.

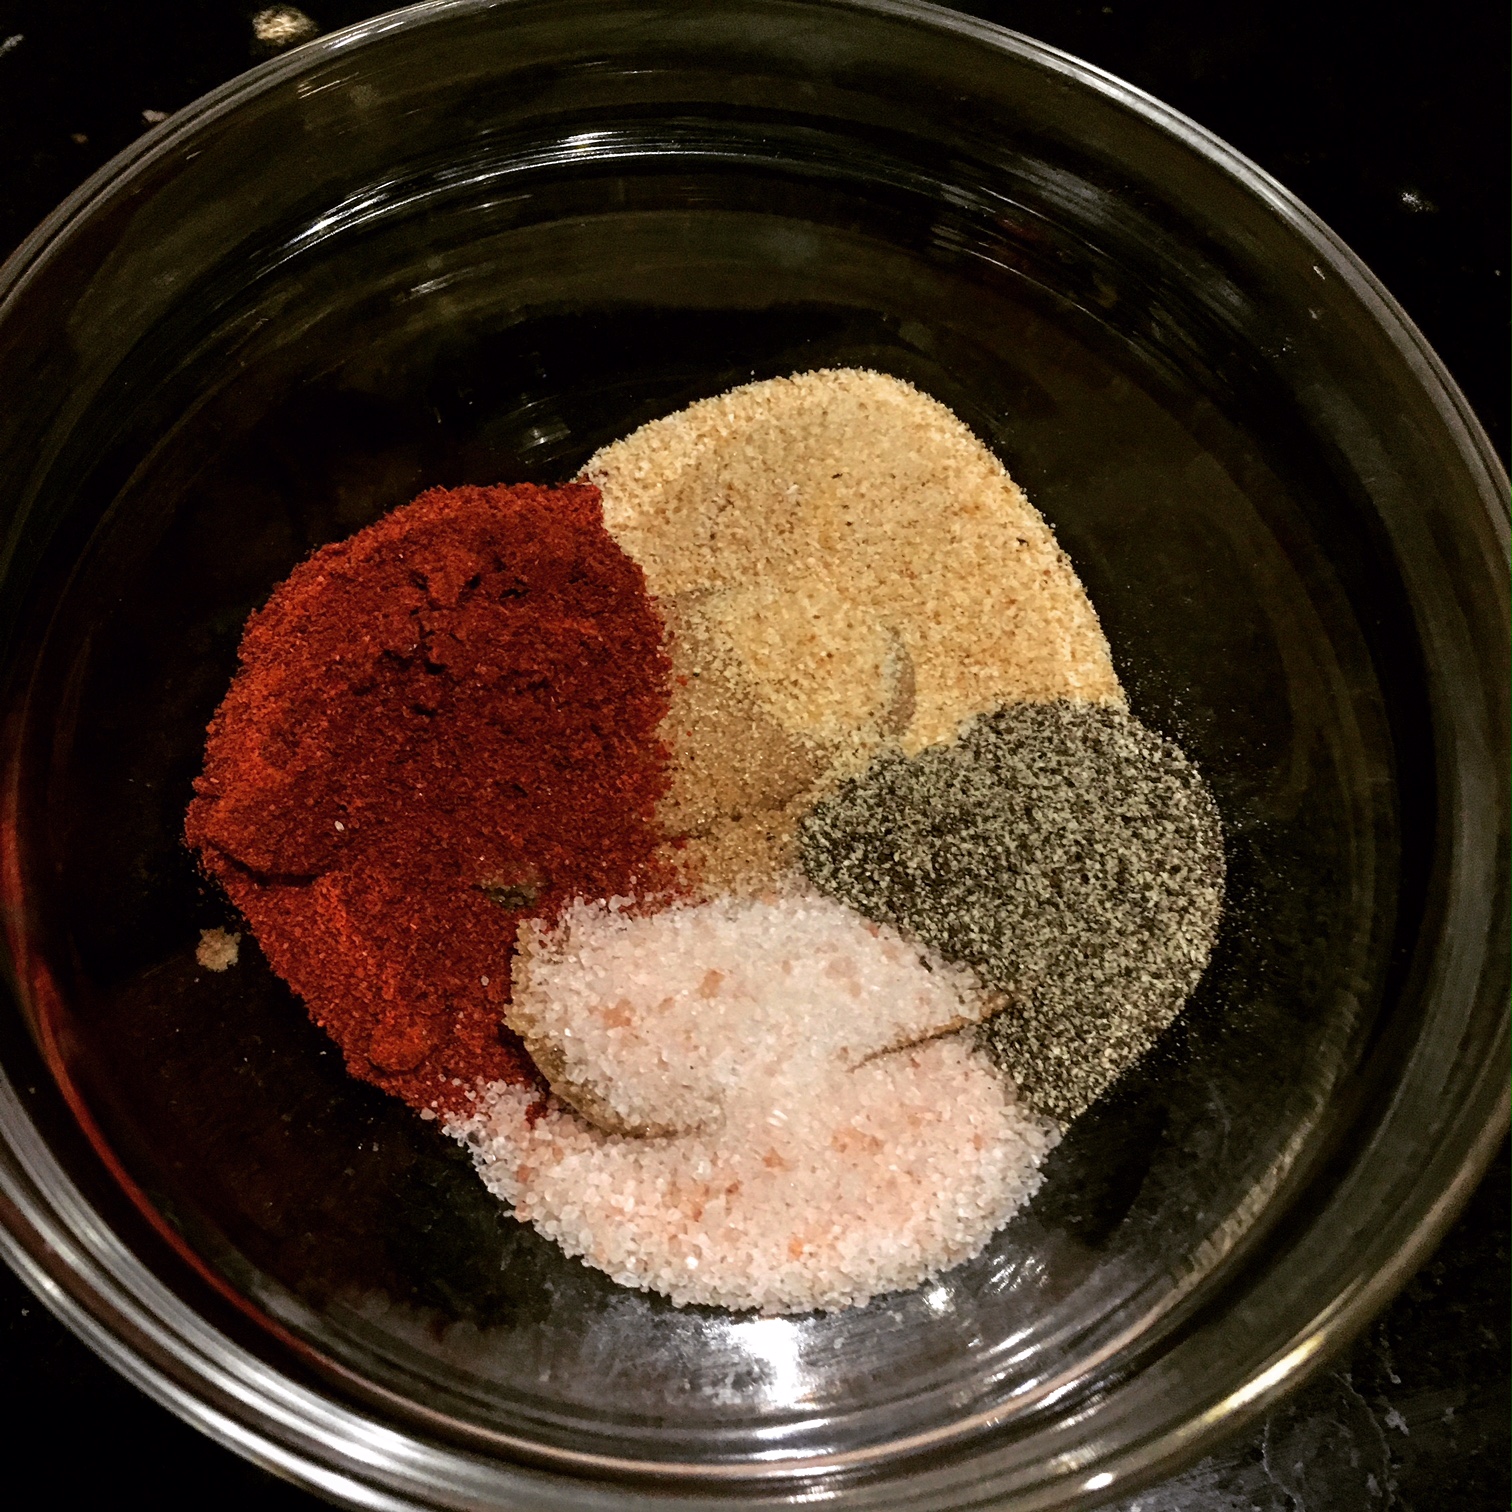
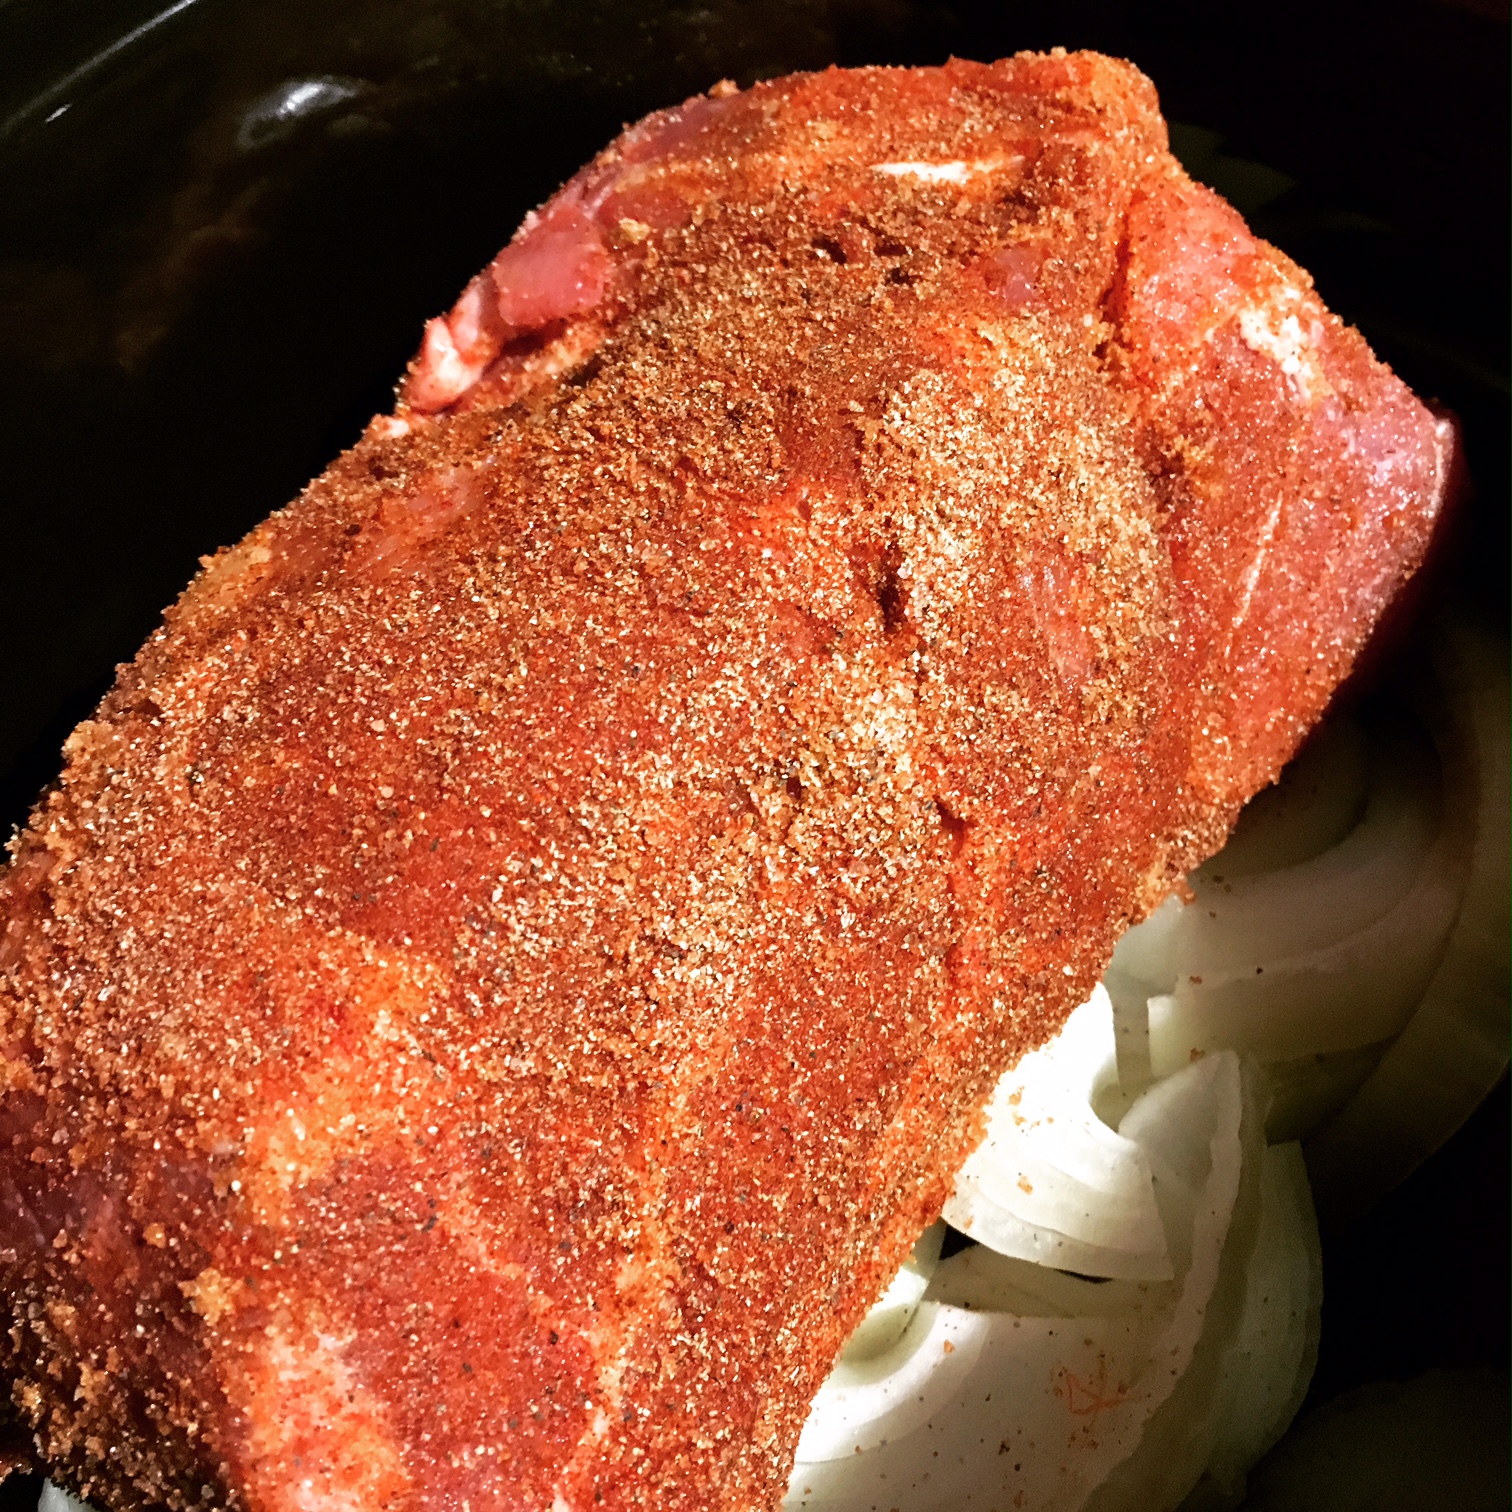
First, I combined 2 tablespoons of brown sugar, 1 tablespoon of smoked paprika, and 1 teaspoon each of salt, pepper and garlic powder. I rubbed the spice mixture onto my roughly 3-pound pork shoulder.

img_2531

While that soaked in, I sliced a large onion. (I used Spanish, but a sweeter onion would probably work just as well.) Mine probably ended up being a bit on the thicker side, but knowing that these are going to cook down all day as the bed of the pork shoulder, you wouldn’t want to slice them too thinly either. We didn’t mind the more prominent onions in our sandwiches, but use your best judgement.

I covered the bottom of the slow cooker with sliced onions and set the spice-covered pork on top.

img_2532

Next, I mixed together the wet ingredients - apple cider vinegar, Worcestershire sauce, ground mustard and brown mustard - with cayenne pepper, crushed chili flakes and the remaining tablespoon of brown sugar. I poured that into the bottom of the slow cooker. I didn’t think I had quite enough liquid so I added some water as the recipe suggested.

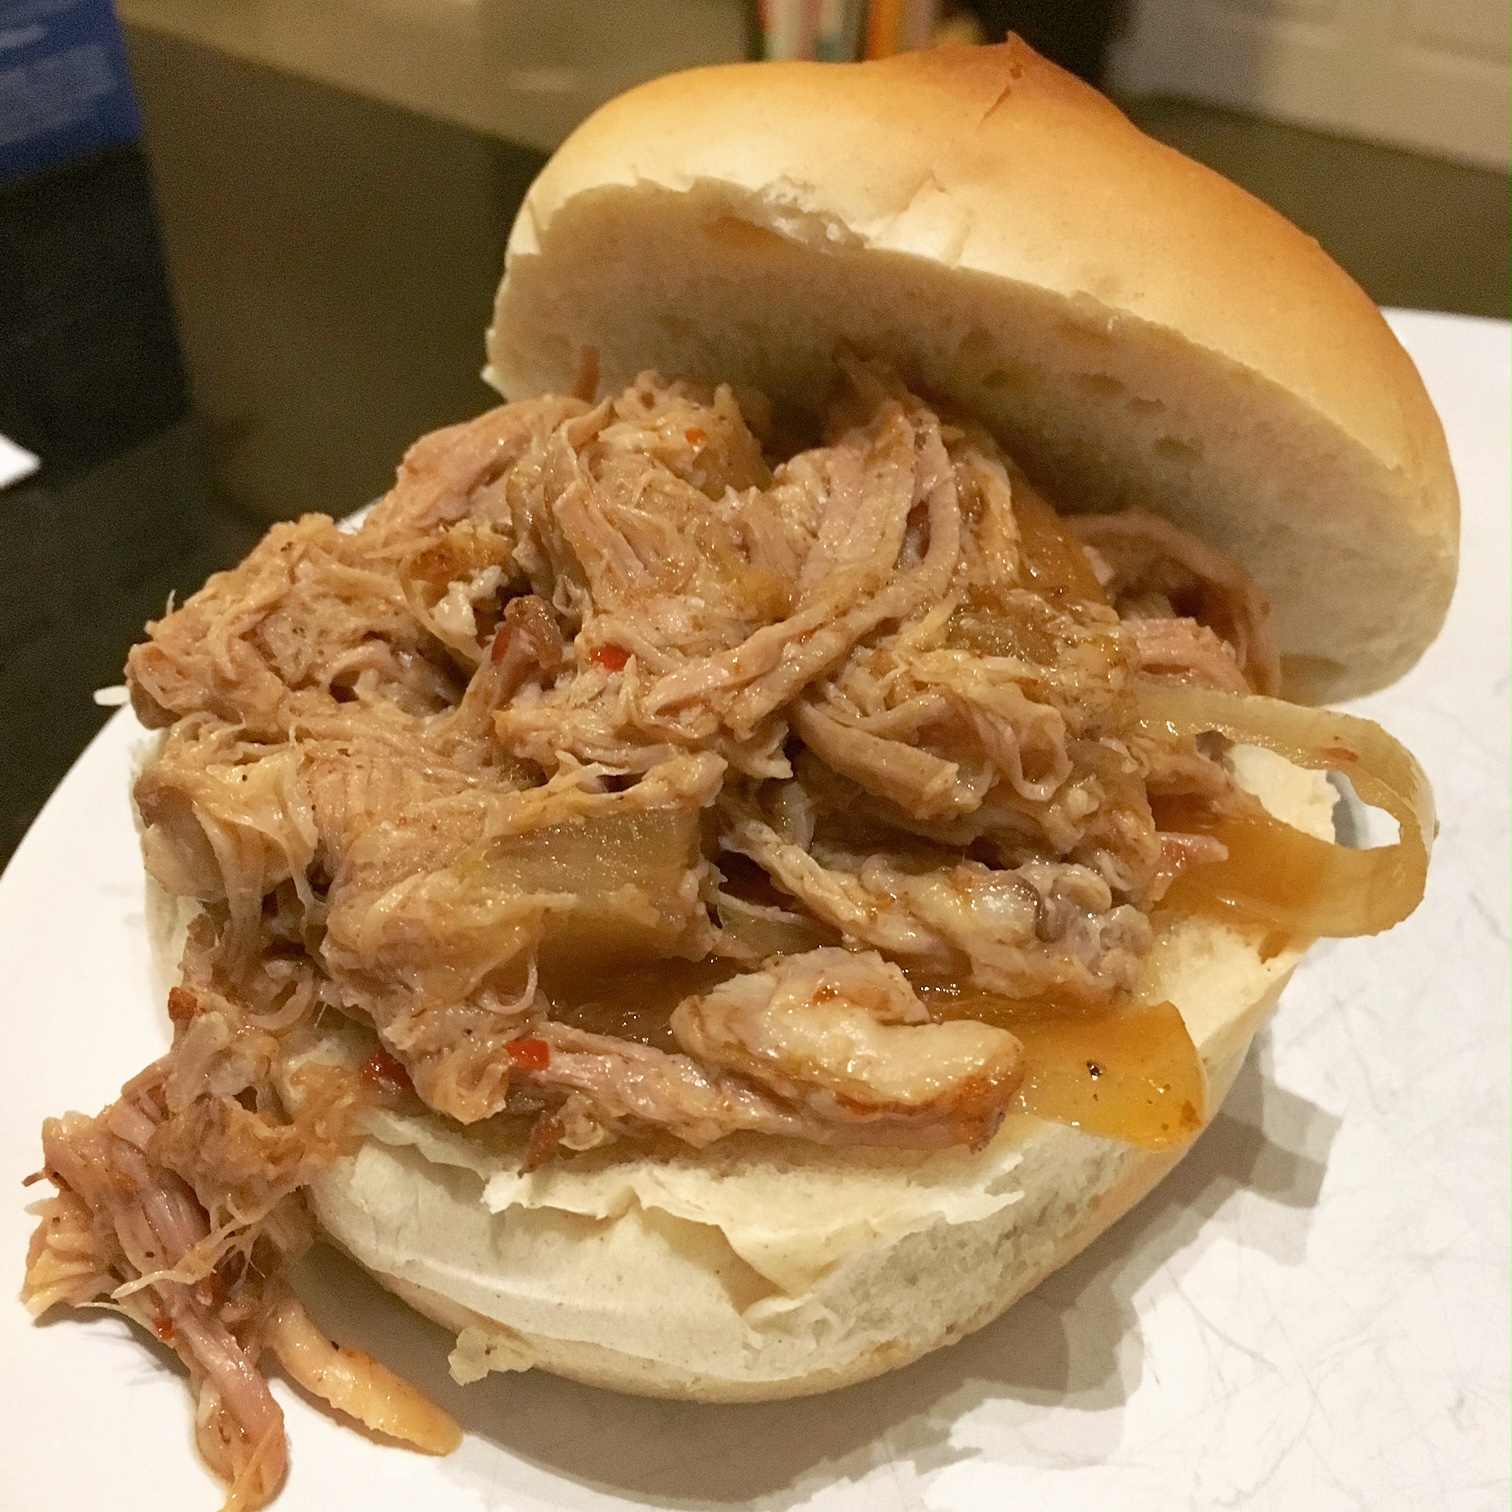
I set my slow cooker to low and let the pork and onions cook for about 8 hours. Once it was tender, I used two forks to “pull” it into small flakes and stirred the pork and onions together with the cooking liquid.

We ate the pulled pork on sandwiches, but it can also be used to make sliders, pulled pork tacos or even quesadillas. This recipe makes plenty for two, so it helps to get creative!

img_2533

Carolina-Style Slow-Cooked Pulled Pork

  • Servings: 8-12 sandwiches
  • Time: 8 hours 10 minutes, mostly inactive
  • Print

From: Plating Pixels

Ingredients

  • 2–3 pounds pork shoulder butt roast
  • 3 tablespoons brown sugar, separated
  • 1 tablespoon smoked paprika
  • 1 teaspoon salt
  • 1 teaspoon pepper
  • 1 teaspoon garlic powder
  • 1 large onion, sliced
  • 1 cup apple cider vinegar
  • ¼ cup Worcestershire sauce
  • ¼ teaspoon cayenne pepper
  • 2 teaspoons crushed red pepper
  • 1 tablespoon brown mustard
  • 1 teaspoon ground mustard

Directions

  1. If pork roast is frozen, defrost in fridge. Trim off any large sections of fat.
  2. In a small bowl, combine 2 tablespoons of brown sugar along with all of the smoked paprika, salt, pepper and garlic powder. Rub spice mixture all over the roast until it's soaked in.
  3. Place the sliced onions in a layer on the bottom of slow cooker with the roast on top.
  4. In small bowl, mix together remaining list of ingredients from apple cider vinegar to ground mustard, plus the leftover tablespoon of brown sugar. Gently pour liquid over roast. You should have about 2 inches of liquid on bottom; if not add a bit of water.
  5. Cook covered on low for 7–8 hours, until pulled pork is tender. Shred pork in slow cooker with a fork until flaked. Stir into liquid to incorporate flavor. Let sit for about 30 minutes, drain liquid and serve.

Filed Under: book review, recipe Tagged With: book club, dinner, fiction, historical fiction, lunch, meat, slow cooker, spicy

Gilmore Girls: A Year in the Life + Mac and Cheese in a Jalapeno-Chipotle Cream Sauce

December 11, 2016 by Megan 4 Comments

I have been wanting to talk about Gilmore Girls: A Year in the Life since I watched the long-awaited last four words two weeks ago. Even though I started it a little late because of my trip, I still finished it before most of my friends. [SPOILER ALERT: Scroll down to the recipe if you’d like to avoid potential spoilers for any/all of the four new episodes.]

rs_1024x694-161115115116-1024-gilmore-girls-key-art-ch-111516
Photo Credit: E-Online

I have to admit, like many, I was a little disappointed in the Netflix revival. It was certainly enjoyable to see the familiar faces around Stars Hollow and revisit the beloved characters. There were peaks where they seemed to really have their rhythm back (gotta love those fast talkers) and poignant moments that captured the essence of the show, but for me, those were few and far between.

[Read more...] about Gilmore Girls: A Year in the Life + Mac and Cheese in a Jalapeno-Chipotle Cream Sauce

Filed Under: of interest, recipe Tagged With: dinner, gilmore girls, lunch, not a book, pasta, spicy

Primary Sidebar

About

The Hungry Bookworm brings together literature and food. Megan has an insatiable appetite for both.

As C.S. Lewis said, “Eating and reading are two pleasures that combine admirably.” Enjoy!

  • Bloglovin
  • Facebook
  • Instagram
  • Pinterest

Subscribe

Don't miss out on bookish content, exclusive giveaways, and of course, book club-friendly recipes. Get notified of new posts via email.

Join 2879 subscribers.

Search for Ingredients, Recipes, or Books

Recent Posts

  • Subscriber Box Review: Literati Book Club - Roxane Gay's Audacious Book Club
  • Arsenic and Adobo + Ensaymada
  • Review of The Kindred Spirits Supper Club
  • Kids Edition: Sometimes I Like to Curl Up in a Ball + "Dirt" Pudding Cups
  • The Midnight Library + Broccoli and Ricotta Toast

Goodreads

Tags

5 ingredients or less appetizer baking book club book list book of the month books about food bread breakfast brunch chicken contemporary cookies cultural dessert dinner dinner party dystopia easy prep favorites fiction fruit historical fiction holiday ice cream linkup lunch meat memoir mini review nonfiction pasta quick read reading challenge science fiction seafood show us your books side dish snack soup TBR list thriller top ten tuesday vegetarian veggies

Archives

Other Great Book Blogs

Literary Quicksand
Never Enough Novels
Death by Tsundoku
Professional Reader 25 Book Reviews
Privacy & Cookies: This site uses cookies. By continuing to use this website, you agree to their use.
To find out more, including how to control cookies, see here: Cookie Policy

Footer Widget Header

Megan’s Instagram

Copyright © 2025 · Hungry Bookworm