• Skip to primary navigation
  • Skip to main content
  • Skip to primary sidebar
  • Home
  • Reviews
    • Book Index
    • Fiction
    • Non-Fiction
    • Top Ten Tuesdays
The Hungry Bookworm

The Hungry Bookworm

reading + eating

  • Recipes
    • Drinks
    • Snacks, Sides & Apps
    • Main Dishes
    • Desserts
    • 5 Ingredients or Less
  • About
    • Meet Megan
    • How I Rate
    • Review Policy
    • Contact

tough topics

Everything Here Is Beautiful + Chinese Almond Cookies

April 23, 2019 by Megan 3 Comments

Mira T. Lee’s debut novel, Everything Here Is Beautiful, is a tough book to discuss—though we attempted to do just that for my last book club meeting. It was suggested by one of our members last year, shortly after it was released, and when it finally got chosen as our monthly pick, I was looking forward to reading it. It’s a story about sisters, about immigrants, about mental illness. It’s a raw and powerful debut that I can’t recommend enough.

Everything Here is Beautiful by Mira T. Lee

The novel follows two Chinese-American sisters, Miranda the oldest and Lucia the youngest, in the years after their mother dies from cancer. Lucia is adventurous and full of life, and when it’s determined that she has schizoaffective disorder, Miranda does everything in her power to keep Lucia grounded and get her the help she needs.

[Read more...] about Everything Here Is Beautiful + Chinese Almond Cookies

Filed Under: book review, recipe Tagged With: baking, book club, cultural, dessert, drama, easy prep, favorites, tough topics

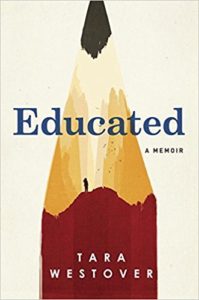
Educated + Peach Cobbler

February 17, 2018 by Megan 3 Comments

As I mentioned in this month’s edition of Show Us Your Books, I read Tara Westover’s memoir Educated in a whirlwind over the weekend. It was one of my most anticipated books of the year, so even though I was excited to get a free copy from NetGalley (and read it before it even came out!), a little bit of me was also nervous to read it and be disappointed. Luckily, it lived up to expectations; I couldn’t put it down.

Tara grew up in Idaho, where her parents were determined to be self-sufficient, teaching their children to be prepared for the end of days that were always just around the corner. They canned peaches and stocked up on other necessities, saved for solar panels and built a bomb shelter. The Westovers didn’t believe in government-sponsored education and insisted on homeschooling all of their children, though the education they received was more of the hard knocks variety than something akin to reading, writing and ‘rithmetic. Perhaps the most terrifying thing about Tara’s parents was their refusal to submit to the “Medical Establishment.” Every wound or injury - no matter the severity - was treated at home.

[Read more...] about Educated + Peach Cobbler

Filed Under: book review, recipe Tagged With: baking, dessert, easy prep, favorites, fruit, memoir, nonfiction, tough topics

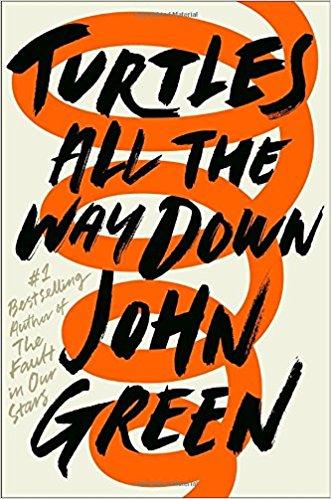
Turtles All the Way Down + Spiral Mac 'n' Cheese

December 5, 2017 by Megan Leave a Comment

John Green has written many young adult novels, including one of my favorites, The Fault in Our Stars. He has a unique way of tackling both the everyday and the unexpected parts of the lives of teenagers. His latest novel, Turtles All the Way Down, is no exception. Like other teenagers, Aza tries her best in school, has an understanding best friend, and doesn’t know exactly what to do when she finds herself in a relationship. Aza also lives with obsessive-compulsive disorder and an often crippling level of anxiety, much of which was drawn from Green’s own experiences.

Because of that, Turtles tells an excellent, unique story. Admittedly, some of the scenes where Aza is having obsessive thoughts were hard to read. It almost felt like I was in her head, and in those moments, I read as if hiding behind split fingers - not wanting to go on but wanting to know what happened all the same. I admire Green’s willingness to not only discuss his own mental health issues but to write about them too, in a way that’s real.

Stories like these help to make mental health something that’s okay to talk about. The existence of a likeable character that readers can connect to and empathize with can help teenagers (and adults) realize that mental illness is not something to be embarrassed or ashamed of. In Green’s own words, “it’s important for people to hear from [those] who have good fulfilling lives and manage chronic mental illness as part of those good fulfilling lives.” And because of that, it is absolutely a book worth picking up - even if you aren’t familiar with John Green, even if you don’t usually read YA.

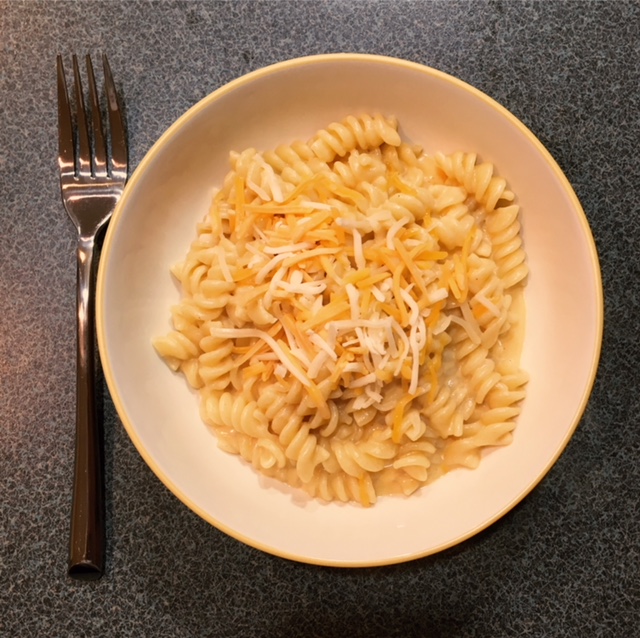
Honestly, the first thing I thought of when I looked at this book's cover was spiral macaroni and cheese. I think they eat it once over the course of the story, but in the end, I couldn’t get it out of my head and no other foods really stood out to me. So, no surprise, that’s what I decided to make. I found an easy recipe from Famished Fish and set to work for a quick, easy dinner one night.

To start, I brought my water to a boil and cooked my noodles according to the package instructions. The original recipe called for rotini, but I also think cavatappi would work great here.

While the noodles cooked, I made the sauce. I melted butter in a pan and then added flour to create a roux. To that, I added the dried mustard and paprika, slowly stirring in 1 cup of milk, so that it could fully incorporate with the roux and remain thick.

Then, I added in the remaining 2 cups of milk slowly, along with the salt and a dash of Worcestershire sauce. I continued cooking the sauce, stirring occasionally for about 5 minutes more or so, until it thickened. I stirred in three-quarters of the cheese so it melted and became incorporated.

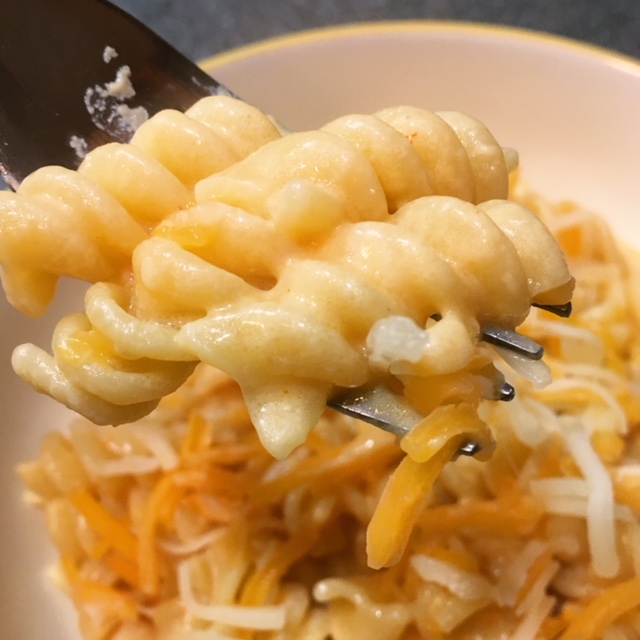
I drained the finished noodles and poured the cheese sauce on top, stirring until the noodles were fully covered. To serve, I spooned the mac 'n' cheese into bowls and topped each with a sprinkling of shredded cheese.

It was delicious! And so easy that I’ll definitely be adding it to my repertoire.

Creamy Spiral Mac 'n' Cheese

  • Servings: 4-6
  • Time: 15 minutes
  • Print

Ingredients

  • 16 oz uncooked spiral noodles (rotini or cavatappi)
  • ¼ cup butter
  • ¼ cup flour
  • ½ tsp mustard
  • ½ tsp paprika
  • 1 tsp salt
  • dash of Worcestershire sauce
  • 3 cups milk, divided
  • 2 cups sharp cheddar cheese, divided

Directions

  1. Add uncooked pasta to a large pot of boiling water. Cook 9-11 minutes, according to package directions.
  2. Meanwhile, in a medium saucepan set over medium heat, melt the butter. When butter has melted, stir in flour to create a roux.
  3. Slowly stir in 1 cup of milk along with the mustard and paprika. Stir and cook until the mixture thickens. Add the remaining 2 cups of milk and the salt and Worcestershire sauce. Cook and stir 5 minutes until has thickened.
  4. Stir in 1½ cups of the sharp cheddar cheese. Stir the sauce until the cheese has melted.
  5. Drain the pasta and return to large pot. Carefully pour the cheese sauce over the cooked pasta. Stir gently to combine the cheese sauce and pasta.
  6. Ladle the macaroni and cheese spirals into a large serving bowl and sprinkle with the remaining ½ cup of sharp cheddar cheese.
  7. Serve immediately.

Adapted from: Famished Fish

This post contains affiliate links. Full disclosure here.

Filed Under: book review, recipe Tagged With: contemporary, dinner, easy prep, fiction, lunch, pasta, quick read, tough topics, vegetarian, young adult

The Heart's Invisible Furies + Custard Slice

October 5, 2017 by Megan 4 Comments

Generally, I do enjoy most of what I read. Sometimes I don’t, but luckily, sometimes the opposite is true and I love a book so much that I can’t shut up about it. John Boyne’s The Heart’s Invisible Furies is one such book. Readers, my second 5-star book of the year is here, and I couldn’t be more excited to share it with you!

I first heard about this book on my new favorite podcast, All the Books. (Thank you, Liberty Hardy! You’re always full of excellent recommendations.) So, when I saw it in my August BOTM selections, I knew I had to select it. When it showed up in the mail, I was surprised at its heft - it’s nearly 600 pages - and set it aside for nearly enough, thinking I didn’t have time to get into a difficult, long book. I waited a couple of weeks, but when I finally picked it up, I was captivated in just the first few pages and by the end of the first chapter, I was hooked.

The novel follows Cyril Avery beginning when he is still an unborn child in his mother’s womb in a small town in 1940s Ireland. When she is cast out by a cruel priest, she finds herself in Dublin, where she must make it on her own. Her circumstances almost require her to put Cyril up for adoption, and he is taken by a hunchbacked Redemptionist nun to the home of Maude and Charles Avery, an eccentric couple who aren’t exactly cut out for parenthood. From there, Cyril’s life takes both heartwarming and heart-wrenching turns, bringing us to modern day Ireland in truly spectacular and unforgettable fashion.

This book may be 592 pages, but I couldn’t put it down. I finished it in a weekend and have been talking about it ever since. Furies is filled with complex and varied characters, all memorable in their own way. As entertaining as this novel was - it absolutely had it’s laugh out loud moments - I should probably mention that, like my last 5-star favorite, it tackles some sensitive topics and was hard to read in parts. But to me, that is the beauty of Boyne’s novel; he expertly captured all the nuances of humanity, from the mundanely everyday to unexpected tragedy in a captivating way.

Finding a recipe to pair with such a sweeping saga wasn’t as hard as I expected it to be. Several key scenes throughout take place in a parliamentary tea shop where “cream slice” seems to be a popular menu item. After doing some research, I found it’s also known as custard slice. I was able to find a recipe from RTE, or the Raidió Teilifís Éireann in Ireland, which is a real television station where Cyril finds himself working at one point in the novel.

The recipe has quite a lot of steps, but the ingredients list is small and it’s not really that complicated, so don’t let the long recipe below fool you. It’s totally doable.

To start, I set out my frozen puff pastry sheets to thaw while I made my pastry cream. I poured the milk into a saucepan, added a vanilla pod split down the middle and let it come to a boil. In the meantime, I combined the sugar, egg yolks and cornstarch with a mixer, beating for a few minutes until it became pale and light.

Once the milk began boiling, I removed it from the heat and slowly added it to the egg mixture, whisking all the while. I added it back to the saucepan, bringing it up to a slow boil over low heat, stirring continuously. After several minutes, it thickened, so I removed it from the heat and added it to a wide bowl to cool more quickly. I covered it with cling wrap and placed it in the fridge.  

Once the puff pastry dough was thawed (able to be unfolded), I used a sharp knife to cut it down to an 8x8 square. (I don’t think this is entirely necessary, if you have a 9x9 pan, which I found I did after the fact. I’ve explained further in the recipe notes below.) Then, on two parchment-lined baking sheets, I baked them for about 10 minutes each, until they were lightly golden.

After they cooled, I placed one pastry in the bottom of my pan, which was lined with foil. Per the directions, I made sure to leave extra foil hanging out of the pan so the completed custard slice could be removed more easily later; this is definitely a big help. Then, I smoothed the cooled pastry cream over the bottom layer of puff pastry and placed the prettier looking pastry sheet on top. The assembled dessert went back into the fridge to set while I made the topping.

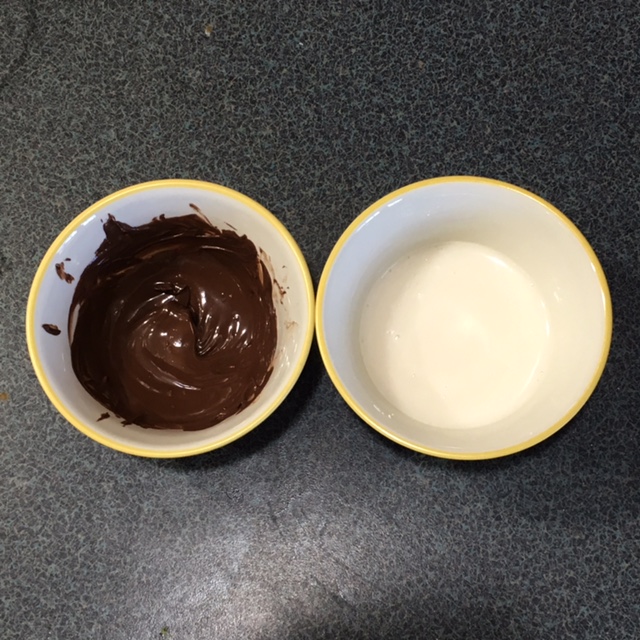
I combined powdered sugar with a small amount of cold water to create a drizzle-able icing. I also melted some dark chocolate (you could also use milk chocolate if you prefer) in a small bowl in the microwave, until it was thin enough to drizzle with a spoon.

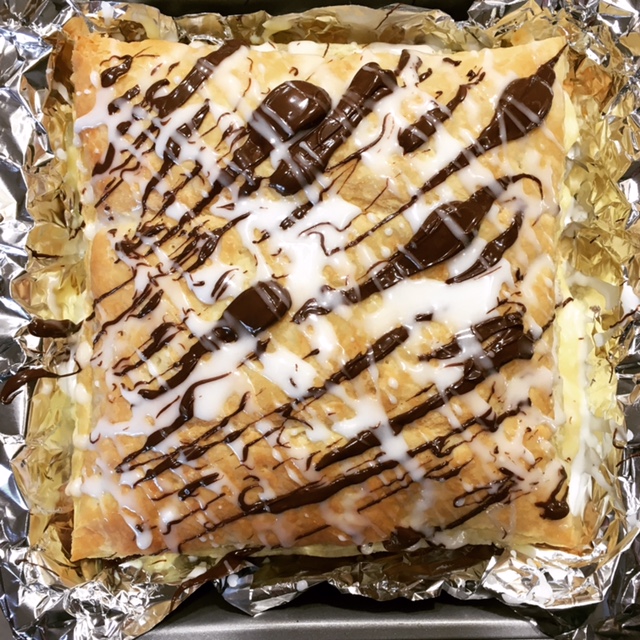
First, I drizzled the icing diagonally across the top of the pastry. Then, turning the pastry 90 degrees, I drizzled the melted chocolate to create a criss-cross pattern with the icing.

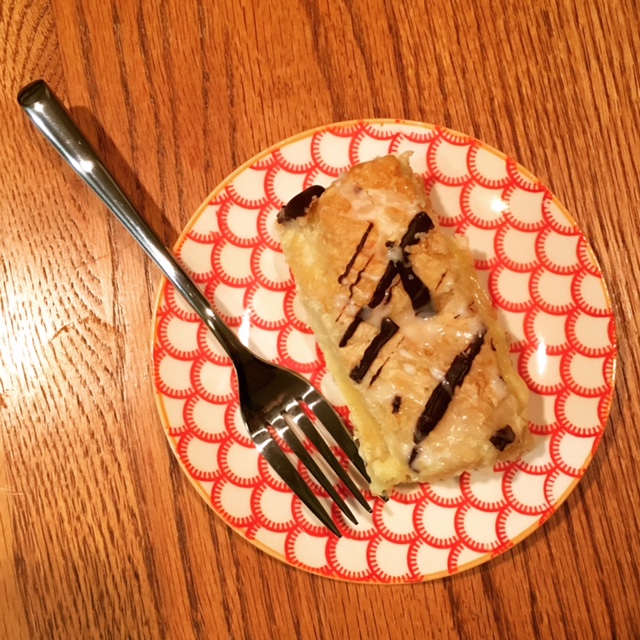
I covered the completed custard slice and put it back in the fridge to set until we were ready to give it a try. Later that evening, I cut it into 8 rectangular slices and served as our dessert. We found it to be sort of messy to eat, and I would recommend using a fork and a knife, but it certainly was tasty. If you decide to give it a go, I hope you enjoy!

Have you read John Boyne’s novel yet? What did you think?

Vanilla Custard Slice

  • Servings: 8
  • Time: 45 minutes
  • Print

Ingredients

  • 2 sheets frozen puff pastry
  • 13 fl oz whole milk
  • 1 vanilla pod, split down the middle or 1 tsp vanilla extract
  • 6 Tablespoons (3 ounces) granulated sugar
  • 3 egg yolks
  • 3 Tablespoons cornstarch
  • pinch of salt
  • 2 Tablespoons, or 1 ounce, or unsalted butter, cut into small cubes
  • ¼ cup powdered sugar
  • ¼ cup melting chocolate or chocolate chips

Directions

  1. Make the crème pâtissière to begin: Pour the milk into a saucepan and add the split vanilla pod, if using. (If using the vanilla extract, add it in with the butter at the end.) Bring the milk mixture to the boil, then remove from the heat.
  2. Whisk the sugar, egg yolks and cornstarch together in a large bowl for about 2–3 minutes using a hand-held electric mixer until pale and light.
  3. Pour the hot milk onto the egg mixture, whisking continuously, and then return the mixture to the saucepan. Cook the mixture over a low heat, stirring continuously, until the mixture becomes thick. It should just come to a boil. If it boils unevenly or too quickly, it may become lumpy, in which case use a whisk to mix until smooth again.
  4. Remove the custard from the heat and pour into a bowl (push the mixture through a sieve if there are any lumps). Add the pinch of salt and the butter (and vanilla extract if using) and stir until melted and thoroughly combined.
  5. Leave to cool, cover with cling wrap and chill before using.
  6. Preheat the oven to 425 degrees F. Line two baking trays with parchment paper.
  7. If using frozen puff pastry sheets, these should already be approximately 9x9. If you have a 9x9 pan available, you can use as-is. If you only have (or prefer to use) an 8x8 pan, cut the puff pastry sheets so they will fit the smaller pan. Cut approximately 1 inch off two of the sides, forming an 8x8 square.
  8. Place each pastry sheet onto the lined baking trays, prick each piece a few times with a fork and chill for 10-15 minutes. Then, bake the pastry sheets for 10-15 minutes or until golden brown and crisp. Set aside to cool.
  9. While the pastry bakes, line your baking pan with foil, allowing plenty of extra foil at the sides to allow you to lift out the assembled slices. If you don't have a square tin, it's not the end of the world, just use the foil to make a base and sides.
  10. Place one pastry sheet in the bottom of the lined tin (reserve the prettiest piece for the top). Spread the crème pâtissière evenly onto the pastry in the baking tray before placing the other piece of pastry on top. Refrigerate while making the icing.
  11. For the icing, sift the icing sugar into a bowl. Stir in 3-4 teaspoons cold water – just enough to give you a thick, drizzling consistency – and set aside.
  12. Place the chocolate in a bowl sitting over a saucepan with a few centimetres of water. Bring the water up to the boil, then take off the heat and allow the chocolate to melt slowly. (Another option would be to heat in the microwave at defrost or 30% power in 30 minute increments, stirring until it becomes melted enough to drizzle. If using melting chocolate, follow directions on the bag.)
  13. Take the custard slice from the fridge to decorate. First, using a spoon, drizzle the icing diagonally across the pastry. Turn the pan 90-degrees and, using a different spoon, drizzle the chocolate across the pastry forming lines that criss-cross the icing lines. Repeat with icing and chocolate as desired/until you run out.
  14. Place the slice back into the fridge to set. Later, cut the finished custard slice into 8 pieces. Using the foil, carefully lift the portioned vanilla slices out of the tray and serve.

Adapted from: Rachel Allen, via RTE

Notes: This recipe was adapted for the US from a recipe created in Ireland. Measurements were converted when necessary to accommodate American cooks.


This post contains affiliate links. Full disclosure here.

Filed Under: book review, recipe Tagged With: baking, book of the month, contemporary, dessert, drama, historical fiction, tough topics

This Is How It Always Is + Simple Orange Salmon

July 22, 2017 by Megan 4 Comments

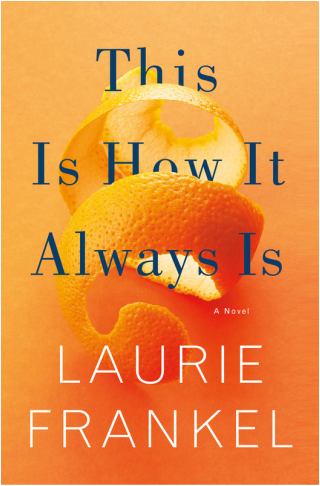
Often, I read a book that has been the talk of the town (so to speak), a book that everyone loves, a must-read, and I’m so excited to dig into it, convinced I will feel the same way, and then I’m disappointed. I’m sure I’ve written in the past about tempering my own expectations, though I know I’m guilty of it too - if I love a book, I can’t recommend it enough. I’ll talk about it constantly and push it on unsuspecting friends. I don’t think Laurie Frankel’s novel This Is How It Always Is falls into the disappointing category, but I think I might have liked it more had I stumbled upon it on my own - and not read it so closely behind the real life saga of a similar family in Becoming Nicole.

That being said, it’s an important novel - tackling controversial issues head on, causing you to examine how you feel and why you feel that way, but doing so in a relatable, enjoyable story - and I liked it for those reasons. The story centers around Claude, the youngest brother in an accepting, open-minded family of five boys. He wants to be a girl when he grows up - inside he feels more like Poppy than like Claude. Though Poppy’s family is fully supportive, the sacrifices they must make to keep this secret affects each of them in unique ways.

After four boys, Poppy’s mom desperately wanted a girl. On the day Claude was conceived, Rosie went through a complicated ritual concocted of random wives’ tales and legends, doing everything in her power to have a baby girl. Claude was born. I’m not entirely sure the result was what she had in mind, but ultimately, Poppy was also born, and their family was complete.

As part of her ritual, Rosie made salmon for her and her husband’s lunch, served alongside chocolate chip cookies. I decided to make the salmon as well, though without the cookies for dessert, and in honor of the orange peel on the cover, incorporate the fruit into the recipe as well.

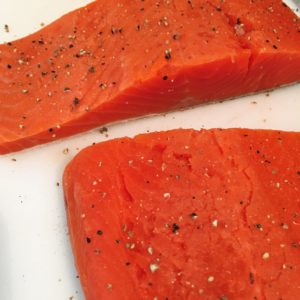
To start, I patted my two salmon fillets dry on both sides and seasoned them with fresh ground black pepper and salt.

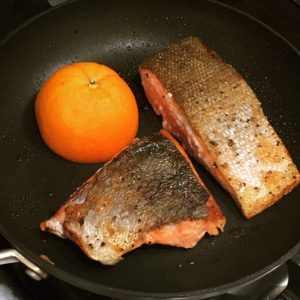
I heated some olive oil in a medium skillet and laid the fillets skin side down to begin cooking. After about 5-7 minutes, I flipped the fillets and added half an orange to the pan to grill alongside the fish.

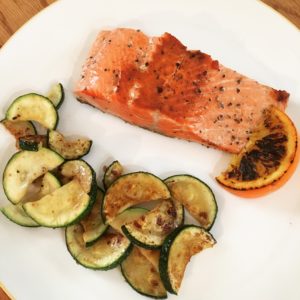
The salmon cooked for another 4 or so minutes, until it was opaque throughout. I plated it with some sautéed zucchini and a wedge (or two) of orange. We squeezed the orange over the salmon just before eating.

Simple Orange Salmon

  • Servings: 2
  • Time: 15 minutes
  • Print

Ingredients

- 2 salmon fillets with skin, 4 to 6 oz each - 1 orange, halved - salt and freshly ground black pepper - olive oil

Directions

  1. Pat salmon fillets dry with a paper towel. Season each side generously with salt and freshly ground black pepper.
  2. Add 2-3 turns of olive oil to a medium or large skillet (depending on size of salmon fillets) and allow to heat through. Add salmon, skin side down. Cook for 5-7 minutes, until skin is a nice golden brown.
  3. Flip fillets and add orange half to skillet. Allow salmon to cook for an additional 3-5 minutes, until fish is opaque throughout. Watch orange and remove when it begins to char.
  4. Serve salmon immediately with orange wedges. Squeeze orange over fish before eating.


This post contains affiliate links. Full disclosure here.


Filed Under: book review, recipe Tagged With: contemporary, dinner, easy prep, fiction, quick read, seafood, tough topics

Lilac Girls + Poppy Seed Cake

July 8, 2017 by Megan 1 Comment

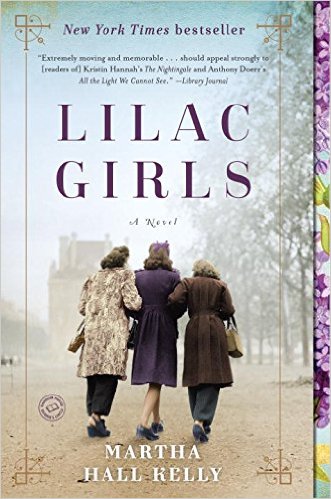
No matter how many WWII novels I read or stories I hear, I’m still astonished at the atrocities that took place and how many people were able to overcome and survive such horrifying ordeals. Though I usually devour these books, which are often natural page-turners, I find them hard to get through mentally. Martha Hall Kelly’s Lilac Girls was no exception.

Inspired by the real Caroline Farriday and a group of Polish prisoners called “the Rabbits,” this novel tells the story of three women whose lives intersect at the Ravensbruck, the only Nazi concentration camp for women. In alternating chapters, we follow Kasia, a Polish teenager who becomes one of the Rabbits; Herta Oberhauser, a German doctor stationed at Ravensbruck; and Caroline, a New York City socialite, who does her best to assist in the war effort from abroad.

Though I’d be interested in finding out more about the real Caroline, I found her chapters to be the least compelling. Honestly, her storyline was the reason I couldn’t give this book a full 4 stars on Goodreads. (I would’ve given it 3.5 if Goodreads allowed it, but they don’t - one of my pet peeves.) Kasia’s and Herta’s chapters, on the other hand, had me turning the page constantly. I liked that Kelly told the story from such different points of view.

In one of the bright spots at Ravensbruck, Kasia and her sister receive a package from their father and unwrapped it to find not only chocolate and a sign of hope, but some poppy-seed cake as well. As she put it, “Polish cake would be good medicine.” I hadn’t heard of poppy seed cake before, but I knew it was the recipe to make this time around. I found one from Jenny Can Cook and set to work.

Upon starting the recipe, I realized I only had half as many poppy seeds as I needed. I’d bought one 2.6 oz bottle of poppy seeds at the grocery store, because the pickings were slim. If you find yourself in the same situation, you may want to pick up two containers, or if you’re trying this for the first time, you may want to make a smaller loaf instead, like I did. When I made it, I adjusted the recipe and made a half-sized loaf instead of the full recipe (I included the full recipe below).

First, I ground the poppy seeds 2 Tablespoons at a time, until they were moist and looked a lot like wet coffee grounds. I added boiling water to a small bowl and stirred in the poppy seeds until they were all moistened, letting them stand uncovered. Then, using the same grinder, I ground up my toasted almonds.

In a large bowl, I combined the flour, yeast, sugar and salt. To that I added, the warmed milk (slightly less than 120 degrees F since I was using active dry yeast), followed by the oil and the egg. Using an electric mixer, I beat it on high for about 2 minutes, and then added in the extra flour, beating it until it formed a mass. Mine was slightly sticky when I transferred it to the board, so I ended up adding about a Tablespoon more of flour (to my halved recipe). I should’ve taken a picture of my messy dough fingers, but it wouldn’t have been safe to grab my phone to do so. Dough everywhere!

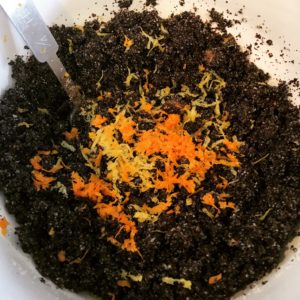
I kneaded it and let it rest for 10 minutes while I combined the filling. To the poppy seeds, I added the ground almonds, lemon and orange zests, sugar and vanilla extract.

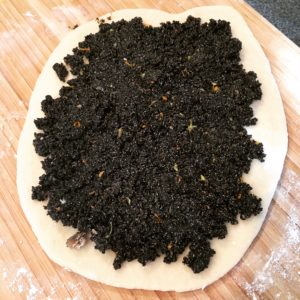
I rolled the dough out to about 5” x 6” (again with the halved recipe) and spread the filling on the top, almost to the edges.

Then, I carefully rolled it, placed it seam-side down, and tucked the ends under, placing it on a parchment-lined baking sheet. I covered it with a cloth and left it untouched in a warm place (aka my upstairs on an 80-degree July day) for about an hour and a half.

I opted to top it with an egg wash and poppy seeds before baking, thinking the glaze might make it too sweet. It also didn’t seem like Papa’s bread for his girls would’ve included a glaze, but I could be wrong. If you prefer a glaze, see the recipe notes.

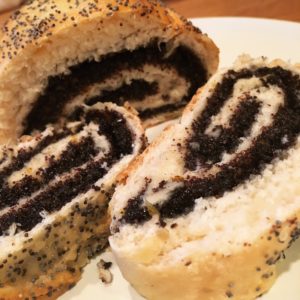
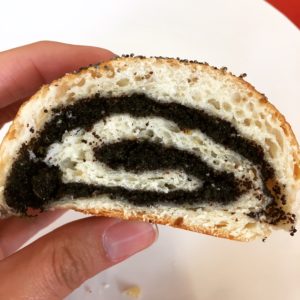
I baked it for slightly less than the recipe called for due to size, but even with halving the recipe, I think it could’ve used maybe 5 minutes longer (or 30 minutes total) in the oven. It was hard to let it cool for a long time once it came out of the oven, but trust me, it’s much better when it’s fully cooled. I also personally like the outside thirds of the bread better than the middle third.

I hope you enjoy! Have you read the Lilac Girls? What did you think?

Poppy Seed Cake

  • Servings: 1 loaf
  • Time: 2 hours, 45 minutes
  • Print

Dough Ingredients

  • 1½ cups bread (or all purpose) flour
  • 1 packet (2 tsp/7 gms/1/4 oz) yeast - instant or active dry yeast
  • ¼ cup sugar
  • ½ teaspoon salt
  • ⅔ cup 1% milk heated to 120-130° F for instant yeast (or 110-120°F for active dry)
  • 2 Tablespoons oil
  • 1 egg
  • about ¾ cup extra flour

Filling Ingredients

  • 1 cup poppy seeds
  • ⅓ cup boiling water
  • ¼ cup ground toasted almonds (20 count)
  • ½ cup sugar
  • ½ teaspoon vanilla extract
  • zest of ½ a lemon and ½ an orange

Directions

  1. Grind poppy seeds (see note below). Place in a small bowl, stir in boiling water & let stand uncovered.
  2. Grind almonds and set aside.
  3. Place flour, yeast, sugar, and salt in large mixing bowl.
  4. Stir in milk followed by oil and egg.
  5. Beat on high for 2 minutes. Stir in extra flour until dough forms a mass.
  6. Place dough on floured board and knead 100 turns (about 2 minutes). Cover and let rest 10 minutes.
  7. Meantime, add ground almonds, sugar, vanilla and zests to poppy seeds.
  8. Roll dough into a 10 x 12 shape. Spread filling almost to edges, roll starting at 10-inch end and place on parchment-lined baking sheet, seam side down. Pinch and tuck ends under.
  9. Cover with a towel and rise in a warm spot for 1½ hours or until double in size.
  10. Before making, brush with egg wash and sprinkle with additional poppy seeds.
  11. Preheat oven to 350° F and bake for 35 minutes. Allow to cool fully before slicing and serving.

From: Jenny Can Cook

Instead of coating the top with poppy seeds, if you prefer a sweeter bread you can add a glaze. Allow baked cake to cool for 10 minutes and drizzle with glaze, made using 1 cup powdered sugar and about 2 Tablespoons milk, added slowly.

If using a spice grinder, grind seeds slowly, about 2 Tablespoons at a time, until they feel moist – about 10 seconds per each portion. Scoop out any that stick to the bottom of the grinder as you go. Once they are all ground, use the same grinder to grind the almonds.


This post contains affiliate links. Full disclosure here.

Filed Under: book review, recipe Tagged With: baking, bread, drama, historical fiction, tough topics

  • Go to page 1
  • Go to page 2
  • Go to Next Page »

Primary Sidebar

About

The Hungry Bookworm brings together literature and food. Megan has an insatiable appetite for both.

As C.S. Lewis said, “Eating and reading are two pleasures that combine admirably.” Enjoy!

  • Bloglovin
  • Facebook
  • Instagram
  • Pinterest

Subscribe

Don't miss out on bookish content, exclusive giveaways, and of course, book club-friendly recipes. Get notified of new posts via email.

Join 2879 subscribers.

Search for Ingredients, Recipes, or Books

Recent Posts

  • Subscriber Box Review: Literati Book Club - Roxane Gay's Audacious Book Club
  • Arsenic and Adobo + Ensaymada
  • Review of The Kindred Spirits Supper Club
  • Kids Edition: Sometimes I Like to Curl Up in a Ball + "Dirt" Pudding Cups
  • The Midnight Library + Broccoli and Ricotta Toast

Goodreads

Tags

5 ingredients or less appetizer baking book club book list book of the month books about food bread breakfast brunch chicken contemporary cookies cultural dessert dinner dinner party dystopia easy prep favorites fiction fruit historical fiction holiday ice cream linkup lunch meat memoir mini review nonfiction pasta quick read reading challenge science fiction seafood show us your books side dish snack soup TBR list thriller top ten tuesday vegetarian veggies

Archives

Other Great Book Blogs

Literary Quicksand
Never Enough Novels
Death by Tsundoku
Professional Reader 25 Book Reviews
Privacy & Cookies: This site uses cookies. By continuing to use this website, you agree to their use.
To find out more, including how to control cookies, see here: Cookie Policy

Footer Widget Header

Megan’s Instagram

Copyright © 2023 · Hungry Bookworm